The Mohawk turn (some people call it the Eagle turn) is a fairly simple skating maneuver to perfect if you are already comfortable on your edges. One player who seems to use this move quite a bit is Sidney Crosby (when he’s not getting hit in the face with pucks). In order to perform the move the skater simply puts their heels together and points the toes out, this almost aligns the skate blades in-line allowing the player to carve or turn in a circular motion.
How to do the Mohawk Turn
First practice while standing still, you can even practice off the ice. Bend your knees a bit and point one toe out, now lift the other leg and point the other toe out, then step down (heel to heel). With your legs you should be making a “fat diamond” shape.
Now try the same thing on the ice (with skates on). It may be a bit harder because you are on your blades, but work on getting comfortable in that position and balancing.
When doing this move while moving you will be on both inside edges of the skates.
Mohawk Turn Video Lesson
In this video I show you how to do the Mohawk turn, a few drills you can use to get better at doing it, and a few game situations when you might want to use it.
When and Why you need the Mohawk
- The move allows you to open up and see the entire ice while still moving
- You can also use it to protect the puck while moving to an area you need to be
- The move gives you more options while skating, with a push, or turn of a foot you can stop, keep going, or go forwards in a fraction of a second
- Great to use when coming from behind the net
- Use it when skating towards the net and calling for a one-timer (on your off wing)
- Transitioning from skating backwards to going forwards
The Mohawk in Action Sidney Crosby
You can see Crosby using this move a few times in the clip below.
Thanks for reading! If you want to share this article or subscribe to our blog for more check out the widgets below.
Choctaws and Mohawks are figure skating turns. The turns are similar since the skater turns from either forward to backward or backward to forward and changes feet.
The Difference Between a Mohawk and a Choctaw
A Choctaw turn is made from one edge to a different edge, from forward to backward or backward to forward.
Mohawks are done from the same edge to the same edge. There are forward to backward Mohawks, and backward to forward Mohawks.
Choctaws can be entered on an inside edge and exited on an outside edge, or be entered on an outside edge and be exited on an inside edge.
Mohawks are entered on an inside edge and exited on an inside edge or are entered on an outside edge and exited on an outside edge. Inside Mohawks are much easier than outside Mohawks.
Why Are the Turns Named for Native American Tribes?
It does seem strange that the names of two common figure skating turns are also the names of two Native American tribes, but the origin of the figure skating terms “Mohawk” and ” Choctaw” really does come from the American Indians.
During the 1800s, the British people were very interested in the Native Americans and they brought them to England to entertain the elite. The British ice skaters noticed that a certain pose done in Indian war dances looked like a figure skating turn they were doing on the ice, so they named that turn the Mohawk.
A variation of the Mohawk was introduced a bit later and was named Choctaw. Those first Choctaws were done from a forward outside edge to a back inside edge.
Mixing Turns Into Figure-Skating Step Sequences
When a series of turns and steps are put together, figure skaters are doing step sequences. Almost all footwork sequences include Choctaws and Mohawks. Choctaw turns, rather than Mohawk turns, can make footwork more interesting and difficult. A simple Mohawk sequence that most new figure skaters can master is done by doing two Mohawks in a row. If the skater can mix the directions of each Mohawk, a very interesting sequence can be created.
The possibilities are endless when figure skaters put steps and turns together. It’s also fun for skaters to be creative with turns and steps.
The Ten-Step Mohawk Sequence
The ten-step Mohawk sequence is usually done in the counter-clockwise direction and on a circle or curve.
- The skater begins on the left foot and does a forward progressive or crossover.
- The first three steps are a left forward outside stroke, then a right forward inside crossover or progressive stroke, and then a left forward outside edge.
- Next, the skater does a right forward inside Mohawk.
- What follows is a short right back outside edge, then a short left back inside edge, followed by a back crossover (left foot over right). ,
- Finally, the sequence ends when the skater steps forward to an extended right forward inside glide.
Difference Between Open and Closed Mohawks and Choctaws
When a skater does a closed Choctaw or Mohawk, the free foot is placed behind of the heel of the skate as the skater changes feet. In an open Choctaw or Mohawk, the free foot is placed almost in front of the other skate or near the middle of the instep of a skater’s foot.
Choctaws in Ice Dancing
Some pattern ice dances include both Choctaws and Mohawks. The Choctaw is the highlight of both the Kilian and the Blues. In the Kilian, the skaters do a forward inside to back outside Choctaw at high speed. In the Blues, the skaters do a forward inside to back outside Choctaw. The Choctaw in the Kilian is an open Choctaw, while the Choctaw in the Blues is a closed Choctaw.
Swizzles make the shape of a fish or football on the ice and are done on two feet and on inside edges. The move helps beginning ice skaters learn how to move and glide forward or backward across the ice and swizzles also help new skaters gain confidence as they use their knees to make their blades glide over the ice.
In roller skating, Swizzles are called “scissors.” Some ice skating schools call swizzles “fishes.” Some ice skating rinks use the word “sculling” when referring to “swizzles.”
Swizzles Help New Figure Skaters Learn to Stroke
All figure skaters should master forward swizzles before beginning to learn and master forward stroking and gliding on one foot.
How to Do Swizzles
- First put your blades together with heels touching in a “V” position.
- On inside edges, push outward, then inward to make your toes touch. You should make the shape of a fish on the ice and have now done a forward swizzle or scissors.
- Repeat by doing several forward swizzles in a row.
- Now try going backward. Reverse the process, starting with your toes together on inside edges, move outward, then inward so your heels touch again.
- As you make the move, make sure to bend your knees.
Swizzle Tip #1: The Rocking Horse Move Helps Skaters Master Swizzles
The rocking horse move is a fun and easy move that helps new ice skaters master swizzles and also helps skaters get used to gliding forward or backward on two feet. To do the rocking horse, simply do a forward swizzle and then a backward swizzle over and over again. Young children especially enjoy doing the rocking horse ice skating exercise. Adults find the rocking horse move useful as they get used to the feel of skating blades moving over the ice.
Swizzle Tip #2: Swizzles Are Done on Inside Edges
It is common for new ice skaters to struggle with swizzles because some skaters have a difficult time getting their feet to move forward or backward on inside edges. To make swizzles work, both blades must be pressed to the inside throughout the entire move.
Don’t Get Discouraged: Swizzles Take Practice
Some new figure skaters may get discouraged or frustrated when they first learn how to do swizzles. It is very common for new ice skaters to give up when they can’t bring their toes or heels completely together at first. When frustration sets in, relax and allow the feet to glide. In time, and with practice, swizzles will become easier to do. Don’t give up!
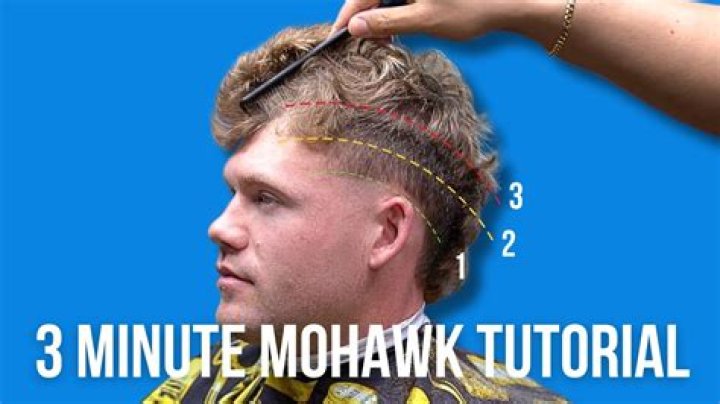
Mohawk, also known as iro or mohican as hairstyle probably originated from Native Americans and later adopted by a few subcultures. It’s a relatively high-maintenance haircut with plenty of styling options. A less radical version is called fauxhawk (’fake – mohawk’) featuring longer hair on sides, oftentimes combined with a crewcut.
What you need for a mohawk
To cut a mohawk, you need somewhat longer hair (it should preferably be more than 1 inch length). Before cutting, decide on how you plan to stylise it – are you going to gel it or let it lay (lazyhawk)? In this case you might prefer doing an undercut instead.
You might find it handy to keep a comb near by to help you disentangle and separate the hair, and a pair of scissors for the final trimming and touch up’s. Obviously, you’ll need hair clippers, but that’s about it.
Centering your mohawk
First, you need to be very cautious about centring the hair correctly. Start with forming this central part with the help of a comb, and worry about the lower parts later. Use any lower number of guards (for example #2 or #3) to buzz your hair off on each side of the mohawk.
This tutorial suggests a very good idea for centring your mohawk – by simply using a piece of masking tape. What you need to do is simply stick a long piece of tape on the top of your head, align it until you’re happy with it, and then you’re ready to clip your hair on the sides following these lines.
Cutting the sides
If you’re unsure about your DIY skills, you might want to take your time and start by using a higher number of guards first. This way you are able to cut the sides shorter and shorter as you go. If you’re confident enough about your skills (don’t worry if you’re not there yet, we’ve got your back!), go ahead with a lower number of guards. Just remember, mohawks demand a lot of precision, so better do it carefully and as slowly as needed for the perfect end result. When you got the mohawk about right, use a shorter sized guards to fade your way down to sideburns and back hairline.
Depending on the length of the central section of your hair, you might want to trim it too. Do this with a pair of scissors rather than using clippers after you clipped the sides. This will prevent you from cutting too much and eliminating the contrast between the central section and the sides.
How do I make my mohawk stand up?
People use gel, spray, blow dryer, or even starch or sugar to make their mohawk stand up. The best option for you will depend on your hair type. If your hair is thick, curly and/or dry, pomade or wax might suit you better than gel or spray that tend to dry hair.
When you’re done with clipping and trimming, wash your (remaining) hair.
While it’s still wet, put your head upside down and blow-dry it. This will add more volume to the central section. Then, while still standing with your head between your legs, apply your favourite stylising product. Depending on the length, use (a lot of) hairspray and let it dry like that for a while. THEN you may lift your head back up and you’re ready to rock that mohawk.
How to dye my mohawk?
If you’re going to dye your mohawk after cutting your hair make sure you don’t wash your hair afterwards and don’t use any stylising product just yet, as you’ll want your hair to absorb more colour pigment.
If you’re choosing a fantasy colour (e.g. purple or green), or if you’re going for a light blonde, you will need to bleach your hair first by mixing bleach powder and developer (peroxide). Mix the bleach powder and the developer in a plastic bowl until the mix has a yogurt consistency, put on some gloves, and spread the product on your hair with the help of a tint brush.
Make sure you don’t let the bleach sit for too long, so that you don’t burn your scalp! If you’re not used to bleaching stick with a lower developer volume for the first times. Since the roots of your hair bleach much faster, you might be done with bleaching in 10-15 minutes.
After this, wash out your hair carefully and you’re ready to apply the dye. Fantasy colours like the ones of Manic Panic don’t damage your hair. Actually, they are extra gentle to your hair since they are completely vegan. Let it sit for a while and check in regularly until the desired colour.
Wash out your hair again and apply conditioner or a hair mask. After drying your hair with a towel and/or blow drying it, you are ready to stylise your hair by following the instructions above.
When figure skaters put a series of turns and steps together, they are doing footwork. The possibilities are endless. This article lists some suggested footwork sequences that can be skated by a figure skater who can do most ice skating turns and steps.
- Video Montage of Top Figure Skaters Doing Footwork
Ten Step Mohawk Sequence
A very simple footwork sequence is a ten step mohawk sequence.
This footwork sequence is usually done in the counter-clockwise direction and on a circle or curve.
The skater begins on the left foot and does a forward progressive or crossover. So. the first three steps are left forward outside, right forward inside, and left forward outside.
Next, the skater does a right forward inside mohawk, followed by a short right back outside edge, then a short left back inside edge, followed by a back crossover (left foot over right), and then a step forward to the right forward inside edge.
Waltz Three Turns
Waltz three turns are easy for most figure skaters and can be done in either the clockwise or counter-clockwise directions. The skater does a forward outside three turn and follows the turn with a back outside edge, then steps forward and repeats the three turn and back outside edge over and over.
Extending the free leg to the back on the back outside edge makes this move look nice.
Mohawk Variations
A mohawk is an ice skating turn that is done from same edge to same edge, from either forward to backward or backward to forward.
A simple footwork sequence can be done by doing two mohawks in a row. If the skater can mix the directions of each mohawk, a very interesting sequence can be created.
Killian Step Sequence
The Killian step sequence begins on the left foot and is done on a curve in the counter-clockwise direction.
The skater first does a forward progressive, followed by the right foot crossing in front to the outside edge and then the left foot is crossed behind to a forward inside edge. Then, a choctaw is done: the skater goes from the left forward inside edge to a right back outside edge. He then tucks the left foot behind on a back inside edge, followed by a short right back outside edge, a cross in front to the left back inside edge, and then a step forward to the right forward inside edge.
Power Three Turns
Power three turns can be done down the length of an ice arena. This sequence should be done in both directions. It is suggested that the skater do three turns on the left foot on one length of the arena and three turns on the right foot down the other length of the arena.
First, the skater does an outside three turn followed by a wide step. For a moment the skater will be on two feet. After the wide step, the skater should pull his or her feet together and do one back crossover on a different curve. After the back crossover, the skater should step forward and repeat the sequence at least one or two more times.
Small Jumps, Moves, Turns, and Steps Can Be Put Together in Various Ways
Small toe jumps, such as a side toe hop or mazurka, can be followed by a power three turn sequence and repeated. A skater could then do a mohawk sequence, followed by three turns, then a hop or half-turn jump. The entire sequence could be repeated or done in the opposite direction in a straight line or on a diagonal. Twizzles, bunny hops, short spread eagles, or lunges could be inserted between each sequence.
Twizzles
Twizzles are multirotational one-foot turns done in figure skating. Twizzles can be done in a row. It is very common to see a skater doing a twizzle in one direction and then to follow the first twizzle with a twizzle in the other direction. Usually, skaters turn for at least four revolutions on a twizzle.
Sometimes viewers of figure skating get confused between twizzles and spins. Twizzles travel and move down the ice. Spins stay in one place.
Twizzles can be done both forward or backward. Twizzles can be done on both inside and outside edges and twizzles can be done in any direction.
Mixing Choctaws, Counters, Rockers, Brackets, Edge Pulls, and Cross Steps
As a figure skating becomes more advanced, adding difficult turns to footwork sequences will make the footwork more interesting. Many skaters take turns from the moves in the field tests to make up footwork sequences. Multiple brackets, counters, and rockers and cross steps where the skater steps in front or behind can make footwork complicated and interesting. Also, doing footwork step sequences in a circle is difficult, but will give the ice skater more points in competition. Choctaw turns, rather than mohawk turns, can make footwork more interesting and difficult.
Running Threes
If a figure skater does a forward inside three turn and then uses the free leg’s toe to turn forward and gain speed, and then repeats the inside three turn again followed by the toe assist to step forward and to begin another inside three, the skater has done a series of running threes. Once a skater gets the hang of doing running threes with speed, he can use this simple step sequence to connect ice skating moves in a freeskating program.
Backward Power Three Turns
If a skater does a back outside three turn followed by a forward inside mohawk and repeats the sequence in a circle, he has done backward power three turns. The skater should push hard on the back outside edge. This footwork sequence should be done with much speed and the skater should practice doing back power threes in both the clockwise and counter-clockwise directions.
Share Your Favorite Footwork
Do you have a favorite footwork sequence you’d like to share with other figure skaters?
ok im taking lessons for figure skating and my biggest problem right now in doing a mohawk ik every thing like on how to start it but the switching of the feet confuses me. any suggestions plz help
5 Answers
It’d so hard to explain it on here, like another user has stated, but you can look up YOUTUBE videos there are about 20+ to choose from. Your can alternatively ask your coach, or maybe someone at your local ice rink who has already done Mohawks to show you. Here is the link to some videos which might help you:
When my coach was away on holiday and i was practising the waltz jump, some YOUTUBE videos did actually help me master the jump. Good luck!
it definitely takes a while, mine did! it’s not really one of those things where you suddenly “get it” and it will be perfect. you will probably end up getting it good enough to pass your level, and over time it will get better and better. with these, it really is true that the more you practice the better you will get. I would suggest just going for it. don’t worry about falling, because it won’t hurt especially if you are not going that fast (but do not go to SLOW. it will not be helpful). really try turning your hips out, and practice them at home off ice
Don’t get discouraged! It’s kind of hard to explain through Y! Answers, but I’ll try. If you ever did ballet, you’d know about first position. This is kind of like that. You are going to step with one foot and then touch that one foot with your other foot and extend. Like I said, it’s hard to explain through Yahoo! Answers but have confidence and ask your coach to help you and keep working on it. It took me awhile to get it too, but once you do it’s worth it because it makes it soooo much easier to go from skating forward to going into backward crossovers! Good luck and keep trying ’cause you’ll get it eventually. 🙂
Description
This article is from the Recreational Figure Skating FAQ, by Karen Bryden with numerous contributions by others.
Learning to do graceful mohawks can take years. Here is a list of
things to make the turn easier, explained for forward mohawks:
1. You begin a mohawk with your free skate at your instep turned out
90 degrees, your hips open and your arms and shoulders extended
along the circle. Your head faces the direction of motion.
Practice the entrance until you can sustain it comfortably.
2. Down up down. Start on a deeply bent skating knee. rise up on the
knee to allow the free foot to draw close under your body, and as
you push the skating foot out of the way (by straightening the
knee and pointing your toe so the foot simply slides off the ice),
sink down onto the new skating knee.
3. POINT THE TOE of the free foot, and let the toe of the free foot
touch down (just behind the toepick) first.
4. Don’t think about your heel (or the free foot). It is a common
tendency to think so hard about the placement of the heel of the
free foot against the instep of the skating foot that you place
the heel/back of the free blade on the ice first. Wrong. This will
cause a bad scrape, a near-stop, or a fall, because when you place
the heel/back on the ice first, the skate will not be on an edge.
THINK ABOUT YOUR TOE (and point it).
5. DON’T LOOK DOWN. Getting your free foot in the right place is a
trial, but try to do it by feel. Your head weighs a lot, and if
you look down at where your free foot is, it pulls you off balance
to the inside of the circle.
6. The change of feet is a process, not an instantaneous action. The
free foot touches the ice and is drawn in under the center of
gravity of the body BEFORE the skating foot leaves the ice. It
does not require open hips because your lower body is rotating
through the turn. As the free foot is pulled along (after it first
touches the ice) it is pulled into a backward position. As the
free foot is pulled closer in under the body, more and more of its
blade will be in contact with the ice. BOTH FEET ARE ON THE ICE at
the same time during the turn.
7. The tracing of a mohawk is a shallow curved X (it looks like
crossed swords). This means that the free foot first touches the
ice INSIDE the tracing. It doesn’t touch down ON the tracing. The
skating foot comes off the ice pointed INTO the circle. It slides
off INSIDE the tracing, and doesn’t leave the ice until it has
moved inside the tracing.
8. Try to NOT move anything in your upper body. You check the turn by
facing into the circle, with your arms extended along the tracing
before, during, and after the turn. Your hips swivel, and your
legs change UNDERNEATH the upper body.
9. The skating foot is slid off the ice by pointing the toe toward
the inside of the circle and straightening the knee, so that at
the conclusion of the mohawk, the new free leg is straight and
extended (though not in a dance-closed mohawk which begins open
(free foot to instep) and ends with the feet side-by-side and
touching.
Although having a good hip/leg turnout will make learning mohawks
easier, especially open mohawks, it is possible to to mohawks with
only about 90 degrees turnout; make sure that you keep you free
shoulder pressing back before and through the turn.
Some moves on the ice were named for the skaters who developed them
- Share
Like most sports, figure skating has its own glossary, the terms that people involved with skating—skaters, coaches, trainers, and others—use to communicate clearly and succinctly with each other. Some terms are descriptive, while others are borrowed from the names of skaters who developed or perfected the moves.
Figure Skating Terms
Here are some common figure skating terms:
Attitude: To do an attitude, start with a one-foot glide, stretching your free leg behind. Bend that leg slightly and put one arm above your head and the other out to the side. Make sure your free thigh is raised and turned outward. Keep your head up throughout. You should look like a ballerina if you do it correctly.
Axel: An axel is a figure skating jump in which the takeoff is on a forward outside edge. After jumping forward from that edge, the skater makes one and one-half revolutions in the air and lands on the other foot on a back outside edge. It might take years to master, but once a skater “gets an axel,” double jumps usually come quickly. The axel was named after Norwegian figure skater Axel Paulsen.
Biellmann: To do a Biellmann, a skater holds the free leg’s blade with both hands and pulls it back above the head. The legs become completely split, although the free leg is bent. The free foot must be over the head. The position is named after Denise Biellmann, a Swiss skating champion.
Bunny Hop: The bunny hop is one of the first jumps new ice skaters master. To do a bunny hop, glide forward on one foot and swing the free leg forward. Then land on the toe pick of the swinging leg and glide forward again on one foot.
Camel Spin: Camel spins are done in the same position as the spiral move, which is based on the classic arabesque position in ballet. As with a spiral, the skater’s upper body and free leg are held horizontally, the free leg extended parallel to the ice and the free foot turned out. The skater’s back should be arched and the head should be up. The arms are usually held out to the sides, but other arm positions are acceptable.
Crossovers: Every new ice skater looks forward to learning crossovers. Crossovers are how skaters move around a corner or curve. The skater crosses the outside skate over the skate on the inside of the curve.
Death Spiral: A death spiral is a figure skating move done in pair skating. The man does a back outside pivot and holds the woman’s hand. The woman circles the man on a forward or backward inside or outside edge, her body almost parallel to the ice and her head dropped back.
Flutz: “Flutz” is a skating term for a Lutz jump done incorrectly. The Lutz’s entry edge must remain on the outside edge. If the edge changes to an inside, the lutz is considered a flip jump, or flutz, and doesn’t receive full credit. The Lutz jump was invented by invented by an Austrian, Alois Lutz.
Freestyle: In ice skating, “freestyle” has more than one meaning. Freestyle can mean doing jumps, spins, turns, and steps on the ice but can also mean a practice session where advanced skaters who do freestyle skating can practice . Beginning ice skaters usually first practice during public skating sessions.
Mohawk: A mohawk is a skating turn from same edge to same edge, from either forward to backward or backward to forward. The name was derived from a cut-like step Mohawk Indians use in their war dances.
Salchow: A Salchow is a figure skating jump done from the back inside edge of one foot to the back outside edge of the other foot, completing a half revolution in the air. The Salchow jump was invented by Ulrich Salchow in 1909.
Shoot-the-Duck: The easiest way to learn a shoot-the-duck is to glide forward on both feet and then bend both knees and squat into a sitting position, moving as fast as possible. The skater glides on both feet, kicks one foot forward, and keeps gliding on one foot.
Skating Parent: A skating parent must get up early, spend a lot of money, do a lot of driving, and sit in a cold ice arena for hours and hours.
Spiral: A spiral is based on the classic arabesque position in ballet. A skater glides on one foot with the chest facing toward the ice and the free leg stretched back.
Swizzles and Twizzles: These terms rhyme but describe very different moves. Swizzles are exercises done by beginning ice skaters that involve pushing your feet out and together again in a V shape. Twizzles are multirotational one-foot turns that move the skater down the ice.
Ice Show Practice
I haven’t really been on the skating scene lately. I’ve been working both my full-time job and my invitation business alot lately. I’ve also been practicing for the annual ice show here which takes up alot of my free evening time especially in the last 2 weeks. While I’ve been skating in the last 2 months it’s really just been mostly to keep my skills up and to practice the ice show. I didn’t watch Worlds this year. This was the first time in years that I didn’t watch it (I can’t even remember the last time I missed it!) but it was on Universal which I do not get and on the web during the day (I work) so no worlds for me! Sometime after the craziness of the ice show I will watch the youtube vid’s that are up. I did see the highlights of Asada, Kim, and Daisuke’s skates though. I loved seeing Asada skate so well, she just floats on the ice.
At any rate, this week is rehearsal week and while I get more ice time now then I do at any other time of the year it’s really spent mostly on practicing only specific elements. Which is just fine, I need all the time I can get.
I usually only participate in one number if I even do the ice show here but since this is going to be my last year (I’m thinking about moving) I decided to volunteer for two more. It’s a little crazy but I think it’s fun and it forces me to learn new things and get’s me out of my apartment socializing at the same time.
So, since I have actually been skating quite alot I decided to have a lesson today. I haven’t had a lesson since December! I think after the holiday ice show and the holidays I went into savings mode and I wasn’t skating enough to really benefit from having lessons. I didn’t realize how much I missed taking lesson’s until I was in it today. I just needed some focus and guidance, I also need someone to tell me what I am doing wrong and fixing it!
I had specific goals in mind for this lesson and we covered most of them.
1. 8 step mohawk sequence for Silver moves
I completely forgot how this went and I needed a refresher (you can see how dedicated I’ve been to testing in the last year 😉
Some pointers for the sequence:
– It should be a clear outside mohawk and I should step into my instep.
– on my bad side (clockwise) I should practice the underpush after the 2 chasse’s (well, they are like chasse’s right?)by practicing going backwards pushing with my left foot underneath. I seriously felt like I had no strength in that foot when I pushed. What have I been doing with that side?? uh, apparently nothing.
– I should focus on counting the steps and making them equal rather than doing certain things faster than others.
– Quickness and making the steps small should be a priority
-Every step counts so I should push on every step.
2. Back Outside 3 Turns
Oh god – these are in one of the ice show programs and to be honest I’ve been cheating on them for some time now. Now, I have to face the music. I think this is what happens when you dawdle on the ice and do your own thing for months, bad habits die hard.
I have a certain sequence I need to learn and I keep on rushing the pattern.
– I have to take my time
– I should start with left arm in front right arm back while going backwards (counterclockwise)
-as I bring my free foot in front of me it should cross over the right closely. The free hip should be up.
– Bring arms close by the sides and then right arm should be in front and I should twist outside the circle with the left arms extended outside.
– knee should still be bent
– turn the three while looking behind with free hip up
– do not rise all the way up after the three
I think the most important part of this was being able to switch my arms and opening my body to the outside of the circle. It feels weird apparently I don’t open that side of my body up much..
3. Axel Prep.
I was soooo excited!
Basic Exercises are:
Waltz from a stand still into almost a traveling back spin into a loop.
The waltz should go up and then down rather than over and down.
– Shoulders should be up and I should lead with the left and picture vase or something breakable 🙂 on my right shoulder in order to keep it from tilting.
– I should try and start rotating in the air before landing in the spin(this is optimal not necessarily what I can do right now 😉
Another exercise:
Alternating Edges
– I should practice these on the line, alternating outside edges keeping my chest and back up with my right leg bent behind me as if I am preparing to jump
Skids
I should practice coming almost to a skidding stop before I feel that pressure to jump into the waltz jump (think of jumping up into a tunnel)
Backspin hop
Do a small backspin keeping the h position and then doing a small loop (or hop in the jump. This can be tiny.
I have problems with my backspins so we worked on those as well.
They should be on the inside edge and more focused on the sweet spot.
I had a really fun time with the axel prep and learning some of the take off’s. Once or twice I felt that snap when I did the exercise correctly. Maybe I’ll land that axel in this lifetime after all!
Pivoting is the ability to go from one skating direction to another without losing momentum. In order to do this, you’ll perform what is known in figure skating as a “mohawk.”
I like the word “pivot” because a mohawk in figure skating is a very precise maneuver, but for ice hockey, the mohawk is applied in more “open” manner (i.e. your legs and feet don’t have to be close before you execute this move). A pivot is simply turning your upper body and shoulders from the forwards direction to the backwards direction. If you turn left, then you will pick up your left leg and skate, then plant it back on the ice, facing in the other direction. Your feet will be pointed in opposite directions for a brief second, but what should happen next is that as you continue turning your upper body to the left, you will pick up your right leg, and point it in the same direction as the left leg. That’s a pivot!
Clearly there are three variations (forwards, going left then right, then backwards, going left then right).
I once watched a Bruins game, and the Bruins defenseman Zdeno Chara was skating backwards (fast) guarding an onrushing forward. The forward turned slightly, and skated between Chara and the boards. Instead of turning towards the forward, Chara turned in the opposite direction. The forward gained an extra second to get past Chara, and (I think) he scored. I remember the pivot because the commentator said “If Chara could have pivoted towards his man, he could have closed down his angle faster.” I have no doubt that Chara could pivot in that direction (backwards, turning left), but it was a moment in an NHL game in which this “advanced” move was revealed.
For the apprentice skater, there are some skills that are often considered as passing a level when mastered.
The standard transition, also known as the mohawk, is probably one of them. Not only does it require balance and agility, but also coordination, and the ability to step out of balance and get back to a steady position as fast as possible.
picture by Gate Festa aka Mr Destroy
Ok first of all, what is a mohawk and how perform it?
The mohawk is a transition in skating direction, from forwards to backwards, or from backwards to forwards, using only inside edges if starting forwards and only outside edges if starting backwards (so not switching edge), and including a feet swtich. The 3-step, for instance, includes switching edges, but not switching feet.
So from forward to backward, and to the right, here is how it goes:
- Put weight on left foot
- Open upper body all the way to the right (180°), starting with the head, then shoulders, then waist
- Lift right foot and open leg from the hip all the way to the right (180°) and put all weight on it
- Lift left foot and put it back next to right foot
So, basically, it’s open and close. Imagine your legs are a book cover. This is how open your legs must be. Yes, I said legs, not feet. I also brought your attention on the fact that the turn starts with head, then shoulders, then waist, and then finally legs. Let’s put a pin in this.
Now, there are some issues that apprentice skaters repeatedly encounter when learning the mohawk. Although this may also be interesting for advanced skaters since they sometimes end up mastering the mohawk with high speed and full balance in one direction, but having an unexplainable issue with the other direction.
1. My arms swing around after I turned round
You probably start the move with your hips and not the upper body. Keep in mind that your head leads the twisting, and then the shoulders, so the more you turn them, the more your whole upper body will turn, dragging your hips and thus your legs too.
The faster your torso reaches its final position, the faster the balance can be recovered too. If you can’t handle your whole body at the same time, why not move progressively, starting with the top?
Start on a straight line, with your hands held together.
Your hands need to point at a mark far away in front of you (on the wall, for instance). Make sure you stretch your arms to aim for the designated mark as much as you can.
On the whistle, you will have to bring your arms in, then aim for the same mirrored mark on the opposite wall, before you can even lift up your feet. Also with arms stretched towards it.
Make sure your arms are making a 180° turn.
This exercise can also be done with a ball in hands. The heavier the ball is, the more effective the drill will be.
Why is this helping?
Asking the skater to aim with fists together is actually asking them to turn their shoulders more, but the focus on the hands give them the awareness of what they are doing exactly. They can see their hands, unlike their shoulders, they can see if they’re actually turning 180°, and if not, correct it on the spot. But the shoulders are still doing the job.
Also, the aiming will force them to start with turning their head, as they need to spot the mark in the first place.
2. I need more than 2 steps to turn completely, or I need to jump
This probably means you’re not “opening your book” enough, in other terms, your first step doesn’t put your foot 180° away from the other one.
This usually happens when the skater tries to open the foot only, and not the whole leg from the hip. So the foot is not open enough, it’s not rolling, and it can’t carry the whole weight for the one last step.
Practice sideways skating, on- and offskate.
Once again, to be aware of your shoulders, strech your arms out above your feet and make them move exactly like your feet:
Position 1: both arms parallel in front of skater skating forwards
Position 2: arms open and as straight as can be while skating sideways
Position 3: both arms parallel in front of skater skating backwards
Oh, and when I say stretched, it’s really like you are trying to make them grow. It’s either derby position or really (I mean REALLY) stretched out, anything in between is not helping at all and actually unbalancing you.
Yeah, figure skaters are position despots. Deal with it. 😉
Also, like for section 1, putting weight in hands will increase the effects of the drill. You don’t need a lot of material, bottles of water are already fine.
Why is this helping?
Since the issue is that your book isn’t open enough, this is going straight to the problem. To be able to go from regular position to sideways means you can put your whole body sideways, which is the middle position of the transition, unless you don’t get out of that position right away, you take the time to put your weight on both feet, and then on the rear foot.
3. I keep on tripping before even turning round
You do probably not notice, but you are taking an extra step with the opposite foot before opening the book. Some people do it because they aren’t confident enough to take one 180° step to the back, others are just confused what foot to start with in which direction.
Start with lifting the foot that is supposed to take the first step (right one on the image) and count to 3. Do not put it back on the floor but initiate the move right after that.
If needed, you can use arms as in section 2. In this case, it is more about being conscious of what feet do, since arms are supposed to mirror them.
Why is this helping?
You can’t take an extra step if the other foot is already lifted up. Sounds obvious, still valid.
4. I can’t preserve my speed or my trajectory
You’re not actually stepping, you are actually making a bow.
It is usually the second step that is skipped, and the result of that is that you find yourself on a double inside edge, with open feet, and your momentum is broken by that.
The result of it is either turning or slowing down, or even both.
Just focus on the sound. Stomp your feet while turning, and expect both feet to make exactly the same noise.
How is this helping?
Same sound means same movement, thus also same height. Although advanced skaters may just lift the front wheels and pivot on the rear wheels, it is better to learn it with complete stepping first, and then get back to letting the rear wheels on the floor.
Always take good habits with exagerated moves first.
So, I hope this helped, feel free to comment and ask if you have any questions 😉
by Gabz Puke
This is pretty much everything I know about mohawks.
How to make your ’hawk healthier and grow faster:
- Don’t spike it everyday. Give your hair a break every now and then.
- Use a shampoo for dyed, fine hair. This is less harsh on your hair, and since most punks dye their mohawks, it keeps the color from fading so quick.
- Condition your hair. This restores the damage all that Elmer’s and hairspray has done.
- Occasionally trim off dead ends.
How to remove styling products:
Note: You may have to do this several times before all the product comes out. Afterward, shampoo, and condition your hair.
If you use styling glue or hairspray:
Usually basic shampoo will work, but in some cases its best to buy a Clairifying shampoo (whatever brand styling glue you use, usually has their own cleansing shampoo, that works great and is less harsh on your hair).
How to spike your ’hawk:
This generally depends on if you want liberty spikes or the “fan” look. Also, depending on the height of your hair, you may need an extra person for assistance.
For spikes:
- Section your hair into however many spikes you want (I prefer 5-6)
- Pull up the first section
- Apply product starting at the base and working your way up
- Blow-dry the heck out of it
- Repeat on all sections until your hair is fully spiked
For the “fan” effect:
All right, this is a tricky one, and I have yet to master it, but here we go.
- Pull up a strip of hair with a comb
- Lace it with hairspray
- Blow dry the hell out of it
- Continue to next section.
For a perfectly straight look, use a hair straightener after it is completely up. I use it before and after, since my hair is wavy.
Recommended products:
If you have a short mohawk, I suggest using a styling glue. Ice is a common one found in every hair junk aisle, but there is an off-brand that is way cheaper. The name escapes me at the moment, but it comes in a yellowish-orange bottle.
If you have a long ’hawk, I suggest using Rave #4 hairspray. This stuff defies gravity, and is cheap! Add a little bit of watered down glue at the tips to keep spikes from splitting.
I don’t really recommend Elmer’s glue because it wreaks havoc on hair, and removing it can be a bitch.
How to get a mohawk:
If you don’t have a uni-brow, pretty much stay aligned with your inner eyebrows, and shave off the rest.
If you have a uni-brow, take a strip of duct tape, run it down the center of your head, and shave off everything else on your scalp.
When it comes to being a chick with a tri-hawk and not being rejected by mankind and guys alike, I can’t help ya there. All I can say is that if ya can’t take the heat, don’t get a mohawk!
[Editor’s Note: If you can’t take the heat, maybe you’d rather try having big hair?]
Here’s a Quick “2 for 1” Post with Two Hockey Skating Drills
The Mohawk Square Drill, and the Full-Ice Snake Drill are two phenomenal ways to work on inside mohawks with your team. I use these two drills to work up to more difficult mohawk drills like the “Snake” Shooting Drill––and of course, the Snake Shooting Drill is a precursor to many other situational drills in which the mohawk can be used.
In this video, I make reference to two previous videos:
Click Here to see the Mohawk in Action
Click here for the Snake Shooting Drill
Here are the diagrams and explanations for the drills mentioned in the video:
Mohawk Square
1. Players start on the boards, about half way between the two cones
2. On the whistle, players skate around the square, executing a mohawk around each cone
3. After a few times through, go the other direction
Note: Once the players can execute the move well, put a puck on their sticks and have them do a toe drag with their mohawk at each cone.
Full-Ice Mohawk Snake
1. Players start in corner.
2. Each player weaves through the cones, executing a mohawk around each cone.
3. Maintain the mohawk behind the net, then come back.
Note: Add a puck and a shot at the end as players begin to improve.
He’s 12 and has had a mohawk cut for a year now- about 2 – 3 inches long depending on the last barbers visit. the sides are a number 1 cut! his hair is actually curly if you leave it alone. we can get it strait using straighteners and can get it to stick up using various gels/waxes/hairspray etc but it never stays up long!! any suggestions of best products – or ideas would be fab! relying on your experience!
14 Answers
Easy look for a product called
Wash hair, dry hair, use this like gell. Hair goes up, in an hour hard as rock. Splash resistant. perfect for punk cuts. If separated by a pin tail comb
The one on the left with wore handle (for parting hair)
If separated and twisted into spikes. If the kid jumpes into a swim pool, underwater and gets out (once its dried first) and does not touch them. it should stay up.
yet will wash out easy with shampoo and when wet rubbed with no residue.
And regualr hair colour if boring.
Try Stargazer hairspray
four unltrviolet flourescent colours.
Ie glows in the dark under UV light (just dont spray on befor a Quasar/lasertag game kinda gives your position away)
Or hows this. get the stargazer hair gell (its crap as regular gel)
Stick it in a pippette bottle
Small squeezy lone skinniy poity top with tiny hole in top
Use like a pen to produce neon sign like effests like glow lines between the spikes.
Or glow writting down arms or say skull and cross bones that glows in the dark.
As he gets older try this. Polomints on the spikes. rules are the girls can take a sweet only no hands. Guess where his head will be?
or if the boy gets good at the art. Then girls may want him to ‘temporary tattoo them. Good girls get hearts and flowers. bad girls (ie those flirting with him that he likes) naughtier cheekier artwork.
In a few years time say when 16.
Both party tricks go down well as ice breakers. If he can do them in a naughty but nice cheeky manner.
Tigi bead head also helps for spikes but you need to use a bit more as dries too quick then its like ouuuuch
This practice emphasizes puck skills and awareness using the Finnish Skills Series and a selection of activities your players will enjoy. Be sure to select 10 or 12 skills appropriate for the age and skill level of your team. The practice outline is as follows:
- Finnish Skills Series (20 minutes)
- Forwards / Backwards Chase (5 minutes)
- Chase the Rabbit (5 minutes)
- Puck Tag (7 minutes)
- King of the Hill (7 minutes)
- Finders Keepers (7 minutes)
- Finders Keepers in Teams (7 minutes)
Half Ice Finnish Series Setup
Forwards / Backwards Chase – Puck Control Activity
Chase the Rabbit Series – With Pucks
Puck Tag – Stickhandling and Awareness Game
King of the Hill Puck Control Drill
Finders Keepers – Puck Protection Drill
Finders Keepers (Teams) – Passing and Puck Control Drill
Half Ice Finnish Series Setup
This is a half ice skill development setup where you can run as many skill variations as you want depending on the skill level of your players. This setup allows you to use the half ice in a way that allows players to get a lot of repetitions. The animation shows an example of the following four skills:
- Mohawk Pivots – open hips towards the tire, heels together.
- Backwards Underhandling – cradle the puck smoothly as you skate backwards around the tires, the less stickhandling the better.
- Escapes – approach the tire forwards, use a 360 degree turn away from the tire, close the blade of the stick to control puck.
- Long Reaches – skate in a straight line between tires and use long reach to move puck outside each tire.
- Inside edges with puck
- Outside edges with puck
- Tight control turns with puck protection
- Pivots facing one direction
- Pivots facing the opposite direction
- Inside / outside pivoting
- Mohawk turns
- Forehand only puck control
- Expansion of reach (long reach)
- Single shift – fake left pull right
- Single shift – fake right pull left
Forwards / Backwards Chase – Puck Control Activity
This drill allows players to work on a coupl eof key fundamentals. First, in order to do this drill properly the players must do this with their head up and an awareness of their surroundings. Second, they have to work on backward skating and agility.
Mark off the boundaries using cones or borders. In most cases this activity works best in either the offense/defensive zone (from the blue line to the end boards). Have your players split up into pairs with one puck for each pair. One player in each pair will start with the puck facing their partner who is also facing them about 3 stick lengths away. On the whistle the player without the puck will skate backwards anywhere they want to go in the zone. The player with the puck will skate forward and try to stay in front of them while maintaining control of the puck. Both players will have to pay attention to their surroundings because everyone is doing this at the same time. The players going backwards are trying to lose the player with the puck by changing directions and speeds.
Allow players to go for 45 seconds to 1 minute then blow the whistle. The players can then switch roles, take a 15 second break, and then start a new round.
Chase the Rabbit Series – With Pucks
This activity works on puck control while skating forwards and backwards, awareness, agility, and creativity. There are 4 progressions and each progression is slightly more difficult. The fourth progression should be reserved for advanced players.
Setup
This is a great station activity for 1/3 stations, 1/4 ice stations, and 1/6 ice stations. Depending on how difficult you wish to make it you can place objects like borders, cones, and tires scattered throughout the station. Pair up the players with partners of similar ability.
How to Play
In each round one player is designated as the “Rabbit” and is chased / followed by their partner. Each round should last 30 – 45 seconds followed by a short rest. The next round players will swap positions.
Variation #1 – The “rabbit” has the puck and tries to stay away from the chaser with deceptive moves, quick stop and starts, changes of directions, tight control turns, and any other creative moves they can execute. The chaser does not try to steal the puck, just maintain a close distance.
Variation #2 – Both players will have a puck. The same rules apply. The player chasing the rabbit tries to maintain a close distance and execute all of the moves made by the “Rabbit”.
Variation #3 – The “Rabbit” skates backwards without a puck. The chaser has a puck and tries to maintain a close distance to the “Rabbit” while they skate backwards.
Variation #4 – Both the “Rabbit” and the chaser skate backwards with pucks. Requires both players to have awareness while maintaining puck control going backwards.
He’s 12 and has had a mohawk cut for a year now- about 2 – 3 inches long depending on the last barbers visit. the sides are a number 1 cut! his hair is actually curly if you leave it alone. we can get it strait using straighteners and can get it to stick up using various gels/waxes/hairspray etc but it never stays up long!! any suggestions of best products – or ideas would be fab! relying on your experience!
14 Answers
Easy look for a product called
Wash hair, dry hair, use this like gell. Hair goes up, in an hour hard as rock. Splash resistant. perfect for punk cuts. If separated by a pin tail comb
The one on the left with wore handle (for parting hair)
If separated and twisted into spikes. If the kid jumpes into a swim pool, underwater and gets out (once its dried first) and does not touch them. it should stay up.
yet will wash out easy with shampoo and when wet rubbed with no residue.
And regualr hair colour if boring.
Try Stargazer hairspray
four unltrviolet flourescent colours.
Ie glows in the dark under UV light (just dont spray on befor a Quasar/lasertag game kinda gives your position away)
Or hows this. get the stargazer hair gell (its crap as regular gel)
Stick it in a pippette bottle
Small squeezy lone skinniy poity top with tiny hole in top
Use like a pen to produce neon sign like effests like glow lines between the spikes.
Or glow writting down arms or say skull and cross bones that glows in the dark.
As he gets older try this. Polomints on the spikes. rules are the girls can take a sweet only no hands. Guess where his head will be?
or if the boy gets good at the art. Then girls may want him to ‘temporary tattoo them. Good girls get hearts and flowers. bad girls (ie those flirting with him that he likes) naughtier cheekier artwork.
In a few years time say when 16.
Both party tricks go down well as ice breakers. If he can do them in a naughty but nice cheeky manner.
Tigi bead head also helps for spikes but you need to use a bit more as dries too quick then its like ouuuuch
Video Playback Not Supported
Recommended For You
The Best Plug-In Bug Trapper for Your Home
The Dimmer Switch That’s Versatile and Convenient
This Flexible Pipe is Perfect for Do-It-Yourselfers
This Primer Has No VOCs to Worry About
The Best Cordless Vacuum for Pet Hair
Mosaic tile come in sheets with a mesh backing to make it easy to install.
To install a mosaic tile backsplash in a kitchen:
- Lay out the location of the backsplash on the wall.
Watch this video to find out more.
Further Information
- How to Install a Ceramic Tile Backsplash (video)
- Ceramic Tile Backsplash Project (article)
- Tools Used to Cut Ceramic Tile (video)
- How to Cut Tile Around Electrical Outlets (article)
VIDEO TRANSCRIPT
To begin installing a tile backsplash, you should first determine the boundaries that will contain it. Creating a plumb, or perfectly vertical, line from the countertop up to the cabinetry is a good way to do that.
The tiles will be held on the wall with thin-set or mastic. This material is applied with a V-notch trowel. The size of the notches in the trowel are important and will vary depending on the size and type of tile being installed, so check the label on the thin-set or mastic.
Position each piece, using the counter as a guide, and press it firmly into the thin-set. To cut around obstacles, like outlets, you can mark the tiles for cutting by applying lipstick to the outlet and pressing the tile, or mosaic of tiles, in position over it.
For sheets of mosaic tiles, most of your cutting will be done to the mesh mat that holds the tile. After you position the piece around the obstacle, you can add back in little individual tile pieces to complete the pattern. To cut the tiles themselves, it’s best to rent a saw designed for cutting ceramic, stone, or glass.
Now once the tile is all in, it will need to dry overnight before you continue. Apply masking tape around the tile before applying the grout to simplify cleanup. And remove any chunks of thin-set left showing between the tiles, so they don’t show through the grout.
To reduce grout cleaning later, dampen the surface of the tiles before you begin applying the grout. The grout is applied with a rubber grout float turn partially on edge. Push the grout across the wall at a 45-degree angle to the lines between tiles, so the float doesn’t catch the edges and dig out the grout.
As the grout begins to dry, begin to wash off the excess with a damp sponge—regularly rinsing it out in clean water. Circular motions work well to remove grout from the tile surface without taking it out of the grooves between tiles. Even after the grout is completely dry, there will be a slight haze over the tile which can be removed by buffing it with a soft cloth.
Wondering how to clean laminate floors and keep them looking great for years? While your laminate floors may look as good as hardwood floors, that doesn’t mean you should clean them the same way. The best way to clean laminate floors is not the same method you would use to make those oak planks shine. Laminate floors need special care because unlike hardwood, the surface can’t just be refinished in the case of stains or damage. To avoid pricey replacements, it’s critical to maintain your floors and treat them with care. (That means no stilettos!) Whether you have new laminate floors or just want your existing surface to look as good as the day it was installed, here’s how to clean laminate floors like a pro.
1. Do read the cleaning instructions that come with your laminate flooring.
Before you get cleaning, consult the manufacturer’s instructions for your floors. The brand may have specific recommendations based on the materials used. Most companies have detailed product guides and instructions on how to clean laminate floors on their websites.
2. Don’t let stains sit on the floor.
Tackle spills as they happen. The best way to avoid stains is to wipe up spills immediately. Liquids can damage laminate floors, so it’s critical to minimize exposure to them.
3. Don’t use abrasive tools.
Laminate floors can scratch, so steer clear of anything abrasive (steel wool, for example). You’ll want to use a soft-bristle broom or dust mop to sweep up debris. If you’re vacuuming, be careful to use an attachment without a beater bar or rotating brush, which could scratch the surface.
4. Do (carefully) mop your laminate floor every two months.
To keep your laminate floors fresh, mop them every two months. Damp mops (a.k.a. microfiber mops) are gentle enough to use on laminate floors. If you’re going to use a regular mop, just wring it out until it’s almost completely dry.
5. Don’t use too much water.
Traditional mopping is a no-no for laminate floors since the water can seep into the seams and cause damage (like swelling or floor bubbling). Pools of water can also cause staining or fading.
6. Do skip cleaning products that aren’t labeled as made for laminate.
Oil-based cleaning products can leave streaks and residue or damage the protective sealant of the floors. If you use laminate cleaner, do so sparingly and apply it to the mop or microfiber cloth rather than directly to the floor. Never use wax or polishes on laminate floors.
7. Do consider a DIY laminate floor cleaner.
You can make your own floor cleaner right at home. For regular cleaning, just combine a teaspoon of clear, unscented dish soap with a gallon of hot water. Another option? If your floor has developed a slight film or waxy buildup on it (which happens over time when the wrong cleaning products are used), you can instead combine a gallon of hot water with a cup of white vinegar. Vinegar, which is a natural cleaning agent, will break down the film without hurting the laminate surface. (Note: The same rules about water apply to either of these DIY solutions. Make sure your mop is only slightly damp and never let any water pool on the floor.)
8. Do add common household items to your laminate-cleaning arsenal.
For tough stains like candle wax or ink, the best cleaning methods are right at hand. Apply a plastic bag of ice to chewing gum and candle wax and remove with a plastic knife, scraper, or credit card once it has hardened. Tackle paint, ink, nail polish, and crayon with rubbing alcohol.
9. Do protect the surface from future damage.
To avoid future scratches, add furniture pads under the legs of chairs and tables, especially if they get moved frequently. Floor mats and rugs—particularly by entrances—will also help prevent wear and tear.
10. Don’t forget to throw down a welcome mat.
Dirt that gets tracked in from outside not only makes your floor dirty, but it can also damage the floor. The grit, for example, from a dirty shoe bottom can be one of the biggest enemies your laminate floor faces, as it dirties, dulls, and can even scratch. Stop dirt in its tracks with a welcome mat that offers visitors the opportunity to give their shoes a good wipe.
11. Do trim your pet’s nails.
True, this isn’t a “how to clean laminate floors” tip, but it is a solid “how to care for your floor” tip: Keep your pet’s nails trimmed! Your cat or dog’s nails can scratch up your laminate floor. Keeping a pet’s nails trimmed will prevent damage to your floor as they roam around.
Caring for RevWood, SolidWood, TecWood
Your new Mohawk SolidWood and TecWood can maintain their strength and beauty for years, while your RevWood flooring pairs the beauty of natural wood with easy, carefree maintenance. You’ll get years of beautiful performance from your wood floors with a little preparation and know-how.
Basic Maintenance
RevWood
Use a dust mop, soft bristle broom or a vacuum cleaner with suction only (no beater bar or with the beater bar disengaged) to remove dust, dirt and loose particulate on a regular basis. Avoid wet-mop cleaning with water or liquid cleaners.
Use protective window coverings to block fade-causing UV rays and excessive heat from direct sunlight, and rearrange rugs and furniture periodically to help your floor age evenly. During inclement weather, avoid exposing your flooring to water as much as possible.
SolidWood and TecWood
Vacuum or sweep your floor regularly with a soft-bristled attachment or broom, especially in high-traffic areas. This prevents gritty dirt and particle buildup that can scratch the wood’s surface. Don’t use vacuums with a beater bar or power rotary brush head.
Use protective window coverings to block fade-causing UV rays and excessive heat from direct sunlight. Most wood types will gradually age when not covered, so it’s a good idea to rearrange rugs and furniture periodically to help it age evenly.
Tips for Preventing Damage
- Carefully remove stubborn stains (like paint, oil, tar, or markers) with acetone-based fingernail polish remover.
- If one of your planks is beyond repair, use the Quick-Step UniFix ® tool to remove and replace the damaged plank in minutes.
- Keep pets’ nails trimmed and their paws clean. Pets can track in substances that cause scratching and stains.
- Use a humidifier during heating seasons to help reduce wood shrinkage and humidity between 35% and 55%.
- Wipe up spills and spots immediately with a clean white cloth.
- Use ice to harden tough substances like wax or chewing gum, and then gently scrape with a plastic scraper or a credit card. Be careful not to scratch the surface and wipe the area clean with a soft, slightly damp cloth.
TIPS FROM CHIP
Get advice on SolidWood and TecWood care and maintenance from flooring expert Chip Wade.
Turning is one of the fundamental skills that every hockey player needs to learn. Sure you might be able to turn, but how well can you do it? There is a big difference in a slow gradual and off balance turn VS a quick, tight, sharp turn. In this video and article we are giving you the information you need to start performing better turns.
How to Turn in Hockey
The Basics of a good turn
For a good turn you want to use both skates. Sure you can still turn with only one skate on the ice, but with two blades on the ice you will be more balanced, and be able to turn at higher speeds. Below is a breakdown of the turn
- If you are turning left, lead with your left foot. If you are turning right, lead with your right foot
- With a staggered stance, most of the weight will be on the outside leg, and your inside skate will be there for extra balance and to help you get lower (and a tighter turn)
- With both feet on the ice you can use both edges, rather than just one
- When you are coming out of the turn, use a few crossovers to accelerate out and keep your speed.
- Throughout the turn you should maintain balance, you can do this by staying low, and having a good base (feet are not too close together)
NHL Examples
Matt Duchene is performing a nice tight turn, he has a good base and a staggered stance. This staggered stance helps Duchene get a better turn, but also protect the puck from the defender!
Here is Pavel Datsyuk in the NHL Skills Competition. Notice how the hands are away from the body, the stick leads Datsyuk through the turn, and he is nice and low with both blades on the ice. As Datsyuk completes this turn he can execute crossovers from this position and keep his speed.
Here is a tight turn with the puck on the forehand. Notice the nice wide base for balance and strength (hard to knock off the puck). Karlsson has his hands away from his body so that he can cup the puck even more and perform a tighter turn. With his feet like this he can keep on pushing with the outside leg and drive wide while pushing on the opponent.
Tight Turn Tips for Hockey
Want more? Check out our Learn to Skate Series and don’t forget to subscribe to our blog (box to the left)
Content Options
For 2020, Sparta Recreation Department’s annual Winter Festival is going big! The 175 Anniversary committee announces the first of several events celebrating the milestone.
Beginning on Friday night, February 7 the field in front of the Mohawk Avenue School will be transformed into a skating rink. Skates will be provided. Inflatable snow tubing and a snow maze will also be available for outdoor fun. The weekend of celebration kicks off from 7 to 9 p.m.
On February 8 the Winter Festival continues with activities inside and out at Mohawk Avenue School. The skating rink and outdoor activities will run from noon until 9 p.m. Family friendly activities will go in inside the school from 1 to 4 p.m. This is open all ages, with family friendly activities.
- Games,
- A gaga pit,
- Bounce house,
- Sand art,
- Face painting,
- Crafts,
- Magic show,
- Dance and yoga demonstrations,
- Boy Scouts’ pinewood derby track.
Requested admission is a donation of a non-perishable food item for the Sparta Ecumenical Food Pantry.
The Annual Wine and Beer tasting will be held later on Saturday, February 8 from 7 to 9 p.m. The Liquor Factory and Sparta Elks Lodge are partnering with the Sparta Recreation Department for this adult only event. Registration through the recreation department is required.
Admission to the Wine and Beer Tasting is $10 per person and must be paid by cash or check made out to Sparta Elks Lodge 2356.
On Sunday, February 9 the skating rink and outdoor activities will continue from noon until 5 p.m.
The 175 Anniversary Committee is planning events that will complement and enhance traditional Sparta celebrations.
Mo·hawk 1
Mo·hawk 2
Mohawk
Mohawk
mohawk
Mo•hawk
n., pl. -hawks, (esp. collectively) -hawk.
Want to thank TFD for its existence? Tell a friend about us, add a link to this page, or visit the webmaster’s page for free fun content.
Link to this page:
- Adirondack Mountains
- brant
- Brant Joseph
- Brantford
- dowitcher
- Empire State
- fauxhawk
- Five Nations
- haircut
- Hudson River
- Iroquoian
- Iroquoian language
- Iroquois
- Iroquois League
- language
- league
- League of Iroquois
- mohawk haircut
- Mohawk River
- ▲
- mogul skiing
- moguled
- MOH
- Moha
- Mohács
- mohair
- Moham
- Moham.
- Mohammad
- Mohammed
- Mohammed Ahmed
- Mohammed Ali
- Mohammed II
- Mohammed Reza Pahlavi
- Mohammed Reza Pahlevi
- Mohammedan
- Mohammedan calendar
- Mohammedan Era
- Mohammedan year
- Mohammedanism
- Mohammedanize
- Mohandas Karamchand Gandhi
- Moharram
- Mohave
- Mohave Desert
- Mohawk
- mohawk haircut
- Mohawk River
- Mohawks
- Mohegan
- mohel
- Mohenjo-Daro
- Mohican
- Mohicans
- Mohism
- Moho
- Mohock
- Mohole
- Moholi
- Moholy-Nagy
- Moholy-Nagy László
- Mohorovicic
- Mohorovicic discontinuity
- Mohorovicicdiscontinuity
- Mohr
- Mohria
- Mohria caffrorum
- Mohr’s circle
- Mohs scale
- mohua
- mohur
- ▼
- ▲
- Mohatma Ghandi
- Mohatma Ghandi
- Mohatma Ghandi
- Mohatra
- MOHATS
- MOHATT
- Mohaupt effect
- Mohave
- Mohave
- Mohave
- Mohave
- Mohave Community College
- Mohave County
- Mohave County Library District
- Mohave County, Arizona
- Mohave County, AZ
- Mohave Desert
- Mohave Desert
- Mohave Desert
- Mohave Electric Cooperative, Inc.
- Mohave Engineering Associates, Inc.
- Mohave green
- Mohave green
- Mohave rattlesnake
- Mohave rattlesnake
- Mohave Valley Irrigation and Drainage District
- Mohaves
- Mohaves
- Mohaves
- mohavite
- Mohawk
- Mohawk (disambiguation)
- Mohawk (disambiguation)
- Mohawk Aircraft
- Mohawk Amateur Radio Club
- Mohawk and Hudson River Humane Society
- Mohawk Area School District
- Mohawk College Alumni Association
- Mohawk College Association of Continuing Education Students
- Mohawk Council of Kahnawake
- Mohawk Data Science
- Mohawk Data Transmission System
- mohawk haircut
- Mohawk Hudson Bonsai Society
- Mohawk Hudson Land Conservancy
- Mohawk Industries
- Mohawk Mountain State Forest
- Mohawk nation
- Mohawk Nation Council of Chiefs
- Mohawk Nation News
- Mohawk Park
- Mohawk River
- Mohawk River Research Center, Inc
- Mohawk State Forest
- Mohawk Towpath Scenic Byway
- Mohawk Trail
- Mohawk Trail Concerts
- Mohawk Trail Regional School District
- Mohawk Trail State Forest
- Mohawk Trail State Forest
- Mohawk Valley
- ▼
- Facebook Share
CITE
- Terms of Use
- Privacy policy
- Feedback
- Advertise with Us
Copyright © 2003-2020 Farlex, Inc
All content on this website, including dictionary, thesaurus, literature, geography, and other reference data is for informational purposes only. This information should not be considered complete, up to date, and is not intended to be used in place of a visit, consultation, or advice of a legal, medical, or any other professional.
Feel the rush of pop with a message
“I believe so wholeheartedly in the power of art and music,” says singer-songwriter Shawnee. “It’s my life’s mission to continue that healing for myself, and anyone else I can give it to. Whether that’s a powerful message, joy or just a sense of knowing you’re not alone, I want to do anything I can do.”
Shawnee infuses her infectious pop songs with messages we don’t hear enough. The Two-Spirit Mohawk musician and winner of CBC’s 2020 Searchlight Award for “Canada’s best undiscovered talent” has long shed light on the struggles faced by Indigenous communities. Last year, she performed her 2017 song “Warrior Heart” at Parliament Hill’s Canada Day event to bring awareness to the nationwide suicide crisis in Indigenous communities. Backed by an orchestra and traditional dancers, Shawnee used the spotlight to acknowledge Two-Spirit youth while tying her performance back to her ancestry. As the first Indigenous winner of the Searchlight Award in its 12-year history, she aims to extend her outreach even further with transmissions of love, healing and empowerment.
“Everything I’ve ever done is a step towards learning more about myself as an artist and who I am as a person,” says Shawnee over the phone from her home in Edmonton (a city she calls “a little windy”). “My writing has changed and evolved alongside my identity. I came out as lesbian and then discovered myself as a Two-Spirit person. It’s all part of my continuous growth.”
Though she moved to Alberta this past January, Shawnee grew up in Welland, Ontario, and her mother’s side of the family is from the Six Nations of the Grand River. Shawnee got her start at an early age, performing as a Shania Twain impersonator at parties and in parades. She later fronted a cover band before deciding to write and perform music of her own. After graduating from high school, Shawnee moved to Toronto and toured with the bands Roxette and Glass Tiger as a backup singer, performing to stadium crowds.
During this formative period in her early 20s, Shawnee began working with her first manager, who helped sign her to a record label. But this came at the cost: She had to hide her identity. “During that time I was very excited because everything was happening and it’s what I always wanted,” she says. “I was touring around Canada and getting on radio stations, but at the same time [I was] being told to stay in the closet.” She says industry professionals told her not to be out because “men need to feel like they’re invited, too.” Shawnee pushed back. “That’s not what I represent and I wasn’t going to fit whatever mould to be a product. My artistry is so much more important than that.”
Growing up, Shawnee didn’t know much about herself as an Indigenous person; it wasn’t until she experienced a racist incident that she started to look closer at her history and culture. After talking to family members and attending her first powwow, Shawnee spoke to Elders about what it means to be Two-Spirit.
In a 2019 interview with Kids Help Phone, Shawnee explained that being Two-Spirit means “knowing, understanding and walking in both gender worlds” and is something that her ancestors “honoured as a gift in their community.”
She says learning her culture really helped her connect to her identity. “I felt understood, complete and whole.”
Shawnee has operated as an independent artist since her negative experience with her manager and label—that “bad deal” in her early 20s. She now cherishes her artistic autonomy and has never looked back. There has been no shortage of highlights, from singing with Tegan and Sara at the 2014 Junos to sharing the stage with Lady Gaga during her surprise appearance at NYC Pride last year. Shawnee laughs at the memory of the Gaga gig. “She said she was nervous because she had to sing the national anthem,” Shawnee says. “I said, ‘You’re nervous? You’re Lady Gaga! Now I have to perform in front of you and thousands of people. I don’t know what you’re talking about!’”
Shawnee’s latest single “Don’t Go,” out June 19, is a catchy ‘80s-indebted summer jam, co-written with her drummer Matt O’Rourke, with a sound that stands out from her previous work. Carrying on the tradition of impassioned, romantic and deeply sincere Canadian synth-pop, it shares a rush with Lisa Lougheed’s “Run With Us” and Carly Rae Jepsen’s “Run Away with Me.” There’s even a sly wink to Shawnee’s Shania Twain past with the pleading way she sings the lyrics “Come on over, baby.” But this time, the song is addressed to a different romantic interest: “You had me at hello/ Hey now girl come on let’s go.”
“I know you’re supposed to pick a genre and a lane, but I don’t do well in the lane going one direction,” Shawnee says. “It goes against my very core being. There are roots that come out in my music, but the instrumentation can be a little more country or a little more pop. On this day in the studio, we were working on another song when [O’Rourke] started dabbling and came up with that synth line. I was like ‘what is that?’ We wrote ‘Don’t Go’ on the spot.”
While she gears up to release an album in 2021, Shawnee will enjoy five days of recording at Calgary’s National Music Centre, part of her Searchlight prize. When Halifax’s Aquakultre won the award last year, they provided a model for how to inject vital messages (such as the history of Africville) into accessible pop—which, for them, meant a dazzling hip-hop/neo-soul sound. Shawnee continues this work by speaking up for her steadfast beliefs, sharing her own experiences in the music industry as a young artist and being open about how it might not be the best fit for a new generation.
“To be completely honest, it was very limiting. That was another growth experience, learning that all the bells and whistles are not always the best way to go,” Shawnee says.
“The most important thing I’ve learned as an artist is to always be true to what I believe in—who I am, what I represent and what I have to say. Otherwise, what do you have at the end of the day? Not much.”
With an active home usually comes an active cleaning routine, and that’s especially true as so many of us are at home right now. As you deep clean your living spaces, it’s important to remember the approved cleaning steps for your specific type of floors so you don’t accidentally damage them. And if you’re looking to clean and disinfect your wood and vinyl floors to kill germs, you’ll want to consult the cleaning advice below from the Centers for Disease Control. Let’s discuss the proper cleaning steps for wood and vinyl flooring.
Vinyl Flooring Cleaning Instructions
Your luxury vinyl plank or sheet vinyl flooring from Mohawk is not only beautiful, but it is also highly durable and waterproof. It only takes a few simple care and maintenance steps to keep your Mohawk luxury vinyl floors looking beautiful for years to come:
- Spills should be cleaned up immediately
- Use a soft bristle broom to remove loose dirt
- Damp mop as needed with clean water and a non-abrasive floor cleaner. Harsh cleaning chemicals should not be used on luxury vinyl flooring
- Never push, pull or drag furniture across vinyl floors. Always lift and carry.
- Heavy furniture or appliances that are not moved often should be equipped with flat, non-staining floor protectors.
- Avoid using a vacuum with a beater bar.
- For spot stain treatment, use a diluted bleach solution that is 1 part bleach and 10-parts water.
Engineered Wood Cleaning Instructions
For a savvy combination of strength and style, engineered wood flooring is a great option for homeowners looking for the best of both worlds. Mohawk TecWood floors feature enhanced engineered construction that resists expansion and contraction from humidity changes, and care and maintenance is a breeze:
- Make sure to vacuum or sweep your floor regularly, especially in high-traffic areas, to prevent dirt and debris from scratching the wood’s surface.
- Always use a soft-bristled attachment or broom.
- Avoid using vacuums with either a beater bar or power rotary brush head.
- Use protective window coverings to block UV rays and excessive heat from direct sunlight.
- Rearrange rugs and furniture periodically to help floor age evenly.
- Wipe spills up immediately with a clean white cloth.
Laminated Wood Cleaning Instructions
With the versatility of laminated wood, you can have the natural beauty of wood in any area of your home with the convenience of durable, easy-care flooring. Advanced options from Mohawk provide a revolutionary step in flooring that gives you complete wood beauty without compromising performance.
RevWood floors are a breeze to spiff up with a dust mop, soft bristle broom or a vacuum cleaner with suction only. Perform this step often to remove dust, dirt and loose particulates on a regular basis, just make sure to use vacuums without a beater bar or with the beater bar disengaged. Also, avoid wet-mop cleaning with water or liquid cleaners, and if using cleaner, spray it lightly onto a cleaning cloth rather than directly to your floors.
If you have RevWood Plus or RevWood Select laminated wood installed in your home, your floors can be wet mopped! And RevWood Plus can be steam mopped, too.
For all three RevWood options, refrain from using wax, polish, oils, soap, detergents, shine enhancers or varnish. Also, use protective window coverings and rearrange rugs and furniture periodically to help your laminated wood floor age evenly.
Solid Wood Cleaning Instructions
Each SolidWood plank from Mohawk is just as the name suggests: a solid piece of wood from the finest domestic and exotic hardwoods. Installation is only appropriate above grade, over approved wooden subfloors, and you want to limit solid wood floors to rooms with controlled temperatures and humidity. Should you spill on your solid wood flooring, follow this specific procedure:
- Wipe up spills and spots immediately with a clean white cloth.
- Use ice to harden tough substances like wax or chewing gum.
- Gently and carefully scrape with a plastic scraper or a credit card.
- Wipe the area clean with a soft, slightly damp cloth.
Disinfecting your Wood and Vinyl Flooring
After thoroughly cleaning your floors, we recommend following the household cleaning guidelines by the Centers for Disease Control for up-to-date information on how to disinfect your home, including hard surfaces like wood and vinyl. Remember to always test EPA-approved disinfectants in an inconspicuous area before using.
General Tips for Keeping Hard Surface Floors Clean
These handy tips and tricks will help you keep all hard surface floors dazzling longer and decrease the amount the time you have to spend cleaning:
- Keep mats at your front doors and back entrances to prevent mud and debris from coming inside.
- When using a dust mop, try a model with a pivoting handle to effectively clean corners and inlets.
- To vacuum a wood floor, opt for a model with a hose attachment instead of a rotating brush.
- If you have wood stairs, using a dust rag by hand can actually save you clean-up time and be more effective versus trying to vacuum your stairs.
In the end, you will find that tailoring your care and maintenance to the specific type of floors you have installed will make a tremendous difference in the long-term effectiveness of keeping them both clean and protected for their lifetime.


