- Google+
Nutrition and extra info
- Freeze up to 3 months
Nutrition: per serving
- kcal 433
- fat 31g
- saturates 15g
- carbs 30g
- sugars 11g
- fibre 8g
- protein 10g
- salt 0.81g
Ingredients
For the filling
- 400ml vegetable stock
- 450g article” data-tooltip-width=”350″ data-tooltip-hide-delay=”200″ data-tooltip-flyout=”true”>celeriac, peeled and diced
Celeriac
The unsung hero of the vegetable world, knobbly, odd-shaped celeriac has a subtle, celery-like…
Carrot
The carrot, with its distinctive bright orange colour, is one of the most versatile root…
Sweet potato
Sweet potatoes have a creamy texture and a sweet-spicy flavour that makes them ideal for savoury…
Like garlic and onion, leeks are a member of the allium family, but have their own distinct…
For the crumble
- 50g article” data-tooltip-width=”350″ data-tooltip-hide-delay=”200″ data-tooltip-flyout=”true”>butter, diced
Butter
Butter is a dairy product made from separating whole milk or cream into fat and…
Parmesan
Parmesan is a straw-coloured hard cheese with a natural yellow rind and rich, fruity flavour. It…
Method
Pour the stock into a pan and bring to the boil. Tip in the celeriac, carrots and sweet potato, then add the leeks. Cover the pan and cook for 10 mins.
Beat the crème fraîche with the flour and mustard. Stir into the vegetables until thickened, then add the thyme and season. Remove from the heat.
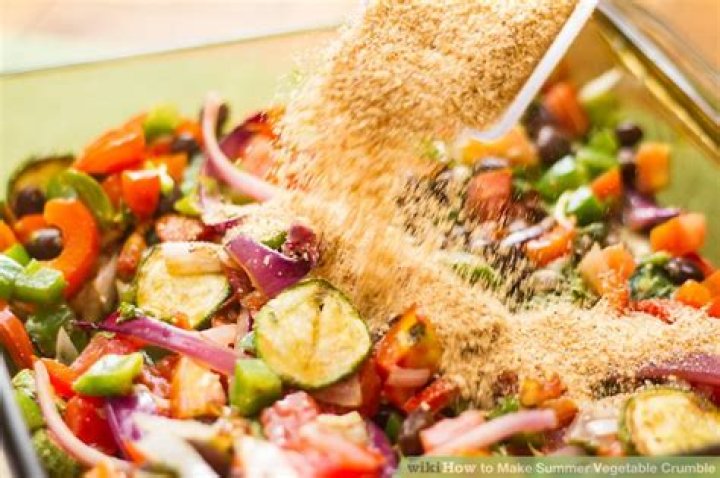
For the crumble, rub the butter into the flour and ground almonds. Season, then stir in the Parmesan and flaked almonds. Spoon the filling into small ovenproof dishes and scatter the crumble on top. If freezing, wrap in cling film, then foil. To defrost, thaw overnight in the fridge.
To cook, heat oven to 190C/170C fan/gas 5 and bake for 30-35 mins until golden.
less than 30 mins
30 mins to 1 hour
Less bother than a pie, vegetable crumble is a great way to use up what you have in the fridge, cupboard or freezer! You can change the filling with the seasons making green and summery fillings in the spring and summer and heartier root vegetable crumbles in the winter.
less than 30 mins
30 mins to 1 hour
Ingredients
For the filling
- About 600g/1lb 5oz mixed vegetables that you like, such as
- carrot
- parsnip
- squash
- potato
- sweet potato
- spring onion
- leek
- mushroom
- pepper
- kale
- peas (frozen or fresh)
- sweetcorn (frozen or fresh)
- 100g/3½oz leftover roast chicken or ham (optional), chopped
- 1 x 400g/14oz beans or pulses (optional), drained and rinsed
For the crumble
- 200g/7oz plain or wholemeal flour
- 100g/3½oz butter, softened
- 50g/1¾oz grated cheese
- handful of porridge oats
- freshly ground black pepper
- 2 tbsp sunflower or pumpkin seeds (optional)
For the sauce
- 2 tbsp butter
- 1 garlic clove, crushed
- 2 tbsp plain flour
- 400ml/14fl oz milk or vegetable stock
- pinch salt
- handful grated cheese (optional)
Method
Adult’s job: Preheat the oven to 200C/400F/Gas 6.
Kid’s job: Chop or slice all of the vegetables into roughly equally sized pieces and set aside.
Kid’s job: For the crumble, put the flour into a mixing bowl. Chop the butter into little lumps and add it to the flour. Using your fingers rub the flour and butter together. Keep going until it looks like breadcrumbs (a few lumps are ok!). Stir in the oats, cheese, pepper and seeds (if using). Set aside.
Adult’s job: Meanwhile, heat a large saucepan and melt the butter until it bubbles slightly. Add the garlic and stir for a minute. Add the flour and stir well for another minute. The butter and flour will thicken and change colour slightly. Gradually add the stock or milk a little at a time, stirring as you pour. The sauce should thicken up and not be lumpy. If it is you will need to mix it really fast to get rid of any lumps.
Kid’s job: Taste your sauce. (Careful – it’s hot.) You may want to add some salt and pepper, grated cheese or just a squeeze of lemon juice.
Adult’s job: Add the chopped fresh vegetables (but not any frozen ones) to the sauce and cook gently for five minutes, stirring often. Then add any frozen vegetables and any of the optional extras like cooked meat or tinned beans and stir through.
Adult’s job: Pour the saucy vegetables into a 20cm/8in square baking dish and let it cool slightly.
Kid’s job: Sprinkle the crumble all over the top of the vegetables. You should cover all of them up and have a nice thick crumble topping.
Adult’s job: Place the dish onto a baking tray (to catch any spills) and bake in the oven for 30-40 minutes or until the crumble is golden-brown all over.
Adult’s job: Remove the crumble from the oven and leave to cool slightly before serving.
Member recipe by Leon Ansorg
- 1
- 2
- 3
- 4
- 5
Member recipe by Leon Ansorg
Cooking time
Skill level
Servings
Ingredients
Filling
- 250 g raspberries
- 250 g blackberries
- 250 g red currants
- 250 g cooking apples
- 60 g castor sugar
- 1 teaspoon of mixed spice
- 2 tablespoons of orange juice (optional)
Crumble
- 80 g castor sugar
- 90 g butter
- 180 g plain flour
Method
Peel the apples. Cut them in half, cut out the cores and slice them. Cook the apples till well done but not squishy.
Then add the raspberries, blackberries and red currants along side the spices, sugar (and orange juice) and cook until soft.
Sift the flour into a mixing bowl and add the butter and cut it into small bits with a knife. Rub the butter into the flour with your fingertips. Keep lifting your hands high above the bowl to let air into the mixture which makes it light. Carry on doing this until you have an even, crumbly mixture,then stir in the sugar.
Pour the cooked fruit into a 1 liter dish and out the mixture evenly. Spoon the crumble over the fruit in the dish. Spread it out with a fork but do not press down.
Bake the crumble for 30-40 min until the top has browned slightly. Serve it hot with custard or cream.
This article contains affiliate links, which means we may earn a small amount of money if a reader clicks through and makes a purchase. All our articles and reviews are written independently by the Netmums editorial team.
Recipe sent in by Abigail
Delicious vegetable crumble recipe, perfect for filling hungry tums.
Preparation
- Total Time 1 hour 15 minutes
- Preparation Time 15 minutes
- Cooking Time 1 hour
For the crumble topping
- 100g butter (or margarine)
- 175g wholemeal flour
- 100g cheddar cheese, grated
- 50g mixed nuts (use more seeds if you don’t like nuts), chopped
- 2 tbsp seeds
For the filling
- 675g mixed root vegetables (parsnip, swede, turnip, potato, carrot etc)
- 1 onion (large)
- garlic (2x cloves), crushed
- 50g butter (or margarine)
- 25g wholemeal flour
- 225g tinned tomatoes
- 275ml vegetable stock
- 150ml milk
- 3 tbsp fresh parsley, chopped
- black pepper (to taste)
- Rub the butter into the flour until the mixture resembles fine crumbs (or whizz together in a food processor)
- Add the cheese, nuts and seeds and set aside
- Chop the vegetables into small cubes
- Melt the butter in a large saucepan and saute the onion until transparent
- Add the prepared vegetables and cook over a gentle heat, stirring occasionally for 10 minutes
- Stir in the flour and cook for a minute, then add the remaining ingredients
- Bring to the boil, reduce the heat,cover and simmer for about 15 minutes, until the vegetables are just tender
- Transfer to an ovenproof dish
- Press the crumble topping over the vegetables and bake in the oven at 190’C/Gas mark 5 for about 1/2 hour, until golden
You will need
Large saucepan – We know this one is on the pricey side but it’s SO worth it. Made from sturdy stainless steal and designed with a fully encapsulated aluminium base, it also features convenient ‘stay cool’ knobs and handles. Get it at Amazon for £40.
Ovenproof dish – This white Mason Cash stoneware is ideal for baking and roasting as it’s durable and resistant to heat and breakage. You can find it at Amazon for less than £9.
This recipe is my favourite one from Cranks and it is just divine!
It takes a little time to prepare the first time you make it, but if you make it in a big dish, you can freeze it in portions and is scrumdiddlyumptious when heated up again in the microwave. It’s also yummy with baked beans!
Variations
You can use a combination of any other vegetables you prefer eg: mushrooms, peppers, courgettes etc
Your browser cannot play this video.
Reviews
Polly L(45)
This is really easy and the cheesy topping makes it tasty enough that the kids will actually eat some veg! I sometimes add a bit of mozzarella in with the veg to give it a great gooey texture.
Guest
Love this as doesn’t take to long and you can batch cook it. We’re not fans of strong cheese so Substituted the strong chedda for Mozzarella
Guest
This is nice. although we changed the name of it to gruffalo crumble to make it more appealing to the little ones.
Hannah C(409)
My dad has been making this since the 80s its awesome!
Guest
I can’t tell you how tasty this is! I admit I was a little dubious about the veg stock, tinned toms, milk combo but the result is like a cream soup! The filling is so tasty that next time I will be making double filling so I can reserve half for soup! The possible variations are endless and I can’t wait to have it again this week with the addition of the spinach, as recommended earlier, and some smoked cooking bacon! Thanks for the recipe!
Guest
thanks for this, made it today but changed the veg to sweetcorn, leeks, carrots and brocolli and added puy lentils and it’s lovely! also froze another 3 portions for another day
Sophie G(131)
Had this for tea last night it was lovely thank you
Guest
Just cooked a batch of this up for freezing. Done a taste test (tough job, but someone has to do it ;)) and it’s yummy! I cheated a little and bought a couple of bags of ready-diced root veg from Teskimos. Really easy to make and it makes quite a lot, as well!
Guest
Made this for tea tonight – it was absolutely lovely! Thanks for sharing the recipe. I added a layer of uncooked spinach on top of the filling before I topped it off with the crumble mix, which worked really well. Will definitely be having this again!
Guest
Think I’ll try this tonight!!
Guest
I made this last night. It’s the nicest veg crumble topping I’ve ever tried. Good old Cranks. (Also, I added tofu to the filling for some extra protein, but since there are nuts and cheese in the topping, I didn’t really need to. This is a really nice recipe for parents like me, who might be worried about their veggie kids not getting all the nutrients they need).
Tracey D(122)
Made this last night and it’s yummy. didn’t put the nuts and seeds in the crumble but it was still lovely – my daughter loved it too.
Guest
I made this today as we are trying to cook more veggie meals and save money on buying meat. I used whatever veg I could find in the fridge and it’s yummy. thanks!
Guest
unfortunately, my fussy eater and my non fussy eater didn’t like this but hubby and I did!
Published July 1, 2018 , Updated June 14, 2019 by Beth Le Manach 2 Comments
Learn how to make an easy summer fruits crumble recipe! My Peach, Nectarine, and Blackberry Crumble Recipe is the perfect summertime treat!
How do you make this summer fruits crumble recipe?
Fruit crumble is one of the easiest summer desserts to make. You can really use any combination of fruit you like. I love the combination of Peach, Nectarine, and Blackberry. All you have to do is cut the fruit, toss with flour, sugar and a little lemon juice, pop in a casserole and top with a simple homemade crumble recipe (instructions below). Once baked, serve with a generous scoop (or 2!) of vanilla ice cream, it’s a dessert that can’t be beat!
An easy summer combo is is peach, nectarine and blackberries. It not only tastes delicious but looks so pretty too.
How do you make crumble with oats?
I really like fruit crumble with oats because it adds another texture and crunch to the crumble. You’ll combine flour, baking powder, salt, sugar, cinnamon, pecans, old fashioned oatmeal, melted butter and a little heavy cream. Mix together until a crumble develops and that’s it! Then top on your fruit.
WATCH MY SUMMER FRUITS CRUMBLE RECIPE VIDEO BELOW
Subscribe to my YouTube Channel and never miss a recipe! (it’s free!) and new videos post on Saturdays!
Please let me know if you make this summer fruits crumble recipe by leaving a rating and review below.
Sign up to get recipes in your inbox- click here to sign up! And make sure to follow us on Youtube, Pinterest, Instagram, Facebook & Twitter!
Recently, I had a recipe and was tempted to buy a bag of frozen meatless crumbles. While at the grocery, I looked at the ingredients of a few brands and found that using store-bought meatless crumbles was not an option for me. They weren’t an option because they contained gluten. This led me to make homemade vegetable meatless crumbles.
I am so happy that I could not purchase meatless crumbles because it led me to discover this awesome, easy and delicious REAL FOOD recipe. If you are wondering how to make vegetable meatless crumbles this post is for you!
Vegetable meatless crumbles are an easy meat substitute to make and they freeze great.
I recommend making this recipe in bulk and freezing for later uses.
If you are a tricky cook I have to tell you that this recipe will fool meat lovers.
I recently made lasagna for my family. As we were eating I noticed my husband looking at me curiously as we ate. I realized he was noticing that I was eating red meat, or so he thought. I let him in on the fact that there was no meat in the lasagna and he was honestly surprised. He had no idea and truly enjoyed the dish.
First thing first, lets talk ingredients.
After all, it was the ingredients that inspired me to make homemade vegetable meat substitute.
ingredients in store-bought meatless crumbles:
- WATER, SOY FLOUR, WHEAT GLUTEN, SOY PROTEIN CONCENTRATE, CORN OIL, CONTAINS TWO PERCENT OR LESS OF CHICORY ROOT FIBER, YEAST EXTRACT, NATURAL FLAVORS, BLACK MALT POWDER, SALT, SOY SAUCE (WATER, SOYBEANS, SALT, WHEAT), DRIED CANE SYRUP, GARLIC POWDER, ONION POWDER, ONION JUICE CONCENTRATE, SPICES, TOMATO POWDER, CITRIC ACID, NIACINAMIDE, XANTHAN GUM, IRON (FERROUS SULFATE), NONFAT MILK, EGG WHITES, VITAMIN B1 (THIAMIN MONONITRATE), VITAMIN B6 (PYRIDOXINE HYDROCHLORIDE), VITAMIN B2 (RIBOFLAVIN), VITAMIN B12.
ingredients in homemade vegetable meatless crumbles:
- CAULIFLOWER, MUSHROOMS, CARROTS, ONION, GARLIC, SUN DRIED TOMATOES, RAW WALNUTS.
Which sound better to you?
I know which one tastes better!
How to Make Vegetable Meatless Crumbles
I put a lot of photos in my how-to posts because I appreciate photos when learning to make something new. I learn visually.
If you are in a hurry, you can skip to the bottom of the post for a printable recipe…..
First, shred your cauliflower.
I use a salad-shooter for this task, I love this kitchen gadget as it saves me SO much time!
Second, shred your mushrooms. This can be a little bit messy and drippy but the result is awesome.
Third, shred your carrots.
Finally, shred (or chop) your garlic and onions. I now put the onion and garlic in my food processor because putting them through the shredder is too much of a mess for me!
Now, throw all of your shredded veggies into a skillet over medium-high heat. Cook for about 5 minutes, until the moisture has evaporated and the veggies are cooked.
While the veggies are cooking process the walnuts and sun-dried tomatoes in a food processor using an S blade until they are chopped finely. You want them to look like this as it gives the vegetable meatless crumbles the ‘meaty’ texture.
Add the walnut and tomato mixture into the skillet and mix with the veggies. Cook for about a minute then package then use them or package them up for later use(s). I put mine in mason jars in 2 cup portions and freeze for later use. In recipes I use 2 cups of homemade vegetable meatless crumbles for 1 pound of ground beef.
Boom! There you go. You now know how to make vegetable meatless crumbles. This meat substitute is easy to make and is a delicious meat substitute for so many recipes.
- Vegetarian
| serves: | 4 |
| Skill: | easy |
| Cost: | cheap |
| Prep: | 20 min |
| Cooking: | 1 hr 10 min |
Nutrition per portion
A savoury crumble takes a classic comforting winter pudding and transforms it into a tasty main course. The flavour packed squash and lentil stew is topped with a crunchy crumble topping, made even better by adding walnuts and blue cheese. This vegetarian main course is like a pie, but with a crumble topping instead of pastry. This savoury crumble is so easy to make, and the blue cheese and walnuts make it perfect for festive entertaining. The rich, cheesy topping is balanced by the spicy kick of harissa in the filling, resulting in a dish that is so tasty that even meat eaters will love it. Harissa is a North African chilli pepper paste that adds depth of flavour and a kick of spice to soups, stews and sauces. For more vegetarian main course ideas, have a look at our vegetarian recipe collection.
Ingredients
- 2 onions, chopped
- 1tbsp olive oil
- 2 garlic cloves
- 2tsp ground coriander
- 1tbsp harissa
- 400g butternut squash, cut into small chunks
- 150g red lentils
- 400g can tomatoes
- 600ml vegetable stock
- For the crumble topping:
- 150g plain flour
- 50g butter, cubed
- 150g blue cheese
- 100g walnuts, chopped
- 1tbsp fresh lemon thyme
Method
Heat oven to 200C. Fry the onions in oil for 5 minutes. Add the garlic, coriander and harissa, give the mixture a good stir, and cook for 1 minute. Add the squash, lentils, tomatoes and stock, and allow to simmer for 30 minutes more.
Meanwhile, make the topping. Rub together the flour, butter and half the cheese, then mix in the walnuts and thyme.
Divide the filling between 4 ovenproof dishes, top with the crumble, then scatter over the rest of the cheese. Bake for 30 minutes.
This easy blueberry crumble with perfectly cooked blueberries topped with a buttery oat crumble is high on our list of favorites. There’s no fancy equipment needed and you only need about 10 minutes of prep time! Jump to the Blueberry Crumble Recipe or watch our quick recipe video showing you how we make it.
Watch us make the recipe
Our secret for the best blueberry crumble
The real secret to our blueberry crumble is in the topping. We use melted butter (or melted coconut oil for a vegan crumble). Most often when looking at the method for making blueberry crumble, you are asked to process or smoosh cold butter into the other crumble ingredients.
In our recipe, we quicken the process and simply stirring in melted butter. Not only is this quicker and less messy, it makes for a much better crumble topping.
By using melted butter, all of the flour and oats are coated in buttery goodness, which helps them stay put on top of the blueberries. After baking, the topping is made up of golden brown crumbles with just enough crunch to stand up to the dreamy blueberry filling below.
We use this same method when making these easy baked apples and our favorite apple crisp recipe.
Note: Choosing whether to call this a blueberry crumble or blueberry crisp was tricky. Both desserts are similar and from what I found online, crumbles might not always include oats (although my Mom always called this type of dessert a crumble). This topping looks like crumbles on top of the berries and crumbles when you dig in after it has been baked, which is why we went with crumble 😊
Keep the filling simple
We keep the filling simple and only add a touch of flour to help thicken the blueberry juices, a little sugar, a pinch of salt, and when we have it on hand, a squeeze of fresh lemon juice. When I don’t have lemon in the kitchen, I simply add a tablespoon of water, which helps moisten the flour before baking in the oven.
Variations
As I mentioned above, I typically keep this dessert simple, but there are some really delicious variations you can make.
- Add a variety of berries to make a berry crumble.
- Substitute blueberries for other berry varieties. Since they may have a different sugar content, it’s a good idea to taste the berries you plan to use before adding sugar to the filling. Gooseberries, for example, are much more tart and might need a bit more sugar to balance things out.
- Add other fruits like sliced peaches, apples or pears.
- Make a spiced crumble topping with 1/2 teaspoon of cinnamon and a pinch of nutmeg.
- Add nuts to the crumble topping. I especially love almonds and blueberries together.
Make ahead tips
Blueberry crumble will last in the refrigerator 3 to 4 days and can be frozen up to a month. I prefer to freeze the crumble before baking and then cover very well so it is airtight. When I’m ready to bake, I simple bake from frozen until the filling is bubbling and the topping is golden brown (40 to 60 minutes). You can also freeze the crumble in small freezer/oven-safe ramekins and then bake those (these will take slightly less time to bake).
What is a crumble
A crumble is a baked dessert with a fruit base and an oat topping. The fruit can be any number of things from apples to pears, peaches to blueberries.
I love crumbles for three main reasons. They are easy to make. They’re versatile. And, they are delicious.
As I said, a crumble is made up a fruit base and a oat topping. That’s really it. So, let’s take a look at these two elements separately and then we can put them together.
The Oat Topping
The topping of a crumble is really what gives the dessert it’s name. It is a “crumble” topping. Which is essentially just a light granola.
The base of this topping is oats, brown sugar, flour, and butter. To this, seasonings like cinnamon and nutmeg are often added as well as a pinch of salt.
A quick Google search of apple crumble recipes will show you that there is no one way to make a crumble. Every site has different recipes and different ratios. My preference is three parts each of oats and flour (I always use gluten-free for both), four parts brown sugar and then two parts butter.
Ratios
If you don’t fully understand the ratio here is how it may look for a large pan of crumble:
- 3/4 cup oats
- 3/4 cup flour
- 1 cup brown sugar
- 1/2 softened butter
For smaller pans of crumble the ratios stay the same but the volumes change.
- 1/4 cup + 2 tbsp oats
- 1/4 cup + 2 tbsp flour
- 1/2 cup brown sugar
- 1/4 cup of softened butter
This second formula looks a bit odd. So what’s important to keep in mind is that this doesn’t have to be perfect. If you add a little less oats and flour or a little more it’s not going to make too much of a difference. With that in mind you could easily change the above recipe to:
- 1/3 cup oats
- 1/3 cup flour
- 1/2 cup brown sugar
- 1/4 cup softened butter
In this formula the ratio of oats and flour to sugar and butter is slightly off. However, it’s not going to have that much of an effect. That’s another reason why I love crumbles. Precision isn’t necessary.
Other Ingredients
To the basic crumble recipe spices like cinnamon and nutmeg can be added. So to can a bit of lemon or orange zest and of course, a pinch of salt. The amounts of these ingredients really comes down to personal preference. Generally, for a full batch of crumble I would say:
- 1/2 a tsp of cinnamon
- 1/8 tsp of nutmeg
- a pinch of salt.
If opting for citrus zest, use zest from half the fruit. For the smaller portion, half all the ingredients.
How to make the crumble topping
Making the topping is a fairly straight forward process.
- Put all the ingredients in a bowl and using your hands rub the mixture together, or use a pastry blender.
- Do this until all the butter has been incorporated.
- As the name suggests, the topping is going to be crumbly.
- Wrap the bowl and put the crumble topping in the fridge until you are ready to use it. It can sit in the fridge for a few days, and freezes well.
The base of the crumble is made of fruit that is usually tossed with a mixture of cornstarch, spices, and sugar. The fruit, as I said in the opening can be almost anything. And again, that’s what makes this dessert so great.
Cornstarch
The reason we put cornstarch in the fruit base is because it captures the juices that come out of the fruit and thickens it into a sauce. Flour can be used to do this but I find cornstarch much for effective.
The amount of cornstarch you use is determined by the size of the crumble you are making and the fruit you are using. Peaches and blueberries are going to require more cornstarch than an apple as they have a higher moisture content.
For a full sized apple crumble I would likely only use 2-3 tsp of cornstarch where I would use 1-2 tbsp for blueberries.
Keep in mind the more cornstarch you added the thicker the sauce for your fruit crumble will be and the more the fruit will stay together.
Sugar
Often a bit of sugar is added to the fruit. This has three purposes.
- It obviously adds sweetness.
- It will lightly caramelize while cooking which will add to the sauce.
- It will draw more moisture out of the fruit providing more sauce.
The amount of sugar you use is largely based on personal preference. However, I suggest going fairly light here. You don’t want the fruit to be too sweet. 2 tbsp for a large crisp and 1 tbsp for a small crisp should be plenty.
Seasonings
Just like with the topping, a bit of cinnamon and nutmeg can be added for flavour. However, it is important to remember that if you are adding spices to both the base and the topping of the crumble they can very quickly become overpowering.
I suggest either only using spices in the topping or the base but not both. Of course you can spice both just go light on it.
Citrus
For fruit like apples and pears a bit of lemon juice is often added to prevent the fruit from oxidizing while you are working with it. It also adds a bit of acid which will make the flavour “pop”. I always like to add a bit of citrus zest and juice to my fruit base for this purpose.
Basic Fruit Base Recipe for a large crumble
- 4 cups of fruit (blueberries, peeled and sliced apples or pears, peaches, or strawberry and rhubarb)
- 2 tbsp sugar
- 1-2 tbsp cornstarch (more for wetter fruits like blueberries and ripe peaches)
- zest and juice from 1/2 a lemon
- 1 pinch of cinnamon
- 1 pinch of nutmeg
All these ingredients get tossed together until the fruit is evenly coated.
Putting the crumble together
To put the crumble together you first want to butter a 9 x 13 inch casserole dish. Add the fruit mixture to the dish and spread evenly. Cover the fruit with an even layer of the crumble topping.
Baking the Crumble
The optimal cooking temperature for crumbles seems to be about 375°f. This temperature allows the fruit to cook without burning the topping. The crumble is going to need to bake for between 40 and 60 minutes.
Once the fruit is soft, the edges are bubbling, and the crumble is golden brown it can be taken out of the oven.
It’s best to place the crumble on a sheet pan in the oven. This will collect any overflows that may occur during cooking.
It is best to let the crumble cool for 15 – 45 minutes before serving it. This will give the sauce time to set a little bit.
Serve the crumble with vanilla ice cream or whipped cream.
Conclusion
I can’t emphasize enough how great this dessert is. It works all year round and will always please. It can be made in a big dish or even individual portions and frozen.
If you haven’t really played around with crumbles, you should. They will be your new go-to dessert.
It’s that time of year when we need to draw deeply upon our super powers. It’s the holidays, there’s no denying it… and all of us are supposed to know how to bake a turkey. I don’t. Also I don’t care to know. I have other super powers. They have to do with multi-tasking, pie baking, patience (usually), understanding (often), and crumble-making.
Let’s draw upon those holiday-necessary super powers and leave the turkey roasting to someone else. Preferably someone we trust. Preferably someone who values a moist turkey.
This savory, comforting, vegetable crumble would be a lovely addition to a Thanksgiving table. Or, you can be like me and eat most of if while watching Season 5 of Grey’s Anatomy in your bed at 10pm on a Tuesday. I mean… equally festive.
This Winter Crumble is from this book: Dinner Pies. Full of satisfying and savory treats that feel extra cozy in these chilly months. My great hope is that the sequel to Dinner Pies is After-Dinner Pies… because that seems only natural.
No need for oats, brown sugar, and toasted pecans.
We’re sticking to savory, which means panko bread crumbs, crushed butter crackers, black pepper and thyme. Butter of course. We can’t be without.
Earthy cremini mushrooms, robust (is that a good adjective…? maybe not) Brussels sprouts, and sweet carrots. I like this blend in our Winter Crumble because they all cook down to soft in a skillet.
The mushrooms will soften, release a lot of their moisture, and then cook down to caramelized brown. The Brussels sprouts and carrots will mellow to a soft bite. It’s a very good situation.
The sautéed vegetables are coated in a bit of flour then chicken stock and heavy cream are added. We’re making a gravy to keep our crumble juicy.
I pressed some of the cracker crumble into the pan and baked it to golden brown. A little savory support for our vegetable filling.
Also gruyere cheese. Because we’re homo sapiens.
The vegetables are cooked through to soft. They just need a little extra loving’ in the oven.
Topped with the last of the cracker crumble, of course.
Warm, crisp, buttery, is this healthy(?), and supremely satisfying. It’s dinner. It’s a side. It’s good news from the oven.
This recipe can be modified to meet you needs.
• Use gluten free crackers, breadcrumbs, and flour if your diet requires. I think Glutino brand has good versions of all of those things.
• Use vegetable stock to keep things more vegetarian.
• Vegan butter can be used if you’re opposed to dairy. Omit the cream and add additional vegetable broth.
Crumble is a wildly simple fruit recipe topped with a crisp, buttery crumb topping that turns any fruit into a stunning dessert. It’s perfectly suited for summer brunches and backyard BBQs alike. Making crumble is so easy that you barely need a recipe. Once you know the basics of making a crumble topping and how to prepare the fruit filling, you can choose any fruit or combination of fruit from any season. Here are the three essential steps you need to know for making a classic fruit crumble.
What Is a Crumble?
Crumbles are part of a family of fruit desserts that include crisps and crumbles. Crumble has a streusel-meets-pastry topping that is both crisp and craggle-filled, while the underside is softened by the fruit juices. Crumbles are more fruit-forward than their more elegant pie and tart cousins. I typically add a minimal amount of sugar or spices and let the fruit speak for itself.
Here are the three steps you need to know for any kind of fruit crumble.
- Selecting and preparing the fruit
- Making the crumble topping
- Baking and serving the crumble
Selecting and Preparing Fruit for Crumble
I also don’t usually bother measuring or weighing the fruit I buy for a crumble. When shopping, I imagine my baking dish and then grab as much fruit as I think I’ll need to fill it. As a general rule, 1 1/2 pounds of fruit will fill most baking dishes. Back in my kitchen, I slice the fruit directly into the pan and keep going until it’s filled. If I don’t have enough fruit, I either settle for a fruit-to-crumble ratio that’s closer to 50/50 (not a bad thing) or add a handful of blueberries or another fruit in my bag to round it out.
Making Crumble Topping
Crumb topping can be as simple as flour and sugar thickened with butter, but two small upgrades make for a tastier crumble topping. First, adding a teaspoon of baking powder to the flour mixture makes the crumble topping more tender. Second, using cold butter and working it into the flour mixture makes for a pastry-like topping reminiscent of pie crust.
Pro tip: Crumble topping freezes incredibly well and can be kept on hand for crumble anytime.
Baking Fruit Crumble
Fruit crumble’s baking success depends on two things: a hot oven and a bubbling filling. Crumble requires more baking time than you think; the top should be brown and the filling should be bubbling. In order to thicken properly, the cornstarch in the filling must boil, which is why bubbling is a key indicator for doneness. If you’re concerned about bubbling over in the oven, you can lay a piece of foil or a baking sheet on the rack under the baking dish.
Serving Fruit Crumble
And don’t worry if you see juices puddling at the bottom of the dish after you start to serve — this is normal, especially if you couldn’t help diving into the crumble while it was still warm and not quite fully set. A spoonful of these syrupy juices is perfect drizzled over the scoop of ice cream you will inevitably want with your crumble.
How To Make a Fruit Crumble
- shellfish-free
- fish-free
- alcohol-free
- vegetarian
- peanut-free
- pork-free
- pescatarian
- tree-nut-free
- soy-free
- egg-free
- red-meat-free
- Calories 349
- Fat 15.8 g (24.3%)
- Saturated 9.8 g (48.9%)
- Carbs 51.8 g (17.3%)
- Fiber 3.6 g (14.3%)
- Sugars 11.8 g
- Protein 3.4 g (6.8%)
- Sodium 172.3 mg (7.2%)
Ingredients
For the filling:
- 6 to 7 cups
fruit, enough to almost fill pan
granulated sugar, depending on the sweetness of the fruit
1 to 3 teaspoons
freshly squeezed lemon juice
1 to 3 tablespoons
cornstarch, depending on juiciness of fruit
ground spice, such as cinnamon, ginger, or nutmeg (optional)
For the crumble topping:
packed light or dark brown sugar
ground cinnamon (optional)
(1 stick) unsalted butter, at room temperature
Equipment
9×9-inch or 11×7-inch baking dish
Gallon-size zip-top freezer bag (optional)
Instructions
Heat oven to 375°F and prepare the baking dish. Arrange a rack in the middle of the the oven and heat to 375°F. Coat a 9×9-inch or 11×7-inch baking dish with butter; set aside.
Prepare the fruit filling. If necessary, dice the fruit into bite-sized pieces, removing any stems, seeds, or inedible parts. Toss the fruit with sugar, lemon juice, cornstarch, and any spices in a large bowl. Use more sugar and less lemon juice when cooking with tart fruits, like rhubarb and blackberries, and less sugar but more lemon juice for sweet fruits, like peaches and plums. Best is to taste a piece of fruit and adjust to taste. Use more cornstarch with very juicy fruits like plums and less with firm fruits like apples. But don’t worry — no matter your ratio of these ingredients, your crumble will be delicious.
Pour the fruit filling into the baking dish. Transfer the fruit filling into the baking dish.
Prepare the crumble topping. Whisk the flour, sugar, cinnamon, baking powder, and salt together in a large bowl. Cut the butter into a few large pieces and toss these in the dry ingredients. Using your fingers, a fork, or a pastry cutter, work the butter into the dry ingredients until large, heavy crumbs are formed.
Scatter the crumble over the fruit. Pour the crumble topping evenly over the fruit.
Bake the crumble. Bake until the fruit juices are bubbling around the edges of the pan and the topping is firm to the touch, 30 to 35 minutes.
Cool the crumble. Let the crumble cool for at least 15 minutes before serving. If transporting to a picnic or party, let the crumble cool completely to give the fruit filling time to set.
Recipe Notes
Storage: Crumbles will keep, covered and refrigerated, for up to 1 week. Serve cold, room temperature, or re-warmed in a low oven for 20 minutes.
Using a 9×13-inch pan: Increase the fruit to 10 to 11 cups, adjusting the other filling ingredients to match. Increase all the crumble topping ingredients by half (1 1/2 cups flour, etc.), except for the baking powder.
To make a crisp: Add 1/2 cup of old-fashioned rolled oats or 1/2 cup chopped nuts (or both) to the topping.
To make a cobbler: Press the crumbs into biscuit-sized patties and arrange them in a single layer over the fruit.
Flour substitutions: Try subbing another flour for all or some of the all-purpose flour in this recipe. Almond flour, spelt flour, and barley flour would all make delicious crumbles and cobblers.
Sugar substitutions: Swap the brown sugar for white sugar for a lighter flavor, especially for cobblers. Feel free to experiment with other sugars in your cupboard as well.
Food Editor, Skills
Meghan is the Food Editor for Kitchn’s Skills content. She’s a master of everyday baking, family cooking, and harnessing good light. Meghan approaches food with an eye towards budgeting — both time and money — and having fun. Meghan has a baking and pastry degree, and spent the first 10 years of her career as part of Alton Brown’s culinary team. She co-hosts a weekly podcast about food and family called Didn’t I Just Feed You.
Served with vanilla ice cream, this strawberry rhubarb crumble is the perfect summer dessert. This recipe has less added sugar.
Pair rhubarb with strawberries to sweeten it naturally
Rhubarb, which is actually a vegetable rather than a fruit, can be a little on the tart side, and this puts off many people – especially small children.
Strawberries are the perfect fruit to serve with rhubarb as their natural sweetness helps the rhubarb to taste less tart without the need to add tons of sugar.
Do you need sugar in your crumble topping?
Crumble toppings usually include a lot of sugar. I played around for ages trying to perfect a sugar free crumble topping but I’ve come to the conclusion that it does need a little sugar.
You can add a little maple syrup or honey if you want to use unrefined sugar, but my preference is to add 2 tbsp caster sugar, which is still considerably less than is usually added.
The sweetness of the strawberries more than makes up for it.
Crumbles are a delicious dessert – all year round
We tend to eat crumbles quite a bit. They’ve always been one of my favourite desserts – or puddings as my mum would say – and we often had them while I was growing up. My dad grew a lot of fruit and veg at home and we had rhubarb, gooseberry and berry crumbles a lot. Dad often used to eat these with custard AND ice cream!
I also remember apple crumble featuring all through the year, but as we didn’t have an apple tree I think the apples probably came from my Grandad, who was a greengrocer.
When my son stopped eating any fruit at the age of 18 months I found that a crumble was one of the ways that I could get him to eat fruit.
We had a blackberry and apple crumble the other day and I watched him pick up a whole blackberry on his spoon, consider it thoughtfully and then eat it.
He’s now seven and hasn’t eaten any raw fruit for years. I don’t see this changing – until he decides to change it. So to see him enjoying a crumble in the full knowledge of what he is eating makes me very glad! Especially if it doesn’t contain too much added sugar.
What ingredients do you need to make strawberry and rhubarb crumble?
To make a strawberry and rhubarb crumble you’ll need the following ingredients:
- 400g rhubarb
- 400g strawberries
- 75g plain flour
- 75g butter or dairy free spread
- 75g oats
- 75g chopped nuts eg almonds
- 2 tbsp maple syrup or caster sugar
How to make the crumble topping
You can either make your crumble topping by hand or in a food processor.
The first step is to rub the butter, or vegan equivalent, together with the flour until you have the consistency of breadcrumbs.
Next you stir through the oats, nuts and sugar.
When I asked E what he wanted for dinner tonight he asked for something with rice. So I decided to find an old favourite recipe from one of my first vegetarian cookbooks which of course was produced by the Australian Women’s Weekly.
I had been thinking of cooking something for Meeta’s Monthly Mingle. This month the theme is one dish dinners. It made me reflect on how my cooking style has changed. I used to be a one pot cook. If I couldn’t throw it all in one pot then it was too complicated. These days I struggle at the idea of having dinner in one pot because I want more vegetables. Often I made a salad or steam some vegetables so their taste is fresher and not hidden under a heavy sauce or swamped by carbs.
But Meeta has made me think I should resurrect some of the good one pot meals I used to make which have fallen by the wayside. (After all I don’t want to throw out the baby with the bathwater!)
This dish is great because it is so satisfying. It has all the elements of a meal in a casserole dish. Rice on the bottom, vegies in the middle and lots of proteins on top. The flavours are quite simple but it works. I was a bit unsure if by one dish dinners, Meeta meant that only one dish was to be used in preparation or one dish was to be served out of. This dish doesn’t fit the former but it fits the latter. What I love about dinner being served from one dish is that it can be prepared ahead or served up as leftovers without any extra effort.
Oh and not only am I not sure it fits the theme, but it is a day late – hope Meeta will still accept it! But I hope she might include it as it is a great recipe that I would recommend – I even got to make dessert while the crumble was cooking. Stay tuned for that one!
Vegetable Nut Crumble
(from AWW Vegetarian Cooking)
Serves 4
Rice layer:
1 cup brown rice
1 tsp vegetable stock powder
1 egg
Vegetable layer:
1 tbsp olive oil
1 small onion, chopped
1 small red pepper, chopped
125g broccoli, chopped
125g cauliflower, chopped
425g tin of chopped tomatoes
1 tbsp fresh parsley, chopped
1/2 tsp dried mixed herbs
1 cup tasty cheese, grated
Crumble topping:
1 tbsp olive oil
3/4 cup breadcrumbs made of stale wholmeal bread
1 cup unsalted mixed nuts, chopped
2 tbsp fresh parsley, chopped
Place brown rice and stock cube in large saucepan of boiling water. Simmer for approximately 30 minutes or until rice is cooked. Drain. Mix rice and egg. Spread in the bottom of a 2 litre dish (mine is about 22 x 22 cm square – update June 2014 – made this again and found a larger rectangular lasagne dish worked better).
While rice is cooking, fry onions in oil for 2-5 minutes over medium heat. Add chopped vegetables, tin of tomatoes, parsley and herbs. Bring to boil and simmer for 7 minutes or until vegetables are just tender. Spoon vegetable mixture over rice.
To make crumble, mix all ingredients together in a small bowl. (Note: I found that I had a lot of crumble mixture and felt I could have used less but it did taste good.) Sprinkle vegetable mixture with cheese and then spread crumble over vegetables and bake in moderate oven for 20 minutes or til crumble is golden brown.
NOTES: Update April 2014 – made this tonight with carrot instead of cauliflower and kale pesto instead of parsley and herbs in tomato mixture (and no parsley in crumble topping – also sprayed with oil spray as well as mixing olive oil through). Made it vegan by replacing egg in rice with 1 tbsp chia seeds and 3 tbsp water, and using Daiya vegan cheese.) Also used 3 cups cooked brown rice mixed with 1 tsp stock powder rather than cooking rice in stock.)
On the stereo:
She will have her way – the songs of neil and tim finn: various artists
Asparagus served in the classic way is delicious, but I wanted to mix the flavours of the spring with the warmer flavours and textures of the summer. I’ve spiced things up a little with the slight smokiness that comes from griddling or barbecuing asparagus, a large sprinkling of smoked paprika and a hint of chilli.
Preparation
Cooking
Skill level
Ingredients
For the paprika dressing
- 3 tbsp extra virgin olive oil
- ½ tsp smoked paprika
- 2 tsp lemon juice
For the hard-boiled eggs and grilled asparagus
- 2 free-range eggs
- 20 green asparagus spears, woody ends removed
- 90–120 ml (3–4 fl oz) refined olive oil
For the vegetable crumble
- 3 tbsp olive oil
- 80 g (3 oz) (about 2½) baby zucchini (courgettes), pulsed in a food processor for 30 seconds
- 80 g (3 oz) cauliflower, pulsed in a food processor for 30 seconds
- 30 g (1 oz) banana shallot, finely chopped
- ½ red chilli, finely chopped
- 3 large pinches of smoked paprika
- pinch of salt
- 2 tbsp lemon juice
- 10 g flat-leaf parsley, chopped
- 5 g chives, chopped
Cook’s notes
Oven temperatures are for conventional; if using fan-forced (convection), reduce the temperature by 20˚C. | We use Australian tablespoons and cups: 1 teaspoon equals 5 ml; 1 tablespoon equals 20 ml; 1 cup equals 250 ml. | All herbs are fresh (unless specified) and cups are lightly packed. | All vegetables are medium size and peeled, unless specified. | All eggs are 55-60 g, unless specified.
Instructions
For the paprika dressing, mix all the ingredients together in a small bowl and set aside.
For the hard-boiled eggs and grilled asparagus, using a spoon, slide the eggs gently into a small pan of water. Bring to a simmer for 13 minutes, then remove the eggs and immediately run them under cold water. While still warm, peel the eggs then transfer to the fridge. Once cold, separate the whites from the yolks and coarsely grate each part (keep them separated), then set aside.
Lay 5 asparagus spears side by side and secure them together using two metal skewers (thread a skewer through each end of the asparagus, avoiding the tips, so that the spears are kept straight). Repeat with the remaining asparagus. Blanch in a large saucepan of boiling water for 3 minutes, then immediately plunge them into cold water to stop the cooking. Dry well (leave them on the skewers).
To cook the asparagus, heat a griddle pan over a high heat. Brush the skewered spears lightly with olive oil. When the pan is hot, lay the asparagus in it, flat, and leave for 3 minutes to gain deep griddle marks. Turn over using tongs and griddle for another 3 minutes. (If necessary do the griddling in batches; simply keep the asparagus warm in an oven preheated to 80°C (60°C fan-forced/gas ¼) while you grill the remaining asparagus.)
For the vegetable crumble, in a large frying pan or sauté pan over high heat, add the olive oil and fry the zucchini, cauliflower, shallot, chilli, paprika and a pinch of salt for 30 seconds. Add 80 ml (3 fl oz) water, the lemon juice, parsley, chives and grated egg white. Boil for 5 seconds then remove from the heat. Stir in the egg yolk and check the seasoning.
To serve, put a spoonful of the vegetable crumble in the centre of each plate and arrange a stack of the grilled asparagus on top. Finish with a drizzle of the paprika dressing.
See more from Raymond Blanc in Royal Gardens On A Plate , on SBS and SBS On Demand.
This post is in collaboration and sponsored by Countdown NZ. They stock an extensive range of fresh, accessible and affordable seasonal produce, which can be whipped up into easy and tasty summer meals this time of year! All words and
opinions are, as always, my own.
We’re at the peak of New Zealand summer, with supermarket shelves overflowing with summer fruit – lots of fuzzy peaches, juicy nectarines and sweet berries.
When in seasonal surplus, these fruit deserve to be celebrated in all their glory – so today here’s a recipe for a tasty, easy-to-prep and nutritious crumble that does just that! This would be dreamy served up as dessert on a summer eve, alongside a scoop or two of your favourite ice cream or yoghurt.
Why buy seasonal goods?
Seasonal produce refers to the time in year when the harvest and flavour of locally grown fruit and vegetables are at their peak.
There are many perks to shopping seasonal. When ample produce is in surplus; being harvested locally and available to purchase, prices naturally drop. This makes shopping seasonal at your local supermarket a great way to keep the food bill down!
Eating seasonal is also better for the environment. When buying local in-season goods we’re not only supporting local Kiwi growers, but also cutting down food mileage (the time it takes for produce to get from grower to consumer), helping reduce our carbon footprint. A win-win.
What’s on our supermarket shelves at the mo’?
Over the summer months keep an eye out for these tasty items that’ll be sitting pretty:
Peaches: a stone fruit jam-packed with antioxidants, which are beneficial plant compounds that help combat oxidative damage. Peaches are also a source of dietary fibre, particularly the skin, which helps promote gut health.
Nectarines: a smooth and fuzz-less variety of peach (who knew?!), offering all-important vitamin C, A and dietary fibre. They’re delicious to munch on whole, or chopped and tossed with yoghurt as a snack – similar to how you’d enjoy peaches!
Berries: a potent source of antioxidants (like any fruit and veg that stains the palm of your hand). They’re versatile on top of porridge or muesli for breakfast, a handful enjoyed on as a snack, or folded into batter pre-baking. Purchase in bulk when cheap and in season, and then freeze for fruity berry smoothies!
Crumble lowdown – not your standard apple
For this dessert I’ve used a trio of nectarines, peaches and berries, which together make the most delicious fruity base for a crumble.
I’ve also blitzed a mix of nuts and seeds into the oat topping. This bumps up the protein and fat content, diversifies the nutrients, and adds a bit more texture and flavour. Use a combination of your favourite nuts or whatever’s in the pantry.
All-in-all, a nice switch from the humble apple version! Maybe just don’t tell grandma.
Summer Fruit Crumble
Ingredients
Filling
800g mixed peaches and nectarines
1 cup berries (e.g. blueberries, strawberries, raspberries)
1 Tbsp of pure maple syrup
1 tsp vanilla extract
¼ tsp cinnamon
Zest and juice of a small orange
Crumble topping
1 cup rolled oats
½ cup shredded coconut
½ cup nuts of choice (e.g. almonds, walnuts, pecans and hazelnuts)
¼ cup seeds (e.g. sunflower or pumpkin seeds)
¼ cup butter or coconut oil
¼ cup pure maple syrup
1 tsp vanilla essence
½ tsp cinnamon
Method
Preheat oven to 170 degrees celcius.
Wash nectarines and peaches. Slice into wedges/chunks, discarding pip. Add to a large mixing bowl with all other filling ingredients and toss to coat evenly. Spread the fruit evenly into a baking dish.
Add all of the crumble ingredients into a food processor and process for a few seconds until the mixture is crumbly and well combined.
Sprinkle crumble topping evenly over top of the fruit mixture.
Bake for 30 minutes.
Notes
Serving suggestion: dollop over plain yoghurt, coconut yoghurt or fresh cream
To make vegan or dairy-free: use coconut oil instead of butter, and serve with coconut yoghurt
30 mins to 1 hour
A colourful veggie quiche that’s best served warm. Try it with a side of green beans or a tomato salad and keep any leftovers for packed lunches.
30 mins to 1 hour
Ingredients
For the pastry
- 225g/8oz plain flour, plus extra for dusting
- pinch salt
- 85g/3oz cold unsalted butter, cubed, plus extra for greasing
- 40g/1½oz cold vegetable shortening, cubed
For the filling
- 1 large red pepper, deseeded and cut into bite-sized pieces
- 1 large orange pepper, deseeded and cut into bite-sized pieces
- 1 courgette, cut into bite-sized pieces
- ½ tbsp extra virgin olive oil
- 2 large free-range eggs
- 2 large free-range egg yolks
- 50ml/2fl oz full-fat milk
- 150ml/¼ pint single cream
- 120g/4⅓oz feta
- salt and freshly ground black pepper
Method
Preheat the oven to 220C/200C Fan/Gas 7. To make the pastry, mix the flour and salt in a large bowl. Rub in the butter and the vegetable shortening until the mixture resembles breadcrumbs. Bring the pastry together using a palette knife, adding cold water a tablespoon at a time – you might need up to 6 tablespoons – until it forms a dough. Shape the dough into a flat disc, wrap in cling film and place in the fridge for 20–30 minutes.
Meanwhile, to make the filling, spread the peppers and courgette over a large baking tray. Add the oil and a generous amount of seasoning and stir well. Roast for about 30 minutes, or until tender and just starting to char. Remove from the oven, leaving the vegetables on the baking tray to cool. Leave the oven on.
Grease a 24cm/9½in diameter quiche tin. Roll out the pastry on a well-floured surface until you have a disc large enough to line the dish. Use the pastry to line the tin, pushing it gently into the corners. Trim excess pastry from around the rim and use it to patch up any cracks if necessary. Return the pastry case to the fridge for 20 minutes.
Whisk together the eggs, egg yolks, milk, cream and a generous amount of seasoning in a large bowl and set aside. Place a heavy baking sheet in the oven to heat up.
Remove the pastry case from the fridge and scatter the cooked vegetables over the base. Crumble over the feta, then pour over the egg mixture. Put the quiche tin on the hot baking sheet and bake for 40–45 minutes, or until the filling is golden, just set and slightly puffy. (If you do not preheat the baking sheet you will need to blind bake the pastry case before filling it – see the tip for information on how to do this.)
Leave the quiche to rest for at least 10 minutes before slicing.
Recipe Tips
If you use all butter rather than a mixture of butter and vegetable shortening in your pastry base, blind bake it (lined with baking paper and baking beans) at 200C/180C Fan/Gas 5 for 15 minutes, then remove the paper and beans and bake for a further 10 minutes.
Feel free to try different roasted veg in this recipe. You could try roasted squash, sweet potato or even cauliflower.
Quiches can be frozen in portions if you have leftovers.
This vegan blueberry crumble is like a huge scoop of summer on a plate! Takes less than 10 minutes to prepare, then the oven does the rest of the work! The perfect treat for blueberry lovers.
How to make the best blueberry crumble
The real name of this recipe should have been ” Third time’s a charm Vegan Blueberry Crumble “. Because that’s exactly how many times it took us to get the recipe the way we wanted it! Crazy, right? Because if you look at it, you’ll notice it’s like, the easiest recipe ever!
So here’s what happened:
First try: we combined fresh cherries and blueberries and came out incredibly DRY. Which is really odd, because how can something that has 4 CUPS OF JUICY FRESH FRUIT in it be dry?? Was it the corn starch? Was it the oats?
Second try: we skipped the cherries (jut because we didn’t love the taste on try number one), reduced the amount of corn starch slight and got rid of the oats altogether. The result: juice, yes. But the topping was mealy and soggy. Flavor-wise, it was yummy!
Third try: kept the cornstarch at 2 tablespoons, but put the oats back into the topping. On point!! The result was a blueberry crumble that is juicy, slightly crisp, with an amazing buttery topping… just delicious.
So, this is why we do recipe testing. So you don’t have to 😉 (and thank goodness it’s blueberry season…)
Published Aug 12 by Cerys Parker .
There is nothing better than on a Sunday evening sitting down to a roast dinner with a crumble served up for dessert. Throughout the year we alternate what we put into our crumble from Rhubarb in Spring to Apple crumble as the temperatures drop and Banana and Rum in the summer months. It’s a favourite and although I have special crumble mixes mostly I use my grandmothers basic crumble topping recipe. It’s really easy to make and only has 3 store cupboard ingredients but throw whatever fruit that you have around and make this family-friendly dessert for others.
What You’ll Find on This Page
Ingredients for your Basic Crumble Topping Recipe
We have included affiliate links to ingredients and products that we recommend
Plain Flour (all purpose) it is really important that you only use plain or all purpose flour we’ve tried with self raising but it really doesn’t work very well.
Unsalted Butter Cubed – don’t get it to room temperature for this recipe it really does work best if you have the butter cold.
Caster Sugar or granulated sugar works. You can switch out half the white sugar for a brown sugar as well.
Top Tip for Making the Crumble Mix
Read our top tips and then scroll down to get a printable recipe card to make it easier to make this next weekend too! Watch the video below to see how we used this delicious crumble mix with our very own cooking apples to create an amazing rainy day dessert.
The most important thing when making crumble like when you make pastry is to have cold hands this will stop the butter from softening and you can then rub it into the crumb consistency needed.
Run your hands under a cold tap before you start rubbing the butter into the flour.
How to Make the Crumble in the Food Processor
I’ve just got my first ever food processor and this has cut the time making the crumble mixture down to a matter of seconds. Same ingredients as before.
- Cube the cold butter.
- Pour the flour and butter into the food processor.
- Pulse it to mix to a breadcrumb consistency.
- Pour into a bowl.
- Add the Sugar.
Then use as you would normally use.
Eat the crumble hot or cold with custard, ice-cream or my personal favourite natural yoghurt.
Use this crumble topping to make this delicious Apple Crumble perfect for a Rainy Day Dessert and ideal comfort food.
How to FreezE your Crumble Topping Mix to Use Another Day
One of the reasons I love this basic crumble recipe so much is how easy it is to make. You can make a bulk of it (2:1 ratio with the flour and butter and then add in sugar 3 tablespoons per 100g of flour) and then freeze.
I use our freezer storage boxes and divide up into family portions and then can take them out on a weekday and use them for a quick and easy delicious crumble in the evening.
Defrost through the day and just pour over the chopped fruit before cooking.
This summer vegetable curry is loaded with seasonal veggies and super easy to whip up for a vegetarian weeknight meal. Perfect for Meatless Monday!
I made this simple summer vegetable curry recipe the night we got back from our Grand Cayman babymoon trip. I shared a sneak peek on Instagram and so many of you were asking for the recipe! Ask and you shall receive.
Vegetable Curry with Curry Powder
I’m not sure if you’ve noticed, but I am a huge curry fan. I’m always making different curry variations and customizing the ingredients depending on what is in season.
Since I already have a shrimp curry recipe that uses red curry paste, I thought I would switch things up for this recipe. We’re using traditional yellow curry powder and keeping the recipe vegetarian/vegan.
Of course, you can absolutely add in a protein of your choice if you want to add more protein to this curry. It would be delicious with chickpeas or even chicken or shrimp. Feel free to swap out veggies for what you have on hand or what is in season as well – curries are the perfect meal for cleaning out your fridge because you can pretty much add any veggies into the pan.
Curry in a Hurry
Curries are awesome for weeknight meals because they cook up quickly, but still have a ton of flavor, almost like they’ve been simmering all day. This particular curry only takes about 10 minutes of prep and about 15 minutes of cooking time so you can easily have a healthy dinner on the table in less than 30 minutes. Woo-hoo!
What is the Difference in Curry Colors?
If you’ve been shopping for curry recently, you know there are a variety of color options! Green, red and yellow curries are all available. So what’s the difference? I’m certainly not a curry guru, but here’s what I do know:
- Yellow Curry – The main spice in yellow curry is turmeric! It is the mildest of the curries because there is less chili and more turmeric. Yellow curry is usually found on the spice aisle at the grocery store and often just called curry powder. You can certainly find yellow curry paste or make your own, but I tend to think of ground curry powder when I think of yellow curry.
- Red Curry – Although you might have expected red curry to be the spiciest, it usually sits right between yellow and green when it comes to heat! Red chilis give this curry its color but the heat is toned down thanks to the coconut milk. Red curry is usually found in paste form with other Thai items in the grocery store.
- Green Curry – Green chilis pack the heat in this dish! Green curry is typically the spiciest curry but don’t let that scare you if you can handle heat because, in my opinion, it’s not that spicy unless you’re also adding fresh chilis. Green curry can be found in paste form with other Thai items, similar to red curry.
Want to learn more about all the different curries and where they originated? Check out this article.
Ingredients in Summer Vegetable Curry
- flavor boosters: ginger,garlic,curry powder
- coconut milk andvegetable broth
- summer veggies: onion, bell pepper, eggplant,mushrooms, andzucchini
- additional flavors: lime andfresh cilantro
- rice (white jasmine rice, brown rice or cauliflower rice)
How to Make Summer Vegetable Curry
To start, you’ll cook up the powerhouse veggies and spices of the dish. Just add your onion, ginger, and garlic in a large skillet over medium-high heat. You’ll cook these up, stirring occasionally for 4-5 minutes, and then add in the curry powder and cook for another minute.
At this point, add in the broth, coconut milk, and veggies. Bring to a simmer, cover and cook for 5 minutes. You’ll continue cooking this mixture until the vegetables are tender. Season with salt and pepper to taste and stir in lime zest and lime juice just before serving.
To serve, add rice to your serving plate and top with the curried vegetable mixture. You can use jasmine rice, brown rice or cauliflower rice – all are delicious in their own way! Top with fresh basil or cilantro – and enjoy!
More Vegetarian Curry Recipes to Try:
If you make this summer vegetable curry, please be sure to leave a comment and star rating below letting me know how it turns out. Your feedback is so helpful for the EBF team and other EBF readers.
By: Annita Lawson
21 September, 2017
Sacramento has a growing season of more than 240 days a year, making it a vegetable gardener’s dream come true. The sunny, warm days make it possible to grow an abundance of vegetables, but the trick is determining when they should be planted. Cool weather lovers, such as lettuce and spinach, must be planted in early spring or fall because they will not tolerate the high temperatures of summer. Other vegetables, like tomatoes and peppers, can be planted in late spring and harvested during the summer and early fall. The garden spot should have well-drained soil and receive full sun.
Take a sample of garden soil to your local extension office for testing to determine what type of soil amendments should be added.
Use a garden tiller to loosen the soil in the chosen planting location. Remove any large rocks or clumps of grass that remain after tilling.
- Sacramento has a growing season of more than 240 days a year, making it a vegetable gardener’s dream come true.
- Cool weather lovers, such as lettuce and spinach, must be planted in early spring or fall because they will not tolerate the high temperatures of summer.
Add any necessary amendments when the soil is dry enough to crumble when squeezed in your hand. Work them in well using a garden hoe.
Create rows for corn and vegetables that climb. For all other varieties, use a hoe to form beds that are 1 to 3 feet in diameter. Leave 2 to 3 feet of space between each row and bed.
Plant the seeds according to the labels on the seed packets. Keep in mind that planting depth is very important, as some vegetable seeds will not sprout without adequate sunlight. Use a watering can to add moisture until the soil feels very moist.
- Add any necessary amendments when the soil is dry enough to crumble when squeezed in your hand.
- Use a watering can to add moisture until the soil feels very moist.
Label each row with a wooden craft stick to avoid confusion when the seedlings begin to sprout.
Continue to water anytime the top of the soil feels dry. Fertilize with a general purpose fertilizer, as directed on the package.
Hoe between the rows regularly to eliminate weeds. Certain vegetables, such a corn, also benefit from having soil heaped around their base to prevent them from falling over during windstorms. Pull weeds from around the other plants by hand.
Some vegetables, such as tomatoes, may need staking when the heavy fruits begin to develop. Provide a climbing structure for vining vegetables, such as beans and cucumbers, to make them easier to harvest.
An Easy Cherry Crumble Recipe for a healthier dessert that’s bursting with fresh summer fruit! With a whole grain oat crust and crisp topping that’s so good you won’t believe it’s refined sugar free!
If you find yourself with an overabundance of cherries (or any summer fruit, for that matter), this healthier crumble recipe is here to save the day! One bite and you’ll be hooked – you won’t want to make your summer fruit crisps any other way!
Last weekend the kids and I went to the farmer’s market and bought a huge bag of cherries. The kids helped me pick out the cherries and put them into the bag, which led to… lots of cherries!
I asked in our Facebook group (join here!) for suggestions of what to do with those cherries, and a few of you left some really good ideas. I decided to make this Easy Cherry Crumble Recipe because a good fruit crumble recipe is a necessity in the summer months. Especially if it’s loaded with maple oat crisp topping!
When I took my first bite of this cherry crumble, I couldn’t believe how good it was. When healthier desserts taste this good, you won’t miss the extra sugar one bit!
I didn’t add any sweetener to my cherry filling, because the cherries were plenty sweet on their own. If you want a sweeter filling you can mix some sugar in with the cherries.
The oat crumbles double as both a bottom crust and a crisp topping. It’s made with just 5 ingredients: oats, whole wheat flour, salt, butter, and pure maple syrup. Combine that with the cherry filling and you’ll need only 7 ingredients in total to make this easy recipe.
If you’re as crazy about crumble topping as I am, you’ll also love my Cherry Crumble Pie.
I use my cherry pitter to make the process of pitting the cherries really fast and easy. If you don’t have one, it’s definitely worth the small price tag. We use ours constantly in the summer! You can watch the recipe video below to see how easy it is to use.
This crumble recipe is going to come in handy for summer potlucks and BBQs in the coming months. Since it’s so easy to make (see the video below), you can prep it in no time. Everyone will love this fresh fruit dessert!
This recipe would work well with many summer fruits. I want to try making it with strawberries and peaches next. If you love summer fruit desserts be sure to also try my Strawberry Oatmeal Bars and Apricot Crisp.
My favourite crumble when the trees are laden with fruits. To make an apple version, use the same quantity of peeled, chopped and cored Bramley apples.
Georgina Glynn Smith
SERVES 6
COOK TIME 30-40 minutes
FOR THE FILLING
900g (2lb) plums, cut in half and stones removed
225g (8oz) granulated sugar
FOR THE CRUMBLE TOPPING
175g (6oz) plain flour
75g (3oz) cold butter, cubed
50g (2oz) demerara sugar
- You will need a 2 litre (31⁄2 pint) wide-based, shallow ovenproof dish. Preheat the oven to 200C/180C fan/gas 6.
- Put the plum halves and granulated sugar into the dish and toss together.
- Measure the flour and butter into a food processor and whiz until the mixture resembles breadcrumbs. Alternatively, rub the flour and butter together in a mixing bowl with your fingertips. Stir in the demerara sugar and sprinkle the mixture evenly over the plums, levelling the top.
- Place on a baking sheet and bake in the oven for about 30-40 minutes or until pale golden brown on top and bubbling around the edges. Serve with custard, cream or crème fraîche.
PREPARE AHEAD
Mary Berry’s plum crumble can be assembled up to a day ahead and kept in the fridge.
FREEZE
Freezes well assembled but uncooked.
MARY’S CLASSIC TIP
To ring the changes, you could add a teaspoon of ground ginger to the crumble topping.
SAVE 20 PER CENT ON MARY’S NEW BOOK
Classic, published by BBC Books on 25th January, price £26. As well as Mary’s introduction the book contains more than 100 all-new recipes, with Mary’s crucial tips for each one. Chapters include canapés and first courses, fish, poultry and game, pork, lamb and beef, vegetarian, puddings and desserts, and teatime. To order a copy for £20.80 until 4th February, visit you-bookshop.co.uk or call 0844 571 0640; p&p is free on orders over £15.
Parenting and Lifestyle Blog
Pages
Tuesday, 23 February 2016
WEANING: Winter vegetable and thyme crumble recipe
9 comments
I used to make a savoury crumble for our shop meals on the farm, perhaps I should start again, you have inspired me #TwinklyTuesday
I have never made a savoury crumble but this sounds way too yummy just to give it to the kids! nom nom nom #twinklytuesday
This is such a great idea. I don’t know why i’ve never thought of a savoury crumble before! My little man would love this. #TastyTuesdays
I have never done a savory crumble, but this looks fabulous & I can’t wait to try it! Pinned 🙂 I would love for you to share this at the Sunday Fitness & Food Link-Up at:
I love your recipes! This sounds really tasty like I would eat it myself haha
Thank you! As a vegetarian I’ve also made this for both Isbella and I to enjoy 🙂
Root Vegetable Crumble | Food styling by Christopher St. Onge | Prop styling by Alanna Davey Image by: Ronald Tsang
This recipe is featured on:
Try this creamy dish in place of mashed potatoes. The nutty herbed topping adds a nice crisp crust.
- Prep time 30 minutes
- Total time 1 hour & 45 minutes
- Portion size 10 servings
Ingredients
Creamy Root Vegetables:
- 4 cups cubed butternut squashes
- 2 onions chopped
- 1 large sweet potato peeled and cubed
- 680 g mini yellow-fleshed potatoes halved or quartered
- 4 cloves garlic sliced
- 1/4 cup butter
- 1/4 cup all-purpose flour
- 2 cups sodium-reduced chicken broth
- 1 cup whipping cream (35%)
- 2 teaspoons Dijon mustard
- 1/2 teaspoon each salt and pepper
Topping:
- 1 1/2 cup fresh bread crumbs
- 1/2 cup walnut chopped
- 2 tablespoons chopped fresh sage
- 1 tablespoon chopped fresh parsley
- 3 tablespoons butter melted
Nutritional facts per serving: about
- Fibre 4 g
- Sodium 385 mg
- Sugars 6 g
- Protein 6 g
- Calories 345.0
- Total fat 21 g
- Potassium 663 mg
- Cholesterol 52 mg
- Saturated fat 11 g
- Total carbohydrate 36 g
- Iron 14.0
- Folate 25.0
- Calcium 9.0
- Vitamin A 143.0
- Vitamin C 35.0
Method
Creamy Root Vegetables: In 12-cup (3 L) casserole dish, combine squash, onions, sweet potato, yellow-fleshed potatoes and garlic. Set aside.
In saucepan, melt butter over medium heat. Sprinkle with flour; cook, whisking constantly, for 1 minute. Whisk in broth and cream; bring to boil. Reduce heat and simmer, whisking constantly, until thick enough to coat back of spoon, about 3 minutes.
Whisk in mustard, salt and pepper; pour over vegetables. Bake in 400°F (200°C) oven until tender, about 1 hour.
Topping: In bowl, mix together bread crumbs, walnuts, sage and parsley; stir in butter. (Make-ahead: Refrigerate in airtight container for up to 2 days.) Sprinkle over vegetables. Bake in 400°F (200°C) oven until crumble is golden, about 15 minutes. Let stand for 5 minutes before serving.
Nutritional facts per serving: about
- Fibre 4 g
- Sodium 385 mg
- Sugars 6 g
- Protein 6 g
- Calories 345.0
- Total fat 21 g
- Potassium 663 mg
- Cholesterol 52 mg
- Saturated fat 11 g
- Total carbohydrate 36 g
- Iron 14.0
- Folate 25.0
- Calcium 9.0
- Vitamin A 143.0
- Vitamin C 35.0
Published: Jun 27, 2019 · Modified: Jul 16, 2020 by Whitney Reist · This post may contain affiliate links As an Amazon Associate, I earn from qualifying purchases. | 1353 words. | About 7 minutes to read this article.
This Easy Freezer Fruit Crumble is all about make-ahead convenience and you-do-you customization. You can make an oat crumble topping, add nuts, use fresh or frozen fruit – so many possibilities!
Crumbles are my jam right now. I’m super in love with the lack of fussiness, ease of preparation, and the fact that I can use a variety of summer fruits – it just depends on what I’m in the mood for! Oh, and did I mention crumbles are a great dessert for making multiple serving sizes? You can easily make a crumble for 1-2 people, or 10+ people. Whatever the situation calls for, really!
This recipe for Easy Freezer Fruit Crumble calls for making a big ol’ batch of crumble topping, freezing it, then using it to top juicy, sweet summer fruit whenever the crumble craving hits. You can make it a crisp by adding oats or nuts, and there’s an option for using frozen or fresh fruit! My favorite crumbles are of the mixed berry or peach variety, but I’m looking forward to trying versions with plums and cherries later in the year. What sounds good to you.
Ingredients for Freezer Fruit Crumble
- Flour – a good all-purpose flour seems to work best for the crumble topping. Feel free to experiment by trying a gluten-free flour blend or white whole wheat flour. The tenderness of your crumble topping may vary slightly, but I bet it will still be very tasty!
- Sugars– a mix of white and brown sugar is my favorite texture in a crumble topping. Both have varying degrees of moisture, and the brown sugar will impart a rich flavor to the topping.
- Butter – for our crumble to hold together, well, crumbles, we need butter! And a little bit of melted butter added to the fruit yields a silky, glossy sauce that forms as the fruit softens while baking.
- Fruit – you can use fresh or frozen fruit in this recipe! I have made and highly recommend buying a big bag of frozen triple berry blend from Wyman’s – their combo of wild blueberries, blackberries, and raspberries is outstanding! I also find that this brand’s berries are more tender and less grainy.
- Cornstarch – we will need a little cornstarch to help thicken the juice of the fruit as it cooks and keep the crumble from being runny. If using fresh fruit, you will typically need less cornstarch then when using frozen. When playing around with the type or combination of fruit, you will likely have to experiment with the amount of cornstarch to get the right texture.
Tips for Making Freezer Fruit Crumble
- Make the crumble ahead of time – if rain changes your weekend plans, if you can’t sleep, need to do a podcast binge, or just want to bake something, make a batch (or 2. or 3!) of crumble topping! It comes together in like, less than 10 minutes! The key to making a good crumble topping that will maintain it’s “crumbled” texture as it cooks is to work the butter into the flour mixture to the point where it resembles a slightly dry play-dough. And having very cold butter helps with this! See the picture below for a reference – you want to be able to shape, mold, and crumble the mixture with your fingers:
- Stir fruit together with a little bit of sugar, butter, and cornstarch – this is the easy step and only requires one bowl! You want to lightly toss everything together. Stirring too vigorously may muss up your fruit.
- Top fruit with crumble topping and bake! It’s as simple as that! A crumble likes a good long stint in the oven – 45 minutes to an hour. You will know it’s done when the fruit is bubbling up over the top of the crumbles.
Fruit Crumble Variations and Modifications
- Add oats or chopped nuts – if you do this, your dessert will be considered a “crisp” and not a “crumble.” See the recipe below for specifics on the amounts! I’m drooling over the thought of a peach crisp with toasted pecans right now.
- Use fresh or frozen fruit – speaking of peaches! I personally think crumbles are great vehicles for making use of frozen fruit. Save the fresh stuff for eating raw, adding to salads, and on top of your breakfast. Frozen fruit is just as delicious, nutritious, and easy to find on sale throughout the year.
- Play around with sweeteners and types of flour – feel free to add honey or maple syrup to replace some of the sugar in the fruit mixture. You will be adding extra liquid, so you may need to play around with a bit more cornstarch. You can also try subbing in half whole wheat flour for the white, or using a gluten-free all-purpose flour blend.
- Add different types of spices – I’m a big fan of cinnamon in my fruit crumble, but ginger, lavender, nutmeg, or cloves would be fun to experiment with.
Other Dessert Recipes
A few other options for those who are dessert lovers:
Are you ready to try this Freezer Fruit Crumble? I’m so excited for you to try this recipe. Once you get the chance to make it, please let me know how it turns out for you! Leave a comment and rate the recipe below. This will help me with the creation of future recipes! I’d also love to feature your creation in my monthly newsletter, so you can upload a photo to Instagram or Twitter with the tag @sweetcayenne5 to be featured!
Freezer Fruit Crumble
Tried this recipe? Mention @sweetcayenne5 or tag #sweetcayenne!
When I make a crumble using frozen fruit pieces Gas mark 4 or 5 middle or top shelf, I find a sliminess under the crumble and on top of the fruit. What am I doing wrong?
Frozen fruit is wetter so when it heats it produces more steam.
Frozen fruit crumbles are best baked from frozen. They will need longer cooking time and perhaps a few steam holes will help reduce the moisture below the crumble.
I am following Delia’s recipe in her original cookery course part 3 and use her advice to cook for 40 minutes.
I’ll try cooking for a bit longer. Your advice to make a steam hole is a bit difficult with crumble as it falls back into the hole, but I’ll see. Thank you
I’m not sure which recipe you are following. Do you mean How To Cook book 2 – Apple and Almond Crumble? Or is it somwhere else? Does the recipe you are following give guidelines about using frozen fruit / cooking from frozen?
I’m using her Cookery Course part 1-3 1981, crumble in part 3. Is that from before you were born?
the recipe doesn’t talk about frozen food, so I’m improvising.
Sam
Delia and I use the Complete Cookery Course version. The recipes are the same as the book you are using but it’s the three books combined.
When Delia makes crumbles now, she likes to press the topping down firmly so it’s crunchier when baked (which is why I suggested that you try a few holes to let the steam escape when you are baking from frozen).
Delia’s timing of 40 minutes is for a fresh crumble. A frozen crumble will need 10 – 15 minutes more in the oven.
PS I’m not sure if I was supposed to be offended or flattered by the reference to my birth but I’ll take it as a compliment.
Hello Lindsey
Thanks for that information. I’ll try all of that next time I make one.
Flattered of course.
I’ll get back to you with the result of my next crumble.
Incidentally, as I have a dairy problem, I use Pure instead of butter and freeze it before I mix it into the flour.
Best wisshes
- Total: 90 mins
- Prep: 30 mins
- Cook: 60 mins
- Yield: 8 Servings
| Nutritional Guidelines (per serving) | |
|---|---|
| 193 | Calories |
| 1g | Fat |
| 48g | Carbs |
| 1g | Protein |
×
| Nutrition Facts | |
|---|---|
| Servings: 8 Servings | |
| Amount per serving | |
| Calories | 193 |
| % Daily Value* | |
| Total Fat 1g | 1% |
| Saturated Fat 0g | 1% |
| Cholesterol 1mg | 0% |
| Sodium 208mg | 9% |
| Total Carbohydrate 48g | 17% |
| Dietary Fiber 4g | 16% |
| Protein 1g | |
| Calcium 28mg | 2% |
| *The % Daily Value (DV) tells you how much a nutrient in a food serving contributes to a daily diet. 2,000 calories a day is used for general nutrition advice. | |
Is there anything better in the summer than spooning a pile of warm, fruit crumble into a bowl and top with a scoop of cold vanilla ice cream? Summer bliss.
Fruit crumbles are one of my favorite desserts to make in the summer (well, any time of year, really). Apple Crumble is how we hang onto summer as we start to make that slide into fall around late August.
This buttery-rich gluten-free apple crumble is a delicious, easy alternative to apple pie. It’s just as flavorful, but without the fuss of making gluten-free pie crust (because honestly, sometimes we just can’t be bothered!)
Serve with vanilla ice cream or dairy-free ice cream over top for an extra dreamy treat.
This recipe was adapted to gluten-free diets from a recipe which appears in the cookbook Cooking Light – Holiday Cookbook, Buttery Apple Crumble.
One of my most rewarding kitchen adventures has been learning how to make cake pops. I always know that if I want to let my baking imagination run wild, I can just start with a cake pop recipe and see where it takes me! The possibilities are endless.
That’s why today I am sharing with you a basic cake pop how to. If cake pops are new to you or you have tried them in the past and never gone back, this simple cake pop recipe is the perfect place to start. With a little step-by-step guidance, cake pops can be easy!
Cake Pop Supplies
To make cake pops, you will need:
How to Make Cake Balls
To create cake pops, you need to start by making cake balls that you will later apply to lollipop sticks . The easiest way to make cake balls is to follow the directions on a box of cake mix and deviate from the directions in one way… use half the amount of oil. This helps create the right consistency for your cake balls. If you are not a fan of boxed cake mix, you can also bake a homemade cake (more power to you!).
After you bake your cake, let it cool completely and… get ready for destruction! Your goal is to crumble your cake into fine crumbs. You can do this one of two ways:
1) Use your hands. Put chunks of your cake into a large mixing bowl and use your hands to crumble it into a pile of fine crumbs. If you use this method, I suggest cutting off the hard edges of your baked cake.
2) Use a food processor . Put chunks of your cake into a food processor and pulse it into fine crumbs. Move the crumbs into a large mixing bowl.
Add a small amount of frosting to your cake crumbs and thoroughly combine using your hands. Continue to add small amounts of frosting until your crumb mixture becomes the consistency of clay.
Helpful Hint: Some cake pop recipes call for you to add an entire container of frosting. I have found that this is way too much. Exactly how much you need depends on the moistness of your cake recipe. I generally add up to 1/3 cup of frosting. A good rule of thumb is to start with a small amount and then add more frosting as needed.
It is easiest to roll cake pops using chilled dough. So, once you have created your “dough”, I recommend sealing it airtight and letting it rest in the refrigerator overnight. If this just doesn’t fit into your busy schedule, a short amount of time in the freezer will do the trick.
I like to use a stainless steel coffee scoop to portion out my chilled cake mixture so that all my cake balls are the same size, about 1.25″. Another popular option is to use a medium cookie scoop for easy measuring. Roll the mixture in the palm of your hand to create round cake balls.
Set your cake balls onto a parchment lined baking sheet or plate until you have completed the entire rolling process. This will give your cake balls time to come close to room temperature before dipping. Keep in mind that making cake pops is a temperature sensitive process. If your cake balls are too cold when you dip them, they will expand as the come to room temperature and crack your chocolate coating.
How To Turn Your Cake Balls Into Cake Pops
Microwave your candy melts in a bowl on low power for 30-seconds at a time. Stop and stir after each 30-second interval then repeat until the coating is completely melted. Do not overheat the candy melts or your coating will become lumpy. If the coating is too thick, add a small amount of paramount crystals or vegetable oil to thin it out.
Dip the end of a lollipop stick into the melted coating and then into a cake ball, gently pushing until the stick is about half way through the cake ball. Turn your cake pop upright and set it in your cake pop stand until the coating has hardened.
Dip each cake pop straight down into the melted coating until the cake ball is completely covered and sealed. If you need to angle the cake pop, gently tilt it in one direction and then another. Resist the temptation to stir the coating with the cake pop. If you do, your cake pop may fall off of the stick into a candy coating abyss. (For help with cake pops that fall off the sticks, please see 5 Tricks to Stop Cake Pops From Falling Off Sticks.)
Remove the cake pop from the melted coating by pulling it straight up. Then, turn the cake pop at an angle and gently tap off any excess coating. Don’t get fancy, keep it simple.
Helpful Hint: Keeping the coating warm (but not hot) throughout the entire dipping process is key to having a smooth coating on your cake pops. To avoid having to repeatedly reheat your coating, a chocolate melting pot is a great tool. If you prefer to heat your chocolate in resealable jars, set the jars on a heating pad to keep your chocolate warm.
Set your cake pops in your cake pop stand until the coating has hardened. Or while the coating is still wet use sprinkles, candies, or sugars to decorate your cake pops.
Celebrate the summer harvest by transforming vibrant vegetables into savory sides and downright delicious meals.
Related To:
Photo By: Matt Armendariz ©2013, Television Food Network, G.P. All Rights Reserved.
Photo By: Matt Armendariz ©2013, Television Food Network, G.P. All Rights Reserved.
Photo By: Matt Armendariz ©2013, Television Food Network, G.P. All Rights Reserved.
Photo By: Matt Armendariz ©2013, Television Food Network, G.P. All Rights Reserved.
Photo By: Matt Armendariz ©2013, Television Food Network, G.P. All Rights Reserved.
Photo By: Matt Armendariz ©2013, Television Food Network, G.P. All Rights Reserved
Photo By: Jessica Brooks ©© 2016, Cooking Channel, LLC. All Rights Reserved.
Photo By: Renee Comet ©Renee Comet
Photo By: Alice Gao ©2014, Television Food Network, G.P. All Rights Reserved.
©2014, Scripps Networks Interactive, Inc. All Rights Reserved.
Photo By: Evan Sung for The New York Times
Photo By: Evan Sung for The New York Times
Photo By: Evan Sung for The New York Times
Heirloom Tomato Caprese Salad
Spend more time in the sunshine (and less time in the kitchen) by prepping this beautiful, no-cook heirloom tomato salad. The colorful mixture needs little more enhancement than shreds of basil, dollops of melt-in-your-mouth burrata and a sprinkling of sea salt to magnify all the flavors therein.
Heavenly Sauteed String Beans with Garlic
Boosting the flavor of string beans is as easy as 1-2-3 ingredients. All you need is salt, pepper and garlic for this simple sautee.
Grilled Squash Quesadillas
Charred Corn Salad
Transform sweet corn by grilling the summer grain, lending it subtle smoky flavor and then pairing it with more of summer’s best, like heirloom cherry tomatoes and a basil-rich vinaigrette.
Spicy Hoisin Glazed Eggplant
Embrace eggplant by topping the meaty vegetable with Bobby’s Asian-inspired glaze –– sticky and bold with hoisin and soy sauces, spicy ginger and red pepper flakes.
Zucchini, Tomatoes and Basil
Three all-stars come together in this simple-yet-satisfying dish that’s bursting with summer flavor. Serve it with crusty bread to sop up the saucy, basil-scented juices.
Risotto Stuffed Peppers and Zucchini
Rachael’s summer vegetables take on a refined air when stuffed with decadent risotto and a regal pinch of saffron. Citrus zest and juice brighten up the buttery dish, while oven-browned panko adds a contrasting crunch.
Tangy Coleslaw with Smoked Corn
Use your stovetop smoker to infuse corn kernels with the rich aroma of oak sawdust chips. Mixed with a colorful array of cabbage, red pepper and jalapeno, corn becomes an unusual slaw with sweet-tangy honey-lime vinaigrette.
Marinated Veggie Kebabs
Eating with your hands is always more fun, and summer’s brightest veggies –– like cherry tomatoes and summer squash –– beg for this plate-free treatment. Firm chunks of halloumi stand up to the heat of the grill and pair perfectly with a spicy avocado dill dip.
Corn Chowder with Chili Powder
The savory secret to Nadia G.’s no-nonsense chowder is her homemade chili powder, which bursts with potency from a cumin, cayenne and paprika trio. As if this weren’t oomph enough, the corn kernel and Yukon gold base is topped off with bacon “crispies” and cheesy crumbles.
Grilled Artichokes with Honey-Chile Dipping Sauce
The secret to tender-crisp artichokes is giving them a quick steam before charring them on the grill.
Marinated Zucchini and Summer Squash
Marinating mild zucchini and yellow squash in a vinegar, lemon, garlic and thyme mixture overnight allows the sturdy vegetables to soak up its flavors. After being grilled, the slices possess even smokier, deeper flavor.
Corn with Spiced Herb Butter
Sriracha adds a spicy kick to this butter –– perfect for livening up corn –– while cilantro adds its distinctive floral notes.
Refreshing Watermelon and Heirloom Tomato Salad
This savory and sweet salad is the perfect side to make when both tomatoes and watermelon are at their peak.
Zucchini Parmesan Subs
Smoky Panzanella With Market Vegetables
Bacon, Arugula, Tomato and Roasted Corn Salad
Looking for a way to spice up your standard corn and tomato salad? Roast the kernels in a bacon-fat glaze (trust us), top with sliced bacon and toss with a tangy Dijon dressing.
Deep-Fried Zucchini Blossoms
These stunning edible flowers grow at the end of zucchini and serve as a surprising warm-weather treat when lightly battered and fried until crisp. Serve the tasty blossoms as a showstopping floral starter at a garden party, or any backyard fete.
Stuffed Peppers
Robust red tomatoes, basil and tapenade fill a gently charred bell pepper in this bright, tangy and tender summer side.
Pickled Corn-Bacon Relish
Chef Edward Lee’s tangy corn-and-bacon relish requires two days in the fridge for all of the ingredients to fully meld and pickle, but the wait is well worth it. Add the condiment to sandwiches, salads or appetizers — like deviled eggs and bruschetta — to give them an extra punch of flavor.
Frittata with Zucchini
This frittata brims with both diced zucchini and its blossoms –– a perfect main for summer brunch or any breakfast for dinner. With perfectly puffed edges and rich Parmigiano-Reggiano cheese, it feeds a hungry crowd with ease.
Stuffed Eggplant with Veal and Spinach
Rachael’s veal stuffing, boosted by aromatic sage and freshly grated nutmeg, transforms eggplant into a buttery, breadcrumb-topped main.
THIS POST MAY CONTAIN AFFILIATE LINKS. PLEASE SEE MY FULL DISCLOSURE POLICY FOR DETAILS. AS AN AMAZON ASSOCIATE I EARN FROM QUALIFYING PURCHASES.
Strawberry Rhubarb Crumble is the perfect balance between sweet and tart. The sweetness of the strawberries, the tart rhubarb and crunchy crumbled topping make for a match made in heaven. This is one of my all time favorite rhubarb recipes. It is easy, quick to come together and a family favorite.
Summer is here in all it’s glory. It is going in to the nineties all week and nothing speaks summer like a good fruit crumble. This Strawberry Rhubarb Crumble is so delicious your friends and family will rave about this dessert. Somehow this tart sour vegetable and this sweet scrumptious berry pair to make a winning combination. This crumble is scrumptious just by itself or a la mode. There is nothing wrong with a little french vanilla ice cream on top of your crumble. Are you a huge strawberry rhubarb fan? If so you have to put this on your to try list now.
How do you make Strawberry Rhubarb Crumble?
In a large bowl mix together strawberries, rhubarb, a few tablespoons of flour and the sugar. Spoon into a baking dish. In a medium bowl combine brown sugar, the remaining flour, softened butter, rolled oats and the cinnamon. Using a pastry knife or fork cut in the butter until the mixture is crumbly. Stir in the chopped pecans. Sprinkle over the strawberry rhubarb mixture.
Bake until the top is browned and the mixture is bubbly. Serve warm or at room temperature. The crumble is delicious just by itself or with a little french vanilla ice cream. Leftovers should be stored in refrigerator.
Helpful tip for making Strawberry Rhubarb Crumble
- Shop around for rhubarb via the telephone unless of course you grow it. Sometimes it is difficult to find.
- Do not eat the leaves of the rhubarb. Remove them and discard them. They can be toxic. Learn more at Modern Farmer on 6 Secretly Poisonous Plants.
- Add some nuts to the crumble. It makes it even more delicious and really complements the fruit. I personally like pecans but you could add sliced almonds or chopped walnuts. As we say often in this house wear what you dig.
- I find that one half cup of sugar is perfect for this recipe bringing out the best in the strawberry rhubarb combination.
- This crumble is best baked the same day as it is served so the topping has a little crunch to it. However that has never stopped me from eating it ice cold straight out of refrigerator with a spoon.
Oh my goodness! Doesn’t this Strawberry Rhubarb Crumble look amazing? It is making my mouth water. I could have eaten that whole pan but I think my family would have given me the stink eye. Get on the phone and round up that rhubarb today. You and yours are going to love it! I mean really can’t put your spoon down love it!
Here are more scrumptious summer desserts!
This post was originally published June 8, 2018 and was republished April 16, 2019 with new content.
Strawberry Rhubarb Crumble
5 from 6 reviews
Strawberry Rhubarb Crumble is the perfect balance between sweet and tart. This is one of my all time favorite rhubarb recipes.
- Author: Beth Pierce
- Prep Time: 20 minutes
- Cook Time: 45 minutes
- Total Time: 1 hour 5 minutes
- Yield: 6 1 x
- Category: Dessert
- Method: Baking
- Cuisine: American
Ingredients
- 4 cups strawberries hulled and quartered
- 4 cups rhubarb trimmed and chopped into one inch pieces
- 3 tablespoons all purpose flour
- 1/2 cup sugar
Crumble Topping
- 1/2 cup brown sugar
- 1/2 cup all purpose flour
- 5 tablespoons butter softened
- 3/4 cup old fashioned rolled oats
- 1/8 teaspoon cinnamon
- 1/2 cup chopped pecan
Instructions
- Preheat oven to 375 degrees. Spray 8 x 11 baking dish with nonstick baking spray for easier clean up.
- In large bowl mix together strawberries, rhubarb, 3 tablespoons flour and sugar. Spoon in baking dish.
- In medium bowl combine brown sugar, 1/2 cup flour, softened butter, rolled oats and cinnamon. Using pastry knife or fork cut in butter until mixture is crumbly. Stir in chopped pecans. Sprinkle over strawberry rhubarb mixture.
- Bake for 45 minutes or until top is browned and mixture is bubbly. Allow to cool for 10 minutes before serving.
- Leftovers should be stored in refrigerator.
Nutrition
- Calories: 232
Keywords: crumble, crumble topping, strawberry crumble, rhubarb crumble, strawberry crumble, summer dessert recipes, strawberry rhubarb recipes
Did you make this recipe?
Nutrition Disclaimer: All nutritional information shared on this site is an approximation. I am not a certified nutritionist and any nutritional information shared on this site should be used as a general guideline.


