Walter Glenn is a former Editorial Director for How-To Geek and its sister sites. He has more than 30 years of experience in the computer industry and over 20 years as a technical writer and editor. He’s written hundreds of articles for How-To Geek and edited thousands. He’s authored or co-authored over 30 computer-related books in more than a dozen languages for publishers like Microsoft Press, O’Reilly, and Osborne/McGraw-Hill. He’s also written hundreds of white papers, articles, user manuals, and courseware over the years. Read more.
If you’re having Wi-Fi or cellular issues that you just haven’t been able to resolve using other methods, iOS gives you the option to reset all your network settings. This sets just about everything back to the factory default, giving you a chance to start from scratch.
Before diving in, it’s important to understand what resetting your network settings actually does. The reset restores just about every network-related setting on your device to the factory default. This includes cellular settings, so it can be useful as a last resort troubleshooting effort if you’re unable get a cellular connection where you think you should be able to. If you’re with a carrier, such as some mobile virtual network operators (MVNOs), that allows you to manually configure access point name (APN) and multimedia messaging service (MMS) settings, you may need to set them up again. On most major carriers, you won’t. It will happen automatically.
All your Wi-Fi networks will be removed and default Wi-Fi settings restored. This includes virtual private networks (VPNs) you’ve set up. If you’re troubleshooting Wi-Fi–especially connections to specific networks–you should try forgetting those networks individually instead. It will be less work than setting everything up again. If you do reset your network settings, you’ll need to connect to Wi-Fi networks again. You should also browse through your other Wi-Fi settings–like Wi-Fi assist and Wi-Fi calling–to ensure things are set up the way you want them.
And finally, all your Bluetooth connections will also be removed, so you’ll need to add those again and double-check your Bluetooth settings.
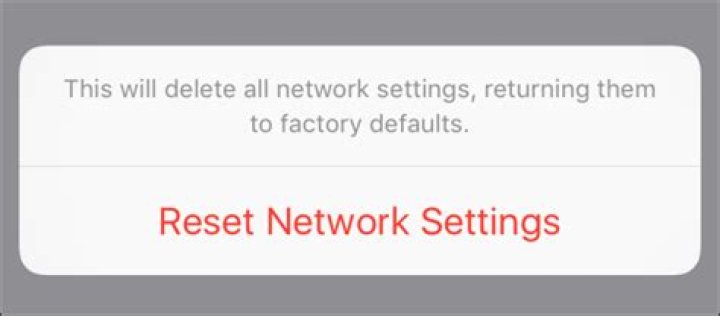
With all that said, actually resetting your network is pretty straightforward. In your Settings app, tap “General.”
On the General settings page, tap “Reset.”
On the Reset page, tap “Reset Network Settings.”
If you have a passcode set up, you’ll be asked to enter it.
And when asked to confirm your action, tap “Reset Network Settings.”
Your device will restart with all network settings reset to their factory defaults. As we mentioned, resetting your network really should be a last resort when troubleshooting cellular, Wi-Fi, or Bluetooth issues that you just can’t resolve any other way. But it’s still a handy way to start from scratch, possibly resolve stubborn networking problems, and set things up the way you want.
If you’re having Wi-Fi or cellular issues that you just haven’t been able to resolve using other methods, iOS gives you the option to reset all your network settings. This sets just about everything back to the factory default, giving you a chance to start from scratch.
All your Wi-Fi networks will be removed and default Wi-Fi settings restored. This includes virtual private networks (VPNs) you’ve set up. If you’ re troubleshooting Wi-Fi–especially connections to specific networks–you should try forgetting those networks individually instead. It will be less work than setting everything up again. If you do reset your network settings, you’ll need to connect to Wi-Fi networks again. You should also browse through your other Wi-Fi settings–like Wi-Fi assist and Wi-Fi calling–to ensure things are set up the way you want them.
And finally, all your Bluetooth connections will also be removed, so you’ll need to add those again and double-check your Bluetooth settings.
Operations:
With all that said, actually resetting your network is pretty straightforward. In your Settings app, tap “General”. On the General settings page, tap “Reset”. On the Reset page, tap “Reset Network Settings” .
If you have a passcode set up, you’ll be asked to enter it.
And when asked to confirm your action, tap “Reset Network Settings”.
Your device will restart with all network settings reset to their factory defaults. As we mentioned, resetting your network really should be a last resort when troubleshooting cellular, Wi-Fi, or Bluetooth issues that you just can’t resolve any other way. But it’s still a handy way to start from scratch, possibly resolve stubborn networking problems, and set things up the way you want.
James Davis
Mar 07, 2022 • Filed to: Fix iOS Mobile Device Issues • Proven solutions
While using iPhone, you may experience problems with your network connectivity like you cannot connect your iPhone to wifi networks, and you cannot make or receive calls even your iPhone may show no service. You may want to take your iPhone to the store for tech support. But you can fix these problems by yourself. iPhone has six reset options to troubleshoot different types of problems. By using the reset network settings, an effective option to solve network related issues, you can fix all these problems by simply resetting the network settings of your iPhone as it will clear all the network settings, current cellular network settings, saved wifi network settings, wifi passwords, and VPN settings and bring back your iPhone Network Settings to factory default. This article covers two simple parts:
- Part 1. Step-by-step Tutorial for how to reset iPhone Network Settings
- Part 2. Troubleshooting: iPhone Network Not Working
Part 1. how to reset iPhone Network Settings
When you find the network on your iPhone quit working, then the very first thing you should do is to reset network settings on iPhone. By resetting the iPhone network, the problem might be solved successfully. And it doesn’t require you any techniques to do the resetting, but four simple steps. Keep patience. It will take one or two minutes to complete the task. Then the iPhone will reboot with default network settings.
Step 1. Tap the Settings app on your iPhone.
Step 2. Tap General.
Step 3. Scroll down to find Reset and tap it.
Step 4. In the new window, select Reset Networking Settings and confirm the action.
Part 2. Troubleshooting: iPhone Network Not Working
Sometimes even though you don’t change any settings on your iPhone, the network might not work. If it happens, don’t take your iPhone directly to a local repair store because you might fix it by yourself. Below are some tips and tricks for how to make it work when your iPhone network quit working.
* wifi is not working:
A good number of iPhone users face difficulties with wifi connectivity after upgrading to the latest iOS 9.0 from the older iOS version. Those who installed new iOS also face the same problem too. If it happens, follow the above-mentioned steps to reset network settings on your iPhone and then try to connect with wifi again.
* Cannot connect iPhone to a specific wifi network:
If you are facing problems connecting to a specific wifi network, then first select that network from the list and click forget. Then search for the network. Enter the network password if needed. If a problem exists then, do a reset network settings. After rebooting the iPhone, connect to the wifi network.
* Searching for network or no service:
Sometimes iPhone takes a long time to search for a network or sometimes show no service. To solve this problem, first, turn on the airplane mode and then turn it off after a few seconds. If it does not solve the problem, then perform “reset network settings”. Resetting the network settings will surely fix the “No Service” issue.
* Cannot make or receive calls:
Sometimes iPhone users cannot make or receive calls with their iPhone. It happens when the airplane mode accidentally turned on. Turning it off will fix the problem. But if the airplane mode does not cause the problem, a reboot may solve the problem. If the problem exists then perform ” reset network settings” and it will solve the problem.
* iMessage is not working:
Some say that iMessage is not working, and even it doesn’t let them turn it off. So they reset the network settings to fix the problem, and iPhone stuck in the halfway of booting for hours. To solve problems with applications like iMessage, do a hard reset by selecting Reset All Setting in the reset menu instead of doing reset network settings.
* Settings or iOS is not responding:
Sometimes the Setting menu is not responding as well as the complete iOS. A hard reset can fix the problem. You can do so by going to Settings > General > Reset > Reset All Settings > Reset all Settings.
* iPhone could not be synced:
Sometimes iPhone users experience problems with their computers. It shows a warning that the iPhone cannot sync due to connection to the iPhone was reset.” A reset network settings in the iPhone and a computer reboot will solve the problem.
By Helen | Follow | Last Updated October 21, 2021
Summary :
This essay submitted by MiniTool Software Limited teaches you how to quickly reset your network settings on your iPhone. It also tells you what will happen if you do that and when you are recommended to do that.
How To Reset Network Settings on iPhone?
To reset your iPhone network settings, just tap Settings > General > Reset > Reset Network Settings and you are done. It may ask for your passcode, just enter it and select Reset Network Settings. This also reset Wi-Fi networks, passwords, cellular settings, as well as VPN and APN (Access Point Name) settings that you have used before.
So, think twice and make sure you want to do that before really starting. Once done, you can’t go back. If you want to get your personal special settings again, you have to set up those network services one by one again.
What Does Reset Network Settings Do on iPhone?
Resetting network settings will delete some data from the device but not all. It will erase all stored networking and Internet-involved data on your iPhone like network login information (username, password, etc.), WiFi names and passwords, as well as info on any paired hardware such as speakers and headsets.
What Happens When You Reset Network Settings on iPhone?
To do iPhone reset network settings will delete not only login details for a single Wi-Fi network, but also all of the data for all your other stored WiFi connections, network preferences, stored VPN specifics, and all of your Bluetooth device pairings.
What Will You Lose to Reset Network Settings iPhone?
First of all, network resetting is not the same thing as factory reset, which will wipe all your personal data off the phone and return it to its original factory state. Whereas network resetting only clears out your network-related data including local network, Internet, and paired devices’ data.
Have you ever encounter “Xfinity WiFi connected but no Internet access” problem? Are you looking for Xfinity WiFi connected but no Internet access solutions?
Resetting the network won’t remove any file, folder, or other media saved on your smartphone. Nor will it delete any web browser data (e.g. browsing history or saved bookmarks). Besides, network resetting will not get rid of mobile carrier functionality or account info. You can normally make phone calls, send text messages, use apps, and so on. The process resets any changes to mobile preferences you may have made since you activated your device.
Why Need to Reset Network Settings iPhone?
Sometimes, you may encounter a situation that your iPhone appears to be connected to the Internet. Yet, it doesn’t have data flow. Then, you may need to reset Internet settings to fix the issues.
However, for many network problems, you don’t need to reset your Internet settings to handle the situation for you have many other solutions to try before resetting. Network resetting should be your last method. The following lists the possible ways to solve iPhone network problems.
- Turn Airplane Mode on and off again
- Forget and reconnect to Wi-Fi
- Reboot iPhone
- Check network on another device to see if the Internet itself has some problem
- Check network coverage area
- Check for a carrier settings update
- Restart modem and router
- Reinstall SIM card
- Check the cable connections
- Troubleshoot network issues
- Update iPhone apps or iOS
- Contact your carrier
ABOUT THE AUTHOR
Position: Columnist
Graduate from university in 2014 and step in work as a tech editor the same year. Writings involve mainly in hard disk management and computer data backup and recovery. Through the years of diving deep in computer technology, Helen has successfully helped thousands of users fixed their annoying problems.
Personally, Helen loves poetry, sci-fi movies, sport and travel. And, she believes that all her life is the best arrangement from god.
Apple recently released iOS 15 to the public for all compatible iPhone models. While the update packs a boatload of new forward-facing features, it does come with its own share of issues. For instance, you might be having trouble connecting to your WiFi network or having difficulty pairing your iPhone with your accessories. If you are encountering WiFi and Bluetooth issues after updating to iOS 15, this is how you can fix them easily.
Fix WiFi and Bluetooth Issues on iPhone After Upgrading to iOS 15 – How to
As mentioned earlier, the new update comes jampacked with a plethora of front-facing additions. These shiny new additions have tempted you to update to iOS 15 right away. However, the update is crawling with bugs at the moment which is causing issues for users who have updated their iPhones. If you are experiencing WiFi and Bluetooth issues, this is how you can fix them and resume normal functionality.
- Restart Your iPhone Running iOS 15
Simply restarting your iPhone can clear most errors in the system that prevent the normal functioning of the device. Turn the device off and leave it as is for a minute and then turn it on again. This will potentially fix WiFi or Bluetooth issues after the iOS 15 update.
- Reboot Router for WiFi Fix
If restarting your iPhone does not help fix WiFi problems, you can also try and reboot your router. There is a possibility that the issue resides in the network rather than the iPhone itself.
- Reset Network Settings
The easiest way to fix WiFi and Bluetooth issues after updating to iOS 15 would be to reset network settings. Take note that this will make your iPhone forget WiFi passwords as well as Bluetooth. Simply, head over to the Settings > Reset > Reset Network Settings.
- Forget Bluetooth or WiFi
You can always forget the WiFi network and Bluetooth device and try to pair it from scratch. A lot of the time, the issue lies in the pairing process and you can simply forget the WiFI or Bluetooth device and try to connect to it again to fix the issue.
- Restore iPhone
If none of the fixes mentioned above resolve WiFi and Bluetooth issues after upgrading to iOS 15, then you would have to restore your iPhone completely. It is possible that errors or bugs rest in the system rather than settings. Henceforth, resetting your iPhone would erase all data and settings and the operating system will be available fresh. However, take note that all of your data will be deleted, so it is better to keep a backup. Restoring your iPhone would potentially fix WiFI and Bluetooth issues after the iOS 15 upgrade.
If you are having trouble installing iOS 15 on your compatible iPhone models, check out the following to fix the issue.
This is all there is to it, folks. What are your thoughts on the scenario? Is your iPhone encountering such a problem? Let us know in the comments.
How to Fix Network Connection Problems on iPad?. Some of the most common problems of iOS devices are the problems connected to network connection. No matter what the cause is, here are some steps that you could perform whenever this happens.
How to Work Out Network Connection Problems
The first thing you can do, is to of course, reset the network settings. Resetting the network settings. Sometimes, while fixing up settings we accidentally set settings that are not compatible with our network causing a lot of problems. a word of caution before you do this though. Check the details of your network connection first as you might have to re-enter them after the reset, to avoid causing further problems.
If for instance this does happen, then do not fret just yet. You can try resetting the router. The router sometimes have the capability of remembering network settings, and this could help with your network problems. After resetting the router, your network connection should be okay by now, but if it’s still not, then you might want to reset your iDevice.
There are two ways to reset your ipad device. The first one is the soft reset. This could be done by holding down the Sleep/Wake button until a red slider appears. Once it does, slide it to power off your device. Turn on your device again. After the reset, see if your network connection is okay already. If it’s still not okay, then maybe a hard reset is going to do the trick? This could be done by holding down the Sleep/Wake button together with the Home button for a longer time than the soft reset. The red slider would still appear but just ignore it. The device would turn off and turn on by itself as long as you keep holding down the two buttons. Once the device powers on, check out the network connection. Again, it should be okay by now, but if it’s not, then this is the time to call your network company and let them figure out your problem.
What to Know
- Go to Settings >General >Reset >Reset Network Settings. Enter your passcode if prompted.
- After a reset, your iPhone reconnects to your carrier, and you must manually reconfigure the Wi-Fi and VPN settings.
- Alternatively, toggle Airplane Mode, restart your device, then reconnect to the network to see if it fixes your problem.
This article explains how to reset the network settings on an iPhone. The information applies to iPhone 12 through iPhone 6 with iOS 14 to iOS 8.
How to Reset Network Settings on iPhone
Take the following steps to reset the network settings on your iPhone:
On your iPhone, open the Settings app.
Tap General.
Scroll to the bottom of the screen and tap Reset.
Tap Reset Network Settings.
If prompted, enter your passcode.
Tap Reset Network Settings.
Your iPhone resets its network settings and then restarts, which takes a minute or so. When you can use your phone again, enter your passcode. Your phone should automatically reconnect to your cellular provider. If your iPhone doesn’t auto-connect to your mobile network, contact your carrier or Apple for support.
You also need to rejoin Wi-Fi networks. Tap Settings > Wi-Fi and then tap the name of the network you want to join. If prompted, enter the network password and then tap Join.
If you use a VPN, obtain and follow instructions from your VPN provider to reconfigure its app and settings on your device.
What Happens When You Reset Network Settings
When you reset the network settings, the configurations for Wi-Fi and cellular networks return to the default settings. A reset also clears virtual private network (VPN) configurations. After a reset, your iPhone reconnects to your carrier, and you’ll need to reconfigure the Wi-Fi and VPN settings manually.
Before you reset your network settings, you can try the following tips when you experience a network connection problem with your iPhone. They are quicker than going through resetting your network, and they often solve the problem.
Tip: Toggle Airplane Mode
Put your phone in Airplane Mode for a minute or so.
Tap Settings on your iPhone. Move the slider next to Airplane Mode to the right, so you can see green, indicating Airplane Mode is on and Wi-Fi is off.
Wait a minute and then move the slider next to Airplane Mode to the left to turn Airplane Mode off and Wi-Fi on again.
Check to see if your connections work.
Tip: Power Off and Power On
If toggling Airplane Mode doesn’t work, turn your iPhone off and back on.
Hold down the Power button on the iPhone for a few seconds. On some phones, you hold down the Power button and a volume button to turn off the iPhone.
Move the Slide to power off slider to the right to power off the phone.
Wait for the phone to power down and then hold down the power button for a few seconds until the Apple logo appears to turn your phone back on. You need to enter your passcode to sign in when your device starts.
Check to see if your connections work.
Tip: Forget and Reconnect to Your Wi-Fi Network
If you still can’t connect, remove and then reconnect your Wi-Fi network.
Open Settings and tap Wi-Fi to open the Wi-Fi settings screen. The name of the network your device is connected to displays beneath Wi-Fi and the on/off slider near the top of the screen.
Tap the i within the circle to the right of the current network name.
Tap Forget This Network and confirm by tapping Forget.
Forgetting a network forces your iPhone to disconnect from the network and returns you to the screen that shows the available wireless networks.
Tap the name of the network you want to join. Enter the network password and tap Join.
Check to see if your connections work.
Was this page helpful?
Thanks for letting us know!
Other Not enough details Hard to understand
If you see No Service or Searching on your iPhone or iPad (Wi-Fi + Cellular), or if you can’t connect to a cellular network or cellular data, learn what to do.
Check your coverage area
- Make sure that you’re in an area with cellular network coverage.
- Turn cellular data off and then back on again. Go to Settings, then tap Cellular or Mobile Data. If you’re using your iPad, you might see Settings > Cellular Data.
- If you’re traveling internationally, make sure that your device is set up for data roaming. Go to Settings > Cellular > Cellular Data Options > Data Roaming.
If you’re on AT&T’s 3G network
AT&T is phasing out their 3G network. If you see No Service in the status bar of your device and you have an iPhone 5s, iPhone 5c, or earlier or an iPad 2 Wi-Fi + Cellular or earlier, contact your carrier to discuss your options. If you have an iPhone 6 or later or an iPad (3rd generation) or later, follow these steps:
- Update your iPhone or iPad to the latest version of iOS or iPadOS.
- Go to Settings > Cellular. Then:
- For iPhone, tap Cellular Data Options, then turn on Enable LTE.
- For iPad, turn on LTE.
If you still see No Service after following these steps, contact your carrier.
iPhone and iPad devices that support 5G networks are not affected by the phasing out of 3G networks.
Restart your iPhone or iPad
Restart your device. If you’re not sure how to do this, follow these steps to restart your iPhone or restart your iPad.
Check for a Carrier Settings update
To manually check for and install a carrier settings update:
- Make sure that your device is connected to a Wi-Fi or cellular network.
- Tap Settings > General > About. If an update is available, you’ll see an option to update your carrier settings.
- To see the version of carrier settings on your device, tap Settings > General > About and look next to Carrier.
If you insert a new SIM card into your iPhone or iPad, you need to download the carrier settings for your new carrier.
Take out the SIM card
After removing the SIM card, put it back in.
- If the SIM card is damaged, or doesn’t fit in the SIM tray, ask your carrier for a new SIM card.
- If you transferred your SIM card from another device, ask your carrier if your SIM card works with your iPhone or iPad.
Learn more about removing your iPhone SIM card or iPad SIM card.
Reset your Network Settings
Go to Settings > General > Transfer or Reset [Device] > Reset > Reset Network Settings. This also resets Wi-Fi networks and passwords, cellular settings, and VPN and APN settings that you’ve used before.
Update your iPhone or iPad
Update your iPhone or iPad to the latest version of iOS or iPadOS.
Contact your carrier
Issues with your carrier or account might affect your service. Contact your carrier to:
- Verify that your account is active and in good standing.
- Make sure that there are no outages in your area.
- Check that your device isn’t blocked from receiving cellular services and is set up with the right data plan.
Only your wireless carrier can access and manage details about your account:
Get more help
If your carrier confirms that there’s no issue with your account or network, but you still can’t connect to a cellular network, contact Apple Support.
If you see an alert next to No Service, learn what you can do.
Resetting network settings will delete some data from your device but not all
:max_bytes(150000):strip_icc()/BradStephenson-a18540497ccd4321b78479c77490faa4.jpg "How to reset your ios device’s network settings and fix connection issues")
:max_bytes(150000):strip_icc()/jonfishersquare-93eb80e77a004035887f56816d3623c5.jpg "How to reset your ios device’s network settings and fix connection issues")
- Wichita Technical Institute
- Tweet
- Share
- Tweet
- Share
Choosing to reset network settings will erase all stored internet and networking-related data on your device, such as Wi-Fi names and passwords, network login information, and information on any paired hardware like headphones or speakers.
What Happens When You Reset Your Network Settings?
Most devices and services will let you manually delete specific information relating to individual internet connections and paired devices. For example, you can delete a single Wi-Fi network you no longer use without affecting any of your other Wi-Fi connections.
Choosing to reset network settings, on the other hand, will delete not just the login information for that Wi-Fi network but also all of the data for all of your other stored Wi-Fi connections, all of your Bluetooth device pairings, mobile network preferences, and stored VPN information.
Will I Lose Anything if I Reset Network Settings?
It’s important to emphasize a network settings reset is not the same thing as a factory reset.
Resetting your network settings clears out all of your internet, local network, and paired devices’ data. A factory reset will delete pretty much everything on your device, reverting it to the state it was in when you unboxed it.
A network settings reset will not delete any files, folders, or other media stored on your device. Nor will it delete any web browser data, such as your browsing history or saved bookmarks.
Here’s what a network settings reset deletes:
- Wi-Fi network names and passwords.
- Bluetooth device connections and preferences.
- VPN settings, local history, and preferences.
- Cellular network preferences such as data management and 4G/5G settings.
Resetting network settings on an iPhone or Android smartphone will not delete any mobile carrier functionality or account information. The process resets any changes to mobile preferences you may have made since you activated your device.
Your ability to make phone calls, send texts, and access apps will not be affected by resetting your network settings.
For example, if you’ve recently turned your iPhone’s 5G off, you will likely have to do so again after the network settings reset is complete.
Do I Need to Reset Network Settings?
Choosing the Reset Network Settings option is just one of many potential ways to fix internet and connectivity bugs and glitches. You don’t need to perform a network settings reset, but it may help you if you’ve tried everything else and nothing seems to work.
A network settings reset only takes a few seconds. However, it may take you a few minutes to manually re-enter any deleted Wi-Fi login information and reconnect your Bluetooth devices afterward.
Performing a network settings reset on a Windows 10 PC can fix several internet problems. Resetting network preferences can also solve Wi-Fi problems on an iPad and get the internet working again on Android tablets and smartphones.
It’s a prevalent and generally very risk-free way of fixing many problems on numerous devices.
Alternatives to Resetting Network Settings
Before choosing to reset your network settings, it’s a good idea to try some fixes specific to the problem you’re experiencing. You may also want to try some of the following general strategies known to fix internet and network problems.
- Restart your device.
- Turn Airplane Mode on and off again.
- Check your internet on another device.
- Reboot your modem and router.
- Install the latest operating system and app updates.
If resetting your network settings doesn’t work, and you feel like you’ve tried every other possible solution, you may need to perform a factory reset. It will delete pretty much everything from your device and is considered by most to be the last resort.
All network settings are removed, including previously used networks and VPN settings. In addition, it clears your device name and resets to “iPhone.”
Resetting network settings on an iPhone returns all your network settings to their default state, wiping out any previously set preferences and configurations. Any Wi-Fi, VPN, or cellular settings go back to the default. After the reset, you’ll need to reconfigure your VPN and Wi-Fi settings, but you should automatically reconnect to your carrier.
Like resetting network settings on an iPhone, you’ll remove any previous Wi-Fi and mobile data connection settings if you reset network settings on an Android. You’ll also wipe out settings for connected Bluetooth devices. After the reset, you’ll need to reconfigure and reconnect Wi-Fi and Bluetooth settings.
Troubleshooting tips for when Discord is not connecting
- Wichita Technical Institute
- Tweet
- Share
- Tweet
- Share
Discord not connecting properly upon startup can be frustrating as it can prevent you from not only sending messages but accessing most of the content already downloaded onto the app. A looping “Connecting” animation is often the main sign of Discord not working though you may also encounter connection problems when trying to access third-party connections or sending and receiving messages.
Causes for Discord Not Working Properly
Discord stuck on connecting is usually caused by technical problems on Discord’s side, such as high volumes of traffic, or internet connectivity issues on your device. Corrupted app data can also be a cause of Discord connection problems, as can custom internet settings.
The following solutions apply to all versions of the Discord app on computers, smartphones, and tablets.
How to Fix Discord Not Connecting Errors
Here are all of the best ways to get around the Discord connecting error message and disconnection problems sorted from easiest to advanced.
Check Discord’s status. Discord, or some of its services, may be down. You can check the current status of Discord at any time via DiscordStatus.com.
Unfortunately, the only thing you can do in this scenario is wait.
Check your internet connection. It’s possible that your smartphone may be out of range or that your internet service could be down. Quickest way to do this is to open another app that needs an internet connection such as Facebook or Twitter and see if they’re working properly.
Disable Airplane Mode. Airplane Mode can disable all cellular and internet connections so you may have accidentally turned Airplane mode on or it might still be on after a recent flight.
Temporarily disable Wi-Fi. Your iPhone or Android smartphone may be connected to a dead Wi-Fi signal. Disable Wi-Fi to use your cellular network and see if that helps you connect to Discord.
Properly close the app and reopen it. Quit the Discord app, wait a few seconds, and then reopen it. This can create a new connection to Discord that may work.
Update the Discord app. If your app is giving you a Discord not connecting error, it may need an update so that it can connect to the Discord servers.
Update your operating system. A system update can often fix any internet connectivity errors in addition to making your device more secure and efficient. This guides will help:
Restart your device. Whether you’re restarting a computer, restarting an Android smartphone or tablet, or any iOS device, t’s a simple fix but one that’s known to get rid of a wide variety of technical issues including connectivity ones.
Check the third-party service. If you’re having problems with Discord not connecting to another service such as Spotify, Xbox, or Twitch, open Connections via the main app menu and check that the link to the account has been made properly. You may need to add the connection again. It’s also possible that the service could be experiencing a temporary server outage. Their official Twitter account should tell you if such a thing is happening.
If you’re unable to call upon an external service or feature while in a Discord chat, it’s entirely possible that the specific chat you’re using may simply not support connections to the service you want. A full list of the supported chatbot commands should be available within your community’s Faq, About, or Welcome topic.
Troubleshoot the Discord app. If you’re using Windows 11, right-click on the Discord app’s icon in File Explorer and select Show more options > Troubleshoot compatibility. This will scan your device and the app’s files for any errors and attempt to fix them.
You can also run a variety of other troubleshooters for internet and connectivity in Windows 11 via Settings > System > Troubleshoot.
Disable proxy server settings. Using a proxy server can disrupt a connection to Discord. On Windows, make sure Use a proxy server is turned off in Settings > Network & Internet > Proxy. On an iPhone or iPad, turn proxy off in Settings > Wi-Fi > HTTP Proxy > Configure Proxy. On Android, go to Settings > Wi-Fi > network name > edit button > Advanced Options. On Mac, Apple > System Preferences > Network > network name > Advanced > Proxies.
Turn off your VPN settings. Using a VPN internet connection can also affect Discord so try turning it off temporarily on your device.
Change your DNS servers. Set the Preferred DNS Server to 8.8.8.8 and the Alternate DNS Server to 8.8.4.4 and check if this fixes the Discord not connecting bug.
If this doesn’t work, make sure to change your DNS server settings back to the way they were before.
Uninstall and reinstall Discord. If Discord is still stuck on the connecting screen, try deleting the app from your device and reinstalling it.
None of your conversations will be lost as long as you use the same account to log in with once you reinstall it.
Try the web version of Discord. If all else fails, you may still be able to access Discord via its website which can be used in any web browser. If the web version also doesn’t work, the problem is most definitely to do with Discord itself and you’ll just need to wait for it to come back online.
For a lot of people, the built-in Mail app on their iPhone or iPad is a perfectly fine way to get their email. But even though it’s easy to use and a fine, barebones email app, problems can still arise. People often run in to connection problems when sending or receiving mail, with those issues cropping up for reasons like a bad or missing internet connection or server errors.
Here’s what you can do to fix connection problems that might crop up in Mail on your iPhone or iPad.
Check your internet connection
First, you’re going to want to check to make sure you have an internet connection. Take a look at the top-left (iPhone 8 or earlier) or top-right (iPhone X) corner of your phone to make sure you’ve got an active cellular connection, Wi-Fi connection, or both.
If you need to connect to Wi-Fi or manage your connection, you’ll want to follow this guide for setting up and dealing with Wi-Fi on your iPhone or iPad.
How to manually configure your account
You might need to check various settings for your afflicted email account. Apple provides a tool that shows you what the proper settings for your given email address ought to be, Mail Settings Lookup. You can then enter these settings in the appropriate fields in the Accounts section of Settings on your iPhone or iPad.
- Open Settings on your iPhone or iPad.
- Tap Accounts & Passwords.
Tap on the mail account that you want to check.
Tap on a new SMTP server connected to the service you’re using (Gmail servers will look like ‘smtp.gmail.com’).
Tap Done.
Set a new IMAP Path Prefix or Server Port as needed.
How to delete a problematic account
If an account keeps giving you trouble, you can always delete it, then add it again to your iPhone or iPad.
- Open Settings on your iPhone or iPad.
- Tap Accounts & Passwords.
Tap the account that you want to delete.
Tap Delete Account.
You’ll then want to add the email account back to your phone, which you can set up using this guide:
Questions?
If you’ve got any more questions about fixing connection errors in Mail, let us know in the comments.
Recommended VPNs to use on iPhone
- ExpressVPN
- NordVPN
- Private Internet Access
- PrivateVPN
- Surfshark
If you have subscribed to a VPN but are having trouble making it work on an iPhone or iPad, this troubleshooting guide is designed to help. There are a few reasons why a VPN may not be working on an iPhone, and this article will give you tips for problem-solving each issue.
The tips we have provided in this article cater to commonly experienced problems. However, there are other provider-specific problems that may occur. If our advice does not help you to solve your connection issues; we strongly recommend that you contact your VPN provider’s customer support for help. If the VPN cannot help you, we recommend that you ask for your money back and subscribe to a recommended VPN for iPhones.
How to fix a VPN not working on your iPhone
Is your VPN not working on your iPhone? Here are some potential fixes. Just click the links for more information.
- Force restart your phone
- Update/re-download your VPN app
- Try another VPN server
- Check for account issues
- Check your VPN account for issues
- Reset your Wi-Fi settings
- Reset your phones IP address
- Manually set your VPN’s DNS
I’m using an older iPhone. Will this guide help me?
Admittedly, if you are using an obsolete Apple device that no longer receives iOS updates, your VPN application may simply not be compatible. If you are using an iPhone 7 or older, it may be necessary to check with your VPN provider whether their VPN client works on deprecated iOS versions (iOS 12.4.1 or earlier).
If you are using an older iPhone with an iOS version that is considered out of date, one option may be to connect using the third party OpenVPN Connect software. Check out our guide for details on how to install an iPhone VPN manually using OpenVPN Connect.
VPN is not connecting on iPhone? Try this.
There are several common reasons why your VPN may not be connecting. This includes issues with your account status, network settings, or app configurations. If your VPN isn’t connecting, we recommend that you start troubleshooting using the steps below.
Please Note
You need to check to see whether the VPN is working after completing each troubleshooting tip.
Force restart your iPhone.
Depending on your generation of iPhone, you will need to force restart by either holding down the power button and the home button at the same time, or the power button and the volume down button at the same time. For iPhone 8 and later, hold down the power button and then quickly press the volume up button and then the volume down button.
Update, delete and re-download your iOS VPN app from the App Store
Getting the latest version of the app will ensure that you aren’t having problems due to outdated software. Apps downloaded from the App Store should update automatically, but you can force the process manually by going into the App Store’s Account section in iOS 13+ or in the dedicated tab in older versions.
If this doesn’t fix the problems you are having, it is worth uninstalling the application entirely and re-downloading it from the App Store.
Try various VPN servers in various regions
If you have only attempted connecting to one VPN server, try a few more to check that it is not just a single server that is causing the problem.
Check for any issues with your account
Try to log in to your VPN through the provider’s website. If you can’t log in, it is possible that you are using the wrong password in the VPN app and need to reset it. If the password is fine, check that your VPN account is still active. If the account is no longer active, you may need to renew your subscription or contact the VPN’s customer support to find out why.
Reset your Wi-Fi network settings
This method has been known to fix connectivity issues for some users. However, it is only necessary if you are trying to connect to your VPN via WiFi.
On our iPhone or iPad go to Settings > General > Reset > Reset Network Settings
Reset your device level IP address
- Launch the Settings app on your iOS device and click on Wi-Fi in the left pane.
- On the menu that opens on the right-hand side, tap the (i) button to view the settings for the local network.
- Now, tap on Renew Lease at the bottom of the settings pane to reset your device’s IP address. Restart your iPhone or iPad to complete this procedure.
Set your VPN’s DNS address manually
This should not be necessary in most cases, and you will need to contact your VPN to find out exactly what DNS address to use. In addition, always ask your VPN whether they believe this is necessary before continuing.
When you have the DNS address, head to Settings > WiFi and click on the (i) next to your WiFi network. Next, Tap Configure DNS, select Manual and then tap Add Server to enter the DNS address provided by your VPN.
10 Best VPN Apps For iOS (iPhone and iPad) in 2022
10 Best VPNs for Mac in 2022 | VPN software for MacOS
The best free VPNs for iPhone and iOS users
VPN is disconnecting when going from a WiFi to LTE Network
When traveling from place to place, it is possible that you will encounter a VPN hang-up. This can happen when moving around on 4G or switching from a WiFi hotspot onto your 4G mobile data. This can cause the VPN to get stuck in an endless loop of trying to reconnect. To fix this issue:
- Head to Settings >Cellular on your iPhone and turn off the switch next to Cellular Data.
- Now turn it back on and try reconnecting to your VPN.
How to test a VPN on iPhone
If you are experiencing issues with a VPN on your iPhone, then it’s always a good idea to test your VPN to ensure it is working as it should. The most important things that you need to check for are IP leaks, DNS leaks, and Web RTC leaks.
VPN leak test
If a VPN is leaking, it is not providing privacy.
- IP leaks will allow the websites you visit to know where you really are.
- DNS leaks allow your Internet Service Provider to track the websites you are visiting.
- WebRTC leaks give away your location to the services you visit.
All three of these leaks are a massive problem, and if your VPN has them, it is essential that you either fix them or subscribe to a different VPN.
To help you out, we have created a comprehensive VPN leak tool that is designed to check for all of these kinds of leaks. Technophobes don’t need to worry, as it is easy to use and requires you to have no prior experience of using leak tools. As a result, you can head straight over to our tool to find out if your VPN is working as it is supposed to.
Written by: Ray Walsh
Digital privacy expert with 5 years experience testing and reviewing VPNs. He’s been quoted in The Express, The Times, The Washington Post, The Register, CNET & many more.
A connection reset message can be caused by several situations, but they all mean the same thing. The link between your web browser and the webserver you are trying to reach is blocked or not working. You can troubleshoot some of this path but not all of it.
There are a few things you can do to fix ‘the connection was reset’ errors. This article shows you the most effective ones.
How to Fix ‘The connection was reset’ Errors
Before fixing ‘Connection was reset’ errors, you need to know roughly where to begin looking. Follow these steps to determine if it is your computer, network, or further onto the internet.
- Try a different website – if you can access other websites, chances are that it is the destination web server causing the problem.
- Try a different browser – Chrome, Firefox, Safari and Edge all work in different ways to achieve the same goal. If one browser gives the error but others don’t, it is possibly a config problem with the browser.
- Reboot your computer—numerous networking issues can be fixed be rebooting your computer, especially if you’re a Windows user.
- Reboot your modem or router—the same for your network hardware. Reboot everything in case there is a DNS or config issue.
Assuming it isn’t the destination web server, your browser, or your ISP causing issues, and you have performed all four steps, you could try some of the following solutions.
If you find that your browser is the problem, you can reset it to default to clear any configurations you made. If that doesn’t work, uninstall and reinstall it again. Read this page for instructions on resetting your browser to its defaults.
Flush the DNS cache
If you use Windows, flushing the DNS cache can work wonders for all manner of problems accessing websites. It takes a second and will not harm anything else, so it is usually the first thing to try.
- Open a CMD window as an administrator.
- Type or paste ‘ipconfig /flushdns’ and hit Enter.
- Type or paste ‘ipconfig /release’ and hit Enter.
- Type or paste ‘ipconfig /renew’ and hit Enter.
The above steps force Windows to drop the DNS cache from memory and reset your IP address. The “flushdns” command is the most useful here. If the above process does not solve your connection reset problem, try resetting Winsock.
Winsock Reset
Again for Windows users, a Winsock reset will clear the Windows Sockets API that interfaces between the operating system and TCP/IP. Occasionally, this leads to errors or becomes corrupted and requires a reset.
- Open a CMD window as an administrator.
- Type or paste ‘netsh winsock reset’ and hit Enter.
- Wait for the command to complete and reboot your computer.
Winsock is legacy tech but still causes issues at times. If it is the API, this process will fix it.
Check Network Settings
Even if you have never made changes to your network settings, you should check them next to ensure no program has done the same. If you use a firewall, VPN software, or other networking or security tool, changes may have occurred without you being aware.
If you have manually configured IP addresses for each device, make a note of them, then try the steps below. You can add your manual configuration back afterward if you need to.
- Open Settings, Network & Internet and select Change adapter options.
- Right click your network adapter and select Properties.
- Select Internet Protocol Version 4 in the center box then the Properties button.
- Ensure both Obtain IP address automatically and Obtain DNS server address automatically are both selected.
- Select the Apple menu, System Preferences and then Network.
- Select your active connection on the left.
- Ensure Configure IPv4 is set to Automatically and not Manually.
- Select Apply if you made changes.
Disable IPv6
Disabling IPv6 isn’t generally recommended as more devices are beginning to use it, but many Windows users do it when they have issues with networks while running.
- Open Settings, Network & Internet and select Change adapter options.
- Right click your network adapter and select Properties.
- Uncheck the box next to Internet Protocol Version 6 in the center box.
- Select OK.
Those are the most effective ways I know to overcome ‘the connection was reset’ errors. Got any other solutions that you know work? Tell us about them below if you do!
Some iPhone and iPad users have updated to iOS 14 and iPadOS 14 and discovered wi-fi issues that did not exist before the update, whether it’s that a wireless network suddenly doesn’t work, or the connection is dropping, abnormally slow, or some other wi-fi difficulty. Considering that nearly everything relies on the internet these days, having wi-fi problems and connectivity issues can be very annoying, so resolving wireless network difficulties is of the utmost important.
This article is going to walk through various steps to troubleshoot wi-fi problems that may be encountered with iOS 14 and iPadOS 14 on iPhone, iPod touch, and iPad.
0: Install Available Updates to iOS / iPadOS
The first thing you should do is check for and install any available updates to iOS or iPadOS. For example, iOS 14.0.1 and iPadOS 14.0.1 was released and includes a fix for wi-fi issues, and that may resolve your problem.
Always check for available system software updates first, as they often include bug fixes which may resolve the problem you are experiencing. This is done by going to Settings > General > Software Update.
Don’t forget to backup your device before installing any software updates as well.
1: Reboot the Device
Sometimes a simple reboot of the iPhone or iPad will resolve connection issues.
You can either soft reboot or hard reboot. A soft reboot means turning the device off, then back on again. A hard reboot is forcing the device to restart, and the procedure for that varies per iPhone or iPad.
For newer iPhone and iPad models, like iPhone 11, XS, XR, X, 8, and iPad Pro, press Volume Up, Volume Down, then hold the side Power button until the device restarts with an Apple logo.
For older iPhone and iPad models with clickable Home buttons, holding the Home button and Power button at the same time until you see the Apple logo will force restart the device.
For iPhone 7 and 7 Plus, hold Volume down button and Power button until the device restarts.
2: Forget the Wi-Fi Network, Toggle AirPlane Mode, then Rejoin
- Open the Settings app, then go to “Wi-Fi”
- Find the wi-fi network you’re connected to, then tap the “I” button next to the network name
- Tap on “Forget This Network”
- Exit out of Settings
- Turn on AirPlane Mode by pulling down Control Center and tapping the AirPlane icon (or by activating it from Settings), leave it on for a few seconds, then turn AirPlane mode back off again
- Return to the Settings app and go back to “Wi-Fi”
- Re-join the wireless network you were previously connected to
3: Reset Network Settings
A common resolution for networking issues is to reset the network settings on the device. The downside to this is that it loses saved wi-fi network passwords and other customizations to network settings, so be prepared to re-enter that info if needed:
- Go to “Settings”, then to “General” and to “About”
- Go to “Reset”, then choose “Reset Network Settings”
- Confirm to reset network settings
4: Disable Private MAC Address
If the wi-fi problems are only happening on a specific network after updating to iOS 14 or iPadOS 14, you may also try disabling the Private Address feature, which randomizes MAC addresses when joining wi-fi networks.
- Open the Settings app, then go to “Wi-Fi”
- Find the network you’re connected to, then tap the “I” button next to the network name
- Toggle the switch with Private Address to the OFF position
5: Delete or Disable VPN, Reinstall VPN
If you’re a VPN user and experiencing wi-fi issues, sometimes disabling, deleting, and reinstalling that VPN can be resolve the issue. You may notice the VPN logo flickers in the corner of the devices screen, but there’s not always and obvious indicator that this is to blame.
To disable a VPN, go to Settings > VPN > toggle the switch OFF
That alone may work for some users. If it does, be sure to update the VPN app from the App Store, or contact whoever your VPN is run through to find additional troubleshooting steps from them, as there may be configuration issues with the VPN.
To delete a VPN, go to Settings > General > VPN > tap the (i) button next to the VPN, then tap on “Delete” and confirm.
Of course if you delete a VPN it will no longer be usable, so you’d need to add one again, either by reinstalling the relevant VPN app, or by re-configuring it again if you have a manually configured VPN.
Did the above troubleshooting tricks resolve your wi-fi problems with iOS 14 or iPadOS 14? Did you find another solution? Share with us your experiences and thoughts in the comments below.
Ever since the iOS 9.3 has come up, the iPhone SE is facing several issues, most of them are related to WiFi and 4G/3G data connectivity. In this guide checkout how to fix iPhone SE WiFi problems and connection issues for A1662, A1723, A1724 models.
iPhone SE WiFi Problems
WiFi connectivity problem is one of the most common problem found on any iPhone. The problem continues with iPhone SE as well. This is certainly annoying because you have invested a good sum of $400 on this little iPhone which is considered to be the most powerful 4 inch smartphone ever manufactured.
If you own iPhone SE and facing WiFi or data connectivity issues, then you can try the following fix WiFi issue troubleshooting guide –
Check with WiFi Router or Channel
To troubleshoot, we will definitely start with the source. First of all checkout whether your WiFi router has any problems or not. Also checkout whether it’s just your device or any other smartphone having the same the issue. Also checkout whether your ISP has the connection up and running without any disconnections.
Also Read – Best Docking Station for iPhone SE
If you iPhone SE is showing the following symptoms then changing the WiFi Channel will be the best idea –
- Poor WiFi signals
- Slow WiFi
- iPhone SE disconnects from WiFi networks
- Connects but unable to browse
Changing WiFi Channel
Any WiFi router has the ability to change the broadcast channel. You can change values from 1 to 8. Try changing that and see whether the iPhone SE data connection issue has been resolved or not.
iPhone SE Reset Network Settings
If at all above guide of changing the WiFi channel doesn’t work then you will have to reset network settings on your device. This will wipe out all the settings related to network and you will have to start a fresh connection with your WiFi device.
Just follow the process mentioned below to do it –
- Open Settings.
- Now go to General and then tap on Reset.
- Now you will find the option of Reset Network Settings, just tap on it.
- Confirm the action.
Now reboot your iPhone and try to connect your device to the same WiFi network
iPhone SE Software Update
If you are facing this issues very recently, then possibly that the minor iOS update might have brought this issue on your device. You can either wait for the next iOS incremental update or restore your iPhone to stock firmware again. I would suggest please wait for the upcoming iOS update to the issue fixed.
This post was last modified on June 7, 2020 11:27 PM
iCloud is an integrated part of all macOS and iOS devices. It not only syncs and stores data but has useful tools like Find My to locate lost devices and other apps. And it even works on Windows and Android devices. It should be easy to connect to iCloud with your Apple ID.
But some people experience errors connecting to iCloud that look like this “Verification Failed. There was an error connecting to iCloud.” Don’t worry. Most iCloud issues are extremely easy to solve. You just need to try out one of these six simple ways to fix iCloud errors.
What’s Causing Errors Connecting to iCloud?
These are some of the most reasons why you might be experiencing an error connecting to iCloud.
1) Check Your Internet Connection
You must be connected to the internet to use iCloud. If you’re somewhere with a bad internet connection or other activities are consuming too much bandwidth, then you might have an error connecting to iCloud.
Be sure you also haven’t set your settings to work on WiFi only if you’re trying to access iCloud via a cellular connection.
2) Change in Apple Terms of Use Agreement
Apple updates its terms of service a few times per year. If you haven’t accepted these updates, you might not be able to access iCloud. Click on your settings in Apple and check if you have any notifications from Apple. You may also need to do this on your computer via iTunes.
3) Are Your Login Credentials Correct?
It seems obvious, but an incorrect password or username will prevent you from connecting. If you’ve updated your password but haven’t done so in your iCloud keychain, you won’t be able to access it.
Try out your AppleID using another browser or device to see if it works. If you’re able to login in and access iCloud, then you’re likely facing a connection issue actually.
You may still get an authentication error even if you entered the right credentials. If this is the case, try logging out and logging back into your device again.
4) Is Your iCloud Storage Full?
Apple only gives your 5 GB of iCloud storage for free. For most people, this doesn’t last long since iCloud stores iPhone backups, photos, emails, and much more.
If you run out of space, you may face an error connecting to iCloud. You have two options here. You can either clear some space in your account or buy more storage. Learn more about how to clear iCloud storage here. Current pricing for extra iCloud capacity is:
- 50 GB: $0.99
- 200 GB: $2.99
- 2 TB: $9.99
How to Quickly Fix An Error Connecting To iCloud
Since iCloud is a cloud-based service, it’s extremely unlikely problems will be coming from Apple. It’s more likely a device or internet issue. Run through this quick checklist to see if you can get back into iCloud:
1) Toggle Airplane Mode on and off.
Turning on Airplane engages a soft reset. This should be able to fix most connection issues for your iOS device unless you have bandwidth problems.
2) Reset Network Settings
If the last step didn’t help you, then Go to Settings > General > Reset > Reset Network Settings. Then connect to your WiFi router again.
3) Check for other devices or bandwidth issues
If you’re trying to sync too many photos and videos at once or streaming 4K Netflix while gaming or doing all of this at once, you’re likely choking your bandwidth, creating iCloud connection errors. Disable these device connections then reboot your iCloud connection.
4) Do a Fresh Login with Account Verification
If Apple has updated its terms of service of agreement, you may have been logged out of your iCloud account. You’ll need to log in again using account verification tools. This may require you to entire a one-time password and other tools you enabled.
After logging in, check your payment information. Issues here may also cause connection issues.
5) Update
If you ever have problems with iCloud, such as this error connecting to iCloud, or any app for that matter, an update can work wonders.
Updates are issued for two reasons: to fix errors and security vulnerability. Check and make sure you are using the latest version of iOS, iPad OS, or macOS.
After updating, try logging into your account again.
6) Apple ID is locked or Disabled
If someone or you have entered your password or security questions incorrectly too many times, Apple may automatically lock your AppleID to protect your security. You won’t be able to sign in to any Apple services until this is fixed. You’ll need to unlock your Apple ID before you’re ready to log in iCloud again.
I’m Still Having An Error Connecting to iCloud: What Should I Do?
If none of these solutions are working for you, you’ll need to contact Apple experts by phone or at an Apple store. They can help you unlock your account or solve other issues that may be creating your errors connecting to iCloud.
The Bottom Line: Fixing iCloud Connection Errors
Most iCloud connection errors are very easy to fix. They generally result from either network connection or account issues. Reboot your device and make sure you’re running the latest operating system and apps. Be sure also to check that your account is currently in good standing with Apple.
If none of these easy tips help you, then you may need to contact Apple support for more help. We have more guides to troubleshooting iCloud on our blog. Learn what you need to do if your iCloud storage is full in this guide. We can also help you remove iCloud locks if you’re blocked from your account for some reason. For all this and more, visit the Buyback Boss blog now.
Bluetooth is what your Mac uses to connect to wireless devices like keyboards, mice, trackpads, speakers, and other peripherals. Generally, it’s a reliable technology. At some point however, the chances are you’ll run into difficulty establishing a Bluetooth connection with one or more of your devices.
Most problems can be fixed by unpairing and repairing the Bluetooth device, changing its batteries, rebooting your Mac, or performing an SMC reset. But if none of these methods work, you can always try resetting your Mac’s Bluetooth module. Here’s how to do it in macOS using the hidden Bluetooth Debug menu.
How to Reset Your Mac’s Bluetooth Module
Before proceeding, bear in mind that if your setup relies exclusively on Bluetooth for communicating with your keyboard and mouse, then you’re going to temporarily lose connection to them using the following methods, so you might want to have a backup wired input device option just in case.
- Holding the Shift + Option (Alt) keys on your Mac’s keyboard, click the Bluetooth symbol in the top-right corner of the macOS menu bar. (If you don’t see it there, you need to check Show Bluetooth in menu bar in System Preferences -> Bluetooth.)
Locate the revealed Debug submenu and hover your mouse cursor over it.
Click Reset the Bluetooth module.
You’ll notice a couple of other potentially useful options in the Debug submenu. Factory reset all connected Apple devices does exactly what it says – forces any Apple-branded Bluetooth accessories back to the default settings they came with out of the box. It’s a reliable fallback option if you’ve tried everything else to fix a connection issue, including resetting the Bluetooth module.
Lastly, the Remove all devices option might prove useful if you’re moving your Bluetooth mouse and keyboard to another Mac, for example. However, you can also remove devices on an individual basis from the macOS menu bar, as long as you hold down Shift + Option (Alt) before you click the Bluetooth symbol.
Removing devices in this manner means you’re not also banishing a whole bunch of other established Bluetooth connections like speakers and so on that you might want to keep.
This article will look at what happens when you reset the network settings on your iPhone.
Most people are hesitant to do it because they fear losing the data on their devices. At the end of this article, it is our hope that you will be able to determine if resetting your network settings is the ideal solution.
Let’s get started.
What Does Reset Network Settings Mean on iPhone
Resetting the network settings on your iPhone will bring all network-related settings to their default state. Your network settings will go back to the way they were when you first purchased the device.
Resetting the network settings will affect network settings such as Wi-Fi, Bluetooth, VPN, and cellular connections. Once the network reset is complete, you will have to set up these settings again.
Resetting the network settings on your iPhone will however not affect the hotspot settings, wireless display, or AirDrop.
When to Reset Network Settings
Resetting the network settings on your iPhone can be useful in the following situations:
- When the iPhone fails to connect to Wi-Fi or when Wi-Fi will not work properly.
- When you are having trouble connecting to Bluetooth devices or when Bluetooth doesn’t work.
- When you are unable to make or receive calls.
- When there is no signal on your iPhone.
Will You Lose Personal Data?
No. You will not lose any of your personal data when you reset the network settings. All your photos, contacts, messages, apps, videos, and other types of data will remain on the device.
Is Resetting Network Settings Bad?
Considering that resetting the network settings can be the best solution when you are having problems with the device’s connections, it can’t possibly be a bad thing. While you will have to enter the Wi-Fi passwords that you were using before, you will not lose any of the data on your device.
Tips to Try Before Resetting Network Settings
If you would rather not lose all your network settings, the following are just some of the solutions you can try when your device is experiencing connection issues;
1. Toggle Airplane Mode
Putting your iPhone in Airplane mode for a second or two has been known to jumpstart connections that may be problematic. Here’s how to do it;
Step 1: Open the Settings on your iPhone and then toggle Airplane Mode to “ON.” You will see that the Airplane mode icon is enabled and Wi-Fi has been turned on.
Step 2: Wait at least a minute ad then toggle the switch to “OFF” to disable Airplane Mode and get Wi-Fi working again.
Check to see if your connections are working again. If they are not, try the next solution.
2. Restart the iPhone
Step 1: Press and Hold down the Power button for a few seconds.
Step 2: Drag the “Slide to Power off” slider on your screen to the right to turn off the iPhone.
Step 3: Wait a few seconds for the iPhone to power down completely and then press and hold the Power button again until the Apple Logo appears and the device powers on. You may need to enter the device’s passcode to complete the restart.
Now check if your network connections are back online.
3. Forget and Reconnect to Wi-Fi Network
If you are still unable to connect to your Wi-Fi networks, it may help to forget the network and then reconnect to it. Here’s how to do that;
Step 1: Open Settings and then tap “Wi-Fi.” You should see the name of the Wi-Fi network that you are trying to connect to.
Step 2: Tap on the “I” icon to the right of this network.
Step 3: Select “Forget this Network” and tap “Forget” to confirm. Doing this will disconnect the device from any network and take you back to the screen with the available networks.
Step 4: Tap on the network that you would like to connect, enter the password, and then tap “Join.”
How to Reset iPhone’s Network Settings
If your connection problem persists, then you will need to reset the network settings. Follow these simple steps to do it;
Step 1: Open the Settings app on your iPhone
Step 2: Select “General.”
Step 3: Scroll down to find and then tap on “Reset.”
Step 4: Select “Reset Network Settings” and if prompted, enter your device’s passcode.
Step 5: Tap “Reset Network Settings” to confirm.
The iPhone will restart, it should connect to the cellular networks automatically, but you will have to rejoin the Wi-Fi networks to connect to them.
Android 10 officially came out in September 2019 with no groundbreaking improvements and a bit different aesthetic approach. Now, we all know about Android fragmentation and the fact that some OEMs still haven’t updated numerous supported devices. But, one possible reason for that is polishing. And some Android 10 users reported various Wi-Fi issues.
If you have any Wi-Fi issues on Android 10, make sure to check the steps we provided below and, hopefully, resolve the problem.
Table of contents:
- Forget the network and connect again
- Check your router/modem
- Disable Bluetooth temporarily
- Check Network settings
- Reset Network settings to default values
- Stick to 2.4GHz frequency for the time being
- Update the firmware on router and phone
- Reset your device to factory settings
Can’t connect to WiFi after Android 10 update
If you can’t connect to Wi-Fi after updating to Android 10, make sure to reboot your phone and router. Alternatively, you can switch to 2.4GHz Wi-Fi frequency and update your router’s firmware.
Check these and other troubleshooting steps below.
Solution 1 – Forget the network and connect again
The first step to try in order to fix connectivity issues on Android 10 is to forget the network and try reconnecting again. Additionally, restart your phone and router. Some kind of IP conflict might be the cause of the problem and, by following the aforementioned steps, you should be able to address the problem most of the time.
Follow these steps to forget and reconnect to your wireless network:
- Enable Wi-Fi from the Quick Access bar.
- Open Settings.
- Open Wi-Fi or Network Settings > Wi-Fi.
- Select the troubled SSID and tap Forget Network.
- Reboot your device.
- Connect to your SSID and enter the password.
Solution 2 – Check your router/modem (disable WPA + WPA2)
Most reports point out that every other device connects without issues except their smartphone. This is, most of the time, caused by the device itself. However, for the sake of troubleshooting, we can also suggest inspecting your router settings.
Google how to enter your router settings and ensure that your smartphone MAC address is not blocked. Additionally, some users suggest disabling WPA + WPA2 security and sticking to just WPA. Alternatively, you can disable passwords completely for your SSID just to check it out.
Finally, you can also reset your router to factory settings and look for improvements. If your smartphone still won’t connect to Wi-Fi after these steps, continue to the next step.
Solution 3 – Disable Bluetooth temporarily
This might sound weird but if it works, it works. Some users managed to connect to wireless as usual, without any issues, by simply disabling Bluetooth. It seems that there’s a bug on certain models (Pixel devices among others) that appeared after the Android 10 update.
And, weirdly enough, disabling Bluetooth while on Wi-Fi worked like magic. In case NFC is available, we recommend disabling it, too. Give it a try and look for a resolution.
Solution 4 – Check Network settings
The next step is to thoroughly inspect Network settings on your device. Make sure that to use randomized MAC and DHCP. Additionally, disable proxy if there’s any.
You can find the aforementioned settings by navigating to Settings > Wi-Fi or Settings > Network Settings > Wi-Fi. If you had to change some of the settings, reboot your device and try reconnecting.
Solution 5 – Reset Network settings to default values
One of the steps that’s frequently recommended is to reset your network settings to factory values. This will remove saved SSIDs and paired devices (via Bluetooth) but it should address the problem at hand.
If you are unsure how to reset Network settings on Android, follow the steps below:
- Open Settings.
- Choose System or General management.
- Tap Reset.
- Then select Reset Network Settings.
- Confirm the selection.
Solution 6 – Stick to 2.4GHz frequency for the time being
Another important thing to consider is that some affected users were not able to address the problem until they switched their router to 2.4GHz frequency instead of the 5GHz one. It seems that, after the Android 10 update, the 5GHz frequency Wi-Fi stopped working.
So, navigate to your router settings again and enable the 2.4GHz mode instead of the 5GHz one. At least for the time being.
Solution 7 – Update the firmware on router and phone
As we already stated, this is in most cases the problem with the device. The problem caused by the major Android update which is Android 10. Thanks to a community, it seems that Google patched the problem that occurred on Pixel devices.
In addition, it might be that the router is not up to date so we recommend updating its firmware as well. Check your router settings and update the firmware to ensure that the latest firmware version is installed.
Solution 8 – Reset your device to factory settings
Finally, if none of the previous steps helped you address the problem at hand, you can try and reset your device to factory settings and start from scratch. We are aware that this might be a time-consuming procedure and you’ll lose all of your data from the internal storage in the process.
Sadly, it’s the last thing we can recommend. If you are not sure how to reset your device to factory settings, make sure to follow the instructions below:
- Back up your data from the internal storage (photos can be saved to Google Photos, other media can be saved to an external storage or a PC).
- Navigate to Settings > System > Reset.
- Select Factory data reset.
- Follow instructions to reset your device to factory values.
And, with that, we can conclude this article about Android 10 Wi-Fi issues. Thank you for reading and make sure to share any alternative solutions we forgot. The comments section is just below.
Every so often, you might end up with two devices on your Wi-Fi network that have the same IP address. This conflict can cause a plethora of problems with trying to use the internet on any of the devices affected.
Fortunately, there’s a really easy to way reset your IP addresses on your iOS devices or Macs, and in this tutorial, we’re going to show you how!
Fixing an IP address conflict in iOS or OS X
IP address conflicts can happen on your computer, no matter what operating system it’s running, as well as your mobile devices. They can be a huge pain in the rear because they can cause your browser to request a website for ages without actually loading anything, and it can cause connectivity issues.
If you’re using an iOS device, and you’re having issues loading web pages or downloading things from the internet even though you have a full internet signal, you may be experiencing an IP address conflict. In this situation, your wireless router will just be too confused to accomplish anything because two devices with the same IP address will be trying to do things on the same network.
This is easily fixed by renewing your DHCP lease, which is a feature built into the Wi-Fi settings. We’ll break this up into two sections for you below; the first for iOS, and the second for your Mac.
Renewing your DHCP lease on your iOS device
We’ll start by showing you how this is done on your iPhone, iPod touch or iPad. Here are the steps:
1) Launch the Settings app from the Home screen and navigate to Wi-Fi.
2) On the right side of your wireless network, tap on the i button to bring up the settings for your Wi-Fi network.
3) Tap on the blue Renew Lease button at the bottom of the settings pane to reset your device’s IP address and to refresh your connection to the wireless router.
That’s all there is to it! If you had an IP address conflict, this will have solved the issue and your websites and other internet business should start to load properly again.
Renewing your DHCP lease on your Mac
Just like on your iOS devices, your IP address can become a conflicted one even on your expensive Mac. Fortunately, it too comes with a similar function from its Wi-Fi settings. Here are the steps to renew your DHCP lease on your Mac:
1) Launch the System Preferences app on your Mac and open the Network preferences pane.
2) Now, make sure you have Wi-Fi selected on the left side of the preferences pane and you’ll click on the Advanced button at the bottom right of the window.
3) In the next window, click on the TCP/IP tab and then click on the Renew DHCP Lease button on the right side of the preferences pane.
That’s all there is to renewing your DHCP lease on your Mac. Your Mac will now acquire a new IP address and reconnect to the wireless network. You should then be able to resume your typical web activities without any issues.
Conclusion
It’s not very often that your wireless router will goof up and assign multiple devices the same IP address, but it happens on occasion, and it’s happened to me many times in the past. Fortunately, this key piece of information will give you the power to put an end to it whenever it happens to you.
Also read:
If you found this tutorial helpful, let us know in the comments below!
Sometimes, you just don’t feel like typing—which is where speech to text comes in. Usually, it works pretty well…but there have been a few times when we at iGeeksBlog noticed that dictation was not working on our iPhones.
We think this issue warrants some iOS troubleshooting tricks, so we put this list together. Give them a chance if you’ve come to this hurdle yourself with the hopes of quickly getting past it.
These first two solutions apply if Dictation’s microphone icon is grayed out.
1. Turn off/on Cellular Data or Wi-Fi
Apple’s speech to text feature requires a stable internet connection to function properly. If your device isn’t connected to the Internet, the microphone icon turns gray.
So, make sure your iPhone or iPad has a proper internet connection.
- Open Settings→ Cellular or Wi-Fi. Then, turn off the switch.
- Next, restart your iPhone.
- Once your device reboots, turn Cellular or Wi-Fi back on.
After that, open an app like Messages or Notes and try to use Dictation as usual. It should work now. If Dictation is still not working on your iPhone, move on to the next solution.
2. Reset Network Settings
What if Dictation’s microphone icon is still grayed out after you refresh your internet connection? There could be some latent network issues on your device.
Don’t worry, there’s a reliable way of fixing them by resetting your iPhone or iPad’s network settings.
- Open Settings on your iOS device → General → Transfer or Reset iPhone.
- Tap Reset → Reset Network Settings and enter your passcode to confirm.
Now, try to use Dictation as usual. If the microphone icon was grayed out, the problem should be gone now.
Note: This next solution applies if Dictation’s microphone icon is missing entirely.
3. Make sure Siri & Dictation aren’t restricted
Does your keyboard not show the microphone button? If that’s the case, we know the likely culprit after going through this ourselves a few times now.
Maybe you’d restricted Siri & Dictation for one reason or another and forgot to lift the restriction, or maybe your kid unknowingly messed with the Dictation settings.
Whatever the case may be,
- go to Settings → Screen Time → Content & Privacy Restrictions → Allowed Apps.
- Now, make sure the toggle for Siri & Dictation is set to on.
Note: If the microphone icon isn’t grayed out but you still can’t use Dictation on your iPhone or iPad, give the next solution a try.
4. Give Siri & Dictation a fresh start
In this scenario, Dictation doesn’t seem to work even when there’s no problems with internet connectivity, and the microphone icon isn’t grayed out either.
In such a case, a fresh start for both your iPhone and its Siri & Dictation settings could do the trick.
- Open Settings on your iOS device → Siri & Search.
- Now, turn off Listen for “Hey Siri” and Press Home/Side Button for Siri.
Then, disable Dictation. To do so,
- Head over to Settings → General → Keyboard.
- Toggle off Enable Dictation.
Next, force restart your device. The process is a little different depending on your iPhone model—check out this guide on force restarting if you need help.
After your device restarts,
- Go back to Settings and turn on Listen for “Hey Siri” and Press Home/Side Button for Siri.
- Also, enable Dictation.
Now, check out if you have finally eliminated the problem. If your iPhone’s Dictation still isn’t working, you have a few solutions left to try.
5. Update your device to the latest iOS version
If you haven’t been able to fix the issue yet, we suspect the problem could well be due to an adamant software bug. To get rid of it, update your device to the latest version of iOS.
Go to Settings → General → Software Update. After that, Download and Install the available update (if any).
6. Check your microphone
Record yourself in a voice memo, or give a friend a call and ask if you sound muffled. If it’s confirmed that your microphone sounds blocked, it’s the likely cause of Dictation not working on your iPhone or iPad.
You’ll want to locate your device’s microphone and gently clean it out using a cotton swab and some isopropyl alcohol. You can also use the process detailed in our guide on fixing your iPhone’s microphone.
After your mic is all clean, test it out again in a voice memo or call. If it works, give Dictation a try; hopefully it works.
7. Restore your device as new
In most cases, a software update is a sufficient fix to the problem, but if it fails, it’s time to restore your device as new.
Yes, it’s a tedious procedure that no one wants to get into. But then again, we shouldn’t leave any stone unturned in the search of a fix. So, give it a try as well. To get it done, head over to this hands-on guide.
Wrapping Up…
We hope you learned what to do if Dictation isn’t working on your iPhone, and if you didn’t find a fix that worked for you, let us know; we want to help! Leave more details about your situation in the comments below and we’ll do our best to find you a solution.
Have any other Apple-related questions? Leave those in the comments as well.
by Sophie Green Updated on 2021-10-30 / Update for Fix Android
APN or Access Point Name settings are for advanced level mobile users which requires a stable internet connection to work along. It can be defined as the essential information needed to connect your phone to the internet that contains your android device address that can be used to have the internet connection.
At times, the APN settings on your android device may get locked or greyed, causing it to not get modified or changed. Through this post, we will discuss all the work-around to modify APN settings with ease!
Part 1: Why Can’t I Change My APN Settings?
Sometimes, APN settings on your device for a particular carrier may be “locked” such that they are “grayed out” and can’t be modified. This is often an indication that they have been set by your currently connected carrier and that you shouldn’t need to modify them. Below are the common APN setting problems on Android.
- Not able to edit the existing access point names.
- Not able to add the new APN –- the + sign or the “add” option is missing.
- Not able to save the APN settings.
- APN settings not available for the current user profile.
When this happens, it’s a clear cut indication that the settings have been set by the connection carrier which cannot be changed or modified. But, in few cases, these settings can be changed by following some easy steps.
Part 2: What to Do When You Can’t Change APN Settings?
In some cases, these settings can be changed by following some easy steps. The below steps will guide you to resolve the concern leading to unable to change APN settings!
1. Fix unable to change APN settings by resetting to default
Resetting to the default will help undo the settings that your carrier has made on your device and will return to the original settings set by the manufacturer. The below steps will guide you to change the APN settings manually:
- Navigate to your phone Settings and select the “Wireless and Network” option.
- From Wireless and Network settings, click on the Mobile Networks option.
- Now, scroll down the page a little and select the “Access Point Name or APN” option.
From here, click on the three dots on the upper right side of your device’s screen and select the Reset to default option.
Note: The APN settings are there in the SIM. in case, you are unable to find it, consider getting in touch with your telecom operator to hello you out. The operator will make you fill all the fields related to your SIM and once it’s done, click on Save to set up the APN on your android device.
2. Activate Airplane mode on your phone to change APN settings
Sometimes, your carrier customized settings are restored while resetting the APN. To prevent the carrier from auto-completing the APN settings, airplane mode works out.
- Go to your device Settings.
Select Airplane or Flight mode from there, by activating or enabling it using a slide button.
3. Remove the SIM card to change APN settings
In case the Airplane mode doesn’t work for you to change the APN settings then consider removing your SIM and then follow the below steps:
- Navigate to APN settings and change them accordingly.
Insert the SIM and restart your android device. Doing so should be able to fix the concern you are facing.
4. Restart Your Phone While Connecting to Wi-Fi to change APN settings
You can also simply restart your phone to fix unable to change APN settings Android issue. Follow the below steps to restart your phone and then change the APN settings:
- Connect your phone to your Wi-Fi.
- When trying to connect to the network, restart your mobile phone.
- When your phone restarts, it will be automatically connected to the previous network.
- After this, go to APN settings to check whether you are not able to edit or view.
5. Restore Your Android Phone and Start Afresh to change APN settings
If you are not able to change the APN settings on your android phone, the last option is to use an Android repair software to repair Android OS.
We recommend using Tenorshare ReiBoot for Android as it is a professional and user-friendly Android repair tool that is capable of fixing numerous Android issues such as Android black screen and Android app crashing seamlessly, etc.
Download and install this tool on your computer. Connect your android device to your computer and click on the “Repair Android System” option.
Now, select “Repair Now” and then select your device information in the list.
Then, after selecting the device information from the list, the firmware package will begin to download and the process will take a few minutes to finish.
After a successful package download, click on “Repair Now” and wait for the entire process to get over.
Conclusion
When you are unable to change the APN settings on your android device, you are restricted from editing existing access points, adding new APN like “+” or “Add” while not being able to save APN settings. The above-given methods will help you in changing the APN setting on your device and let you perform your tasks without worrying!
Updated on 2021-10-30 / Update for Fix Android
There are a few steps you can follow to avoid OneNote sync issues on a mobile device:
Check and make sure OneNote is running in the foreground.
Logout and log back in to OneNote to reset your credentials and avoid authentication problems.
Force a OneNote to sync
In Microsoft OneNote for iOS, go to Settings on your device:
On an iPad, tap the gear icon in the upper right corner.
On an iPhone, tap the ellipsis ( . ) icon and then tap Settings.
Open OneNote, tap the back
On the Settings screen, under Account, tap the account name.
Tap the account name again and then choose Remove Account.
Accept the notification that appears to confirm signing out.
Double tap the device’s home button, and swipe up on the OneNote app to close it .
Start OneNote and sign in to your account.
Force Syncing for iOS
There are no options to force sync a notebook in OneNote for iPad or iPhone.
Open OneNote and then on the bottom left, tap Notebooks.
Tap the three-dots menu in the upper right corner of the screen, and choose Settings.
Tap Sign Out, and then click OK.
Tap the recent apps button on the bottom of the screen (the one to the left of your Home button), find the OneNote app and swipe it sideways to close it.
Start OneNote and sign in to your account.
Force Syncing for Android phone
In OneNote, find the notebook that’s experiencing the sync issues.
Tap the three-dots menu in the upper right corner of the screen, and choose Sync (account name) notebook.
Tip: To sync all notebooks, go to the list of notebooks. Tap the three-dots menu and then choose Sync all.
Leave the device on until the sync is done. You may have to leave the device on overnight, especially in the case of very large notebooks or first-time syncs.
Alice MJ
Apr 27, 2022 • Filed to: Fix iOS Mobile Device Issues • Proven solutions
- Part 1: Have you ever faced any reception problem when using your iPhone?
- Part 2: Fix iPhone reception problems by yourself
Part 1: Have you ever faced any reception problem when using your iPhone?
It can happen to have problems with signal reception when you use the iPhone and receive messages on display like “No Service”, “Searching for Service”, “No SIM”, “Insert sim card”. Also, there could be issues with Wifi signal or unrecognized internet networks even you know and you receive them to other devices. The reception issues could be caused by your iPhone device or by your service provider. If it is a brand new iPhone, you should go to the store where you bought it and change it. Yes, I know it is uncomfortable because you want to enjoy immediately by your iPhone. But, trust me, you avoid upcoming issues. Another case could be that you have signal everywhere else, but not at your home. In this case you should contact your service provider. More than likely, in this case there would be problems generated by the iPhone.
Even if it is recommended to upgrade your iPhone with the latest suitable iOS, may arise reception problem. Before making any upgrade, first you should backup all your data from your iPhone. Just to be prepared if any issues occur.
Antenna issues may arise if the iPhone is gripped in a way that covers both sides of the metal band from the lower left corner. It is depending the place where the antenna is in device. One idea is to buy an external case in order to avoid this kind of issues. In our times, there are so many nice-looking external cases, so you certainly find an awesome case for your iPhone.
Part 2: Fix iPhone reception problems by yourself
Here you can find several ideas to solve reception issues by yourself, before to go at your service provider.
1. You can reset the network settings from your iPhone, by going to Settings > General > Reset and select Reset Network Settings. This action could make the proper changes and could solve the network issues.
2. Talking about resetting only of some features, you can also reset the all data. You should search the Settings on your iPhone, and choose General, then Reset and the final step is to select Reset All Settings. This action will not delete your data. But if you feel more comfortable, you can make a backup for your iPhone before to go through the settings.
3. Restore your iPhone like a new iPhone it is another option, but you should save all your data from your iPhone before the make this drastic action. During using the iPhone, you have gathered a lot of data. Of course, you want to keep these informations even if sometimes the troubleshooting is necessary and your device must to be restored.
4. Protect your iPhone with an external case, especially if you had before troubles with the reception of signal and somehow you had solved this issue. In order to avoid the upcoming problems, related to reception caused by antenna of your device, keep your iPhone with an external case.
Safari is a pretty stable piece of software. Apple made its default browser to work seamlessly in the well-optimized iOS environment. But some problems may arise here and there. And perhaps the biggest nightmare of every user is when their browser is unable to connect to the internet.
Indeed, reports about Safari connection issues are quite common. Users have been reporting this problem for years now. But luckily, most of these internet connection issues are easily solvable. In fact, it usually takes a simple, general solution, and the internet connection comes back.
In this article, we’re going to focus on issues tightly connected to Safari itself. So, if you’re unable to connect to the internet using any other app, you have a different kind of problem. In that case, try some other solutions like restarting your router, check your WiFi connection, etc.
But if you’re unable to connect to the internet solely through Safari, the following solutions might be helpful. None of these solutions is rocket science, but as unappealing as they might seem, these actually solved the problem for the majority of users. So, at least give it a try.
Table of contents:
- Clear the Website data
- Update your iPhone
- “Allow” Safari to use the cellular data
- Reset the Network Settings
- Perform Factory Reset
Solution 1 – Clear the Website data
The first thing most people do when there’s any app problem is clearing the cache and data of that app. And Safari is no different. So, we’re going to start our troubleshooting process by clearing the Safari cache and data.
In case you’re not sure how to do that, just follow these instructions:
- Go to the Settings app, navigate to Safari.
- Now, scroll to the bottom, and tap the Advanced tab.
- Tap Website Data >Remove All Website Data.
That’s about it, your app data is now clear, and hopefully, the problem is resolved now. If you have any issues clearing the site data or cookies (because that’s been a problem for some people, as well), check out this article.
Solution 2 – Update your iPhone
It’s quite possible the system itself caused the problem. Most likely after some update. And since Safari receives updates through the system, there’s a good chance the latest patch messed up your browser.
iOS updates are somehow notorious for causing various controversial issues. Although this one isn’t as dangerous as that alleged battery drain incident, it’s still quite annoying. Don’t blame Apple for delivering faulty updates, because every software on every platform is prone to update-caused issues. It’s just how it works.
Anyway, if you find out the problem was indeed caused by the most recent update, there’s pretty much nothing you can do about it. Except waiting for Apple to release a new update. If the problem is wide-spread, the development team will quickly acknowledge it, and release a follow-up patch.
Of course, there could be something you can do, even if the update causes the problem. However, as each update is different, I can’t tell you exactly what to do here. Just search for some more info about that specific update, and maybe you’ll find something useful.
Solution 3 – “Allow” Safari to use the cellular data
iPhone allows you to apply all sorts of restrictions to which kind of content your apps have access to. So, if you’re unable to access the internet through Safari, there’s a good chance your permissions don’t allow you to.
So, the next thing we’re going to try is making sure you’ve obtained all the necessary permissions to access the internet through Safari. Here’s what you need to do:
- Go to Settings.
- Tap Go to Cellular.
- Scroll down, and make sure Safari is allowed to use cellular data.
Now you have all the necessary permissions to access websites through Safari. If you’re still unable to connect to the internet, move on to another solution.
Solution 4 – Reset the Network Settings
Resetting the Network Settings is a general solution, in fact. But it will also reset the Safari settings, in case we’ve missed something. So, it’s a quick solution, to say so. It will definitely save you some time, and effort.
Here’s how to reset the Network Settings in iOS:
- Open Settings.
- Tap General.
- Tap Reset.
- Choose Reset Network Settings.
- Enter your passcode.
- Tap Reset to confirm.
- Restart your device.
Now you have both network and Safari settings reset. If that didn’t get the job done, there’s the last, most strict solution.
Solution 5 – Perform Factory Reset
And finally, the last solution would be to perform the Factory Reset of your system. Doing this has the same purpose as resetting the Network settings, but to a bigger degree, because you’e resetting the whole system.
Here’s how to factory reset your settings:
- Go to Settings.
- Tap General.
- Tap Reset.
- Select Erase All Content and Settings.
- Don’t forget to backup your data before you confirm.
- Confirm the selection and start the process.
- Later on, you should choose Restore from the iCloud Backup feature.
That’s about it. I hope at least one of these solutions helped you resolve the problem with the Safari internet connection. If you have any comments, questions or suggestions, just write them down in the comments below.
Editor’s note: This article was originally published in April 2018. We made sure to revamp it for freshness and accuracy.
If your iPhone doesn’t connect to Bluetooth devices, don’t worry because there are plenty of practical solutions
If your iPhone doesn’t connect to Bluetooth devices, don’t worry because there are plenty of practical solutions you can try to fix the problem.
Bluetooth issues are common, but the question is, what is causing them? Some of the reasons why an iPhone won’t pair with Bluetooth speakers, Apple Watches, or other devices could be a software glitch or an issue with the Bluetooth device.
We will list a few solutions that will help you set things in motion in no time.
Before you start fixing the problem:
- Make sure the Bluetooth is enabled. Go to Settings > Bluetooth.
- Charge your iPhone and the device you are trying to pair with.
- Your iPhone and the Bluetooth device should be close to each other.
Methods to try if your iPhone won’t connect or pair with Bluetooth devices
1. Toggle Bluetooth
We will start with the simplest solution. All you need to do is turn off the Bluetooth, wait for a couple of seconds, and enable it again.
Open the control center by swiping down from the top right section of the screen; tapping on the Bluetooth icon will change its state.
Or, go to Settings > Bluetooth, turn it off, wait and turn it back on.
2. Toggle WiFi and Airplane mode
You can often fix the issue by just toggling the WiFi and Airplane mode. Give it a try. Open the control center on your iPhone.
- First, tap on the WiFi icon and turn it off. Tap on it again to turn it back on. If this doesn’t work, turn off WiFi and try pairing again.
- If toggling and turning off WiFi didn’t fix the problem, open the control center and tap on the Airplane icon. Leave the Airplane mode ON for a few seconds and turn it back off by tapping on the icon again.
2. Restart your iPhone and your Bluetooth accessory
The next step is to restart your iPhone.
- Press and hold the sleep/wake button or ( Volume down + Power buttons)
- When “Slide to power off” appears, drag the slider
- Next, reboot your iPhone.
Restart your Bluetooth accessory as well.
After doing this, try to pair the Bluetooth device with your iPhone.
3. Force Reset
Have you tried the above solutions and the Bluetooth is still not working? Go for a force reset.
Force restart an iPhone with Face ID.
- Press and quickly release the volume up button, press and quickly release the volume down button, then press and hold the side button.
- When the Apple logo appears, release the button.
Force restart iPhone 8 or iPhone SE (2nd generation and later)
- Press and quickly release the volume up and volume down buttons, then press and hold the side button.
- When the Apple logo appears, release the button.
Force restart iPhone 7
- Press and hold the volume down + Sleep/Wake buttons simultaneously.
- When the Apple logo appears, release both buttons.
Force restart iPhone 6s or iPhone SE.
- Press and hold the Sleep/Wake + Home buttons simultaneously.
- When the Apple logo appears, release both buttons.
4. Forget the Bluetooth device
We said at the beginning that Bluetooth problems are common. You may experience Bluetooth connection issues no matter which iPhone you own. Another way to solve the problem when Bluetooth is not connecting or pairing is to forget the device and pair again.
It is a lot simpler than it sounds. Here is what you need to do:
- Go to Settings.
- Tap Bluetooth.
- You will see the list of Bluetooth devices.
- Find the one you can’t connect with and tap on the info button (i).
- Tap Forget this device.
- Now pair your Bluetooth device with your iPhone.
5. Test With Other Devices
- To help Narrow down the problem, consider pairing with other devices in your household or nearby. If other devices connect, the problem might be the Bluetooth device itself.
6. Ensure that the device does not require a pairing app
- Some devices like Samsung earbuds and smartwatches need to be connected through the Galaxy Wearable app.
- Check the device’s support page to learn more about its Bluetooth pairing.
7. Ensure you have sufficient power
- Consider charging both devices above 25% before creating a connection.
8. Reset network settings
If you are experiencing Bluetooth connection problems and nothing seems to work, consider resetting your network.
- Navigate to Settings
- Tap General
- Next, tap Transfer or Reset iPhone
- Tap Reset
- Select the option “Reset network settings“
- Enter your passcode
- Tap Reset network settings.
9. Upgrade your iPhone iOS Version
Have you installed the newest version of iOS? If not, do it now. Before starting, make sure your device is charged or connected to a power source. Connect to a WiFi network.
- Go to Settings > General >Software Update.
- Tap Download and Install or Install Now (if you have already downloaded the latest version of iOS).
10. Reset all settings
Reset all settings: This will not delete any of your data.
- Navigate to Settings
- Tap General
- Next, tap Transfer or Reset iPhone
- Tap Reset
- Select the option “Reset all settings.“
- Enter your passcode
- Tap Reset all settings.
11. Erase all content and settings
This option gives your device a fresh start. Unlike the previous solution, this will wipe your iPhone, not just the settings but your apps and data. It’s essential to back up your files.
- Navigate to Settings
- Tap General
- Next, tap Transfer or Reset iPhone
- Tap Erase All Content and Settings


