Hard Drive Partitions
Boot Camp software relies on controlling how a Mac boots. To understand how Boot Camp takes control, let’s first look at the Mac boot process. Specifically, we need to look at how a Mac reads and uses its hard drive, which stores the operating systems and all your data.
The hard drive is divided into one or more partitions. A partition is a range of physical addresses on the hard drive. In other words, the partition tells the computer where to read and write bits of data inside the hard drive. Information about the partitions on a hard drive is stored in a partition table.
When you boot your Mac, part of the boot process includes accessing the first few bytes of data of the hard drive. Those first bytes point to the partition table. From there, the partition table indicates which partition has the operating system and other data needed to finish booting the Mac.
When your Mac is fresh out of the box, it recognizes all the available storage space on your hard drive as one single partition. This is sufficient for most users, and it makes it easy to track your total available hard drive space.
However, if you want to install multiple different operating systems on the same hard drive, you have to create different partitions for them. You could use any disk utility to create and format new partitions. Boot Camp, though, takes care of this partitioning for you. Boot Camp will resize your existing macOS partition and create and format a new partition for Windows. Boot Camp could also help in partitioning a separate hard drive if you had multiple hard drives in your Mac.
When it boots, how does the Mac know which partition to target? The partition table has an indicator of which partition to use when booting. Your Mac looks for its operating system on that partition. If you have both Mac and Windows, though, you need some way to select between those partitions. Boot Camp’s role is to automate that selection so you don’t have to worry about partition tables. Using Boot Camp, you’ll have two options for switching between your Mac and Windows partitions:
- Use the Boot Camp utility to indicate you want to switch to the other partition, and then reboot.
- Use the Option key during the white splash screen while booting and select the partition you want to use.
Now that you know what Boot Camp’s doing, let’s look at how to set it up on your Mac.
Boot Camp is limited to switching between booting to a macOS or a Windows partition. Linux boot loaders are designed to boot any number of operating systems. You can find instructions on the web for installing and configuring Linux on your Mac alongside macOS and Windows. If you want to run Windows within macOS, or vice versa, you can install virtualization software like VMware, VirtualBox or Parallels. Such software is designed to use part of your computer’s resources to run a virtual machine, which imitates the way the operating system runs on a dedicated physical machine.
Justin Pot has been writing about technology for over a decade, with work appearing in Digital Trends, The Next Web, Lifehacker, MakeUseOf, and the Zapier Blog. He also runs the Hillsboro Signal, a volunteer-driven local news outlet he founded. Read more.
Sometimes you want to quickly run a Windows program, without restarting your Mac. Sometimes you need access to all your Mac’s computing power for a Windows program or game. All of this makes it hard to decide whether you should dual boot with Boot Camp or use a virtual machine.
It turns out you don’t have to decide: if you have Boot Camp installed, you can run your Windows partition as a virtual machine in Parallels Desktop. It’s the best of both worlds. (The only downside: you have to pay $80 for the full version of Parallels. But we think it’s well worth it.)
We’ve shown you how to install Windows on a Mac with Boot Camp, and how to run Windows on your Mac with Parallels. Combining the two gives you an amazing amount of flexibility, and it’s not hard to get started.
Open Parallels and click the “+” button to create a new virtual machine.
You’ll be presented with four primary options for creating a new virtual machine; choose “Use Windows from Boot Camp.”
After this you will be warned that Windows may ask for re-activation inside the virtual machine. Check to box to say you want to continue, then click “Continue.”
You will be asked where you virtual machine should be located. Note that this is basically just a configuration file: there is no virtual hard drive, because Parallels will use your entire Boot Camp partition instead. Configure things as you like, then click “Continue.”
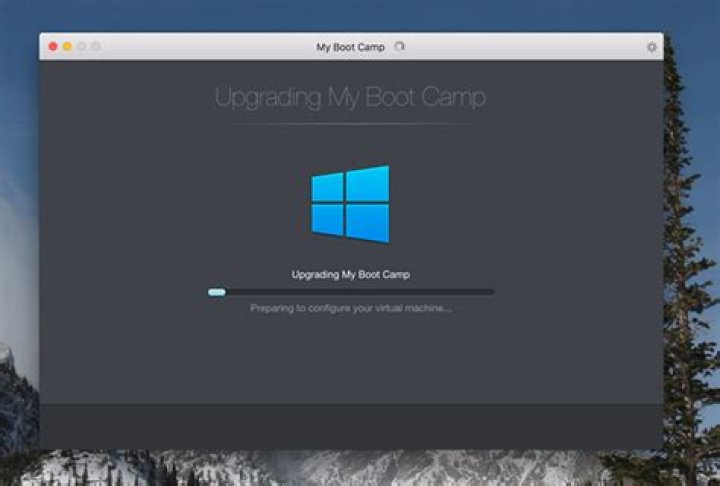
Parallels will get to work setting up your Boot camp partition to run as a virtual machine. At some point you’ll be asked to log into your Windows account, after which Parallels will automatically install Parallels Tools .
(Note that Parallels Tools will only run while you’re running Windows inside Parallels—you won’t see it when you boot into Windows directly.)
Eventually you’ll be told that the everything is properly configured.
You can now use your new virtual machine! Your new virtual machine uses your Boot Camp partition, meaning anything you do in the virtual machine will be waiting for you when you log into Windows directly using Boot Camp.
For example: you could install Steam and download a bunch of games while running macOS, then reboot your Mac into Windows later and play them. Or you could do a bunch of processor-intensive work in CAD while running Windows directly, then quickly access the results from macOS via Parallels if you need to.
Every feature of Parallels is supported here. You can use Coherence Mode to run Windows and Mac App side by side, for example, or use the Shared Folders feature to access your macOS files using Windows applications.
There’s only one downside, and that has to do with activation. Windows and Microsoft Office are activated specifically to one piece of hardware, and they will see the virtual machine as a different computer entirely. The result: you may have to re-activate Windows and Office from time to time. It’s annoying, and there’s no real way around it, but it’s a small price to pay for the convenience of this setup.
With Boot Camp, you can install Microsoft Windows 10 on your Mac, then switch between macOS and Windows when restarting your Mac.
What you need to install Windows 10 on Mac
- MacBook introduced in 2015 or later
- MacBook Air introduced in 2012 or later
- MacBook Pro introduced in 2012 or later
- Mac mini introduced in 2012 or later
- iMac introduced in 2012 or later 1
- iMac Pro (all models)
- Mac Pro introduced in 2013 or later
The latest macOS updates, which can include updates to Boot Camp Assistant. You will use Boot Camp Assistant to install Windows 10.
64GB or more free storage space on your Mac startup disk:
- Your Mac can have as little as 64GB of free storage space, but at least 128GB of free storage space provides the best experience. Automatic Windows updates require that much space or more.
- If you have an iMac Pro or Mac Pro with 128GB of memory (RAM) or more, your startup disk needs at least as much free storage space as your Mac has memory. 2
An external USB flash drive with a storage capacity of 16GB or more, unless you’re using a Mac that doesn’t need a flash drive to install Windows.
A 64-bit version of Windows 10 Home or Windows 10 Pro on a disk image (ISO) or other installation media. If installing Windows on your Mac for the first time, this must be a full version of Windows, not an upgrade.
- If your copy of Windows came on a USB flash drive, or you have a Windows product key and no installation disc, download a Windows 10 disk image from Microsoft.
- If your copy of Windows came on a DVD, you might need to create a disk image of that DVD.
How to install Windows 10 on Mac
To install Windows, use Boot Camp Assistant, which is included with your Mac.
1. Check your Secure Boot setting
Learn how to check your Secure Boot setting. The default Secure Boot setting is Full Security. If you changed it to No Security, change it back to Full Security before installing Windows. After installing Windows, you can use any Secure Boot setting without affecting your ability to start up from Windows.
2. Use Boot Camp Assistant to create a Windows partition
Open Boot Camp Assistant, which is in the Utilities folder of your Applications folder. Follow the onscreen instructions.
- If you’re asked to insert a USB drive, plug your USB flash drive into your Mac. Boot Camp Assistant will use it to create a bootable USB drive for Windows installation.
- When Boot Camp Assistant asks you to set the size of the Windows partition, remember the minimum storage-space requirements in the previous section. Set a partition size that meets your needs, because you can’t change its size later.
3. Format the Windows (BOOTCAMP) partition
When Boot Camp Assistant finishes, your Mac restarts to the Windows installer. If the installer asks where to install Windows, select the BOOTCAMP partition and click Format. In most cases, the installer selects and formats the BOOTCAMP partition automatically.
4. Install Windows
Unplug any external devices that aren’t necessary during installation. Then click Next and follow the onscreen instructions to begin installing Windows.
5. Use the Boot Camp installer in Windows
After Windows installation completes, your Mac starts up in Windows and opens a ”Welcome to the Boot Camp installer” window. Follow the onscreen instructions to install Boot Camp and Windows support software (drivers). You will be asked to restart when done.
- If the Boot Camp installer never opens, open the Boot Camp installer manually and use it to complete Boot Camp installation.
- If you have an external display connected to a Thunderbolt 3 port on your Mac, the display will be blank (black, gray, or blue) for up to 2 minutes during installation.
How to switch between Windows and macOS
Restart, then press and hold the Option (or Alt) ⌥ key during startup to switch between Windows and macOS.
Learn more
If you have one of these Intel-based Mac models using OS X El Capitan or later, you don’t need a USB flash drive to install Windows:
- MacBook introduced in 2015 or later
- MacBook Air introduced in 2017 or later 3
- MacBook Pro introduced in 2015 or later 3
- iMac introduced in 2015 or later
- iMac Pro (all models)
- Mac Pro introduced in late 2013 or later
For more information about using Windows on your Mac, open Boot Camp Assistant and click the Open Boot Camp Help button.
1. If you’re using an iMac (Retina 5K, 27-inch, Late 2014) or iMac (27-inch, Late 2013) or iMac (27-inch, Late 2012) with a 3TB hard drive and macOS Mojave or later, learn about an alert you might see during installation.
2. For example, if your Mac has 128GB of memory, its startup disk must have at least 128GB of storage space available for Windows. To see how much memory your Mac has, choose Apple menu > About This Mac. To see how much storage space is available, click the Storage tab in the same window.
3. These Mac models were offered with 128GB hard drives as an option. Apple recommends 256GB or larger hard drives so that you can create a Boot Camp partition of at least 128GB.
Information about products not manufactured by Apple, or independent websites not controlled or tested by Apple, is provided without recommendation or endorsement. Apple assumes no responsibility with regard to the selection, performance, or use of third-party websites or products. Apple makes no representations regarding third-party website accuracy or reliability. Contact the vendor for additional information.
Tom Nelson is an engineer, programmer, network manager, and computer network and systems designer who has written for Other World Computing,and others. Tom is also president of Coyote Moon, Inc., a Macintosh and Windows consulting firm.
- Tweet
- Share
- Tweet
- Share
Boot Camp Assistant, part of Apple’s Boot Camp, serves two functions in getting a Mac ready to run Windows. Its main purpose is to help you partition your hard drive, to create the necessary Windows partition. If you decide to delete Windows at some point in the future, Boot Camp Assistant can restore your Mac to its pre-Windows configuration.
In this guide, we’ll look at using an early version of Boot Camp Assistant to partition a Mac hard drive.
You can also use Boot Camp Assistant 4.x to install Windows on your Mac if you’re using Boot Camp Assistant 4.x or later.
You will need:
- An Intel-based Mac
- OS X 10.5 or later
- Available hard drive space (we recommend at least 20 GB)
First Things First: Back Up Your Data
Fair warning: You’re about to partition your Mac’s hard drive. The process of partitioning a hard drive with Boot Camp Assistant is designed not to cause any data loss, but when computers are involved, all bets are off. The partitioning process alters the way data is stored on your drive. If something should unexpectedly go wrong during the process (such as your dog tripping over the power cord and unplugging your Mac), you could lose data. In all seriousness, plan for the worst, and back up your data before doing anything else.
Back up your data. If you haven’t already, try using Time Machine to back up your data. Time Machine is included with Mac OS X 10.5 and later, and it’s very easy to use. You can also use the third-party backup software of your choice. The important thing is to back up your data on a regular basis, including now; how you do it is up to you.
Getting Ready to Partition Your Drive
Boot Camp Assistant is automatically installed as part of OS X 10.5 or later. If you have the beta version of Boot Camp Assistant, which was available for download from Apple’s website, you’ll find that it no longer works, because the beta period has expired. You must be using OS X 10.5 or later in order for Boot Camp Assistant to function.
Launch Boot Camp Assistant
- Launch Boot Camp Assistant by double-clicking the Boot Camp Assistant application located at /Applications/Utilities/.
- Print a copy of the Installation & Setup Guide by clicking the Print Installation & Setup Guide button.
- Click the Continue button.
- Select the Create or remove a Windows partition option.
- Click the Continue button.
Select a Hard Drive to Partition
After you select the option to create or remove a Windows partition, Boot Camp Assistant will display a list of the hard drives installed in your computer. For many individuals, this will be a short list, limited to the drive that came with the Mac. Whether you have one hard drive or several, select a drive to partition.
Select a Hard Drive to Partition for Windows
- Click the icon for the hard drive that will be the new home for Windows.
- Select the Create a second partition for Windows option.
- Click the Continue button.
Determine the Size of Your Windows Partition
The hard drive you selected in the previous step will display in Boot Camp Assistant, with one section labeled Mac OS X and the other labeled Windows. Use your mouse to click and drag the nub between the sections, to expand or shrink each partition, but don’t click any of the buttons yet.
As you drag the nub, you’ll notice that you can only shrink the Mac OS X partition by the amount of free space that is available on the selected drive. You’ll also notice that you can’t make the Windows partition smaller than 5 GB, although as we mentioned earlier, we don’t recommend making it smaller than 20 GB.
You may also notice that there are two predefined sizes to choose from, via the two buttons located just below the display of the partitions. You can click the ‘Divide Equally’ button, which, as you might have guessed, will split your drive in half, using half of the available space for Mac OS X and half of the available space for Windows. This, of course, assumes that there’s enough available free space on the drive to split things equitably. Alternatively, you can click the ’32 GB’ button, which is a good general-purpose choice for a Windows partition, again assuming you have enough free hard drive space to create a partition this size.
Set Your Partition Sizes
- Adjust your partition sizes
- Use the nub to select a custom size
- Use the buttons to select the pre-defined sizes
- Click the Partition button when ready.
Partitioning a drive usually takes some time, so be patient.
Your New Partitions Are Ready
When Boot Camp Assistant finishes partitioning your hard drive, the Mac partition will have the same name as the original unpartitioned hard drive; the Windows partition will be called BOOTCAMP.
At this point, you can quit Boot Camp Assistant or click the Start Installation button, and follow the onscreen instructions to install Windows on the BOOTCAMP partition.
Everything you need to know about how to get windows on Mac including differences between using Boot Camp, VMware and Parallels.
Once you’ve completed those preparations you’ll be ready to run Boot Camp Assistant and install Windows on your Mac. Here’s what to do.
Step 1: Open Boot Camp Assistant.
When you run Boot Camp Assistant for the first time, it will prompt you with a number of options. The first option is to select the ISO image you want to use. Click the Choose button then navigate to the one you have created or downloaded. This will copy your Windows ISO file on to the USB memory stick so that you can install Windows.
If your Mac has more than one internal hard drive or SSD, it’s possible to devote one of those drives exclusively to Windows.
However, Boot Camp doesn’t play well with external drives connected via USB or Thunderbolt, so it’s best to use your normal internal drive wherever possible. And if you have an external drive connected to your Mac for Time Machine backups then it’s a good idea to remove it as Boot Camp can get a bit confused if it detects an external drive during installation.
When you’re done, click the Install button at the bottom of the window to start the process.
Step 5: Install Windows
Once you’ve partitioned your Mac drive, Boot Camp will shut down your Mac and launch the Windows installer program from the USB memory stick. You can just follow the prompts to install Windows. As soon as Windows starts up you will also be prompted to install the additional Boot Camp drivers from the memory stick as well.
You may need to buy a copy of the VM software, as well as providing your own copy of Windows. Parallels starts at £69.99/$79.99, VMware is free for personal use, but will cost from $149 otherwise.
There is also a free virtualisation program, called VirtualBox, but it’s fairly complex and difficult to use, so we’ll focus first on using Parallels and VMware to install Windows. We do have a separate article discussing how to use VirtualBox though, if you feel ready for the challenge.
We have a separate in-depth guide to the Best virtual machine software for Mac.
Run Windows on a Mac with Parallels
Parallels Desktop (version 16 at time of writing – read our Parallels Desktop 16 review) costs £69.99/$79.99 and has a more colourful graphical interface than VMware Fusion, but the two programs take the same basic approach. They provide several options for creating a new VM on your Mac, using an installer disk, or ISO file.
It’s also possible to connect an existing Windows PC to your Mac and create a VM on the Mac that is an exact copy of the PC, complete with Windows and all the Windows apps that you need. And, if you’re already using Boot Camp, you can even create a VM that duplicates your Boot Camp partition – which is a handy option for quickly checking a few files, or running apps that don’t need top performance, without having to shut the Mac down and boot into Windows.
Once you’ve decided how you want to install Windows, both programs allow you to adjust a number of important settings.
How to Get Acid Pro on a Macbook
Acid Pro is a popular digital audio workstation that, unfortunately, is only available for Windows operating system. But what if you want to compose music on a Mac? In that case you can either select an Acid Pro alternative or install Windows on the Macbook. There are two ways to do the latter: install Windows alongside macOS with the help of Mac’s BootCamp, or use virtualization software like Parallels or VirtualBox to install and run Windows inside an app. This article overviews ways to run Windows on Mac and describes pros and cons of each method. I hope this will assist you in selecting the best way to run Acid Pro on a Mac in your case.
Option 1: Download Windows 10 and Acid Pro on a Mac With BootCamp
Boot Camp comes with your Macbook for free, and it allows you to install Windows alongside macOS, so you can choose which of them to boot on startup. Mac’s Boot Camp Assistant will help you install Windows, partition the startup drive and install necessary drivers.
If you install Windows via Boot Camp, Windows will have all of your Macbook’s resources and can run programs with the maximum possible performance. That’s why dual-booting is ideal for running resource-intensive programs like video-editing software or high-end games.
On the other hand, only one operating system will be able to run at the same time, so you will have to reboot into Windows in order to use Acid Pro. Another possible drawback is fact that Windows and macOS use different file systems, and you will not be able to open Mac files on Windows or vice versa unless you install specific third-party drives for it. That is not a problem when using virtual machines.
Option 2: Run Acid Pro on a Macbook Using a Windows 10 Virtual Machine
Virtual machines allow you to install and open Windows 10 in a window on your Mac desktop. Windows will “think” it’s running on a real computer, when it is running inside an app. With virtual machines you run both macOS and Windows at the same time, which is handy if you want to open Acid Pro alongside your Mac applications. However, when you run a virtual machine, your computer’s resources are split between the two operating systems, so everything may run slower than usual.
Install Windows 10 and Acid Pro on macOS With Parallels Desktop
Parallels Desktop is very intuitive and easy-to-use for regular computer users. The app will configure everything for you, even download Windows 10 or utilize the one you already downloaded via Boot Camp. You can open Windows in a separate window (including a full screen mode), or you can turn on Coherence mode. In Coherence mode the virtual machine will run in the background, while Acid Pro or other Windows programs can run alongside your Mac apps. You can even put Windows programs on your macOS desktop or pin them to Dock. Parallels Desktop allows you to copy and paste or drag and drop between Windows and macOS without any problems.
Parallels Desktop prices start at $79.99, however there is a free trial period available.
Get Windows 10 and Acid Pro on Mac OS X With VMware Fusion
VMware Fusion is another popular virtualization software for Macbooks. It is close to Parallels in terms of functionality and pricing, but VMware’s Fusion supports a larger number of operating systems than Parallels. On the other hand, Parallels is easier for beginners, and runs a little smoother. Otherwise, these two programs are approximately on the same level.
Install Windows 10 and Acid Pro on a Mac OS Via VirtualBox
If you don’t plan to spend extra money on virtualization software, there’s always VirtualBox by Oracle. VirtualBox is a pretty decent free alternative to paid software if not slower, less polished and missing some handy functions. If you need to run some resource intensive Windows programs (like Acid Pro), VirtualBox might not be the best choice for you. VirtualBox also requires more technical knowledge than, for example, Parallels, as users need to tune some settings themselves when installing it. However, if you are a power user already or don’t mind doing a little more work, VirtualBox may be a good (and free!) alternative.
Kartais norite greitai paleisti “Windows” programą, neperkartodami savo “Mac”. Kartais jums reikia prieigos prie visos “Mac” kompiuterinės galios, skirtos “Windows” programai ar žaidimui.
SUSIJĘS: Kaip tvirtai paleisti “Windows” programas “Mac” naudodami “Parallels”
Pasirodo, kad jūs neturite ” t turi nuspręsti: jei turite įdiegtą “Boot Camp”, “Parallels Desktop” galite paleisti “Windows” skaidinį kaip virtualią mašiną. Tai geriausias iš abiejų pasaulių. (Vienintelis trūkumas: jūs turite sumokėti 80 USD už visą “Parallels” versiją, bet mes manome, kad tai verta.)
Mes parodėme, kaip įdiegti “Windows” Mac kompiuteryje su paleidimo stovu ir kaip paleisti “Windows” savo “Mac” su “Parallels”. Sujungus du, jums bus suteikta nuostabi lankstumo ir sunku pradėti.
Atidarykite “Parallels” ir spustelėkite mygtuką “+”, kad sukurtumėte naują virtualią mašiną.
Jums bus pateikiamos keturios pagrindinės parinktys sukurti naują virtualią mašiną; pasirinkite “Naudoti” Windows “iš” Boot Camp “.
Po to būsite įspėti, kad” Windows “gali paprašyti pakartotinai aktyvuoti virtualioje mašinoje. Pažymėkite laukelį norėdami tęsti, tada spustelėkite “Tęsti”.
Jums bus klausiama, kur turi būti virtualioji mašina. Atkreipkite dėmesį, kad tai iš esmės tik konfigūracijos failas: nėra virtualaus kietojo disko, nes “Parallels” naudos visą jūsų “Boot Camp” skirsnį. Konfigūruoti dalykus, kaip jums patinka, tada spustelėkite “Tęsti”.
Parallels pateks į darbą, nustatydami jūsų “Boot Camp” skirsnį paleisti kaip virtualųjį kompiuterį. Tam tikru momentu bus paprašyta prisijungti prie savo “Windows” paskyros, po to “Parallels” automatiškai įdiegs “Parallels Tools”.
(Atkreipkite dėmesį, kad “Parallels Tools” veiks tik tada, kai naudojate “Windows”, esančiame “Parallels”, jūs jo nematysite. kai įkeliamas į “Windows” sistemą.)
Galų gale jums bus pranešta, kad viskas tinkamai sukonfigūruota.
Dabar galite naudotis savo nauja virtualia mašina! Jūsų nauja virtualioji mašina naudoja jūsų “Boot Camp” pertvarą, tai reiškia, kad viskas, ką jūs darysite virtualioje mašinoje, laukia, kai prisijungsite prie “Windows” tiesiogiai naudodami “Boot Camp”.
Pvz., Galite įdiegti “Steam” ir atsisiųsti daugybės žaidimų paleisti macOS, tada iš naujo paleiskite “Mac” į “Windows” vėliau ir paleiskite juos. Arba jūs galite padaryti didelę procesorių intensyvų darbą CAD sistemoje, kai naudojate “Windows”, tada greitai prijunkite rezultatus iš “macOS” per “Parallels”, jei jums reikia.
Kiekviena “Parallels” funkcija palaikoma čia. Pavyzdžiui, “Coherence Mode” galite naudoti “Coherence Mode”, kad galėtumėte paleisti “Windows” ir “Mac” programas, pavyzdžiui, naudodami “Shared Folders” funkciją, kad galėtumėte pasiekti savo “macOS” failus naudodami “Windows” programas.
Yra tik vienas trūkumas, susijęs su aktyvinimu. “Windows” ir “Microsoft Office” yra konkrečiai įjungiamos vienai aparatinei įrangai, o virtualios mašinos matysite kaip visiškai kitokį kompiuterį. Rezultatas: gali prireikti pakartotinai aktyvuoti “Windows” ir “Office”. Tai erzina, ir tai nėra realus būdas, bet tai maža kaina sumokėti už šios sąrankos patogumą.
“Pranešimų centras” iOS “yra padalytas į du skyrius: naujus pranešimus ir jūsų istoriją. Viršuje rodomi pranešimai apie įvykius, įvykusius nuo paskutinio jūsų telefono žiūrėjimo. Po to jūs turite visus senus pranešimus, kuriuos matėte, bet nieko nedarėte; jie rodomi anksčiau Šiandien, Vakar ir kt. Pagal numatytuosius nustatymus “iOS” nepašalina pranešimų iš “Pranešimų centro”, kol iš tikrųjų nieko nedaro.
Tiek “Amazon Echo”, tiek “Google” namuose uždirbo savo vietą “smarthome” hierarchijos viršuje, bet kurį turėtumėte pirkti ? SUSIJĘS: Taigi, jūs turite tik “Google” namų. Dabar kas? “Amazon” sulaužė visą pramonės šaką, išleidusi “Echo” atgal 2014 m., Ir nuo to laiko tapo populiariausi bendrovės aparatūros produkcija.
Nogle gange vil du hurtigt køre et Windows-program uden at genstarte din Mac. Nogle gange har du brug for adgang til al din Macs computerkraft til et Windows-program eller -spil. Alt dette gør det svært at afgøre, om du skal dual boot med Boot Camp eller bruge en virtuel maskine.
RELATED: Sådan løser du Windows-programmer på din Mac med paralleller
Det viser sig, at du ikke gør det t skal beslutte: Hvis du har Boot Camp installeret, kan du køre din Windows-partition som en virtuel maskine i Parallels Desktop. Det er det bedste fra begge verdener. (Den eneste ulempe: Du skal betale $ 80 for den fulde version af Parallels. Men vi synes det er det værd.)
Vi har vist dig, hvordan du installerer Windows på en Mac med Boot Camp, og hvordan du kører Windows på din Mac med Parallels. Kombinationen af de to giver dig en fantastisk fleksibilitet, og det er ikke svært at komme i gang.
Åbn Parallels og klik på knappen “+” for at oprette en ny virtuel maskine.
Du vil blive præsenteret med fire primære muligheder til oprettelse af en ny virtuel maskine; vælg “Brug Windows fra Boot Camp.”
Efter dette bliver du advaret om, at Windows kan bede om genaktivering i den virtuelle maskine. Afkryds i feltet for at sige, at du vil fortsætte, og klik derefter på “Fortsæt”.
Du bliver spurgt, hvor din virtuelle maskine skal være placeret. Bemærk, at dette stort set kun er en konfigurationsfil: Der er ingen virtuel harddisk, fordi Parallels vil bruge hele Boot Camp-partitionen i stedet. Konfigurer ting som du vil, og klik derefter på “Fortsæt.”
Parallels vil komme til at arbejde med at konfigurere din Boot Camp-partition til at køre som en virtuel maskine. På et tidspunkt bliver du bedt om at logge ind på din Windows-konto, hvorefter Parallels automatisk installerer Parallels Tools.
(Bemærk at Parallels Tools kun kører, mens du kører Windows inde i Parallels-du kan ikke se det når du starter direkte til Windows.)
Til sidst får du at vide, at alt er korrekt konfigureret.
Du kan nu bruge din nye virtuelle maskine! Din nye virtuelle maskine bruger din Boot Camp-partition, hvilket betyder, at alt hvad du gør i den virtuelle maskine, vil vente på dig, når du logger ind på Windows direkte ved hjælp af Boot Camp.
For eksempel: Du kan installere Steam og downloade en masse spil mens kører macOS, genstart derefter din Mac til Windows senere og afspil dem. Eller du kan gøre en masse processor-intensivt arbejde i CAD, mens du kører Windows direkte, så få hurtigt adgang til resultaterne fra macOS via Parallels, hvis du har brug for.
Alle funktioner i Parallels understøttes her. Du kan bruge Coherence Mode til at køre Windows og Mac App side ved side, eller brug funktionen Shared Folders til at få adgang til dine MacOS-filer ved hjælp af Windows-programmer.
Der er kun en ulempe, og det har at gøre med aktivering. Windows og Microsoft Office aktiveres specifikt til et stykke hardware, og de vil se den virtuelle maskine som en anden computer helt. Resultatet: Det kan være nødvendigt at genaktivere Windows og Office fra tid til anden. Det er irriterende, og der er ingen rigtig vej rundt om det, men det er en lille pris at betale for bekvemmeligheden af denne opsætning.
Så du bruger Disk Utility til at partitionere din nye harddisk, når du får et valg af potentielle filsystemer. Listen er længere, end du tror, med vilkår som “APFS (Case-sensitive)” og “Mac OS Extended (Journaled, Encrypted)” at vælge imellem. Hvad betyder alt dette, og hvad skal du vælge ? Der er grundlæggende tre muligheder: RELATED: Nyheder i MacOS 10.
Om du har brug for undertekster for at undgå at vække børnene, eller du er forfærdelig ved at forstå regionale accenter, gør Plex Media Center det nemt at downloade og Brug undertekster med alle dine film og tv-shows. Som standard bruger Plex ikke automatisk eksisterende undertekster eller downloader nye på dine vegne.
Kartais norite greitai paleisti “Windows” programą, neperkartodami savo “Mac”. Kartais jums reikia prieigos prie visos “Mac” kompiuterinės galios, skirtos “Windows” programai ar žaidimui.
SUSIJĘS: Kaip tvirtai paleisti “Windows” programas “Mac” naudodami “Parallels”
Pasirodo, kad jūs neturite ” t turi nuspręsti: jei turite įdiegtą “Boot Camp”, “Parallels Desktop” galite paleisti “Windows” skaidinį kaip virtualią mašiną. Tai geriausias iš abiejų pasaulių. (Vienintelis trūkumas: jūs turite sumokėti 80 USD už visą “Parallels” versiją, bet mes manome, kad tai verta.)
Mes parodėme, kaip įdiegti “Windows” Mac kompiuteryje su paleidimo stovu ir kaip paleisti “Windows” savo “Mac” su “Parallels”. Sujungus du, jums bus suteikta nuostabi lankstumo ir sunku pradėti.
Atidarykite “Parallels” ir spustelėkite mygtuką “+”, kad sukurtumėte naują virtualią mašiną.
Jums bus pateikiamos keturios pagrindinės parinktys sukurti naują virtualią mašiną; pasirinkite “Naudoti” Windows “iš” Boot Camp “.
Po to būsite įspėti, kad” Windows “gali paprašyti pakartotinai aktyvuoti virtualioje mašinoje. Pažymėkite laukelį norėdami tęsti, tada spustelėkite “Tęsti”.
Jums bus klausiama, kur turi būti virtualioji mašina. Atkreipkite dėmesį, kad tai iš esmės tik konfigūracijos failas: nėra virtualaus kietojo disko, nes “Parallels” naudos visą jūsų “Boot Camp” skirsnį. Konfigūruoti dalykus, kaip jums patinka, tada spustelėkite “Tęsti”.
Parallels pateks į darbą, nustatydami jūsų “Boot Camp” skirsnį paleisti kaip virtualųjį kompiuterį. Tam tikru momentu bus paprašyta prisijungti prie savo “Windows” paskyros, po to “Parallels” automatiškai įdiegs “Parallels Tools”.
(Atkreipkite dėmesį, kad “Parallels Tools” veiks tik tada, kai naudojate “Windows”, esančiame “Parallels”, jūs jo nematysite. kai įkeliamas į “Windows” sistemą.)
Galų gale jums bus pranešta, kad viskas tinkamai sukonfigūruota.
Dabar galite naudotis savo nauja virtualia mašina! Jūsų nauja virtualioji mašina naudoja jūsų “Boot Camp” pertvarą, tai reiškia, kad viskas, ką jūs darysite virtualioje mašinoje, laukia, kai prisijungsite prie “Windows” tiesiogiai naudodami “Boot Camp”.
Pvz., Galite įdiegti “Steam” ir atsisiųsti daugybės žaidimų paleisti macOS, tada iš naujo paleiskite “Mac” į “Windows” vėliau ir paleiskite juos. Arba jūs galite padaryti didelę procesorių intensyvų darbą CAD sistemoje, kai naudojate “Windows”, tada greitai prijunkite rezultatus iš “macOS” per “Parallels”, jei jums reikia.
Kiekviena “Parallels” funkcija palaikoma čia. Pavyzdžiui, “Coherence Mode” galite naudoti “Coherence Mode”, kad galėtumėte paleisti “Windows” ir “Mac” programas, pavyzdžiui, naudodami “Shared Folders” funkciją, kad galėtumėte pasiekti savo “macOS” failus naudodami “Windows” programas.
Yra tik vienas trūkumas, susijęs su aktyvinimu. “Windows” ir “Microsoft Office” yra konkrečiai įjungiamos vienai aparatinei įrangai, o virtualios mašinos matysite kaip visiškai kitokį kompiuterį. Rezultatas: gali prireikti pakartotinai aktyvuoti “Windows” ir “Office”. Tai erzina, ir tai nėra realus būdas, bet tai maža kaina sumokėti už šios sąrankos patogumą.
Ankstesniomis dienomis, kai norėjote filmuoti, nusileidote į sofą ir nueikite į vaizdo įrašų parduotuvę. Žinoma, jūs turėjote palikti savo namus ir pasikalbėti su asmeniu (niekaip niekas neturėtų priešintis savo valiai 2017 m.), Tačiau jums nereikėjo stebėtis, kur ieškoti ko. Kiekvienoje parduotuvėje buvo iš esmės kiekvienas filmas.
Daugelis žmonių prisiekia keliais monitoriais, nesvarbu, ar jie yra kompiuterių geeks, ar tiesiog žmonėms, kurie turi būti našūs. Kodėl naudokite tik vieną monitorių, kai galite naudoti du ar daugiau ir peržiūrėkite daugiau iš karto? Papildomi monitoriai leidžia jums išplėsti savo darbalaukį ir gauti daugiau ekrano nekilnojamojo turto jūsų atviroms programoms.
Macs All-in-One For Dummies
Boot Camp itself is free. You have to supply your own single-disc or downloadable full-install version of Windows; an upgrade disc won’t cut it.
It’s also important to note that you can use a 64-bit version of Windows, Windows 7 (Home Premium, Professional, or Ultimate), Windows 8, or Windows 8.1. Consult Apple support to see which Mac models are compatible with which versions of Windows. In its current incarnation, Boot Camp isn’t compatible with 32-bit versions of Windows.
Other requirements follow:
An Intel Mac with OS X version 10.6 or later
At least 2GB of RAM and 20GB of available space on the Mac’s storage drive that you want to donate to Windows
A blank CD or USB storage device that you’ll use for Windows software drivers
If you don’t run into snags, the entire installation should take about an hour.
Windows 8 and Windows 8.1 are optimized for a touchscreen environment, though you can use it with a standard mouse and keyboard. For now, Macs don’t support touchscreen computing.
To install Windows 8 via Boot Camp, you still must have a legitimate Windows 8 license from Microsoft and a Win8 installation disc, assuming that you have an optical drive. If you don’t have an optical drive, you may be able to create a Windows installer from an ISO file downloaded from Microsoft on a USB flash drive that’s 8GB or larger.
Because snags are possible, back up all your important information on the Mac’s startup disk.
Basic training
Run Boot Camp Assistant (in the Utilities folder inside the Applications folder) to make sure that you have the latest firmware on your computer and to install any support software from Apple that you might need.
You’ll find any updates at Apple support. If you’re using a laptop, make sure to connect the power adapter. You will also be given the option to create a Windows 7 (or later version) install disk for which you’ll need a USB flash drive and an ISO image downloaded from Apple.
Follow the prompts in Boot Camp Assistant to create a partition for Windows.
You’re essentially carving out an area of your hard drive for the Windows operating system. This partition must be at least 30GB and can swell to the total free disk space on hand minus 30GB. If you don’t plan on doing much in Windows, keep the partition small.
Drag the divider to set the partitions for both OS X and Windows, or click Divide Equally to make equal partitions. You can’t resize a Windows partition after creating it, though you can replace it with a larger Windows partition.
If you have a Mac Pro with more than one internal hard drive, you can select which drive to partition. If any of this makes you nervous, know that you can remove the Windows partition later and go back to a single-partition Mac.
Insert the Windows CD or a USB flash drive with the Windows ISO file and then click Start Installation.
If you exited Boot Camp Assistant before installing Windows, open it again, choose Start the Windows Installer, and click Continue.
When you’re asked to choose the Windows partition, select the partition that says BOOTCAMP.
You may have to scroll down to see it.
Don’t erase any partitions that you see or create a new partition here. Failure to heed this warning could wipe out your entire Mac OS X startup disk.
(Optional) If you see a listing for Drive Options, click it; otherwise, proceed to Step 6.
Reformat the partition by using the Windows installer: Click Format.
You’re using the reliable and secure NTFS file system, but you won’t be able to save files to Windows from Mac OS X, at least not without a techie workaround.
Follow the onscreen instructions to finish installing Windows.
Boot Camp 5.1 includes several Mac drivers so that Windows will recognize your trackpad, Thunderbolt, USB 3.0, the iSight (or FaceTime) camera, the Eject key on the Mac keyboard, networking, audio, graphics, and so on.
A Boot Camp Control Panel for Windows and an Apple Boot Camp system-tray item will be added.
As with any new Windows computer, Microsoft requires that you activate your Windows software within 30 days.
Switching operating systems
Restart your Mac, and hold down the Option key until icons for each operating system appear onscreen. Highlight Windows or Macintosh HD, and click the arrow to launch the operating system of choice for this session.
If you want OS X or Windows to boot every time, choose app → System Preferences, click Startup Disk, and choose the OS you want to launch by default.
You can perform the same function in Windows by clicking the Boot Camp system-tray icon and selecting the Boot Camp Control Panel. Click either the Macintosh HD or Windows icon, depending on your startup preference.
About This Article
This article is from the book:
About the book authors:
Joe Hutsko has been writing about computers, gadgets, and video games for over 20 years. He worked at Apple from 1984 to 1988. Barbara Boyd is a coauthor of multiple editions of iPhone All-in-One For Dummies. Boyd worked at Apple from 1985 to 1990. Jesse Feiler is a developer, web designer, trainer, and author. He has worked with mobile devices starting with Apple’s Newton and continuing with the Apple’s iOS and OS X products, including the iPhone and iPad. He is heard regularly on WAMC Public Radio’s The Roundtable. Doug Sahlin operates a professional photography business specializing in event and portrait photography. He’s the best-selling author of more than 20 books on computer applications such as Adobe Photoshop and Adobe Acrobat. He’s written four books on digital photography. Sahlin also writes mysteries.
WineBottler or Boot Camp are your best options
:max_bytes(150000):strip_icc()/Lifewire_Jerri-Ledford_webOG-2e65eb56f97e413284c155dade245eeb.jpg "How to run your mac’s boot camp partition as a virtual machine")
- Tweet
- Share
- Tweet
- Share
What to Know
- An EXE file is an executable file that either runs an application or an application installer.
- Mac has a utility called Boot Camp you can use to install a copy of Windows to run Windows EXE files on some Mac.
- Boot Camp alternative: The WineBottler application translates EXE files into files macOS can understand.
This article explains two ways to run Windows EXE files on your Mac, either using the Boot Camp software that comes pre-installed on some Macs or using the WineBottler application, which translates Windows files for use on Macs.
Can My Mac Run Windows EXE?
No, you cannot run Windows EXE files without some help. However, with a translator or a compatible installation of Windows, you can get a Windows EXE file working on your Mac. Fortunately, Mac has some built-in capabilities to make this process easier, and if you prefer not to use the Mac capabilities, there are applications available to help.
How Do I Run an EXE File on a Mac?
There are two ways that you can Windows EXE files on a Mac. One is to use the Mac’s Boot Camp capability. The other is to use an application like WineBottler, which translates Windows applications to Mac on the fly.
How to Install Window EXE Files on Mac With Boot Camp
Boot Camp is a utility that comes pre-installed on some Macs, which lets you install an instance of Windows on your Mac so you can switch between the two operating systems. When you use Boot Camp, you’ll have to create a Windows partition, format that Windows partition, and then install the Windows operating system on your Mac. You’ll also need a valid Windows license key to complete the installation.
Boot Camp is only supported on Macs running Intel processors. Apple is currently moving away from using Intel processors to their home-grown processors. If your Mac has an M1, M1 Pro, or M1 Max, you can’t use Boot Camp.
If this is the method you would like to take, you can follow our guide to using Boot Camp to install Windows on your Mac to get started. You’ll need enough available resources on your Mac to run both macOS and the Windows operating system you choose.
The two operating systems don’t run concurrently. At the boot-up time, you have to choose whether your Mac will boot into Windows or macOS.
How to Install Windows EXE Files on Mac With WineBottler
WineBottler is another option for running Windows EXE files on a Mac. WineBottler is a compatibility layer that converts the Windows Application Programming Interface (API) calls made by Windows apps to portable operating system interface (POSIX) calls that macOS can use.
The caveat is it’s not always completely reliable. WineBottler will not translate all Windows API calls entirely, so sometimes Windows applications won’t work as expected or at all. Still, this is another option you may find helpful if you have the occasional need to run Windows applications from your Mac.
Go to the WineBottler site and download the version of WineBottler compatible with your macOS installation.
Double-click the downloaded file and drag Wine and WineBottler into the Applications folder to begin the installation process. It may take a couple of minutes for the installation to complete.
Once the file installs, you can navigate to the EXE file in Finder. Then right-click the file to bring up a drop-down menu.
Select Open With.
Choose Wine.
A pop-up window appears that prompts you to choose how to run the file. Select Run directly in [address].
Then click Go, and your file should begin to load.
If your file does not begin to load, it likely isn’t supported by Wine, which means you’ll have to use the Boot Camp option listed at the beginning of this article (if your Mac can use Boot Camp).
Open Finder > in the left pane, select All My Files. Newer versions of macOS do not have this option, so you have to search for files using Finder.
To find downloads on a Mac, open Finder > go to the left pane and select Downloads. Alternatively, use the keyboard shortcut Command+Option+L to open the Downloads folder.
To unzip a file on Mac, open it like any other file by double-clicking. To zip a file, right-click and select Compress.
To select multiple files on a Mac, press the Command key as you choose your files. Or, click and drag files with your mouse. To select all files in a folder, long-press Command+A.
Mac OS X is capable of running Windows operating system on them using the built-in Boot Camp feature. Before you initiate Windows installation on your Mac machine, you must be aware of how to create a Windows partition using the Disk utility. In order to initiate the steps to install Windows on your Mac, you need to set up a Windows partition first.
Set up a Windows partition on your Mac using Boot Camp Assistant
Mac OS X’s Boot Camp Assistant built-in utility not only lets you add a new partition on your Mac hard drive but also helps to install and run Windows in a fully native environment. This advanced utility takes care of all the necessary drivers required by Windows to run in Apple hardware like networking, keyboard, mouse, camera, audio, trackpad, and video.
Steps to partitioning your Mac drive for Windows
- Go to Applications ->Utilities and run Boot Camp Assistant.
- An introduction screen displays, click ‘Continue’ button.
- The next screen shows a ‘Select Tasks’ option that includes the three different functions that Boot Camp Assistant can perform. Here select ‘Install or remove Windows 8.’ option and click Continue.
Note: Here you can also place check marks next to ‘multiple tasks’ and ‘Boot Camp Assistant’ will automatically perform each task in a sequence.
- If you have connected multiple drives to your Mac system, then all of them will be listed. Select the desired drive you are willing to install Windows. In the case of a single drive, skip this step and click Continue.
- After the successful selection of the targeted hard drive, you will be able to see one section listed as Mac OS X and the new section listed as Windows. Till this time, no partitioning has been performed. To initiate a partition, you need to decide the size of the Windows partition first.
- To increase or decrease the size of your created partitions, you can click and drag with your mouse. Drag until the desired size of the Windows partition.
- Once you are done with the Windows partition size, you can begin the process of creating the partition and installing Windows 7. Make sure, you have a Windows 8 drive or DVD and the version of Windows support software you have created in an earlier step. Insert your Windows 8 Install disk, and click Install.
- Now, ‘Boot Camp Assistant; will automatically create a Windows partition and name it BOOTCAMP. After the successful process, it will restart your Mac and initiate the Windows installation process.
Tips to keep in mind while creating a Windows partition:
- Open ‘Boot Camp Assistant’ in the utilities of Applications folder and do as per the instruction.
- Note: In case you have used any application to partition the drive instead of ‘Boot Camp Assistant’, then this process could erase the partition as ‘Boot Camp Assistant’ creates the partition only if the targeted Mac drive is formatted as Mac OS supported format and doesn’t include a partition created using Boot Camp Assistant.
- In order to decide the best size of Mac partitions, you can use the manual of your version Windows you want to install. For Windows 8, 30 GB space is required to create a partition.
- If while creating Windows partition, the Boot Camp Assistant shows the message ‘verification failed’ then try to repair the drive using Disk Utility’. If it doesn’t work, take back up of your drive and reinstall OS X.
- Make sure the drive you are targeting to partition should be an internal drive.
Capabilities of Boot Camp Assistant utility
- Creates partitions on your Mac hard drive without any data loss
- Avail all the required drivers for Windows to run all Mac’s hardware.
- Provides a Windows control panel for selecting the environment the Mac will boot into.
- Capable of removing the created Windows partition and add the free space to your Mac drive.
Change the size of the partition
You cannot change the size of created Boot camp partition after installing Windows, but if you want to increase or decrease the size of your Windows partition on your Mac, user can remove the partition and create a new one of the size the user wants to have. An additional feature that the users enjoy is that they can rename the Window partition from within Windows. The users can refer to Windows documentation for instructions.
In case you have the process gets failed and you have lost your complete data on your Mac drive then it is better to take your drive to a Data recovery service experts as they are highly qualified and can treat your data in a better than any existing software service.
About The Author
Girish
Girish is a blogger and writer. He has over 4-year experience in Data Recovery and Data Eraser technology. In his free time, he writes about technical tips and tutorials.
Nogle gange vil du hurtigt køre et Windows-program uden at genstarte din Mac. Nogle gange har du brug for adgang til al din Macs computerkraft til et Windows-program eller -spil. Alt dette gør det svært at afgøre, om du skal dual boot med Boot Camp eller bruge en virtuel maskine.
RELATED: Sådan løser du Windows-programmer på din Mac med paralleller
Det viser sig, at du ikke gør det t skal beslutte: Hvis du har Boot Camp installeret, kan du køre din Windows-partition som en virtuel maskine i Parallels Desktop. Det er det bedste fra begge verdener. (Den eneste ulempe: Du skal betale $ 80 for den fulde version af Parallels. Men vi synes det er det værd.)
Vi har vist dig, hvordan du installerer Windows på en Mac med Boot Camp, og hvordan du kører Windows på din Mac med Parallels. Kombinationen af de to giver dig en fantastisk fleksibilitet, og det er ikke svært at komme i gang.
Åbn Parallels og klik på knappen “+” for at oprette en ny virtuel maskine.
Du vil blive præsenteret med fire primære muligheder til oprettelse af en ny virtuel maskine; vælg “Brug Windows fra Boot Camp.”
Efter dette bliver du advaret om, at Windows kan bede om genaktivering i den virtuelle maskine. Afkryds i feltet for at sige, at du vil fortsætte, og klik derefter på “Fortsæt”.
Du bliver spurgt, hvor din virtuelle maskine skal være placeret. Bemærk, at dette stort set kun er en konfigurationsfil: Der er ingen virtuel harddisk, fordi Parallels vil bruge hele Boot Camp-partitionen i stedet. Konfigurer ting som du vil, og klik derefter på “Fortsæt.”
Parallels vil komme til at arbejde med at konfigurere din Boot Camp-partition til at køre som en virtuel maskine. På et tidspunkt bliver du bedt om at logge ind på din Windows-konto, hvorefter Parallels automatisk installerer Parallels Tools.
(Bemærk at Parallels Tools kun kører, mens du kører Windows inde i Parallels-du kan ikke se det når du starter direkte til Windows.)
Til sidst får du at vide, at alt er korrekt konfigureret.
Du kan nu bruge din nye virtuelle maskine! Din nye virtuelle maskine bruger din Boot Camp-partition, hvilket betyder, at alt hvad du gør i den virtuelle maskine, vil vente på dig, når du logger ind på Windows direkte ved hjælp af Boot Camp.
For eksempel: Du kan installere Steam og downloade en masse spil mens kører macOS, genstart derefter din Mac til Windows senere og afspil dem. Eller du kan gøre en masse processor-intensivt arbejde i CAD, mens du kører Windows direkte, så få hurtigt adgang til resultaterne fra macOS via Parallels, hvis du har brug for.
Alle funktioner i Parallels understøttes her. Du kan bruge Coherence Mode til at køre Windows og Mac App side ved side, eller brug funktionen Shared Folders til at få adgang til dine MacOS-filer ved hjælp af Windows-programmer.
Der er kun en ulempe, og det har at gøre med aktivering. Windows og Microsoft Office aktiveres specifikt til et stykke hardware, og de vil se den virtuelle maskine som en anden computer helt. Resultatet: Det kan være nødvendigt at genaktivere Windows og Office fra tid til anden. Det er irriterende, og der er ingen rigtig vej rundt om det, men det er en lille pris at betale for bekvemmeligheden af denne opsætning.
Siden Windows 7 kombineres apps med flere åbne vinduer i en enkelt proceslinjeknap. Hvis du flytter over knappen, får du et levende miniaturebillede af hvert vindue, og du kan derefter klikke på det vindue, du vil arbejde med. Hvis du rutinemæssigt skifter mellem apps med åbne vinduer, kan det være lidt besværligt.
I årevis har jeg drømt om at have en Emergency Pizza Button, der automatisk vil bestille en pizza til mig med en enkelt tryk. Jeg er ikke den eneste med denne drøm. Der har været utallige innovationer inden for pizza bestillingsteknologi de seneste år . men de har alle været fra Domino’s. Hvad sukker, fordi de har værste pizza.
And you can have it all.
By David Nield | Published May 21, 2022 11:00 AM
There are many reasons you might want to run Windows on your Mac computer. Maybe you need to run a Windows-only application, or you actually prefer the look and feel of Microsoft’s operating system. Whatever your reason is, you’ve got mainly two ways to go about it.
Which method is right for you depends on your budget, how often you’re planning on using Windows, and how old your Mac is. We’ve covered both here so you can take your pick or switch between the two if you need to.
And just in case you’re wondering, you can’t run macOS on a Windows computer—at least not easily. Apple doesn’t make its software available for non-Apple computers, so if you want to try your luck, you’ll need to follow unofficial workarounds that you may feel are more trouble than they’re worth.
Option 1: Boot Camp
Apple’s Boot Camp is a built-in app that sets up your computer as a dual-boot system, which allows you to pick between loading Windows or macOS every time you start up your machine. There are a lot of advantages to Boot Camp: It’s officially supported by both Apple and Microsoft, it makes full use of the processing power and memory of your Mac, and it’s simple to set up.
But because nothing concerning Windows-Mac relations can be perfect, Boot Camp has the big disadvantage of rapidly getting out of date, making it incompatible with the newest Apple computers. Macs with Apple’s M1 chip inside—meaning all machines the company has launched since 2020 and will continue to launch going forward—don’t support Boot Camp, as Windows is simply not built for that processor design.
But the limitations keep on coming, and even if you have an older Mac with an Intel chipset, Boot Camp will only allow you to run Windows 10. This is because Windows 11 has some pretty strict system requirements that Intel Macs just don’t meet. At the time of writing, it’s not clear if Boot Camp will ever come to Macs running Apple silicon, or if Windows 11 will ever work with Boot Camp. Apple has made a few positive noises about it, so it seems it’s now down to MIcrosoft.
So if you have an older Mac and you’re content with running Windows 10, Boot Camp can easily give you OS flexbility. To start, you’ll need a digital copy of Windows (which you can get from MIcrosoft for $139) and run the Boot Camp Assistant. Use Spotlight search (command + spacebar) to find the app on your Mac, open it and follow the installation process.
The first step is to set up a partition on your Mac’s hard drive, which will separate part of the disk so that WIndows can live in it. It’s up to you how large you make this space, but the more files and programs you want to use with Windows, the more room you’re going to need. Apple recommends at least 64GB for Windows to run properly, and at least 128GB for the best experience.
When the time is right, Boot Camp Assistant will prompt you to open the file you’ve downloaded from Microsoft—you’ll know which one it is by the ISO extension on the filename. After the installation is complete, whenever you start up your Mac, hold down the Option key to choose between macOS and Windows. You can also set the default choice from macOS by opening up the Apple menu and choosing System Preferences and then Startup Disk.
Option 2: Virtualization software
The other option for getting Windows on your Mac—and really the only option if you have a newer M1-powered machine or want to use Windows 11—is to use virtualization software.
This type of program runs Windows on top of another software layer that works with macOS, making it so that as far as Windows is concerned, it’s running on a normal PC. That extra layer of processing and interpretation makes performance slower than with Boot Camp, though for most tasks you shouldn’t notice any major lagging problems. This is also a more expensive option, as you’ll be paying for the virtualization package as well as for Windows itself.
Parallels is the best in the business for this, and will set you back a one-off fee of $80. For faster support, free upgrades to future versions and a few extras (like more customization tools), there’s also a pro-level package for $100 a year. As with Boot Camp, you’re also going to have to buy Windows, which will set you back $139. At the time of writing Microsoft is not selling Windows 11 directly, so you’ll have to settle for Windows 10 which you can then upgrade to the latest version of the operating system.
But this approach also has its issues. If you want to use Windows 11, you need to use an experimental version of the software that Microsoft has built especially for ARM processors, which is what Apple’s chips are. You’ll need to register with Microsoft to use this version, and because it’s experimental, you may come across a few bugs.
The good news is that Parallels does all the heavy lifting for you. Download and run the installation package, follow the instructions on screen, and you’ll be using Windows on your Mac within minutes. Parallels also allows you to run Windows as a Mac app, so you can switch between OSs as needed without rebooting, have Microsoft’s operating system running full screen or even in a window.
While the performance isn’t quite as good as it is with Boot Camp, Parallels does a good job of optimizing Windows, so most applications and even less demanding games should run with no issues. Other virtualization tools are available including VMware Fusion and VirtualBox, but they’re more difficult to configure than Parallels and have even more issues when it comes to M1 Macs and Windows 11.
Finally, if those two options sound like a bit much to you, things might be getting easier in the future. Microsoft’s Windows 365 Cloud PC is a tool capable of streaming access to a Windows 11 computer through any browser on any kind of machine, no matter the OS they’re running. This app is currently only available to businesses, but it could become a consumer option at some point in the future, making a PC experience on a Mac seamless.
David Nield is a freelance contributor at Popular Science, producing how to guides and explainers for the DIY section on everything from improving your smartphone photos to boosting the security of your laptop. He doesn’t get much spare time, but when he does he spends it watching obscure movies and taking long walks in the countryside.
Choosing between a Windows computer and a Mac can be a tough decision. Some users think they’ll be giving up features or apps they enjoyed on Windows when making the switch to Mac. Luckily, you can have the best of both worlds by running Windows on a Mac using Apple’s Boot Camp.
Why would you want to run Windows on an Apple machine in the first place? First of all, there’s quite a large number of programs and apps that only work on Windows, especially professional software. If you’re a gamer, you can’t go without Windows as the selection of games on macOS is extremely limited.
So why not just buy a Windows computer? Well Apple computers are known for their reliability and they hold their value very well compared to PCs. Some people still buy used Apple laptops that are a few years old, something almost unheard of for Windows laptops.
Mac owners can use Apple’s built-in Boot Camp Assistant to install Windows for free. The first-party assistant makes installation easy, but be forewarned that you will need to restart your Mac whenever you want to access the Windows provision.
Another option is Parallels Desktop, a third-party service that allows you to switch back and forth between macOS and Windows without having to reboot, but that product requires an annual subscription.
Before we begin installing Windows using Boot Camp, make sure you’re on an Intel-based Mac, have at least 55GB of free disk space on your startup drive, and have backed up all of your data.
The first thing we need is a Windows disc image file, or ISO. Use Google to search and find the “Download Windows 10 ISO” file page on Microsoft’s website. Once there, select “Windows 10,” and hit “Confirm.” Choose your language and select “64 bit” unless you’re running an older Mac that only supports 32 bit programs.
If you’re not sure, click the Apple logo at the upper-left hand corner of your Mac’s home screen and select “About this Mac.” If it says “Core Duo” in the processor section, then your Mac is 32-bit.
If you’re running OS X El Capitan 10.11 or later on a Mac, Windows installation is going to be a breeze since those models use the computer’s internal drive to temporarily store Windows installation files. If not, you’ll need to insert a blank 16GB or larger USB flash drive or external SSD to complete the installation.
Once your ISO file is done downloading, open Spotlight Search or Launchpad and search for “Boot Camp Assistant.”
Click continue, then click choose and select your newly downloaded ISO file. Next, Boot Camp will ask you to adjust the size of your Windows partition. You should make it larger if you plan on downloading and playing games or using professional software.
If you’re on an older Mac operating system, you’ll see some options to create an install disk and download the latest Windows support software. Make sure all of them are checked, then click continue.
Now choose your ISO image file, and the destination disk, which is your USB Flash drive. Then click continue, choose the partition size for Windows 10, and click install.
If the installation is successful, the system will ask for your Mac’s password. Make sure to save any important documents or files, as your Mac will instantly restart into Windows once you enter your password.
After the reboot, you’ll be greeted with the windows setup menu. If your mouse isn’t working, click a couple of times and the mouse pointer should show up.
Click Next, then enter your Windows 10 activation key if you have it. If you don’t have one yet, click “I don’t have a product key.” In that case, choose which version of Windows 10 you want to install. We chose Windows 10 Home. Accept the terms and click next on the next page to begin the installation.
When it’s finished, Windows will automatically restart and bring you through the rest of the installation. Once at the Windows desktop, the boot camp installation program will show up. This will install all the necessary drivers for Windows to run properly.
Your system will restart one more time and then Windows is ready for use!
To get back to macOS, find boot camp at the bottom right hand corner of the screen, right click on it? And click “Restart in MacOS”
If you get an error message, don’t worry. Just restart your system while holding down the option key to choose which operating system to start up in.
To get back to Windows from macOS, you can either use the restart while holding the option key method, or you can use Spotlight search to open the Startup Disk settings. Click the lock and authenticate to unlock the settings, then click on Bootcamp, and click restart.
If you want to completely remove the Boot Camp partition, open Boot Camp Assistant again and click Restore. Just remember that this operation will delete all data and contents on the Windows partition.
Mac OS X is capable of running Windows operating system on them using the built-in Boot Camp feature. Before you initiate Windows installation on your Mac machine, you must be aware of how to create a Windows partition using the Disk utility. In order to initiate the steps to install Windows on your Mac, you need to set up a Windows partition first.
Set up a Windows partition on your Mac using Boot Camp Assistant
Mac OS X’s Boot Camp Assistant built-in utility not only lets you add a new partition on your Mac hard drive but also helps to install and run Windows in a fully native environment. This advanced utility takes care of all the necessary drivers required by Windows to run in Apple hardware like networking, keyboard, mouse, camera, audio, trackpad, and video.
Steps to partitioning your Mac drive for Windows
- Go to Applications ->Utilities and run Boot Camp Assistant.
- An introduction screen displays, click ‘Continue’ button.
- The next screen shows a ‘Select Tasks’ option that includes the three different functions that Boot Camp Assistant can perform. Here select ‘Install or remove Windows 8.’ option and click Continue.
Note: Here you can also place check marks next to ‘multiple tasks’ and ‘Boot Camp Assistant’ will automatically perform each task in a sequence.
- If you have connected multiple drives to your Mac system, then all of them will be listed. Select the desired drive you are willing to install Windows. In the case of a single drive, skip this step and click Continue.
- After the successful selection of the targeted hard drive, you will be able to see one section listed as Mac OS X and the new section listed as Windows. Till this time, no partitioning has been performed. To initiate a partition, you need to decide the size of the Windows partition first.
- To increase or decrease the size of your created partitions, you can click and drag with your mouse. Drag until the desired size of the Windows partition.
- Once you are done with the Windows partition size, you can begin the process of creating the partition and installing Windows 7. Make sure, you have a Windows 8 drive or DVD and the version of Windows support software you have created in an earlier step. Insert your Windows 8 Install disk, and click Install.
- Now, ‘Boot Camp Assistant; will automatically create a Windows partition and name it BOOTCAMP. After the successful process, it will restart your Mac and initiate the Windows installation process.
Tips to keep in mind while creating a Windows partition:
- Open ‘Boot Camp Assistant’ in the utilities of Applications folder and do as per the instruction.
- Note: In case you have used any application to partition the drive instead of ‘Boot Camp Assistant’, then this process could erase the partition as ‘Boot Camp Assistant’ creates the partition only if the targeted Mac drive is formatted as Mac OS supported format and doesn’t include a partition created using Boot Camp Assistant.
- In order to decide the best size of Mac partitions, you can use the manual of your version Windows you want to install. For Windows 8, 30 GB space is required to create a partition.
- If while creating Windows partition, the Boot Camp Assistant shows the message ‘verification failed’ then try to repair the drive using Disk Utility’. If it doesn’t work, take back up of your drive and reinstall OS X.
- Make sure the drive you are targeting to partition should be an internal drive.
Capabilities of Boot Camp Assistant utility
- Creates partitions on your Mac hard drive without any data loss
- Avail all the required drivers for Windows to run all Mac’s hardware.
- Provides a Windows control panel for selecting the environment the Mac will boot into.
- Capable of removing the created Windows partition and add the free space to your Mac drive.
Change the size of the partition
You cannot change the size of created Boot camp partition after installing Windows, but if you want to increase or decrease the size of your Windows partition on your Mac, user can remove the partition and create a new one of the size the user wants to have. An additional feature that the users enjoy is that they can rename the Window partition from within Windows. The users can refer to Windows documentation for instructions.
In case you have the process gets failed and you have lost your complete data on your Mac drive then it is better to take your drive to a Data recovery service experts as they are highly qualified and can treat your data in a better than any existing software service.
About The Author
Girish
Girish is a blogger and writer. He has over 4-year experience in Data Recovery and Data Eraser technology. In his free time, he writes about technical tips and tutorials.
Most users across the world use either Windows or Mac Operating system. They have their own reasons for choosing either of them. Well, now you can enjoy benefits of both on a single system! Yes. That’s right. With Mac’s Boot Camp Assistant, you can install Windows on your Mac system. Once the installation is complete, you can seamlessly shift between macOS and Windows.
First things first. These are the requirements for having Windows on your Mac.
(i) Intel-based Mac.
(ii)A disk image (ISO) of a 64-bit version of Microsoft Windows 8 or later. Go for a full installation and not just an upgrade when you are installing Windows for the first time.
(iii)Apple keyboard, mouse/trackpad, or USB keyboard and mouse.
(iv)Minimum of 55 GB free disk space on your startup drive.
(v)An empty 16GB or larger USB 2 flash drive.
Before you go ahead with Windows installation on your Mac, you should create a Windows partition and then format it. You can create a Windows partition using Boot Camp Assistant and format it using Windows installer.
- How to Partition Your Mac System for Windows?
(i) Go to Applications -> Utilities. Now run Boot Camp Assistant.
(ii) A new screen appears. Click Continue.
(iii) Under Select Tasks option, select Install or Remove Windows 8 option and click Continue.
(iv) You can now see the drives connected to the system. Select the drive where you want to install Windows.
(v)There will be a new Windows section on your screen. You can choose the size of Windows partition by clicking and dragging mouse until you reach the desired size.
(vi)After Windows partition size is set, you can insert your Windows installation disk and click install.
(vii)Boot Camp Assistant will create a partition and name it BOOTCAMP. Your system will restart so that Windows installation process can begin.
- Format Windows Partition
(i) Windows installer aids in formatting the Windows partition. You have to select partition named BOOTCAMP to install Windows.
(ii)Click Format to begin formatting your partition with the NTFS file system. Note: If you are installing Windows 7 or Windows 8, you can see Format option if you click Drive options (Advanced).
(iii) If the installer says it could not create a new partition or identify an existing one, disconnect any Thunderbolt storage devices connected to your Mac. You can reconnect them once Windows installation is complete.
(iv) If you see the message “No Boot Disk Attached” while booting up your Mac, the Windows partition isn’t formatted properly. Remove your partition, repeat previous steps for creating and formatting the partition.
NOTE:
(a) You can refer your Windows documentation guide for knowing the best size of your partition. At least 30 GB partition is required for Windows 8.
(b)If Boot Camp Assistant comes up with a verification failed message, you can repair the drive with Disk Utility. If that doesn’t work either, you have to back up the drive and reinstall OS X.
(c) The drive you are partitioning has to be an internal drive.
(d) Boot Camp Assistant creates the partition only if the drive is formatted as Mac OS Extended (Journaled) and does not already have a partition that was created by Boot Camp Assistant.
Bonus Tip: If you have trouble fixing mac grey screen error, click here to know how to fix mac grey screen of death error.
Recover Data with Remo Recover Software
While creating a partition on your Mac, there are chances of losing your hard drive data. If you encountered such loss, you can easily recover all the data using Remo Recover software.
The software works on both Mac and Windows Operating systems. The data recovery software can restore data from lost, deleted, formatted as well as re-formatted partitions or drives. The powerful scanning algorithms scan the entire hard drive for lost or deleted data.
If your Windows partition got damaged during the installation process, Remo Recover explains in easy to comprehend steps on how to repair damaged partition.
If the hard drive has bad sectors, the software creates a disk image that bypasses all the bad sectors and later recovers data from the image.
Remo Recover can restore several different file types. You can also search for the recovered files using file type search option. If the file type you are trying to recover is not listed by the software, you can add it to Raw signature search option.
The file systems supported by the software include FAT16, FAT32, NTFS, NTFS5, and ExFAT.
The software has a user-friendly interface that helps you recover data in just a few simple steps.
Also Read:
- How to Fix the Mac Boot Camp Error
- Deleting a GPT Protective Partition or EFI System Partition On Windows
- How to run Windows 10 on your Mac or MacBook
- Know about Windows Boot Camp partition and steps to delete it
John Harris
Senior Editor, Content Analyst and a fan of exceptional customer service. John develops and publishes instructional and informational content regarding partition management, Windows hot-fixes, data management and computer troubleshooting.
As a tenured data recovery specialist, John shares exceptional insights and blog posts about data loss and data recovery across any storage device. With 8+ years’ experience in writing for Data Recovery for both Mac OS and Windows OS computers, he is an avid learner who always wants to polish and simplify the data recovery process. John passes his free time playing Chess and reading Science Fiction novels.
Někdy chcete rychle spustit program Windows bez restartování počítače Mac. Někdy potřebujete přístup ke všem výpočetním výkonům systému Mac pro program nebo hru Windows. To vše dělá těžké se rozhodnout, zda byste měli obejít Boot Camp nebo používat virtuální počítač
SOUVISEJÍCÍ: Jak hladce spouštět programy na vašem Macu s Parallels
Ukazuje se, nemusíte se rozhodnout: pokud máte nainstalovaný Boot Camp, můžete v systému Parallels Desktop spustit svůj oddíl systému Windows jako virtuální počítač. Je to nejlepší z obou světů. (Jediná nevýhoda: pro plnou verzi Parallels musíte zaplatit 80 dolarů, ale myslíme si, že to stojí za to.)
Ukázali jsme, jak nainstalovat systém Windows do systému Mac s Boot Camp a jak spustit systém Windows na počítači Mac s Parallels. Kombinace těchto dvou funkcí vám dává úžasnou flexibilitu a není těžké začít.
Otevřete Parallels a klikněte na tlačítko “+” pro vytvoření nového virtuálního stroje.
Zobrazí se čtyři hlavní možnosti pro vytvoření nového virtuálního stroje; zvolte možnost “Použití systému Windows z Boot Camp”.
Poté budete upozorněni, že systém Windows může požádat o opětovné aktivaci uvnitř virtuálního počítače. Zaškrtněte políčko, chcete-li pokračovat, a klikněte na tlačítko “Pokračovat”.
Budete dotázáni, kam by se měl virtuální počítač nacházet. Všimněte si, že je to v podstatě jen konfigurační soubor: neexistuje žádný virtuální pevný disk, protože Parallels místo toho použije celý oddíl Boot Camp. Nakonfigurujte věci tak, jak se vám líbí, a klikněte na tlačítko “Pokračovat”.
Parallels se dostanou do práce a nastaví váš oddíl Boot Camp tak, aby fungoval jako virtuální počítač. V určitém okamžiku budete požádáni, abyste se přihlásili do svého účtu Windows, po kterém Parallels automaticky nainstaluje Parallels Tools.
(Poznamenejme, že Parallels Tools bude fungovat pouze v době, kdy používáte Windows uvnitř Parallels – neuvidíte ji při spuštění systému Windows přímo.)
Nakonec vám bude řečeno, že je vše správně nakonfigurováno.
Nyní můžete použít nový virtuální počítač! Váš nový virtuální počítač používá váš oddíl Boot Camp, což znamená, že vše, co děláte ve virtuálním počítači, na vás čeká, když se přihlásíte přímo do systému Windows pomocí Boot Camp
Například: můžete instalovat Steam a stahovat hromadu her spuštěním systému MacOS a následným restartováním systému Mac do počítače Windows a jejich přehrávání. Nebo můžete v systému CAD pracovat se spoustou práce s náročným procesorem při běžícím systému Windows a pak rychle přistupovat k výsledkům z MacOS přes Parallels, pokud to potřebujete.
Zde jsou podporovány všechny funkce Parallels. Režim koherence můžete použít k tomu, abyste například mohli používat systém Windows a Mac App nebo použít funkci sdílených složek k přístupu k souborům macOS pomocí aplikací systému Windows.
Existuje pouze jedna nevýhoda, což se týká aktivace. Systémy Windows a Microsoft Office se aktivují specificky na jeden kus hardwaru a virtuální počítač vidí jako úplně jiný počítač. Výsledek: Pravděpodobně budete muset znovu a znovu aktivovat systém Windows a Office. Je to nepříjemné a kolem toho není žádná reálná cesta, ale je to malá cena, kterou zaplatíte za pohodlí tohoto nastavení.
Aktualizace Windows 10 Creators Update přidává praktickou funkci, která automaticky vyčistí vaše dočasné soubory a věci, které seděly ve vašem koši více než měsíc. SOUVISEJÍCÍ: 7 způsobů, jak uvolnit místo na pevném disku v systému Windows Systém Windows 10 vždy obsahuje řadu nastavení úložiště, které můžete použít ke správě místa na disku.
Instagram se mění. Gone je jednoduchá aplikace filtru; na jeho místě je jednou z nejpopulárnějších sociálních sítí na světě. K podpoře potřeb milionů uživatelů Instagram neustále inovuje a přidává nové funkce. V poslední aktualizaci můžete nyní přidat více snímků do stejného příspěvku Instagram. Podívejme se na to.
Sue Wayne
Apr 20, 2022 • Filed to: Solve Mac Problems • Proven solutions
Recovery Mode in OS X provides a set of solutions for users to utilize when users need to repair and reinstall their operating system in an emergency. You can also reset the Mac password using recovery mode if needed. There are several ways to boot Mac into recovery mode. If you find one method overwhelming, there are several other alternatives you can use. We will walk you through the different ways on how to boot Mac into recovery mode so that they will become undoubtedly useful in a rare emergency.
- Part 1: How to Boot Mac in Internet Recovery Mode
- Part 2: How to Create a bootable drive into Recovery Mode
- Part 3: How to Boot Mac with Installation Disk
- Part 4: How to Boot Mac into Recovery Mode with Local Recovery
- Part 5: How to Boot Mac into Recovery Mode from Time Machine
Part 1: How to Boot Mac in Internet Recovery Mode
Along with the introduction of a locally stored recovery volume, Apple introduced its Internet Recovery service that allows your operating system to download contents of the recovery hard disk partition from the company’s service. This option is great to use when your local drive is completely corrupted and you no longer can access locally-stored recovery tools.
To launch Internet Recovery, make sure your Mac is connected to a WiFi network and follow the steps below:
- Reboot your Mac.
- Hold the “Options”, “Command”, and “R” buttons until the boot chimes are triggered.
- Wait until the system finished downloading the recovery tools from Apple’s website.
It is noted that you are unable to boot Mac into Recovery Mode if you are using devices older than the ones below:
- MacBook Pro (13-inch, Early 2011)
- MacBook Pro (15-inch, Early 2011)
- MacBook Pro (17-inch, Early 2011)
- iMac (21.5-inch, Mid 2011)
- iMac (27-inch, Mid 2011)
- MacBook (13-inch, Mid 2010)
- MacBook Pro (13-inch, Mid 2010)
- Mac mini (Mid 2010)
- MacBook Pro (15-inch and 17-inch, Mid 2010)
- iMac (21.5-inch and 27-inch, Mid 2010)
- MacBook Air (11-inch and 13-inch, Late 2010)
Part 2: How to Create a bootable drive into Recovery Mode
You can create a bootable drive to store an OS X Recovery Disk so that you can access recovery tools anytime, anywhere. It would be great if you could invest in a high-capacity USB 3.0 flash drive to store the required tools.
There are plenty of articles outlining how you can create a bootable OS X Recovery Disk, including ours. Once you have this established, you can follow these steps to get your Mac into Recovery Mode:
- Reboot your Mac.
- Hold down “Option” on your keyboard once you hear the chime sound.
- Attach your bootable OS X Recovery Disk to your Mac and select it from the prompt list.
- Your Mac will launch into Recovery Mode and you can start fixing your Mac.
As you can see, there are plenty of methods you can use to boot Mac into Recovery Mode. There is no need to panic when you find yourself in trouble – just choose and master the method that seems least intimidating to you and you will be well on your way. After you boot Mac into Recovery Mode, you can also restore your data on Mac.
Part 3: How to Boot Mac with Installation Disk
If you are using an older Mac, it probably comes with a grey recovery DVD that you can use to run recovery routines. If you had bought a copy of a newer operating system, you can also use the installation disk to perform recovery.
It is the easiest way to go into Recovery Mode and here is how you can do it:
- Insert the grey DVD and reboot your Mac.
- Hold down “C” on your keyboard until you hear the boot chimes.
The recovery tool will take some time to load. Follow the wizard that will put your Mac into Recovery Mode.
Part 4: How to Boot Mac into Recovery Mode with Local Recovery
- Reboot your Mac.
- Hold the “Command” and “R” buttons until the boot chimes are triggered.
- You will see the OS X utility window that will prompt you to choose one of the four options.
Part 5: How to Boot Mac into Recovery Mode from Time Machine
It is really important to keep backups of your machine and Apple facilitates this with its Time Machine feature. It would be best to store your backup on an external drive so that you can initiate Recovery Mode using this when your hard drive is wiped out.
Follow these steps to boot Mac into Recovery Mode:
- Reboot your Mac.
- Hold down the Option button when the startup chimes sound.
- Connect your Time Machine drive. It will take some time for the system to detect the drive. You might need to key in your password.
- Choose the drive to launch your Mac into Recovery Mode.
After all the above methods, you finally fail to boot your Mac into Recovery mode. Don’t worry. We also provide further solutions for you – Fix “Cannot boot into Recovery mode”. For those who need the data recovery solution, Recoverit would be a nice option. Free download and try it now.
Video Tutorial on How to Boot Mac into Recovery Mode
Recent Videos from Recoverit
Boot Camp software from Apple shook up the computing public on its apocalyptic arrival in April 2006. Boot Camp graduated from beta, or nearly finished, status with the arrival of Leopard. Boot Camp Assistant software is stored in the Utilities folder inside the Applications folder.
Boot Camp itself is free. You have to supply your own single-disc or downloadable full-install version of Windows; an upgrade disc won’t cut it.
It’s also important to note that you can use a 64-bit version of Windows, Windows 7 (Home Premium, Professional, or Ultimate), Windows 8, or Windows 8.1. Consult Apple support to see which Mac models are compatible with which versions of Windows. In its current incarnation, Boot Camp isn’t compatible with 32-bit versions of Windows.
Other requirements follow:
An Intel Mac with OS X version 10.6 or later
At least 2GB of RAM and 20GB of available space on the Mac’s storage drive that you want to donate to Windows
A blank CD or USB storage device that you’ll use for Windows software drivers
If you don’t run into snags, the entire installation should take about an hour.
Windows 8 and Windows 8.1 are optimized for a touchscreen environment, though you can use it with a standard mouse and keyboard. For now, Macs don’t support touchscreen computing.
To install Windows 8 via Boot Camp, you still must have a legitimate Windows 8 license from Microsoft and a Win8 installation disc, assuming that you have an optical drive. If you don’t have an optical drive, you may be able to create a Windows installer from an ISO file downloaded from Microsoft on a USB flash drive that’s 8GB or larger.
Because snags possible, back up all your important information on the Mac’s startup disk.
Table of Contents
Basic training
Following are the basic steps to get through Boot Camp:
Article post on: us.dinhthienbao.com
Run Boot Camp Assistant (in the Utilities folder inside the Applications folder) to make sure that you have the latest firmware on your computer and to install any support software from Apple that you might need.
You’ll find any updates at Apple support. If you’re using a laptop, make sure to connect the power adapter. You will also be given the option to create a Windows 7 (or later version) install disk for which you’ll need a USB flash drive and an ISO image downloaded from Apple.
Follow the prompts in Boot Camp Assistant to create a partition for Windows.
You’re essentially carving out an area of your hard drive for the Windows operating system. This partition must be at least 30GB and can swell to the total free disk space on hand minus 30GB. If you don’t plan on doing much in Windows, keep the partition small.
Drag the divider to set the partitions for both OS X and Windows, or click Divide Equally to make equal partitions. You can’t resize a Windows partition after creating it, though you can replace it with a larger Windows partition.
If you have a Mac Pro with more than one internal hard drive, you can select which drive to partition. If any of this makes you nervous, know that you can remove the Windows partition later and go back to a single-partition Mac.
Article post on: us.dinhthienbao.com
Insert the Windows CD or a USB flash drive with the Windows ISO file and then click Start Installation.
If you exited Boot Camp Assistant before installing Windows, open it again, choose Start the Windows Installer, and click Continue.
When you’re asked to choose the Windows partition, select the partition that says BOOTCAMP.
You may have to scroll down to see it.
Don’t erase any partitions that you see or create a new partition here. Failure to heed this warning could wipe out your entire Mac OS X startup disk.
Article post on: us.dinhthienbao.com
(Optional) If you see a listing for Drive Options, click it; otherwise, proceed to Step 6.
Reformat the partition by using the Windows installer: Click Format.
You’re using the reliable and secure NTFS file system, but you won’t be able to save files to Windows from Mac OS X, at least not without a techie workaround.
Follow the onscreen instructions to finish installing Windows.
Boot Camp 5.1 includes several Mac drivers so that Windows will recognize your trackpad, Thunderbolt, USB 3.0, the iSight (or FaceTime) camera, the Eject key on the Mac keyboard, networking, audio, graphics, and so on.
A Boot Camp Control Panel for Windows and an Apple Boot Camp system-tray item will be added.
As with any new Windows computer, Microsoft requires that you activate your Windows software within 30 days.
Switching operating systems
You can go back and forth between OS X and Windows on your Mac, but you can’t run both operating systems simultaneously under Boot Camp. Instead, you have to boot one operating system or the other — thus, the name
Restart your Mac, and hold down the Option key until icons for each operating system appear onscreen. Highlight Windows or Macintosh HD, and click the arrow to launch the operating system of choice for this session.
If you want OS X or Windows to boot every time, choose app → System Preferences, click Startup Disk, and choose the OS you want to launch by default.
You can perform the same function in Windows by clicking the Boot Camp system-tray icon and selecting the Boot Camp Control Panel. Click either the Macintosh HD or Windows icon, depending on your startup preference.
Article post on: us.dinhthienbao.com
Recent Posts
- The Girl Who Got Away Ending Explained – Did Elizabeth Die?
- Where to Stay in Cyprus (2022 • COOLEST Areas!)
- 12 Reasons Why Men Come Back Weeks Or Months Later
- How to change the name of your Mac computer in 4 steps, so that it’s easier to find on your local network and AirDrop
- How To Make A New Layer From A Selection In Photoshop
- The Fur Tumbleweeds are Flying! How to Reduce Your Cat’s Shedding
- Cotai – Where to stay in Macau for first timers
- Forensic Scene Analysis: Breaking Bad’s ‘I Am the One Who Knocks’
- 15 reasons why guys ignore you even when they like you
- How to Take a Screenshot on Samsung s9 [2022]? (6 Methods)
- How to fix ‘my Mac won’t update’ issue
- Fire Emblem Warriors Guide — How to Unlock the Secret Characters
- Hawkeye finale recap: Ending and post-credits scene, explained
- How to View Your Own Story on Facebook
- Necrozma – Evolutions, Location, and Learnset | Crown Tundra DLC | Pokemon Sword and Shield
© 2022 by cohaitungchi – Synthesize and organize information automatically by computer program.
Sue Wayne
Apr 20, 2022 • Filed to: Solve Mac Problems • Proven solutions
Recovery Mode in OS X provides a set of solutions for users to utilize when users need to repair and reinstall their operating system in an emergency. You can also reset the Mac password using recovery mode if needed. There are several ways to boot Mac into recovery mode. If you find one method overwhelming, there are several other alternatives you can use. We will walk you through the different ways on how to boot Mac into recovery mode so that they will become undoubtedly useful in a rare emergency.
- Part 1: How to Boot Mac in Internet Recovery Mode
- Part 2: How to Create a bootable drive into Recovery Mode
- Part 3: How to Boot Mac with Installation Disk
- Part 4: How to Boot Mac into Recovery Mode with Local Recovery
- Part 5: How to Boot Mac into Recovery Mode from Time Machine
Part 1: How to Boot Mac in Internet Recovery Mode
Along with the introduction of a locally stored recovery volume, Apple introduced its Internet Recovery service that allows your operating system to download contents of the recovery hard disk partition from the company’s service. This option is great to use when your local drive is completely corrupted and you no longer can access locally-stored recovery tools.
To launch Internet Recovery, make sure your Mac is connected to a WiFi network and follow the steps below:
- Reboot your Mac.
- Hold the “Options”, “Command”, and “R” buttons until the boot chimes are triggered.
- Wait until the system finished downloading the recovery tools from Apple’s website.
It is noted that you are unable to boot Mac into Recovery Mode if you are using devices older than the ones below:
- MacBook Pro (13-inch, Early 2011)
- MacBook Pro (15-inch, Early 2011)
- MacBook Pro (17-inch, Early 2011)
- iMac (21.5-inch, Mid 2011)
- iMac (27-inch, Mid 2011)
- MacBook (13-inch, Mid 2010)
- MacBook Pro (13-inch, Mid 2010)
- Mac mini (Mid 2010)
- MacBook Pro (15-inch and 17-inch, Mid 2010)
- iMac (21.5-inch and 27-inch, Mid 2010)
- MacBook Air (11-inch and 13-inch, Late 2010)
Part 2: How to Create a bootable drive into Recovery Mode
You can create a bootable drive to store an OS X Recovery Disk so that you can access recovery tools anytime, anywhere. It would be great if you could invest in a high-capacity USB 3.0 flash drive to store the required tools.
There are plenty of articles outlining how you can create a bootable OS X Recovery Disk, including ours. Once you have this established, you can follow these steps to get your Mac into Recovery Mode:
- Reboot your Mac.
- Hold down “Option” on your keyboard once you hear the chime sound.
- Attach your bootable OS X Recovery Disk to your Mac and select it from the prompt list.
- Your Mac will launch into Recovery Mode and you can start fixing your Mac.
As you can see, there are plenty of methods you can use to boot Mac into Recovery Mode. There is no need to panic when you find yourself in trouble – just choose and master the method that seems least intimidating to you and you will be well on your way. After you boot Mac into Recovery Mode, you can also restore your data on Mac.
Part 3: How to Boot Mac with Installation Disk
If you are using an older Mac, it probably comes with a grey recovery DVD that you can use to run recovery routines. If you had bought a copy of a newer operating system, you can also use the installation disk to perform recovery.
It is the easiest way to go into Recovery Mode and here is how you can do it:
- Insert the grey DVD and reboot your Mac.
- Hold down “C” on your keyboard until you hear the boot chimes.
The recovery tool will take some time to load. Follow the wizard that will put your Mac into Recovery Mode.
Part 4: How to Boot Mac into Recovery Mode with Local Recovery
- Reboot your Mac.
- Hold the “Command” and “R” buttons until the boot chimes are triggered.
- You will see the OS X utility window that will prompt you to choose one of the four options.
Part 5: How to Boot Mac into Recovery Mode from Time Machine
It is really important to keep backups of your machine and Apple facilitates this with its Time Machine feature. It would be best to store your backup on an external drive so that you can initiate Recovery Mode using this when your hard drive is wiped out.
Follow these steps to boot Mac into Recovery Mode:
- Reboot your Mac.
- Hold down the Option button when the startup chimes sound.
- Connect your Time Machine drive. It will take some time for the system to detect the drive. You might need to key in your password.
- Choose the drive to launch your Mac into Recovery Mode.
After all the above methods, you finally fail to boot your Mac into Recovery mode. Don’t worry. We also provide further solutions for you – Fix “Cannot boot into Recovery mode”. For those who need the data recovery solution, Recoverit would be a nice option. Free download and try it now.
Video Tutorial on How to Boot Mac into Recovery Mode
Recent Videos from Recoverit
by Marcel Dufresne
Feb 15, 2021
Since Apple switched to an Intel processor, there arose the opportunity to run Windows applications on the Mac S. Boot Camp, for instance, comes with OS X for installing Windows on a separate partition. The software for running this is found in the Utilities folder of your Applications. With Boot Camp installed, you can startup your computer in either the Mac OS or the Windows environment. The big problem here is that you must reboot to switch operating systems. Parallels and VMware offer virtualization software that let you run your Windows programs without logging out of OS X. The thing that all of these options share though is that they legally require you to actually run Windows and therefore own a Windows license. The second problem with these is that Windows always seems to be updating its software which slows down the startup process or the shut down process.
CrossOver however enables you to run Windows applications without actually running Windows. With CrossOver installed on your Mac, you can use a Windows version installer, install the program, and run it. CrossOver bridges directly between Windows software and OS X, allowing applications to run at full speed on your Macintosh desktop. CrossOver has been tested for performance with many common applications such as Microsoft Office, Adobe Photoshop and Quicken. It also works efficiently with a wide variety of other programs. Click here to check for compatibility issues. There are thousands of applications that work fine.
I would always opt for a Mac if given the choice, but some things you want to do with your computer still require Windows. Now, thanks to the Intel-based Mac, you can get a fast Windows environment without leaving the comfort of your Mac OS X. Some of the top reasons for needing to resort to Windows would be for games, some Microsoft or Adobe applications, Quicken, some tax programs and a Windows browser for filling out online forms.
I must admit that the biggest reason I wanted CrossOver was to run Steam in the Windows environment. I have a few games that are Windows specific. If you are at all familiar with Steam, you know that there are a lot more Windows games available than Mac games, at a much lower cost. Now with CrossOver, I am not limited to what I can play. Besides Steam, I also installed a browser. I have had problems with online forms in the past not being Mac compatible. And CrossOver provides cross-platform copy and pasting and access to your files under either environment.
Installing a Windows program is as straight forward as it would be on any Windows computer. CrossOver has a list of specific applications that you can choose to help you install. If you wish to install from a single installer file or install one of CrossOver’s automatic packages, select “Install Software…” from the Configure menu. Then select the name of the package from the list provided. If the program you want to install is not in the list, click “Install Unsupported Software…” and follow the steps provided by the CrossOver Software Installer. If all went well, a launcher icon appears for the application you just installed. This icon is in your home directory for later use. If your program did not create any icons, you can still launch it by selecting “Run Command…” from the Programs menu. This will access your virtual C drive which is located in Application Support/Crossover of your Library file. Remember that unsupported software may work poorly or not at all. In addition, installing unsupported software may prevent already installed supported Windows applications from working. It is generally recommended that unsupported applications be installed in a new bottle for testing purposes. The bottle idea was the most confusing term used by CrossOver. A bottle is a virtual windows environment. Each bottle contains a unique C drive and all its standard sub directories: Windows, Program Files, etc. A bottle also contains a complete Windows registry, a full set of most CrossOver settings, and one or more Windows applications.
CrossOver allows you to maintain multiple bottles in one CrossOver installation. This is useful anytime you wish to install multiple applications yet prevent them from interacting or damaging one another. Most CrossOver users will be happy using a single, default bottle. The CrossOver Software Installer will automatically create the default bottle and any other bottles which you may need during normal use. You can decide to install all new software into an already existing bottle.
There is a very useful help menu that will lead you through your first few installs, if you need it. In case of a problem, the first place to check is online at the CodeWeavers tech-support. It is updated regularly to document known issues and their workarounds. With luck the solution to your problem may already be waiting for you. There are likewise some videos that can be watched for the more visual learners. These can also be found in the support area on CodeWeavers web site.
CrossOver is not difficult to install, and requires very little space on your system. There is a demo version of CrossOver that can be downloaded that has all the functions and features of the full version. Any Windows software that works on a full version will also run in the demo version, and vice versa. The principal limitation of the demo version is that bottles can only be used for 14 days. This means that any Windows packages that you install using the demo version will cease to work no more than 14 days after their installation. CrossOver has a couple of purchase options. The simplest is $39.95 for the one time purchase with no support or upgrades. There is also a $59.95 version which provides a one year subscription with upgrades and email support. You can read about these and download a trial copy from the
CrossOver Mac 20 is the easiest way to run Microsoft Windows software on your Mac without buying a Windows license, rebooting or using a virtual machine. CrossOver Mac makes it easy to launch Windows programs natively from the dock, and integrates macOS functionality like cross-platform copy and paste and shared file systems to your Windows applications. This is the way to go if you do not have a Windows license. I can now run some older Steam games that I picked up at 90% off.


