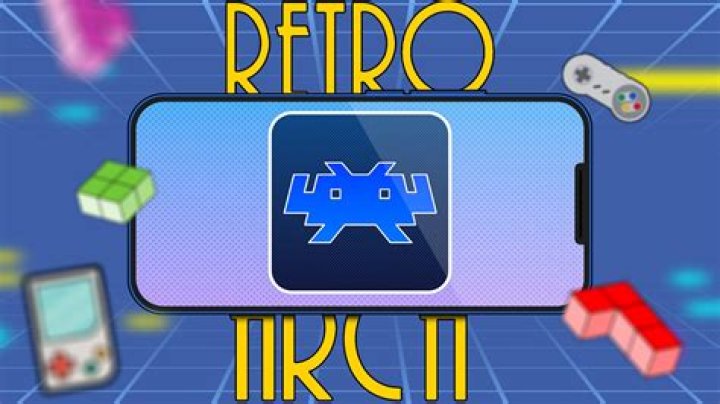
How to Setup RetroArch ? Being a gamer, you must be missing those retro games from the Nintendo’s and Arcades. Here is a much better way to get all that nostalgic feeling back without using a bunch of old school systems or using multiple emulators. The RetroArch is the all-in-one solution for all of our problems. And the guidance of how to setup RetroArch is all you need. RetroArch is a powerful emulator that can run almost any retro game you can thin of. Ant it can be accessed on Windows, Mac and Linux computers without any hazel.
Yet so amazing things to offer, it’s bit tricky to set things up. No need to panic, though, here is an easy representation of how to setup RetroArch emulator step-by-step. Consider yourself one step away from reaching your desired game from the past, cause you are about to relive your memories. Want to learn how to setup RetroArch ? Just go through the process given below.
Cut to the Chase
Download RetroArch
Step one, go to the libretro.com and click on the “Downloads” available in the top-right corner of your screen (in menus). Here you will get the latest version of the emulator. Be specific with your platform and choose accordingly where you want to go. For Example, if you are a Windows user, then go for the windows section.
Browse for it and you will find a 7-Zip archive file containing RetroArch emulator. Just extract the archive to a specific folder and you are good to go.
To launch the RetroArch Emulator, just double click on “retroarch.exe”.
Configure and Setup Your Controllers
As you run the RetroArch Emulator, you will see a user interface not that convenient but you’ll get used to it soon. Moving to the Configurations can be a bit more to ask as a lot of things seems new and you probably don’t know what to do, but trust me, its easier than it looks.
About the emulator, at first you cannot use it by user mouse cursor, instead use “Arrow keys” to scroll down the menu and switch between the options from left to right. Use “Enter key” to select an option, and “Backspace key” to jump back to the previous menu (level).
It may remain as a one time thing here, cause the next thing that needs to be done is setup your controller. The Xbox 360 controller works fine but you can still change the layout the way you want.
To have that, head to the Settings menu (using keyboard) present that the top most of menus represented with a double gear symbol and from there scroll down to the “Input” and hit enter.
Now select option named “Port 1 Controls” and scroll down to the option “Set All Controls” select this option and now you will be able to map the layout of your controller.
The binding works across all emulators and are designed to copy and act exactly like the controller associated with the selected system. So that, you can bind each button ideally with respect to the picture shown below.
After coming this far, you will be able to play your favorite game with controller the way you used to do. Though, you can still change the configuration if you want. One the controller is configured, then you can use it to navigate and select options in RetroArch Emulator without touching the keyboard.
If you wish to configure multiplayer rig, then use the same process and you will be done in no time.
Download Emulators
Now understand this, RetroArch Emulator isn’t an emulator itself, instead, it is a user interface (front end) which has capability of running multiple emulators. These emulators are represented as “cores” in RetroArch Emulator. And you will need the appropriate cores for you to play your desired games.
But you don’t have to go anywhere for it, you can download them from RetroArch itself. All you have to do is go to the Main Menu in RetroArch and scroll down till you find “Online Updater”.
Select “Core Downloader”. Here you’ll find number of cores of your choice. Just scroll through it and download as many cores as you want.
You may find multiple cores for same system, but don’t panic as they all are almost same with same purpose. Just choose your favorite one and prepare to initiate.
Add ROMs
Now that you have cores ready, now it’s time to add ROMs. We’ll proceed considering you already own a collection of ROMs of your favorite games with respect to the core (system).
The RetroArch has the ability to scan your folder of ROMs and will organize them for you. To do that, from main menu, go to “Load Content” and select the Drive that has ROMs. After that browse your folder full of ROMs and select it. You will see blue text at the bottom of the screen that will help you see the progress. Once done, select the ROM you want to play.
As shown in the image, you will be able to access your game collection. When you try to open any of them, you will be asked which core you want to run the game with. Select one and next thing you will see on your screen is your game up and running.
So this is the easiest way you can experience the good old nostalgia and have a good time reliving the memories. Got any questions related to How to Setup RetroArch ? Feel free to ask.
Lakka is a lightweight Linux distribution that transforms a small computer into a full blown retrogaming console.
Powerful
Built on top of the famous RetroArch emulator, Lakka is able to emulate a wide variety of systems and has some useful features such as automatic joypad recognition, rewinding, netplay, and shaders.
User friendly
Lakka is easy to setup and use. Once installed on your SD card or USB flash drive, you just have to copy your ROMs on the device, power up the rig and plug your joypad and enjoy your favorite games.
Low cost
We try our best to keep the hardware required to run Lakka as cheap as possible. The software is optimized to run fast even on low end computers, and we support a lot of USB joypads.
Open source
Lakka is a community-driven project. Coders, designers and gamers, from all around the world, are working together to make it the Ultimate Emulation OS. Come and join us!
Lakka on Raspberry Pi
Lakka is the easiest way to setup emulators on a Raspberry Pi.
The Raspberry Pi is a very affordable single board computer. It is powerful enough to emulate most retro consoles such as the Nintendo NES, the SEGA Genesis, the Sony PlayStation, or Arcade Games.
Beginners can buy a Raspberry Pi with a pre-flashed NOOBS SD card online and setup Lakka using NOOBS.
There are many cases available, and with Lakka you can customize your setup to build your own video game console.
Lakka is the official Linux distribution of RetroArch and the libretro ecosystem.
Each game system is implemented as a libretro core, while the frontend RetroArch takes care of inputs and display. This clear separation ensures modularity and centralized configuration.
Recalbox 8 and Recalbox RGB Dual are available!
THE all in one
Play again to all the consoles, arcades and computers of your childhood.
We help you to create your Recalbox, in 4 steps.
I am already equipped.
Download and install the latest version of Recalbox on your hardware!
100+ compatible systems
Play again to 100+ consoles, handhelds and computers. Find games from thousands of arcade cabs
And you, which console will you play again?
It has never been so simple
Simple and accessible, we do our best to offer you the best retrogaming experience ever !
The system is designed to be as easy to use as possible, even for beginners. And moreover, we accompany you from the purchase of the material until your first game on Recalbox. Are you ready to play?
The retro console with a twist
Instant save, rewind, scraping, overlays, shaders, virtual keyboard, multi-system search, it would be too long to list everything that makes Recalbox the ultimate retrogaming solution. Discover it by yourself by trying Recalbox !
Where to start with Recalbox?
1 – Create your Recalbox
We advise you to start with the section Create your Recalbox which will allow you, in 4 steps, to get the necessary hardware, to assemble and to launch your first game on Recalbox.
Once your Recalbox is up and running, the Tutorials section will allow you to discover the menus, options and configurations of your Recalbox and to master your console to perfection.
To go even further, you can visit the official Recalbox documentation written by the community. And if you want to participate, don’t hesitate to propose content!
New Update (v1.9.14)
Get the latest version of RetroArch right now on your platform of choice.
Read the article linked down below to see what’s new!
A Polished Interface
Browse your game collection through a beautiful settop box-oriented menu.
After scanning your collection, games will be sorted by system.
The menu supports thumbnails and features various animated backgrounds.
Cross platform
RetroArch can run on the usual platforms like Windows, Mac OS X and Linux.
RetroArch also runs on Apple and Android for tablets and phones, as well as on game consoles like PS3, PSP, PS Vita, Wii, Wii U and more!
Next-frame response time – impeccable latency results
RetroArch is capable of next-frame responsive time. This means that there should be no nearly no perceivable difference in terms of input latency from real hardware, FPGA/clone or original hardware.
On top of all that, there are various settings you can configure to optimize the results even more.
Highly Configurable
Our advanced settings interface lets you tweak every possible option about how the games are run and displayed.
Every setting has a logical default so you can be up and running in no time.
Automatic Controller Configuration
Common game controllers are automatically configured when plugged in, just like a real console.
Ideal for multiplayer games when a friend brings their own controller!
You can also configure controllers manually to assign special actions to button combos.
Shaders
Shaders are efficient graphical filters that can greatly improve the rendering of old games.
They can also be used to replicate the look and feel of old CRT monitors.
You can even stack them to create your own effect. The possibilities are endless.
Achievements
Unlock achievements on your favorite classic games!
Unlock trophies and badges like on a modern game consoles!
Netplay
Host or join a network gaming session.
Rediscover the joy of multiplayer games using RetroArch built-in netplay lobby.
You can also use the spectator mode to watch others play.
Recording & Streaming
RetroArch is able to record your gaming session to a video file.
The same mechanism also enables you to live stream your games to platforms like Twitch.tv or Youtube.
Expanding app library
New programs are constantly being added to RetroArch’s app library.
And with RetroArch’s built-in Core Updater, you can download new programs directly as soon as they become available!
Dolphin
Dolphin is a Wii and Gamecube emulator. It has been ported to libretro and an alpha version of the core is available now for Windows and Linux! Version for macOS will be released at a later date.
For more information on Dolphin, visit the author’s website here.
See also our in-depth article here.
Citra
Citra is a ‘work in progress’ Nintendo 3DS emulator.
Core available now for Windows and Linux. Version for macOS will be released at a later date.
For more information on Citra, visit the author’s website here.
See also our in-depth article here.
OpenLara
OpenLara is an early Tomb Raider game engine recreation.
Core available now for Windows/Linux.
For more information, read our article on this release here.
It uses the original data files in order to work. What is nice about this one is that it has some very fancy graphics effects that it adds on top of the old game engine without it resulting in any stylistic clashes.
melonDS
melonDS is a ‘work in progress’ Nintendo DS emulator.
Core available now for Windows, macOS, Linux, Android and iOS.
For more information on melonDS, visit the author’s website here.
See also our in-depth article here.
SameBoy
SameBoy is a highly accurate Game Boy/Game Boy Color emulator.
Core available now for Windows, macOS, Linux, Android and iOS.
For more information on SameBoy, visit the author’s website here.
PX68K
PX-68K is a Sharp X68000 emulator. This is a Japanese home computer from the late ’80s/early ’90s that was used by Capcom as devkits for their arcade games. It played host to many popular games from the likes of Namco, Konami and Capcom.
Core available now for Windows, macOS, Linux, Android and iOS.
For more information, read our article on this release here.
RetroArch Open-Hardware Newsletter & User Survey
Mon, 10 Jan 2022 15:16:32 +0000 m4xw
A busy year passed by and there was a lot of silence on the Open-Hardware Project. The promise of RetroArch Open-Hardware has always been open hardware with open software delivering an open solution. We stand by this goal to this day, however we felt that the DIY market alone will not help the cause significantly […]
RetroArch 1.9.14 release!
Mon, 06 Dec 2021 04:02:38 +0000 Daniel De Matteis
RetroArch 1.9.14 has just been released. Grab it here. If you’d like to learn more about upcoming releases, please consult our roadmap here. Remember that this project exists for the benefit of our users, and that we wouldn’t keep doing this were it not for spreading the love to our users. This project exists because […]
Lakka 3.6 release
Sun, 14 Nov 2021 01:09:20 +0000 Daniel De Matteis
Original article here. New version of Lakka has been released! We are happy to announce the new and updated version of Lakka. Release summary Changes since version 3.5.2: RetroArch updated to 1.9.13.2Option to control the menu by all users is back New option for automatic frame delay (accessible via Settings → Latency, and also via […]
RetroArch 1.9.13 ninjafix release
Thu, 11 Nov 2021 00:49:03 +0000 Daniel De Matteis
A ninjafix release was just pushed for RetroArch 1.9.13. This overwrites the current 1.9.13 build. Download it here. The main reason for this was that the overlays had been changed in 1.9.13. This would lead to many people’s existing overlay config files being broken due to the paths no longer working. So we changed it […]
The emulator of emulators that lets you play everything
Latest version
RetroArch Android is a very special emulator that, instead of focusing on a single console, such as Playstation or SuperNintendo, attempts to include all kinds of consoles and games, thus being able to emulate thousands of game titles to perfection.
The amazing complete list of consoles -with the emulator used in parenthesis- that RetroArch is able to emulate is the following: PlayStation 1 (PCSX ReARMed), Super Nintendo (SNES9x Next), Nintendo Entertainment System (FCEUmm / NEStopia), GameBoy / GameBoy Color (Gambatte), GameBoy Advance (VBA Next), Arcade (Final Burn Alpha), Neo Geo Pocket Color (Mednafen NGP), Virtual Boy (Mednafen VB), Sega Genesis/Mega Drive (Genesis Plus GX), Sega Master System/Sega Game Gear (Genesis Plus GX), Sega CD / Mega CD (Genesis Plus GX), PC Engine / PC Engine CD (Mednafen PCE Fast), WonderSwan Color / Crystal (Mednafen Wonderswan).
As if the complete catalogues of all these video game consoles weren’t enough, RetroArch Android also lets you emulate Doom 1, Doom 2, Ultimate Doom and Final Doom, to perfection. Why? Because they’re Doom!
Just in case all this compatibility wasn’t enough, RetroAch is also compatible with USB and Bluetooth controllers, which means we can plug in a controller at any time and play on our tablet as if it was a real video game console.
RetroArch Android is, by far, the most complete emulator in existence. There isn’t a single other application with the potential of allowing us to enjoy more games on an Android terminal. It can, however, get to take up quite a bit of space on the SD card.
Retroarch can be called the most complete emulator that we have to enjoy games of yesteryear from different consoles such as Supernes, Saturn, and many others that have given a lot of play to different generations.
Retroarch it we have available on Android and it will allow us to play Super Mario World or many other games that today for many can belong as a beautiful story that remained in its time. Let’s do it with this platform or video game emulator.
Table of Contents
What is Retroarch
If we go as is to Wikipedia, Retroarch is a free and open source cross-platform that serves as a front end for emulators, game engines, video games, media players and other types of platforms. If we go a bit to something more technical, it is the reference implementation of the API libretro and it was designed to be fast, light in weight and portable without any dependencies.
Now speaking in silver, Retroarch allows us to play retro games on a wide variety of PCs and devices such as our Android mobile. And the best, it does it through its classic interface so that the experience is as genuine as possible.
All this seasoned with technical features for the best gaming experience, such as its advanced features: shading, network play, rewind, next-frame response times, translator, accessibility features and much more.
Its best features
Being a platform for emulate challenge games, Retroarch is characterized by a number of main functions which we will summarize below:
- Optimized interface: as we can launch the retro games that we have loaded, Retroarch uses an optimized interface that offers us through tabs and folders to access all the games that we have loaded. Even the menu offers thumbnails for quick viewing
- Cross-platform: Works on Windows, MacOS and Linux, as well as Android and iOS mobiles, as well as consoles such as PS3, PSP, PS Vita, Wii Wii U and more
- Fascinating for latency with next-frame– You can boast of next-frame technology which means that we won’t even notice in terms of latency when using real or simulated hardware
- Highly customizable: the interface and the system allows you to touch or customize every possible option for the most optimal gaming experience.
- Game controller settings: the most common controls are configured by default when connected as if it were a console. At the same time, you can customize the remote to configure a specific button
- Shading– Graphics filters to emulate the monitors of yesteryear for the best retro experience. It even allows you to stack them to create your own experience
- Achievements– Unlock the most fascinating achievements of your favorite retro games
- Network game: host or enter a created session. Guest session is even allowed to watch others’ games
- Recording and streaming: Retroarch allows the recording of a game in a video file. So it can also be streamed on platforms such as YouTube or Twitch.
As you can see, Retroarch is full of details and is the perfect emulator for those who want to personalize their gaming experience. That is, if what you are looking for something faster, perhaps it is better to look for other solutions or alternatives to this emulator such as may be for Nintendo 3DS with Citra.
But it is true that its greatest advantage is that with a single solution like Retroarch, we will be able to play all the console games we want. What do we have to adjust something or other? Well, but we are only going to have to pull this app and not others, since there is usually an emulator for each console.
How to install a game with Retroarch: Super Mario Bros on SNES
And while it’s true that Retroarch can be a bit more dense when installing a game, yes it is true that if we go straight to the point we will be able to play mythical games of the SNES and other consoles quite easily.
First we have to know that we need the ROM (game file) to be able to launch it with Retroarch. Those ROMs are available on a lot of websites, and although they are illegal, we can easily access them using a search on Google itself.
How to download a ROM for Retroarch
The first is always use the word ROM in the search plus the console and the title of the game. In this case we are going to play Super Mario Bros on our Android mobile with Retroarch to serve as an example.
- We go to google
- We put in the search:
download rom super mario nes
- El The first link you give us is the perfect one and we will go to your page so that from a Download button we can download it
- It is important that you look at the termination of the file, since it must be a .zip
- Downloaded, we take a good look at where we have stored the file and then load it from Retroarch
How to load a game core in Retroarch
Now let’s move on to download Retroarch on Android:
For the first time, the ‘It just works’ philosophy now extends to open source video game emulation on the Mac. With OpenEmu, it is extremely easy to add, browse, organize and with a compatible gamepad, play those favorite games (ROMs) you already own.
- Experimental
- Press Pack
Please read special instructions for opening.
Take Control
Up, Up, Down, Down, Left, Right, Left, Right, B, A, Start
Why restrict yourself to just the keyboard? Although it is not a requirement, OpenEmu is best used with a peripheral gamepad or controller to interact with your games.
Via the Controller Preferences, simply auto- magically assign buttons with any generic HID compliant USB or Bluetooth game controller.
Plug in your gamepad, select it from the list… and press start to begin your adventures!
Time To Get Organized
Everything in its place. Automatically
We combine some of the best emulation projects together into one beautiful unified application that simply organizes your personal games library. Watch as you drop in backups of your games (ROMs) & they are gracefully added to their appropriate library along with original box art!
Drag n’ Drop a backup game (ROM) from your Mac desktop.
OpenEmu ‘scans’ your game and begins the organisation process.
Your game is now neatly organized and you are ready to start playing!
Features Overview
An exciting world of video games is within your grasp.
Library
One of the standout features of OpenEmu is how it organizes all your games into one unique, unified games library. Watch as backups of the games (ROMs) you already own are gracefully added to their appropriate library and box art is magically added. You can even create your own ‘collections’ mix and matched from different consoles.
- Your IP:
- Your Country:
- Your City:
- Your ISP:
- الخطوة الأولى: تنزيل RetroArch
- الخطوة الثانية: تكوين وحدات التحكم الخاصة بك
- الخطوة الثالثة: تنزيل المحاكيات (المعروفة أيضًا باسم “النوى”)
- الخطوة الرابعة: أضف مجموعة ROM الخاصة بك
- الخطوة الخامسة: استمر في التغيير والتبديل ، إذا كنت تريد ذلك
- ОС: Microsoft Windows 7
- Процессор: Intel Pentium 4 and up (CPU with SSE2 instructions required)
- Оперативная память: 32 MB ОЗУ
- Видеокарта: Any compliant OpenGL 2.x or Direct3D11 GPU. For shaders to work properly, should support at least Shader Model 2.0.
- DirectX: Версии 11
- Дополнительно: For OpenGL: Intel HD 2K/3K GPUs on Windows 10 will have to fall back to an OpenGL 1.1 driver.
- ОС: Microsoft Windows 10
- Процессор: Intel Core series or AMD equivalent
- Оперативная память: 512 MB ОЗУ
- Видеокарта: Intel: At least Intel HD 4K required for OpenGL, any compliant D3D11 GPU for Direct3D 11. Should support at least Shader Model 3.0 and/or 4.0.
- DirectX: Версии 11
- Дополнительно: For OpenGL: Intel HD 2K/3K GPUs on Windows 10 will have to fall back to an OpenGL 1.1 driver.
- ОС: Linux-based distro
- Процессор: Intel Pentium 4 and up (CPU with SSE2 instructions required)
- Оперативная память: 32 MB ОЗУ
- Видеокарта: Any compliant OpenGL 2.x or Direct3D11 GPU. For shaders to work properly, should support at least Shader Model 2.0.
- Место на диске: 500 MB
- ОС: Linux-based distro
- Процессор: Intel Core series or AMD equivalent
- Оперативная память: 512 MB ОЗУ
- Видеокарта: Intel: At least Intel HD 4K required for OpenGL, any compliant D3D11 GPU for Direct3D 11. Should support at least Shader Model 3.0 and/or 4.0.
- Место на диске: 500 MB
Controls & Controllers
Any generic HID compliant USB or Bluetooth game controller should work with OpenEmu out of the box. OpenEmu now automatically maps controls for the following recognized devices in our database:
Cores & Systems
OpenEmu is modular, and thanks to the work of other great open source projects, it can emulate a wide variety of video game systems (we call them ‘cores’). OpenEmu emulates the following systems:
Videogames. There’s nothing quite like them. And although modern games have things older games will never have – realistic graphics, incredible sound design, detailed worlds, and true-to-life lighting and textures, there’s just something about retro games that makes them so enjoyable.
The only issue is that many of the retro games were not only released at various different times, but also on completely differently consoles.
Not only will this put you back a decent amount of cash just to get the consoles to play them on, but having the swap and change between a handful of consoles, controllers and setups isn’t convenient at all.
However, there’s a solution – RetroArch.
What is RetroArch?
RetroArch is the ultimate all-in-one gaming emulator, capable of running almost any original retro game you can imagine. And better yet, it works on Windows, Mac & Linux! Because of just how much it’s capable of doing, it goes without saying that RetroArch is a little difficult to set up. But it’s nothing to worry about.
The following article will go through how to set up RetroArch, so you can start playing all your old favorites from any computer or laptop. Best of all, all your games will be in the same place, so you can swap and change between them as much as you want.
So, let’s get you set up!
1. Download RetroArch
To get started, go to the Libertro Home Page and click ‘Downloads’ at the top right. This will show you the latest RetroArch release that’s suitable for your system. Click on the relevant folder for you. After browsing, you’ll come across a 7-Zip archive that contains RetroArch.
If you haven’t already, go ahead and download and install 7-Zip in order to open this archive. After opening the archive, drag its contents to wherever you would like it on your system (i.e. in a folder on the desktop, or in system files). When this is done, launch RetroArch by double-clicking on “retroarch.exe”.
Attention: Read before you continue
Governments and ISPs across the world monitor their users online activities. If found streaming or browsing content on your Fire TV Stick, mobile or PC, you could get into serious trouble.
Currently, the following information is visible:
If this is your real information, you need to use a VPN to protect your identity.
We strongly recommend you to get a good VPN and hide your identity so that your online experience doesn’t take a bad turn.
We use IPVanish which is the fastest and most secure VPN in the industry. It is very easy to install on any device including Amazon Fire TV Stick. Also, it comes with a 30-day money-back guarantee. If you don’t like their service, you can always ask for a refund. IPVanish also runs a limited time offer where you can save 74% on your VPN and they allow you to use one account on unlimited devices.
This is a flash sale that can expire at any time!
Special FPGA circuits transform the MiSTer into whichever retro gaming hardware you desire
You may have heard rumblings of a magical box capable of flawlessly running games from old-school arcade titles up through the Super Nintendo and Sega Genesis. That box is called the MiSTer, and over the past couple of years, it’s completely transformed the retro emulation scene. I’ve been playing with one for several months now and can confirm that yes, it rules.
What’s the difference between software- and hardware-based emulation?
“Traditional” emulation is software-based. Developers of popular emulation software create a program that tricks game ROMs—that is, copies made from cartridge- and disc-based games, that you can store on your computer—into thinking they are running on original hardware. These are the emulators you download to your computer or which come preinstalled in retro TV consoles like the NES Classic . Software emulation can be great. It can also be flawed. Some games run poorly, graphics get distorted, sound gets garbled. The games can exhibit slowdown and input lag not present on original hardware. Software emulation can be kind of a crapshoot.
Enter the field-programmable gate array, or FPGA for short. An FPGA is an integrated circuit that contains an array of programmable logic blocks that the end-user (that’s you) can configure as they see fit. These logic blocks can be rearranged on the fly to simulate video game consoles (and other circuit-based devices) at a hardware level. Reimplementing them, basically.
Instead of tricking a game ROM with software, you can program an FPGA to more or less be the original console hardware. Configure an FPGA just right, and for all intents and purposes, the game ROM will be running on a highly accurate reproduction of the original hardware. This can make some of the problems inherent in software emulation, like hard-to-avoid input lag, just go away.
We’ve seen FPGA emulation in action before. Analogue’s line of pricy prestige NES, SNES, Genesis, and soon Game Boy consoles each utilize FPGAs configured to simulate the hardware of individual systems. They work wonderfully, are incredibly well-engineered, and come highly recommended if you’re looking to emulate one or two specific gaming platforms (and don’t mind navigating Analogue’s notorious availability issues ).
What is the MiSTer, aside from a bestselling novel by E.L. James?
The MiSTer project, often referred to as MiSTer FPGA, is an open-source project that harnesses the configurability of the FPGA to emulate everything from old school arcade hardware to early computer platforms to the first several generations of handhelds and consoles. The FP in FPGA stands for field-programmable, so why lock into a single console when you can reconfigure logic blocks into any gaming hardware your heart desires? The name MiSTer, as far as I can tell, comes from the MiST project , originally meant to emulate the Atari ST and Amiga 500.
From those humble beginnings, the MiSTer project has evolved into a massive community endeavor capable of simulating nearly 30 consoles and computers, with cores for more retro platforms being worked on every day. We’re talking old computers like the Commodore 64, arcade classics like my beloved Mr. Do! and Robotron 2084, to mainstream consoles like Sega Genesis and Super Nintendo. As of this writing, project contributors are trying to get a PlayStation core up and running . Sega Saturn is making headway too . MiSTer is an ever-evolving box of retrogaming wonders.
What’s a MiSTer made of?
The MiSTer, being an open-source project, comes in many shapes and sizes, but there is a basic configuration that’s really popular with newcomers to the scene. It all starts with a DE10-Nano board. The most expensive aspect of building a MiSTer, the DE10-Nano runs around $180. It houses the FPGA that makes the whole thing work, along with an ARM processor and several I/O ports, including an HDMI-out that upscales up to 1080p.
هل ترغب في تصفح مجموعة ضخمة من الألعاب القديمة من على أريكتك ، دون الحاجة إلى توصيل مجموعة من الأنظمة أو تجميع برامج محاكاة مختلفة معًا؟ RetroArch يجعل ذلك ممكنًا. يمكن لمحطة محاكاة الكل في واحد هذه تشغيل أي لعبة قديمة تقريبًا يمكن تخيلها ، وتعمل على أجهزة كمبيوتر Windows و Mac و Linux.
RetroArch رائع ، لكن إعداده صعب بعض الشيء. لا داعي للذعر ، لأنه بعيد عن المستحيل. فيما يلي كيفية إعداد RetroArch على كمبيوتر المسرح المنزلي أو أي كمبيوتر آخر ، حتى تتمكن من محاكاة جميع ألعابك المفضلة في ضربة واحدة.
لقد أوضحنا لك كيفية لعب ألعابك المفضلة على جهاز الكمبيوتر الذي يعمل بنظام Windows ، وما زالت هذه الأدوات تعمل. يجعل RetroArch الأمور أسهل من خلال وضع جميع ألعابك في نفس المكان ، ومنحك واجهة جاهزة للأريكة لتصفح مجموعتك. سواء كنت من مستخدمي Nintendo أو PlayStation أو Sega أو حتى DOS متعصبًا ، يمكنك إضافة مفضلاتك إلى قائمة واحدة موحدة.
الخطوة الأولى: تنزيل RetroArch
توجه إلى صفحة Libretro الرئيسية ، ثم انقر على رابط “التنزيلات” في القائمة العلوية اليمنى. ستجد هنا أحدث إصدار لمنصتك. على سبيل المثال ، إذا كنت من مستخدمي Windows ، فانقر فوق مجلد “Windows”.
تصفح وستجد أرشيف 7-Zip يحتوي على Retroarch. ستحتاج إلى تنزيل برنامج 7-Zip وتثبيته إذا لم تكن قد قمت بذلك بالفعل ، من أجل فتح الأرشيف. اسحب محتويات هذا الأرشيف إلى مجلد ، وضع هذا المجلد في أي مكان تريده. أضع خاصتي في “D: \ Retroarch” ، لكن الأمر متروك لك.
لتشغيل RetroArch ، انقر نقرًا مزدوجًا فوق “retroarch.exe”.
الخطوة الثانية: تكوين وحدات التحكم الخاصة بك
يمكن أن تكون واجهة المستخدم RetroArch ساحقة في البداية ، مما يدفعك مباشرة إلى قائمة خيارات التكوين. لا تقلق: إنه أبسط مما يبدو.
أول شيء يجب أن تعرفه هو أن الماوس ليس مفيدًا هنا. انقر أينما تريد ، فلن يحدث شيء. بدلاً من ذلك ، تصفح القائمة باستخدام مفاتيح الأسهم. لأعلى ولأسفل يمرر من خلال القائمة ؛ ينتقل اليمين واليسار من قائمة إلى أخرى ، ويشار إليها بالرموز الموجودة أعلى الشاشة. يتيح لك مفتاح “Enter” تحديد عنصر قائمة ، ويتيح لك “Backspace” القفز إلى المستوى السابق.
بالطبع ، إذا كنت ترغب في تصفح مجموعتك من الأريكة باستخدام لوحة ألعاب ، فإن أول شيء تريد القيام به هو إعداد وحدة التحكم الخاصة بك للعمل مع RetroArch. في الاختبارات التي أجريناها ، عملت وحدة تحكم Xbox 360 خارج الصندوق ، ولكن إذا كانت وحدة التحكم الخاصة بك لا تعمل لتصفح القائمة – أو كنت تريد تكوين الأزرار بشكل مختلف – فيمكننا تغيير ذلك.
باستخدام لوحة المفاتيح ، توجه إلى قائمة الإعدادات ، والتي يتم تمثيلها في الجزء العلوي من الشاشة بواسطة ترسين. مرر لأسفل إلى “الإدخال” ، ثم اضغط على Enter.
الآن قم بالتمرير لأسفل إلى “Input User 1 Binds” ، ثم قم بالتمرير لأسفل إلى “User 1 Bind All”. انقر فوق ذلك ويمكنك تعيين أزرار إلى لوحة الألعاب.
تعمل روابط RetroArch عبر جميع المحاكيات ، وهي مصممة لتقليد لوحات الألعاب التي تأتي مع الأنظمة المناسبة باستمرار. يجب عليك ، بشكل مثالي ، تكوين عصا التحكم الخاصة بك بحيث تتوافق الأزرار مع تلك الموجودة في هذه الصورة:
افعل ذلك ، ويجب أن تلعب معظم الألعاب بالطريقة التي تتذكرها بالضبط ، على الرغم من أنه يمكنك تكوين الأشياء بشكل مختلف إذا كنت تفضل ذلك. بمجرد إعداد هذا ، يمكنك التنقل في قوائم RetroArch باستخدام لوحة الألعاب فقط ، لذا ضع لوحة المفاتيح بعيدًا إذا كنت لا تريدها.
إذا كنت تقوم بإعداد منصة متعددة اللاعبين ، فكرر هذه العملية لجميع وحدات التحكم الخاصة بك. سيكون الأمر يستحق كل هذا العناء ، أعدك.
الخطوة الثالثة: تنزيل المحاكيات (المعروفة أيضًا باسم “النوى”)
الآن بعد أن تعلمت كيفية التنقل في RetroArch ، حان الوقت لتعلم بعض المفاهيم. RetroArch ليس محاكيًا بحد ذاته ؛ بدلاً من ذلك ، فهي واجهة أمامية قادرة على تشغيل عدد كبير من برامج المحاكاة. تسمى هذه المحاكيات الفردية النوى داخل RetroArch ، وستحتاج إلى تنزيل النوى المناسبة للألعاب التي تريد تشغيلها.
لكن لا تشغل المتصفح: يمكنك تثبيت النوى من داخل RetroArch. عد إلى العمود الأول في RetroArch ، ثم قم بالتمرير لأسفل إلى “التحديث عبر الإنترنت”.
حدد “Core Updater” ، العنصر الأول في القائمة الناتجة. من هنا يمكنك تنزيل مجموعة متنوعة من النوى. قم بالتمرير عبر القائمة وقم بتنزيل أي عدد تريده من النوى. يتم فرز النوى حسب الأنظمة التي تحاكيها ، لذا قم بتنزيل شيء ما لتشغيل جميع ألعابك.
إذا لم تكن متأكدًا من النواة التي تختارها لنظام معين ، فلا تقلق ، يمكنك التجربة لمعرفة أي النوى تعمل بشكل أفضل لاحقًا. ومع ذلك ، يجب أن تكون متشابهة بالنسبة للجزء الأكبر ، لذلك اختر واحدة فقط في الوقت الحالي.
الخطوة الرابعة: أضف مجموعة ROM الخاصة بك
الآن بعد أن أضفت بعض النوى ، حان الوقت لإضافة ROM الخاص بك. سنفترض أن لديك بالفعل مجموعة من ROM لأغراض هذا الدليل.
يمكن لـ RetroArch مسح مجلد مليء بأقراص ROM وتنظيمها لك. من القائمة الرئيسية ، توجه إلى “إضافة محتوى”. اختر “Scan Directory” ، ثم تصفح نظام الملفات حتى تجد مجلدك ممتلئًا بأقراص ROM. سيظهر لك النص الأصفر في أسفل الشاشة تقدمك. بمجرد الانتهاء من كل شيء ، توجه إلى الشاشة الرئيسية وسترى رمزًا جديدًا: وحدات التحكم لكل نظام قمت بإضافة روم له. استخدم مفتاح السهم الأيمن للوصول إلى هذه القوائم وتصفح الألعاب.
من هنا يمكنك تصفح مجموعة الألعاب الخاصة بك. حاول فتح أي منها ، وسيتم سؤالك عن النواة التي تريد تشغيل اللعبة بها. اختر واحدة ، وسيتم نقلك أخيرًا إلى شاشة يمكنك من خلالها تشغيل اللعبة.
تهانينا! لديك الآن إعداد محاكاة رائع يمكنك التحكم فيه من أريكتك. ابدأ اللعب!
الخطوة الخامسة: استمر في التغيير والتبديل ، إذا كنت تريد ذلك
لا شك أن القراء المهتمين بعيون النسر لاحظوا الصور المصغرة الموضحة في الخطوة أعلاه. يمكنك العثور على هذه الصور المصغرة في قسم “المحدث عبر الإنترنت” حيث قمت بتنزيل النوى ، ضمن “Thumbnails Updater”. ما عليك سوى تحديد الأنظمة التي أضفتها إلى ذاكرة القراءة فقط وستحصل على صور مصغرة مخبوزة في الواجهة.
في الواقع ، أثناء وجودك في برنامج التحديث عبر الإنترنت ، يمكنك أيضًا تحديث ملفات المعلومات الأساسية والأصول وكل شيء آخر. إنها مجرد مسألة التمرير لأسفل القائمة واختيار كل شيء.
ذات صلة: ثماني ميزات متطورة من RetroArch تجعل الألعاب الرجعية رائعة مرة أخرى
يجب على المستخدمين المتميزين أيضًا التحقق من علامة التبويب “الإعدادات” ، حيث ستجد الفيديو والصوت ومجموعة متنوعة من الإعدادات الأخرى. لست مضطرًا للدخول في هذه الأشياء وتعديلها ، لكن المستخدمين المحترفين سيحبون الغوص فيها وجعل كل شيء يعمل بشكل صحيح. يحتوي موضوع المنتدى هذا ، على سبيل المثال ، على إعدادات رائعة لتجربة NES و SNES المثالية. راجع دليلنا لميزات RetroArch المتقدمة إذا كنت تريد حقًا الحصول على أفضل تجربة.
هل ترغب في تصفح مجموعة ضخمة من الألعاب القديمة من على أريكتك ، دون الحاجة إلى توصيل مجموعة من الأنظمة أو تجميع برامج محاكاة مختلفة معًا؟ RetroArch يجعل ذلك ممكنًا. يمكن لمحطة محاكاة الكل في واحد هذه ت
المحتوى:
هل ترغب في تصفح مجموعة ضخمة من الألعاب القديمة من على أريكتك ، دون الحاجة إلى توصيل مجموعة من الأنظمة أو تجميع برامج محاكاة مختلفة معًا؟ RetroArch يجعل ذلك ممكنًا. يمكن لمحطة محاكاة الكل في واحد هذه تشغيل أي لعبة قديمة يمكن تخيلها تقريبًا ، وتعمل على أجهزة كمبيوتر Windows و Mac و Linux.
RetroArch رائع ، لكن إعداده صعب بعض الشيء. لا داعي للذعر ، لأنه بعيد عن المستحيل. إليك كيفية إعداد RetroArch على كمبيوتر المسرح المنزلي أو أي كمبيوتر آخر ، حتى تتمكن من محاكاة جميع الألعاب القديمة المفضلة لديك في ضربة واحدة.
لقد أوضحنا لك كيفية لعب الألعاب القديمة المفضلة لديك على جهاز كمبيوتر يعمل بنظام Windows ، وما زالت هذه الأدوات تعمل. يجعل RetroArch الأمور أسهل من خلال وضع جميع ألعابك في نفس المكان ، ومنحك واجهة جاهزة للأريكة لتصفح مجموعتك. سواء كنت من مستخدمي Nintendo أو PlayStation أو Sega أو حتى متعصب DOS ، يمكنك إضافة مفضلاتك إلى قائمة واحدة موحدة.
الخطوة الأولى: تنزيل RetroArch
توجه إلى صفحة Libretro الرئيسية ، ثم انقر على رابط “التنزيلات” في القائمة العلوية اليمنى. ستجد هنا أحدث إصدار لمنصتك. على سبيل المثال ، إذا كنت من مستخدمي Windows ، فانقر على مجلد “Windows”.
تصفح وستجد أرشيف 7-Zip يحتوي على Retroarch. ستحتاج إلى تنزيل برنامج 7-Zip وتثبيته إذا لم تكن قد قمت بذلك بالفعل ، من أجل فتح الأرشيف. اسحب محتويات هذا الأرشيف إلى مجلد ، وضع هذا المجلد في أي مكان تريده. أضع خاصتي في “D: Retroarch” ، لكن الأمر متروك لك.
لتشغيل RetroArch ، انقر نقرًا مزدوجًا فوق “retroarch.exe”.
الخطوة الثانية: تكوين وحدات التحكم الخاصة بك
يمكن أن تكون واجهة المستخدم RetroArch ساحقة في البداية ، مما يرمي بك مباشرة إلى قائمة خيارات التكوين. لا تقلق: إنه أبسط مما يبدو.
أول شيء تحتاج إلى معرفته هو أن الماوس الخاص بك ليس مفيدًا هنا. انقر أينما تريد ، فلن يحدث شيء. بدلاً من ذلك ، تصفح القائمة باستخدام مفاتيح الأسهم. لأعلى ولأسفل يمرر من خلال القائمة ؛ ينتقل اليمين واليسار من قائمة إلى أخرى ، ويشار إليها بالرموز الموجودة أعلى الشاشة. يتيح لك مفتاح “Enter” تحديد عنصر قائمة ، ويتيح لك “Backspace” الانتقال إلى مستوى جديد.
بالطبع ، إذا كنت ترغب في تصفح مجموعتك من الأريكة باستخدام لوحة ألعاب ، فإن أول شيء تريد القيام به هو إعداد وحدة التحكم الخاصة بك للعمل مع RetroArch. في الاختبارات التي أجريناها ، عملت وحدة تحكم Xbox 360 بشكل جاهز ، ولكن إذا كانت وحدة التحكم الخاصة بك لا تعمل لتصفح القائمة – أو كنت تريد تكوين الأزرار بشكل مختلف – فيمكننا تغيير ذلك.
باستخدام لوحة المفاتيح ، توجه إلى قائمة الإعدادات ، والتي يتم تمثيلها في الجزء العلوي من الشاشة بواسطة ترسين. مرر لأسفل إلى “الإدخال” ، ثم اضغط على Enter.
الآن قم بالتمرير لأسفل إلى “Input User 1 Binds” ، ثم قم بالتمرير لأسفل إلى “User 1 Bind All”. انقر فوق ذلك ويمكنك تعيين أزرار لوحة اللعبة.
تعمل روابط RetroArch عبر جميع المحاكيات ، وهي مصممة لتقليد لوحات الألعاب التي تأتي مع الأنظمة المناسبة باستمرار. يجب عليك ، بشكل مثالي ، تكوين عصا التحكم الخاصة بك بحيث تتوافق الأزرار مع تلك الموجودة في هذه الصورة:
افعل ذلك ، ويجب أن تلعب معظم الألعاب بالطريقة التي تتذكرها بالضبط ، على الرغم من أنه يمكنك تكوين الأشياء بشكل مختلف إذا كنت تفضل ذلك. بمجرد إعداد هذا ، يمكنك التنقل في قوائم RetroArch باستخدام لوحة الألعاب فقط ، لذا ضع لوحة المفاتيح بعيدًا إذا كنت لا تريدها.
إذا كنت تقوم بإعداد منصة متعددة اللاعبين ، فكرر هذه العملية لجميع وحدات التحكم لديك. سيكون الأمر يستحق كل هذا العناء ، أعدك.
الخطوة الثالثة: تنزيل المحاكيات (المعروفة أيضًا باسم “النوى”)
الآن بعد أن تعلمت كيفية التنقل في RetroArch ، حان الوقت لتعلم بعض المفاهيم. RetroArch ليس محاكيًا بحد ذاته ؛ بدلاً من ذلك ، فهي واجهة أمامية قادرة على تشغيل عدد كبير من برامج المحاكاة. تسمى هذه المحاكيات الفردية النوى داخل RetroArch ، وستحتاج إلى تنزيل النوى المناسبة للألعاب التي تريد تشغيلها.
لكن لا تشغل المتصفح: يمكنك تثبيت النوى من داخل RetroArch. عد إلى العمود الأول في RetroArch ، ثم قم بالتمرير لأسفل إلى “التحديث عبر الإنترنت”.
حدد “Core Updater” ، العنصر الأول في القائمة الناتجة. من هنا يمكنك تنزيل مجموعة متنوعة من النوى. قم بالتمرير عبر القائمة وقم بتنزيل العديد من النوى كما تريد. يتم فرز النوى حسب الأنظمة التي تحاكيها ، لذا قم بتنزيل شيء ما لتشغيل جميع ألعابك.
إذا لم تكن متأكدًا من النواة التي ستختارها لنظام معين ، فلا تقلق ، يمكنك التجربة لمعرفة أي النوى تعمل بشكل أفضل لاحقًا. ومع ذلك ، يجب أن تكون متشابهة بالنسبة للجزء الأكبر ، لذلك اختر واحدة فقط في الوقت الحالي.
الخطوة الرابعة: أضف مجموعة ROM الخاصة بك
الآن بعد أن أضفت بعض النوى ، حان الوقت لإضافة ROM الخاص بك. سنفترض أن لديك بالفعل مجموعة من ROM لأغراض هذا الدليل.
يمكن لـ RetroArch مسح مجلد مليء بأقراص ROM وتنظيمها لك. من القائمة الرئيسية ، توجه إلى “إضافة محتوى”. اختر “Scan Directory” ، ثم تصفح نظام الملفات حتى تجد مجلدك ممتلئًا بأقراص ROM. سيظهر لك النص الأصفر في أسفل الشاشة تقدمك. بمجرد الانتهاء من كل شيء ، توجه إلى الشاشة الرئيسية وسترى رمزًا جديدًا: وحدات التحكم لكل نظام أضفت رومًا له.استخدم مفتاح السهم الأيمن للوصول إلى هذه القوائم وتصفح الألعاب.
من هنا يمكنك تصفح مجموعة الألعاب الخاصة بك. حاول فتح أي منهم ، وسيتم سؤالك عن النواة التي تريد تشغيل اللعبة بها. اختر واحدة ، وسيتم نقلك أخيرًا إلى شاشة يمكنك من خلالها تشغيل اللعبة.
تهانينا! لديك الآن إعداد محاكاة رائع يمكنك التحكم فيه من أريكتك. ابدأ اللعب!
الخطوة الخامسة: استمر في التغيير والتبديل ، إذا كنت تريد ذلك
لا شك أن القراء المهتمين بعيون النسر لاحظوا الصور المصغرة الموضحة في الخطوة أعلاه. يمكنك العثور على هذه الصور المصغرة في قسم “المحدث عبر الإنترنت” حيث قمت بتنزيل النوى ، ضمن “Thumbnails Updater”. ما عليك سوى اختيار الأنظمة التي أضفت ذاكرة القراءة فقط (ROM) لها وستحصل على صور مصغرة مدمجة في الواجهة.
في الواقع ، أثناء وجودك في برنامج التحديث عبر الإنترنت ، يمكنك أيضًا تحديث ملفات المعلومات الأساسية والأصول وكل شيء آخر. انها مجرد مسألة التمرير لأسفل القائمة واختيار كل شيء.
يجب على المستخدمين المتميزين أيضًا التحقق من علامة التبويب “الإعدادات” ، حيث ستجد الفيديو والصوت ومجموعة متنوعة من الإعدادات الأخرى. لست مضطرًا للدخول في هذه الأشياء وتعديلها ، ولكن المستخدمين المتميزين سيحبون الغوص في كل شيء وجعل كل شيء يعمل بشكل صحيح. يحتوي موضوع المنتدى هذا ، على سبيل المثال ، على إعدادات رائعة لتجربة NES و SNES المثالية. راجع دليلنا لميزات RetroArch المتقدمة إذا كنت تريد حقًا الحصول على أفضل تجربة.
After literally years of striving for the ultimate Retro gaming setup in my lounge, I have finally managed it!
For those looking for a way to display their retro games in a beautiful, arcade style browser – original cover art – with links to Retroachievements.org (more on that later) … I highly recommend using a combination of RetroArch and Arc Browser on an Nvidia Shield.
In the past I have tried various setups, numerous emulators and every frontend available – but I now have something which is close to being perfect.
RetroArch
I have ‘fiddled’ with RetroArch in the past, and found it a bit cumbersome, overly complicated and a bit frustrating. But things have since changed! In it’s latest format, it is a breeze to use. Just keep in mind you will need the right emulator bios in the ‘system’ folder… and make sure the first thing you do is set a main menu hotkey in the control settings panel! And for the easily confused – “cores” are “emulators”! Visit the Retroarch homepage here!
Arc Browser
I was first put off by the price on Google Play. There are lots of cheaper alternatives, along with a good many free frontends. But since I wasn’t 100% satisfied with any of the rest, I decided to shell out my hard earned money and see what all the fuss was about. I was glad I did. With the new ‘Arcade view’ and being able to view your retro achievements on the game cover screen – along with compatibility for almost every emulator out there – Arc Browser is truly a retro gamer’s dream. Read more about Arc Browser here.
Spectrum Emulation…with pokes!
When I first booted it up, I was a bit disappointed find one of my favourite emulators (Spectacol (by Bogdan Vatra) – one of the only ZX emulators which supports pokes – and spectrum gaming just isn’t spectrum gaming without pokes) wasn’t supported. I sent an email to the developer, more out of hope than expectation, and he replied the very same day – saying the emulator was no supported. You can’t get any better support that that!
I know have all my spectrum games with original cover art and Arcade view on my big screen TV. Pokes are easy to enter, and the emulator is also linked to World of Spectrum – so you can download new games at the touch of a button! It’s a retro gaming miracle!
BTW, if you love Spectrum games, as I do, please check out this — the dizzy games, ranked from best to worst!
And the cherry on top… finally decent Amiga emulation!
I have been battling with Amiga emulation since Noah was a boy… and it’s been incredibly hard work. That’s why it’s so satisfying to finally get it working on my big screen lounge TV – using my wireless Nvidia Shield controller. Imagine – I can now play Alien Breed 3D, Ruff n Tumble and New Zealand Story from the comfort of my sofa!
Thanks to the new RetroArch Amiga core “PUAE” – emulating Amiga CD32 is simply a case of loading the core and pointing Retroarch to your folder with your ISOs (or zips). And what’s best… PUA even supports WHDLoad – which, if you know anything about Amiga emulation at all, is absolute gold. I was expecting the setup to be a nightmare, in the past I’ve had to draw up a seperate config file for each seperate game. NO MORE! Simply put all your WHDLoad zip files in one folder, and point RetroArch in the right direction. (Don’t forget to make sure all your kickstart roms are in the RetroArch system folder!)
Then, add the Amiga as a new system on ArcBrowser (you can add the Amiga CD32 as a separate system)… and ArcBrowser will then scan your files and, as long as they are named correctly, will download the cover art and screenshots for you. Wallah!
Retro Achievements
Being an avid Retro-gamer, I’m kind of late to the part with Retroachievements.org, only finding out about them through Arc Browser. But what a find! If one was needed, I now have a new reason to tackle my favourite games, this time competing against other retro gamers!
Take one of my favourite games for example, Banjo Kazooie. Here’s the page on retroachievements. As you can see, a wide variety of achievements are available, which, when completed, appear in-game just like with a modern game. Your progress is even recorded in Arc-Browser, you can see what achievements have been completed, and which ones are still to be done.
One gripe is that they still don’t support Amiga or Spectrum games (my two favourite retro consoles as you can tell). Imagine competing against others in Jet Set Willy. It really does add a new layer to retro gaming.
So there you have it, thanks to these apps and the work of some fantastic developers, I now have the ultimate retro gaming setup. I just need the ultimate girlfriend now to bring me a cup of tea whilst I play some Silkworm!
P.S – You can buy and Nvidia Shield from Amazon (natch!). Comes with a fancy gaming controller, too!
(The Goblin & Sausage does not condone illegal downloading of roms!)
Вы хотите, чтобы вы могли просматривать массивную коллекцию ретро-игр с вашего дивана, без необходимости подключать кучу систем или собирать различные эмуляторы? RetroArch делает это возможным. Эта станция эмуляции «все в одном» может запускать практически любую воображаемую ретро-игру и работает на компьютерах Windows, Mac и Linux.
RetroArch потрясающий, но его немного сложно настроить. Однако не паникуйте, потому что это далеко не невозможно. Heres, как настроить RetroArch на ПК домашнего кинотеатра или на любом другом компьютере, чтобы вы могли эмулировать все свои любимые ретро-игры одним махом.
Weve показал вамКак играть в любимые ретро игры на вашем компьютере Windows, И эти инструменты все еще работают. RetroArch упрощает задачу, размещая все ваши игры в одном месте и предоставляя вам готовый к дивану интерфейс для просмотра вашей коллекции. Будь то фанатик Nintendo, PlayStation, Sega или даже DOS, вы можете добавить свои избранные в одно унифицированное меню.
Шаг первый: Скачать RetroArch
Отправляйтесь вДомашняя страница Libretro, Затем нажмите ссылку Загрузки в верхнем правом меню. Здесь вы найдете последний релиз для вашей платформы. Например, если вы являетесь пользователем Windows, щелкните папку Windows.
Просмотрите и вы найдете архив 7-Zip, содержащий Retroarch. Youll нужно, чтобыСкачать и установить 7-ZipЕсли вы уже не успели, для того, чтобы открыть архив. Перетащите содержимое этого архива в папку и поместите эту папку в любом месте. Я ставлю свою в D:\ Retroarch, но это ваше дело.
Чтобы запустить RetroArch, просто дважды щелкните retroarch.exe.
Шаг второй: Настройте ваши контроллеры
Поначалу пользовательский интерфейс RetroArch может быть непосильным, попадая прямо в меню параметров конфигурации. Не волнуйтесь: это проще, чем кажется.
Первое, что вам нужно знать, это ваша мышь здесь не полезна. Щелкните, где хотите, ничего не произойдет. Вместо этого просмотрите меню, используя клавиши со стрелками. Вверх и вниз прокручивает список; правый и левый перепрыгивает из одного меню в другое, обозначенные значками в верхней части экрана. Enter позволяет выбрать пункт меню, Backspace позволяет вам вернуться на уровень.
Конечно, если вы хотите, чтобы просмотреть свою коллекцию с дивана с геймпадом, первое, что вы собираетесь сделать, это настроить контроллер для работы с RetroArch. В наших тестах контроллер Xbox 360 работал из коробки, но если ваш контроллер не работает для просмотра меню, вы хотите настроить кнопки по-разному, мы можем это изменить.
С помощью клавиатуры перейдите в меню «Настройки», которое представлено в верхней части экрана двумя передачами. Прокрутите вниз до Input, затем нажмите Enter.
Теперь прокрутите вниз до ввода пользователя 1 Binds и прокрутите вниз до User 1 Bind All. Нажмите на это, и вы можете сопоставить кнопки с вашим геймпадом.
Привязки RetroArch работают на всех эмуляторах и предназначены для последовательной имитации геймпадов, которые прилагаются к соответствующим системам. В идеале следует настроить свой джойстик так, чтобы кнопки совпадали с теми, что на этом изображении:
Сделайте это, и большинство игр должны играть именно так, как вы помните, хотя вы можете настроить вещи по-другому, если хотите. Как только это будет настроено, вы сможете перемещаться по меню RetroArch, используя только свой геймпад, поэтому, если вы этого не хотите, удалите клавиатуру.
Если вы настраиваете многопользовательскую установку, повторите этот процесс для всех ваших контроллеров. Все это того стоит, обещаю.
Шаг третий: скачать эмуляторы (aka Cores)
Теперь, когда вы научились ориентироваться в RetroArch, пришло время изучить несколько концепций. RetroArch не является эмулятором; вместо этого это передний конец, способный запусывать большое количество эмуляторов. Эти индивидуальные эмуляторы называютсяСердечникиВ RetroArch, и вам нужно будет загрузить соответствующие ядра для игр, которые вы хотите запустить.
Но не запускайте браузер: вы можете установить ядра изнутри RetroArch. Вернитесь к первому столбцу в RetroArch, затем прокрутите вниз до Online Updater.
Выберите Core Updater, первый пункт в получившемся меню. Отсюда вы можете скачать самые разные ядра. Прокрутите меню и загрузите столько ядер, сколько вам нравится. Ядер сортируется по системам, которые они эмулируют, поэтому загрузите что-нибудь для запуска всех ваших игр.
Если вы не уверены, какое ядро выбрать для конкретной системы, не волнуйтесь, вы можете поэкспериментировать, чтобы узнать, какие ядра работают лучше всего позже. Однако по большей части они должны быть похожими, поэтому пока просто выберите один.
Шаг четвертый: Добавить вашу коллекцию ROM
Теперь, когда вы добавили несколько ядер, пришло время добавить свои ПЗУ. Хорошо предположим, что у вас уже есть коллекция ПЗУ для целей этого руководства.
RetroArch может сканировать папку, полную ПЗУ, и организовывать их для вас. Из главного меню, глава Добавить контент. Выберите Scan Directory, затем просматривайте свою файловую систему, пока не найдете папку, полную ПЗУ. Желтый текст в нижней части экрана покажет вам ваш прогресс. Как только все будет сделано, перейдите на главный экран, и вы увидите новый значок: контроллеры для каждой системы вы добавляете ромы для. Используйте клавишу со стрелкой вправо для доступа к этим меню и просмотра игр.
Отсюда вы можете просматривать свою коллекцию игр. Попробуйте открыть любой из них, и вы спросите, с каким ядром вы хотите запустить игру. Выберите один, и вы, наконец, будете представлены на экране, с которого вы можете запустить игру.
Поздравляем! Теперь у вас есть довольно крутая настройка эмуляции, которую вы можете контролировать со своего дивана. Начните играть!
Шаг пятый: продолжайте твидать, если хотите
Орлиные читатели, несомненно, заметили эскизы, показанные на вышеуказанном шаге. Вы можете найти эти миниатюры в разделе Online Updater, где вы загрузили ядра, в разделе Thumbnails Updater. Просто выберите системы, для которых вы добавили ПЗУ, и вы получили эскизы в интерфейсе.
На самом деле, пока вы находитесь в Online Updater, вы можете также обновлять основные информационные файлы, активы и все остальное. Это просто вопрос прокрутки списка вниз и выбора всего.
Пользователи также должны проверить вкладку «Настройки», где вы найдете видео, аудио и множество других настроек. Вам не нужно заходить и настраивать этот материал, но энергетические пользователи будут любить нырять и заставлять все работать правильно.Эта ветка форума, Например, имеет отличные настройки для идеального опыта NES и SNES. ПроверьтеНаш путеводитель по расширенным функциям RetroArchsЕсли вы действительно хотите получить лучший опыт.
Follow Android Police
This post looks best with 2x scaling and scanlines enabled
Right now, it’s not an easy time to be a gamer looking to play the latest and greatest titles. Between all the headaches you’d face trying to get your hands on a PS5, or afford a 3080 for your new PC rig without taking out a second mortgage, it’s enough to make you want to give up on the whole mess. But if you’ve got even a moderately powerful smartphone, and are willing to invest a little time, there’s a whole world of classic gaming waiting to be tapped into (on the cheap, no less) through the power of emulation.For the better part of the past 35 years now, gamers have been using some clever software to reproduce the functionality of older consoles on newer hardware. By faithfully emulating the behavior of all the components that built up those gaming machines — everything from the CPU, to audio and video chips, to all input/output circuitry — and pairing that with a copy of the game software (most often referred to as the ‘ROM’) you can relive these classic titles without needing any of the original equipment.While emulation got started on the PC, like pretty much all software these days, emulators have migrated to smartphones — and done so in spades. With the right app, and access to the right ROMs, you can play anything from a blocky Atari 2600 (or VCS to you cool kids) game to relatively modern Wii titles. So what do you need to start emulating?
Choosing your emulators
Image Gallery (1 Images)
Unlike Apple’s App Store, Google Play is simply brimming in emulators
No matter where your tastes in gaming lie — whether you’re into home consoles, handheld devices, rich 3D worlds, or just some basic platforming — there’s an emulator that’s got you covered. Some only attempt to emulate a single console, while others might focus on a few related devices. The most ambitious try to emulate pretty much every system under the sun. Let’s start with just such a heavyweight: RetroArch.
RetroArch
It’s best to think of RetroArch like a framework: it’s not so much an emulator itself, but a front-end that lets you install “cores” that add support for various systems. There are dozens upon dozens available for download, letting you emulate anything from an NES to a PlayStation 2 or even modern consoles like the Nintendo Switch.
While support is impressively broad, and RetroArch offers lots of useful configuration options, it can really be a bit overwhelming at times — when you’ve got the option of installing half a dozen different Game Boy cores, how do you know which is best? So though it’s very powerful, this solution may be more geared to users comfortable with experimentation and tinkering.
Better living through emulation
Yearning to sit on the couch and play some Super Mario Bros like the good ol’ days? Or wait, no, Sonic 2. Wait jk Crash Bandicoot! Lakka’s got your back. In just a few minutes it’ll turn virtually any PC into a dead simple all-in-one emulation machine.
More streamlined than installing a whole bunch of different emulators onto your laptop, Lakka is a custom Linux distribution that crams nearly every retro emulator you could want into one bundle with a slick UI. All you have to do is go to the Lakka website and follow six-step instructions that’ll walk you through getting Lakka on a thumb drive, then onto your target PC, and then getting some games on there.
Lakka doesn’t require a whole bunch of horsepower, so you can throw it on any old laptop or PC you might have hanging around, or even just chuck it on a $35 Raspberry Pi and hook it up to a TV—although performance might suffer if you’re emulating more modern games. And Lakka supports PS3 and Xbox 360 controllers, which you probably already have lying around somewhere.
A great gift for the youngins in your life who need to be learned up about classic games
The only thing Lakka won’t do for you is bring the games. Downloading ROMs is sort of a legal grey area (or sometimes a legal black area), so that’s on you. That, and a few of the emulators require you to find system BIOS files somewhere, considering it’s illegal to provide them.
But once you can get that all taken care of, Lakka seems like a great way to condense all your old-school emulated gaming onto one device that’s easy to boot up and play. It’s a fun little DIY project, and the finished product would probably make a great gift for the youngins in your life who need to be learned up about classic games. If only we’d had this 20-some years ago.
Контент для этой игры Просмотреть все (31)
Find us on socials!
Об этой игре
RetroArch is an open source and cross platform frontend/framework for emulators, game engines, video games, media players and other applications.
While it can do many things besides this, it is most widely known for enabling you to run classic games on a wide range of computers and consoles through a slick graphical interface. Settings are also unified so configuration is done once and for all.
In addition to this, you will soon be able to run original game discs (CDs) from RetroArch. We take videogame preservation seriously and want to ensure you can run your originally bought content on modern day PCs.
RetroArch has advanced features like shaders, netplay, rewinding, next-frame response times, runahead, and more!
Maybe there is no rewind in real life, but there is a rewind in RetroArch! You can go back in time and correct your mistakes!
Seeing things as we remembered was our first priority, so with our Shading feature, you can change colors, smooth pixels or recreate your bedroom TV from 1995!
You think the excitement of playing elbow-to-elbow with friends is a bygone memory? No! With our rollback-based, latency-hiding Netplay, your Player 2 is beside you again! Fight the competition not the lag!
Системные требования
- Минимальные:
- Рекомендованные:
- Минимальные:
- Рекомендованные:
RetroArch is free/open source software, available under the GNU GPL 3.0 license.


