Justin Pot has been writing about technology for over a decade, with work appearing in Digital Trends, The Next Web, Lifehacker, MakeUseOf, and the Zapier Blog. He also runs the Hillsboro Signal, a volunteer-driven local news outlet he founded. Read more.
We all know it’s important to back up your Mac with Time Machine, but remembering to plug in your external drive can be a hassle, especially if you’re a MacBook user. So networked backups come in handy: you don’t have to remember to do anything.
But there aren’t many easy ways to back up your Mac over the network. This feature used to be offered by the Airport Time Capsule, a router with a built-in hard drive for Time Machine backups, but Apple isn’t planning on making new versions. You can set up a Raspberry Pi as a Time Machine server, but it’s not exactly easy and you’re bound to run into glitches.
But if you’ve got multiple Macs, High Sierra brings what was a macOS Server exclusive feature to everyone: the ability to set up any shared folder as a Time Machine destination. You could set up an old Mac Mini to be your backup server, or if you’ve got two Macs you use regularly, you could back them up to each other. You could even plug an external drive into your desktop Mac and share it over the network—then you can back up your MacBook to it wirelessly.
Whatever your configuration, setup is relatively simple, albeit hidden. Here’s how to get started.
Set Up Time Machine Sharing on Host Mac
Open System Preferences on the Mac you want to back up files to, then head to “Sharing.”
Make sure “File Sharing” is turned on and selected. Next, share an empty folder by clicking the “+” button.
I’ve called mine “Time Machine” because I’m boring, but you can use whatever time travel terminology you prefer (88MPH and Tardis are both solid choices.)
You can use your Mac’s primary account for this if you like, or you can create a networking-only account if you want to keep things sandboxed.
When you’re done right-click your folder, then click “Advanced Options.”
Make sure “Share as a Time Machine backup destination” is checked. I’d highly recommend “Limit backups to…GB” is also checked.
By default Time Machine will use up all space on a drive to store old files until the drive is full, and you don’t want that happening if you use this drive for anything but Time Machine backups.
Connect to Time Machine Share on Client Mac
On your client Mac open the Finder. You should see the server Mac in the sidebar; click it, then click the “Connect As…” button at top-right.
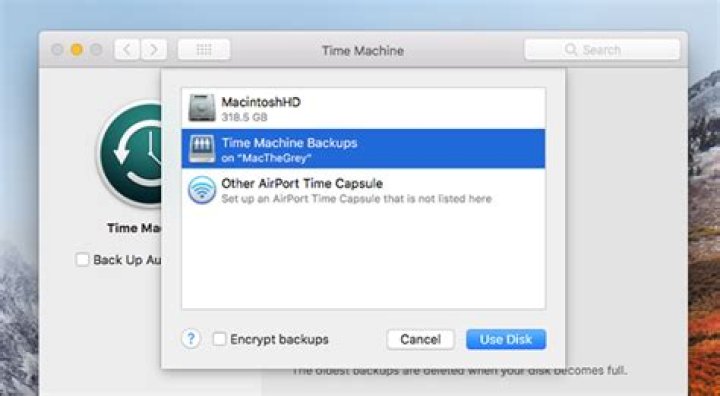
Enter the username and password for your server Mac, the open System Preferences and head to the Time Machine panel and click “Select disk.” You’ll see your network share as an option.
You can now back up your Mac to this network share. You can repeat this process on as many Macs as you like, just make sure you’ve got enough storage space for all those backups.
While Time Machine in macOS 10.15 Catalina still can’t back up to a directly connected APFS-formatted drive—only to one formatted with the older HFS+ filesystem—you can back up over a network to most volumes that can be shared, including other Macs.
There’s a semi-hidden feature in the Sharing preference pane that you can set up:
On the destination Mac, open the Sharing preference pane.
Click File Sharing Service, or check its box if it’s not already turned on.
Under Share Folders, click the + to add a folder.
Navigate in the dialog box to the Shared folder in the Home folder. Select it and then click Add.
If you’re not concerned about other users on the network leave the Users options for access permissions as they stand (all set to Read & Write). If you want to limit it to logged in users, click Everyone and set the permission to No Access. (You can also disable the other two options an add individual users there.)
Now Control-click the Shared folder in the Shared Folders list and select Advanced Options.
Use Advanced Options to share as a Time Machine destination.
Check “Share a a Time Machine backup destination,” and optionally check the “Limit backups to number GB” to prevent backups from overwhelming this machine.
On any other Mac on the network, open the Time Machine preference pane.
Click Select Disk.
The shared volume should appear under Available Disks and note that it’s “on ‘computer name’” with the same name as appears in the Shared preference pane on the shared computer.
Select the volume and click Use Disk.
If you opted in step 5 to require an account to use the folder, you will be prompted to enter the username and password of the macOS account at this step, and the drive will be mounted.
Time Machine recognizes the Shared folder as an available destination.
Now the Shared folder-as-a-volume appears as a selected volume. I’ve found in testing that even if you specify a limited amount of Time Machine storage, the Time Machine preference pane still shows all available storage remaining on the target volume.
This Mac 911 article is in response to a question submitted by Macworld reader David.
How many times have you forgot to plug the external hard drive into your Mac, only for your scheduled Time Machine backup to fail as a result?
Creating a backup is one of those annoying tasks that’s easy to keep putting off, especially if you need to attach an external hard drive to your Mac every single time you create a backup. But if something does go wrong with your Mac and you wind up losing days, weeks, or even months worth of data, then you’re going to regret falling behind on your Time Machine backups!
In previous releases of macOS, you could setup macOS Server on a “host” Mac and then share a mounted hard drive as a Time Machine disk over the network – but in High Sierra this functionality is now built-in.
If you have access to two Macs that are running High Sierra, then you can create a shared folder on the host Mac, and then setup the “client” Mac to automatically backup its data to this shared folder. This is much easier than having to invest time and effort into setting up macOS Server, plus it doesn’t require you to download any additional software!
In this article, I’m going to show how to turn your Mac into a centralised backup for one, or even multiple Macs on the same network.
Since this technique requires multiple Macs, it’s particularly well-suited to places such as offices and schools, but it can also come in handy if you have an old Mac laying around, that you want to repurpose as your own personal Time Machine repository.
Creating a shared folder
The first step is creating a folder on the host Mac, that other Macs will be able to access. For the best results, the host Mac should be permanently switched on and connected to the network, as this ensures the client Mac(s) will always be able to backup their data to the shared folder.
On your host Mac:
- Click the ‘Apple’ logo in the Mac menu bar.
- Select ‘System preferences… > Sharing.’
- In the left hand menu, find ‘File Sharing’ and select its accompanying checkbox.
- Select ‘Options’ and make sure the ‘Share files and folders using SMB’ checkbox is selected.
- Create a new folder by clicking the little ‘+’ icon underneath the ‘Shared Folders’ list.
- In the subsequent Finder window, navigate to the location where you want to create this folder, and then click ‘New Folder.’
- Give your folder a descriptive name (I’m using ‘Time Machine Backups’) and then click ‘Create,’ followed by ‘Add.’ This folder will now be added to your shared folders list.
- Since this folder is where you’ll be storing your Time Machine backups, eventually it may contain sensitive data and content from other Macs. If multiple people use your host Mac, then you may want to restrict who can access this folder. Control-click the shared folder, select ‘Get Info,’ scroll to the ‘Sharing & Permissions’ section and then specify which user accounts have read and write access. Once you’ve finished, close the ‘Get Info’ menu.
- Back in the main ‘System preferences… > Sharing’ menu, Control-click your shared folder and select ‘Advanced Options…’
- Select the ‘Share as a Time Machine backup destination’ checkbox.
- By default, Time Machine will consume more and more space until you have a hard drive that’s full of nothing but backups. Most of the time, you’ll want to limit how many bytes Time Machine can use for its backups, by selecting the ‘Limit backups to…’ checkbox and then setting an upper limit. Once macOS reaches this limit, it’ll start replacing older backups with newer ones, although note that if multiple Macs are backing up data to this machine, then this is the total limit for all these Macs combined.
Connect the client to the host
Once you’ve created a shared folder, you’ll need to connect all of your client Macs to the host Mac.
On your client Mac:
- Open a new ‘Finder’ window.
- Your host Mac should appear automatically in the left-hand menu, under the ‘Shared’ heading; select it.
- Select the ‘Connect As…’ button in the upper-right corner of the Finder window.
- If macOS asks you to authenticate the connection, then enter the username and password of an account that’s associated with your host Mac.
- Navigate to ‘System preferences… > Time Machine.’
- Click the ‘Select Backup Disk…’ button.
- You should see your shared folder as an option, select it, and then click ‘Use Disk.’
- Back in the main ‘System preferences… > Time Machine’ menu, make sure the ‘Back Up Automatically’ checkbox is selected, and from this point onwards, your Time Machine backups will be saved to this remote, shared folder automatically.
Repeat this process for any additional Macs that should store their backups to this shared folder.
Before you go
After spending over 20 years working with Macs, both old and new, theres a tool I think would be useful to every Mac owner who is experiencing performance issues.
CleanMyMac is highest rated all-round cleaning app for the Mac, it can quickly diagnose and solve a whole plethora of common (but sometimes tedious to fix) issues at the click of a button. It also just happens to resolve many of the issues covered in the speed up section of this site, so Download CleanMyMac to get your Mac back up to speed today.
Here’s a strange (but interesting!) thing you can do with APFS under Mojave and High Sierra: You can designate a Mac as a network Time Machine destination, so in a pinch, you could back up one Mac in your house to another. Strange, huh?
I can see this being useful if, for example, you’re concerned about potentially failing hardware on a machine and want to get it backed up before you can even run to the store to get an external drive. In that scenario, this feature could really save your bacon! Or, you know, your files. Which are maybe more important than bacon.
To configure this, start on the Mac you want to back up to. As I noted, this machine will need to be using APFS, so you’ll have to have High Sierra or Mojave installed. One easy way to check to see which format your disk uses is to open Finder, choose Go> Computer from the menus at the top…
…then click your Macintosh HD (or whatever your startup disk is called) to select it. If you press Command-i or choose File> Get Info , you’ll get your answer.
Anyway, to enable your destination’s Time Machine abilities, click on the Apple Menu first and choose “System Preferences.”
Then open the Sharing pane…
…and turn on “File Sharing” if it’s not already on.
Afterward, click the plus button under the “Shared Folders” section to add whichever folder you want to store those Time Machine backups in.
Once you’ve picked your poison there, right- or Control-click on the folder you just chose to reveal a contextual menu, from which you’ll select “Advanced Options.”
And here’s the magic setting: Turn on “Share as a Time Machine backup destination.”
You could also turn on that “Limit backups to” checkbox to only allow a designated amount of storage to be used. But either way, the folder you chose will then appear on the other machine underneath System Preferences> Time Machine> Select Disk .
Now, know that when you use the “Select Disk” option, you’re likely going to have to authenticate with whichever user you enabled File Sharing for. As you can see above, it gave my “melissa” user read/write access when I turned it on for my Mac, so that would be one account I could use to log in with on my source computer.
It’s also important to mention here that you’ll want to be sure that your destination Mac has enough storage to accommodate however much you’re transmitting to it (if you didn’t limit the amount of space that can be used); if not, then you’ll definitely want to exclude some data from being backed up. And I’d say to err on the side of caution with this! You don’t want to leave your destination Mac with only a few gigabytes free, say. Or maybe you do. Maybe you like living on the edge because you’re a rebel.
Source: Bryan M. Wolfe / iMore
Apple’s built-in Time Machine app in macOS Monterey makes it simple to back up Mac data. To create backups with Time Machine, you’ll need an external storage device.
After you connect the storage device and select it as your backup disk, Time Machine automatically makes hourly backups for the past 24 hours, daily backups for the past month, and weekly backups for all previous months. The oldest backups are deleted when your backup disk is full.
How to set up Time Machine
As explained by Apple support, you can use any of the following backup methods:
- External drive connected to your Mac, such as a USB or Thunderbolt drive
- Network-attached storage (NAS) device that supports Time Machine over SMB
- Mac shared as a Time Machine backup destination
- AirPort Time Capsule, or external drive connected to an AirPort Time capsule or AirPort Extreme Base Station (802.11ac)
Follow these instructions to begin using Time Machine for backup purposes on your Mac.
How to enable Time Machine backups on your Mac
- Select System Preferences from the Apple menu.
Choose the Time Machine icon.
Source: iMore
Select which disk you’d like to use as a Time Machine backup.
Source: iMore
Check the Back Up Automatically box in order to automatically back up your Mac to your chosen disks.
Source: iMore
Your hard drive is now ready to accept backups through Time Machine.
How to restore files from a Time Machine backup
- Select System Preferences from the Apple menu.
Choose the Time Machine icon.
Source: iMore
Click Enter Time Machine after clicking the Time Machine icon in the Menu bar.
Source: iMore
Find the file or folder in question and click Restore.
Source: iMore
You’re set! Time Machine will copy that file back to its original location on your hard drive.
Go further
Looking for a fresh, new backup drive? Be sure to look at our favorite external hard drives for Mac and the ones that use USB-C. You’ll be happy you did!
We may earn a commission for purchases using our links. Learn more.
How to get all Green Stars and Stamps in Super Mario 3D World
It can be tricky finding all 380 Green Stars in Super Mario 3D World + Bowser’s Fury, but we’re here to help. Don’t forget to grab all 85 Stamps along the way as well.
Nintendo recap: Pokémon leaks, Kingdom Hearts coming to Switch, and more
Pokemon Legends: Arceus leaks online, Castlevania NFTs sell for a ton of money, and, oh yeah, Microsoft bought Activision Blizzard. There’s even more to discuss on this week’s Nintendo recap.
Did you know these 10 Kingdom Hearts facts?
Kingdom Hearts has been around for two decades and in that time it’s had a fascinating history. Here are 10 facts you probably didn’t know about the popular games.
Stay fit with the best fitness accessories for working out at home
Staying fit and healthy with the best fitness accessories for working out at home.
There’s almost nothing worse than getting caught with a dysfunctional Mac and no backup of your data. Here’s how to prevent that from happening using Time Machine.
Don’t get caught without a backup if your Mac crashes.
With so many cloud storage services available that can automatically sync your files, such as Dropbox or Google Drive, it’s easy to get complacent about keeping your Mac backed up. But as easy as it is to just set it and forget it with a cloud drive, they can’t back up everything on your computer. For example, they don’t remember the local coffee shop’s complicated Wi-Fi password or every setting you’ve changed that’s finally made booting your Mac feel as familiar as sinking into a comfy couch.
That’s why a recent backup of your Mac, be it a MacBook , Mac Mini or iMac , makes a lot of sense, just in case your computer crashes and you can’t access its storage. A backup also makes it easy to move your apps and data to a new Mac if you upgrade to a new machine (or get a new MacBook as a gift ).
Get the CNET Apple Report newsletter
Apple makes backing up relatively painless by including its Time Machine app in the Mac operating system, which you can schedule to run a full backup of your Mac. You don’t have to do a thing after the initial setup process, which takes just a few minutes.
Below I’ll walk you through using Time Machine, cover how to check what iCloud is keeping a backup of and for those who want some extra assurance, how to back up your Music library.
Time Machine is where it’s at.
More from 12 Days of Tech Tips
- Change this annoying trackpad setting right now on your Mac
- MacOS: 10 tips to flex your superpowers on Mac
- PS5 games take up a ton of space. Here’s how to boost your PlayStation 5 storage
Use Time Machine to back up your Mac
As long as it knows where to store the files, Time Machine can be set to periodically backup your computer, though you can also manually trigger a backup. In fact, when you connect an external hard drive or SSD to your Mac, you may see a prompt asking if you want to use the drive with Time Machine.
Once Time Machine is set up, it will create and store one backup every hour for the past 24 hours, daily backups for the past month and one backup a week for all previous months until it runs out of space. Once the backup drive is full, it will make room by deleting the oldest backups.
As far as how big of a drive to get, the rule of thumb is 1.5 to 2 times the size of your Mac’s hard drive. For example, if your Mac has 512GB of storage, you’ll want a 1TB drive. You can find an external hard drive or SSD for relatively little, and we even have a handy guide to the best drives .
The drive can be directly connected to your Mac or connected via your network.
- External USB, Thunderbolt or FireWire drive connected to your Mac
- Network-attached storage (NAS) device that supports Time Machine over SMB
- Mac shared as a Time Machine backup destination
- External drive connected to an AirPort Extreme Base Station (802.11ac) or AirPort Time Capsule
- AirPort Time Capsule (technically discontinued, but still available as a refurb)
Screenshot by Matt Elliott/CNET
To begin, plug the drive into your Mac and wait for the prompt to use it with Time Machine. If your Mac forgets its manners and doesn’t ask, select the drive to use by going to System Preferences > Time Machine and clicking the Select Disk button.
If it’s not already formatted to work as a backup drive, Time Machine will ask if you want to format the drive. Doing so will erase anything on the drive, so make sure there’s nothing on the drive you don’t want to lose.
When selecting your drive for Time Machine, you can also choose to encrypt backups. Encryption means restoring from the Time Machine backup will require a password. If you want it to back up at regular intervals, make sure to check the box next to Back Up Automatically.
Screenshot by Matt Elliott/CNET
Click the Options button in Time Machine’s panel in System Preferences to indicate what types of items you’d like Time Machine to exclude. Excluding items can speed up the process, but you can still use your Mac while its running in the background. Older Macs might feel a bit sluggish during the backup process, though.
There is also an option to Show Time Machine in menu bar. The menu bar icon lets you keep an eye on the status of the backup, stop it and manually start a backup.
To restore your system or even a single file to a previous point, click the menu bar and choose Enter Time Machine. You’ll see your previous Time Machine backups arranged like cards in a rolodex. Scroll through, find the one you want and click the Restore button.
Organize your files before creating a backup so you don’t leave anything behind.
Screenshot by Jason Cipriani/CNET
iCloud backs up some stuff, but not everything
Where Time Machine is a complete system backup, iCloud only stores selected files and data. You can see a list of everything that’s currently being synced and stored in your iCloud account under System Preferences > Internet Accounts > iCloud. Naturally, this can be limited by the amount of data in your iCloud or Apple One subscription . The free default is a mere 5GB of iCloud space.
Click the Options button next to iCloud Drive to see the files and folders that are stored in your account. It should include your Desktop and Documents folders, along with any apps you use that store data in iCloud Drive.
Buying a new Mac? Here’s a list of the best Macs in 2021 and the best MacBook deals happening now. Plus, you should get a Mac VPN .
I am having trouble setting up a Time Machine backup to a shared network drive. I have an external drive plugged into a MacBook Pro (MBP), and I want to use Time Machine to remotely back up a MacBook Air (MBA) to it. I followed the instructions in “Can Time Machine back up to an external HD connected to another Mac?” but Time Machine will not present the remote drive as an option.
- The drive is formatted properly. I have an identical partition to which the MBP does a local Time Machine backup.
- The drive is shared properly. In fact, the MBA can see and mount the remote drive.
- However, the partition is not shown as a potential Time Machine drive.
Finder can see and access the drive, so why can’t Time Machine? Is there a bit somewhere I can flip to tell Time Machine to see it?
10 Answers 10
This answer is from 2013. Recent versions of macOS prefer SMB for Time Machine. AFP isn’t really used for anything anymore.
For Mac OS X 10.5-11 (before Sierra)
When you click the “Options. ” button in the File Sharing preferences, is “Share files and folders using AFP” enabled? Time Machine over the network requires AFP, so it won’t work if only SMB is enabled.
You may also need to disable SMB. I am not exactly sure why this is the case, but sometimes the SMB share takes priority and Time Machine can’t seem to see the AFP share. Note that this will prevent Windows clients from connecting to file shares.
Because your Shared drive is not a TimeMachine enabled shared volume.
TimeMachine have special requirements using AFP as pointed out by gabedwrds thus thoses (eg. AFP Replay Cache) are not necessarily included with “OSX Client”.
You should enable a “TimeMachine Server” in order to share an external disk accross the network.
You may try using the Terminal if you are not prepared to buy “Server.app“. But you’re talking about data backup therefore you want to be sure about consistency and recoverability ! Other backup solutions such as the excellent “Carbon Copy Cloner can achieve this without the “Server.app” and you may get free of charges similar results by using the rsync command from the terminal or using Automator.app…
If you don’t care about using an unsupported solution and you are willing to take the risk of being in the so called “poo” :
• Either show unsupported network volumes :
And then have a look in your TimeMachine system preferences…
• Or inputing the shared volume name manually therefore in your case type in the terminal :
Then start your first backup :
I know its an old post, but hopefully this will help anyone looking into the issue. Disabling SMB will work, but isn’t necessary. OS X now uses SMB as the default connection (see here: ), and SMB doesn’t work with Time Machine. You can either disable SMB, thus forcing the mac to connect with AFP, or you can use the Finder ‘Connect to Server’ button under the Go menu, and force AFP as the protocol. I.e. afp://myserver.domain Tested under Yosemite 10.10.3
Our situation was that Time Machine could not see an SMB-attached drive even though the SMB drive contents could be otherwise accessed from that same MAC.
Today I was able to have a Time Machine backup created but by using Apple Filing Protocol (AFP), not SMB.
To do this, I took the following steps:
Turn off Time Machine using system preferences, Time Machine, unclick “Back Up Automatically”
Disconnect from the SMB-attached network drive
Clean out the keychain of all “Time Machine” references using Keychain Access. Make sure you look in Category “All Items” and delete from Keychains under “login”, “System” and “Local Items” all keychain entries related to:
- the IP address of the SMB-attached drive
- the name of the SMB-attached drive
- the words “Time Machine”
- the word “sparcebundle”
Try to create a Time Machine backup using SMB:
- Using a Finder window: Go, Connect to Server
- In the Server Address box, type in “smb://aaa.bbb.ccc.ddd” where aaa.bbb.ccc.ddd is the IP address of the network-attached storage.
- Using Time Machine Preferences and hit the “Select Disk” button
- If the SMB-attached drive is visible, then select that drive.
- If applicable, select to encrypt the backup
- If the backup is made, then you are done
But if Step 4 was not successful, try to create a Time Machine backup using AFP (Apple File Protocol):
- Redo steps 1, 2, 3, and 4
- Using a Finder window: Go, Connect to Server and in the Server Address box, type in “afp://aaa.bbb.ccc.ddd” where aaa.bbb.ccc.ddd is the IP address of the network-attached storage
- Using Time Machine Preferences and hit the “Select Disk” button
- If the AFP-attached drive is visible, then select that drive.
- If applicable, select to encrypt the backup
- If the backup is made, then you are done
We now have a backup created using AFP and although it is not a sparcebundle it seems to be running fine. At some point in the future, I plan to disconnect from the network-attached storage and reconnect to it with SMB as it is my understanding that SMB is current Apple protocol choice for creating a Time Machine backup over a network.
If anyone knows what might be the root problem on why AFP was successful and SMB was not, I would appreciate some advice.
Apple’s Time Machine software helps you create a backup of your Mac hard drive. That’s great, but what if something happens to the external drive you’re using for the Time Machine backup? If you’re following our 3-2-1 Backup Strategy, then you’ll be protected, but you can do more, too.
How about using multiple backup drives with Time Machine? Here’s how.
Some Background on Time Machine
Time Machine is more than just backup software for your Mac. You can think of it as a tool that keeps moments in time for you to look back on, so you can recover deleted or missing files or even revert to older versions of files you’ve worked on.
Time Machine stores hourly backups for 24 hours, daily backups for the past month, and weekly backups for all previous months for as much space as you have on your Time Machine backup drive. The oldest backups get deleted when the drive fills up. That makes it great for backups, but not great for archives, which require long-term storage. For more on the difference between backups and archives, see our post, What’s the Diff: Backup vs Archive.
Which Storage Devices Can be used with Time Machine?
Time Machine supports any of the following external storage devices.
- External drive connected to your Mac, such as a USB, Thunderbolt, or FireWire drive
- External drive connected to an AirPort Extreme Base Station (802.11ac model) or AirPort
- Time Capsule (See our post, What’s the Diff: Time Machine vs. Time Capsule)
- AirPort Time Capsule
- Mac shared as a Time Machine backup destination
- Network-attached storage (NAS) device that supports Time Machine over SMB
What is less well known is that you can use a single Time Machine backup drive with multiple Macs. If you have a large disk, you can partition it and use part of it for regular data and part of it for a Time Machine backup.
You also can use your Mac with more than one Time Machine backup drive. Let’s see how that works.
Use More than One Backup Disk Using Disk Rotation
Disk rotation is a technique borrowed from corporate IT professionals. The adage, “Don’t put all your eggs in one basket,” is the reason. While Time Machine is great backup software, it’s not foolproof. If your Time Machine backup drive dies — as hard drives eventually do — all of that data will be gone.
Having Backblaze Personal Cloud Backup is a great way to fix that, of course, because your data is also backed up to the cloud. They’re complementary to one another: Backblaze tracks the last 30 days of changes to your files, for example, while Time Machine will keep track of as many changes as it can within the storage capacity of your backup drive. So it’s nice — ideal, really — to have both.
| Tip: If you have a Backblaze backup in addition to Time Machine, and you’re planning to restore from Time Machine, it’s a good idea to save a restore from Backblaze prior to initiating your Time Machine restore in case anything goes wrong. We wrote a help page on the topic, Before You Restore With Time Machine. |
Fortunately, Time Machine handles disk rotation with aplomb. You can attach a second hard drive and use it with Time Machine with only a couple of clicks. When Time Machine is connected to your first backup drive, it will back everything up. Then it’ll do the same for the second one. Time Machine backs up everything that’s changed on your Mac’s hard drive since the last time that backup drive was connected. So each drive will keep a complete Time Machine backup.
How to Use Multiple Backup Drives with Time Machine
- Connect your second hard drive to your Mac.
- Click on the Time Machine icon in the menu bar, then click on Open Time Machine preferences .
- Click Select Disk .
- Select the drive you want to rotate, then click Use Disk .
- Time Machine will ask you if you want to replace your existing Time Machine drive, or use both drives. Click Use Both .
Time Machine will now back up to each individual drive as they’re connected.
When you want to check on your Time Machine backups later, all you need to do is hold down the option key when clicking on the Time Machine icon in your menu bar. You’ll see Browse Other Backup Disks. You can use that to browse whichever Time Machine backup you’d like.
The same process works if you mix a Time Machine backup drive with Apple’s Time Capsule network device (a home Wi-Fi router with built in backup drive). You can back up to both without any problem.
Using this procedure, your data is backed up on two (or more) drives. You can leave one at home and leave the other in the office, for example. That way you’ll never be without a backup you can recover from quickly and easily.
Other Time Machine Backup Tips:
- To exclude items from your backup, open Time Machine preferences, click Options, then click the Add (+) button to add an item to be excluded. To stop excluding an item, such as an external hard drive, select the item and click the Remove (–) button.
- If using Time Machine to back up to a network disk, you can verify those backups to make sure they’re in good condition. Press and hold Option, then choose Verify Backups from the Time Machine menu.
- In OS X Lion v10.7.3 or later, you can start up from your Time Machine disk, if necessary. Press and hold Option as your Mac starts up. When you see the Startup Manager screen, choose “EFI Boot” as the startup disk.
- If you’re a Synology NAS user, you might be interested in our blog post, Backup and Restore Time Machine using Synology and the B2 Cloud.
Do You Use Time Machine for Local Backups?
Do you use Time Machine and have you set up a disk rotation scheme? Do you combine Time Machine with cloud backup? Or, do you still have questions? Let us know in the comments.
Editor’s Note: This post was updated from May 3, 2016.
So far in my exploration of Big Sur’s new Time Machine feature to back up to APFS (TMA), I have covered exclusively backing up to local storage. This article looks at configuring and using TMA’s backup storage on a shared disk over a network – in this case, a shared APFS volume on another Mac running Big Sur.
Configuring the server
The fundamental requirements for the shared folder or volume on the server are that it’s shared using SMB and designated as being available for Time Machine backups. For the sake of simplicity here, I formatted an external SSD on the server in APFS Case-sensitive format, then ensured that volume was already added to the Time Machine exclusion list on the server, so that the server wouldn’t try to back it up.
With the volume/folder to be shared mounted on the server, click the + tool at the foot of the list of Shared Folders, and add the shared volume/folder to the list of Shared Folders. Check that the list of users is appropriate, with the correct permissions, then click the Options button.
Ensure that the files and folders will be shared using SMB; the older alternative of AFP has long been deprecated and shouldn’t be used. Then select the name of the shared volume/folder in the Shared Volumes and Control-click it to bring up its options. There tick the third item, to share the volume as a Time Machine backup store. If you want to enforce any maximum size limit on this share, this is the place to set that too.
Check the remaining options, particularly users and their permissions. Your network share is now ready for connection.
Configuring the client
Ideally, particularly for the first full backup, ensure that both the server and client are connected to the local network using wired Ethernet. Even backing up a fairly modest internal disk is going to take an hour or more if left to a Wi-Fi connection.
On the client which is going to back up to that network share, open the Time Machine pane and configure any exclusions using the Options button. Then click the Select Disk… button, and you should see the network share. Select that, decide whether you wish to encrypt the backups, and click Use Disk to start the countdown to the first full backup.
You’ll then be required to authenticate to the server, and Time Machine will construct a special type of sparse bundle on the shared volume.
Time Machine will next start its first full backup to the network share.
Although the Time Machine pane shows a useful progress indicator during the backup, its estimate of time remaining is quite flexible. You should also expect it to show Zero KB available on the share throughout the backup. Backups can slow to an interminable crawl when copying very large and complex networks of folders and files, including those in Apple’s Xcode. Over Wi-Fi, transfer speeds can be as high as 50 MB/s. When copying parts of Xcode, transfer rates can fall unrecordably low, with less than 50 items/s being copied. Use T2M2’s Check Speed feature to monitor progress and reassure yourself that it hasn’t entirely ground to a halt.
Because of its more general significance, I’m posting a separate article about this very shortly. You may wish to exclude items such as Xcode from your TMA backups made over a network.
The network share
Time Machine creates a machine-specific sparse bundle in which it stores the backups. In my case, this contains 1,050 band files each of no more that 67.1 MB, giving it an initial capacity of just over 70 GB, the size of the first full backup. When mounted, the sparse bundle’s virtual volume is in APFS Case-sensitive format, just as local backup stores are in TMA. In addition to containing some custom Property List files, this special sparse bundle contains another folder named mapped, in which there’s a matching file for each of the band files. None of the band files or other contents of the sparse bundle are themselves sparse files.
Conclusions
As an implementation of TMA on a network share, this backup scheme appears to work well. It’s readily accessed through the Time Machine app, although that isn’t complemented by the same Finder interface as a local backup store is. Its main limitations appear to be those imposed by poor performance of SMB file sharing, particularly on objects which contain large numbers of small files, notably the Xcode app. Provided that they are excluded, it should prove suitable for backing up documents and the other contents of a user’s Home folder.
Site Navigation[Skip]
- Home
- About CTS
- Why choose CTS?
- The Apple advantage
- Get a quote up front
- Support new technology
- Macintosh
- Why choose a Mac?
- Guide to a happy Mac
- Replace your old Mac
- Why upgrade your macOS?
- What’s new in macOS?
- Business apps for Mac
- Creative apps for Mac
- Backup is essential
- Why get a newer Mac?
- iPhone & iPad
- Why iPhone & iPad?
- Purchasing an iPhone
- Buy or sell a used iPhone?
- What’s new in iOS
- Cloud computing
- Apple TV
- Welcome to the digital life
- Workgroups
- Why get help?
- Why upgrade software?
- Apple servers
- AirPort & Time Capsule
- Optimize wi-fi networks
- Choosing a cloud service
- Why use Google Apps?
- Apple saves money
- Help & Tutorials
- Contacting us for help
- Welcome to Macintosh
- Macintosh 101
- Mac reference guide
- Software & accessories
- iPhone & iPad guide
- Apple IT guide
- Google Workspace reference
- More help
- Visiting an Apple Store
- News
- Highlights
- Latest in Apple news
- Links for more info
- Search
Managing Time Machine when you replace drives or computers
Time Machine is Apple’s built-in, set-it-and-forget-it backup system. Time Machine makes hourly snapshots of files and copies them to a backup drive. It keeps older revisions and deleted documents so it can restore them or an entire computer to any point in the past. When the backup drive is full it automatically deletes the oldest backups.
Time Machine works so well it doesn’t always get much attention. But if you need to replace computers or hard drives, you’ll appreciate these advanced techniques that put you in charge of what happens behind the scenes.
Inheriting a backup versus creating a new backup
When you replace a Mac that was previously backed up with Time Machine, you can set it to use the same backup drive as the old Mac as long as there’s enough room for both computers’ backups.
If you used Migration Assistant to set up the new Mac,В at the first backup Time Machine may ask if you want to inherit the backup history of the old computer. Note that even if you choose to inherit the backup,В Time Machine cannot pick up where it left offВ and copy only new files. It always copies everything from the new Mac to the backup. Even so, inheriting can have benefits.
Inheriting a backup allows the user to easily restore files from the previous computer’s backup even if they weren’t on the computer when you set up the new Mac. And if the backup drive eventually fills up, Time Machine will seamlessly remove the old Mac’s backups to make room.
Instead, if you create a new backup Time Machine leaves the old backup set intact and starts a new set. That’s great if you plan to continue using both Macs but it’s not convenient if you intend to sell or dispose of the old Mac. You may run out of space and have to remove the old backup set manually. That’s not always easy because, as Time Machine will tell you, “backup items cannot be modified.”
Forcing a Mac to inherit a backup
- OnВ the new Mac, В set Time Machine to use the same backup drive as before. Then immediately turn backups off.В
- Log in as an admin user В and open Terminal.
- TypeВ or copy & pasteВ the following command: В sudo tmutil inheritbackup В and a space.
- If the Mac backs up to a local drive, В open the backup driveВ and the Backups.backupdb folder. Drag the folder named after the old computer to the terminal window.
- If you back up to a network  (such as a Time Capsule or server),  mount the backup volume and look for the Mac’s backup disk image inside. Do not open it – just drag the disk image to the terminal window.
- Click the terminal window,В hit return and type the admin password.
Replacing a drive and continuing the same backup
When you replace a hard drive in a Mac that was backed up with Time Machine it’s usually considered an entirely new volume. Everything is backed up from scratch. Although the original drive may also show in Time Machine this will undoubtedly take a lot of time and space. In fact, Time Machine may delete a good part of your backup history (maybe all of it) to make room for the new drive. Thankfully, there’s a better way.
Associating a new drive with a Time Machine backup
Is your backup ready to be used in an emergency?
Tom Nelson is an engineer, programmer, network manager, and computer network and systems designer who has written for Other World Computing,and others. Tom is also president of Coyote Moon, Inc., a Macintosh and Windows consulting firm.
- Tweet
- Share
What to Know
- Network backup: Open Time Machine, hold down the Option key, and select Verify Backups.
- Local backup: Open Terminal, enter tmutil compare –s, and press the Return key.
- File restoration test: Open Time Machine, select Enter Time Machine, choose a file, and click Restore.
Time Machine automatically backs up files on your Mac, such as apps, documents, system files, emails, and more. If the original files are deleted or become corrupted, or if your Mac’s hard drive fails, restore your files from a Time Machine backup. This article provides instructions on verifying Time Machine backups with a network storage device or a local storage drive.
Verify Time Machine Backups to a Network Disk
If you’re backing up your files with Time Machine to a networked location, verifying your backups is a simple process.
Select the Time Machine icon on the Mac menu bar.
If you don’t see the Time Machine icon on your menu bar, select System Preferences under the Apple menu, choose Time Machine, and then select Show Time Machine in menu bar.
Hold down the Option key.
Select Verify Backups in the drop-down menu.
Verifying might take a while, depending on the size of your backup and your Mac’s speed. Time Machine alerts you if there are any problems with your backup.
Verify Time Machine Backups With Local Storage
If you’re using a local storage device for your Time Machine backups, you can’t use the Verify Backups option, which works only with a network storage device. Instead, use the Mac Terminal command-line system to run the Time Machine Utility. This compare Time Machine snapshots to verify that backups are valid.
Ensure that your backup drive is plugged into your computer.
Select the Spotlight Search icon on the Mac’s menu bar.
Type Terminal into the Spotlight Search field to bring up the Terminal window.
Select the Terminal app in the search results to open it.
In the Terminal window that opens, enter the following:
Press the Return key.
The system compares the contents of your Mac with the contents of your backup.
Depending on the size of your last Time Machine backup, this report can take up to 15 minutes to finish.
When it is finished, you see a report listing the files that were compared, how much data was added, how much data was removed, and how much data has changed. You are notified of any problems in the backup.
Verify Time Machine Backups by Restoring a File
The simplest method of verifying that your backup files are sound is to do a spot check and restore a test file using Time Machine. This works regardless of whether you’re using a network device or a local device to store your backups.
Select the Time Machine icon on your Mac’s menu bar.
Select Enter Time Machine in the drop-down menu.
Select a previous version of a folder or file and then select Restore in Time Machine. Time Machine copies that folder or file back to its original location, where you can verify that it was backed up properly.
Follow MUO
Wondering whether it’s better to use iCloud or Time Machine to back up your Mac? Here’s a detailed comparison of the two options.
With our digital data becoming more important each day, no one wants to lose their valuable files and photos, either to a corrupted hard drive or a stolen machine. This is why having a backup of your Mac is essential, to help you in those bad times (if they ever do come.)
There are two methods available for Apple users to back up their data—iCloud Drive and Time Machine. While they can ultimately serve a similar purpose, the way both services work is significantly different.
Today we’ll cover which service should you be using for your Mac backups, and how they both differ.
How Does iCloud Drive Work for Mac?
We first need to understand how iCloud Drive and Time Machine work to truly understand the difference between the two. Most people are familiar with “cloud” backups but don’t know how they actually work. When you sync your iPhone or Mac to iCloud, your device uploads all the selected data to a secure server owned by Apple. Apple has tons of facilities around the world filled with such servers, providing them with more than enough bytes of data.
These servers are backed up regularly, so even if one fails, your data can be restored from a backup. Your data remains secure on the specific server and can be downloaded back onto your device if the need arises. You can sync and store specific files on iCloud Drive (such as documents and photos), but you can’t store system files or make complete system backups for your Mac.
iCloud Drive also allows you to offload data from your Mac onto the cloud if your Mac is running low on storage. This basically means that all files that you rarely use are backed up on the cloud and deleted from your system. However, a file shortcut is still present in the same location on your Mac, and in the case that you need to access it again, the original file is downloaded and opened on your system immediately. This allows you to save some crucial storage space on your Mac.
How Does Time Machine Work for Mac?
Whilst iCloud has an internet-based approach to backing up your data, Time Machine has a more local, hands-on approach for data backup. Time Machine is a feature available in macOS that automatically backs up your files to an external hard drive every hour or so (depending on the backup duration you have set.)
This means that the backup is available to you locally on your external hard drive as opposed to over the internet. Time Machine also backs up your system files and settings, creating an entire clone of your Mac. You can use this to restore your Mac later if needed.
iCloud Drive vs. Time Machine
Now that we’ve talked about how both options work, we’ll take a look at the benefits and drawbacks of using iCloud Drive or Time Machine for your backups.
Benefits and Drawbacks of iCloud Drive
A benefit of iCloud Drive is that alongside your files being synced to the internet server, they are also synced to all of your other Apple devices. This means that you can access them from anywhere. As soon as you make any changes in your files (such as editing a document), the new version is automatically synced to the cloud.
You may also be able to access the file version history in iCloud Drive. This depends on the file type, but it usually allows you to view and restore previously saved versions (if you require them).
Many users who prefer to use iCloud Drive over Time Machine do so because they don’t want to deal with the hassle of managing an external hard drive all the time. Since iCloud Drive only requires an active internet connection to back up your files, it’s much easier to manage.
iCloud Drive also has some drawbacks, as you might imagine. Since it’s a subscription-based service, there’s a monthly fee depending on how much online storage you use. 5GB is offered for free, whereas upgrades are available to 50GB for $0.99 per month, 200GB for $2.99 per month, or 2TB for $9.99 per month.
Another drawback is that iCloud Drive only syncs user files with the server. No system files or system backups are performed. This means that if you needed to restore a new Mac, you can only retrieve your files (such as your documents and photos) from iCloud Drive. You won’t be able to restore your entire system from the cloud.
You can also only restore deleted files from the last 30 days, which is a major downside if you might need to recover lost data from more than a month ago.
Benefits and Drawbacks of Time Machine
Time Machine allows you to create a backup of your entire system, including both user and system files. This will allow you to restore your entire system from a Time Machine backup if the need ever arises, which is why many users recommend frequent Time Machine backups for your system.
It’s important to note that Time Machine doesn’t back up every file every hour. Instead, it only backs up the files that have changed during the last hour. So if you haven’t done anything in the last hour, your Mac won’t probably take much time to do a back up. However, major system changes can take more time to back up to your external drive.
Time Machine doesn’t cost much apart from the one-time investment in an external hard drive or SSD. Since the hard drive is a local storage site and doesn’t rely on the internet for access, you can keep it somewhere safe and secure. However, you also have to remember that hard drives do eventually fail after a few years, so you’ll have to change your drive after a while. It also won’t help you much if you lose your hard drive with your Mac.
Time Machine is usually very easy to set up, but it can become a bit complicated if you plan to use network storage devices for the backup. A Time Machine backup also isn’t as accessible as iCloud Drive, since the data on there can only be accessed on a Mac and not on any other device.
What’s more, if you’re already using iCloud Drive, you’ll need to download all offloaded data onto your Mac to back it up using Time Machine.
The fundamental difference between iCloud Drive and Time Machine is that Time Machine is meant for complete system backups, including system files and settings. In case your Mac stops working or gets stolen, you can set up a new Mac using the Time Machine backup. Everything will be exactly the same as it was on your previous Mac.
Which One Should You Use?
The debate between using iCloud Drive or Time Machine is a long-standing one, and won’t be ending anytime soon. Each backup method has its pros and cons. We recommend you use both if you can, using iCloud Drive for syncing your files to the cloud and keeping them accessible on different devices, and using Time Machine as an ultimate redundancy in case something goes wrong.
However, if you’d like to use only one of them, we recommend using Time Machine only. This it offers a complete system backup that can be used for a full system restore as compared to the user files backed up by iCloud Drive.
Lost your important document files? Here’s how to recover previous version of Word, Pages, and Google Docs documents on your Mac.
Shujaa Imran is a die-hard Apple user and loves helping out others with their macOS and iOS-related issues. Apart from this, he’s also a cadet pilot, aspiring to become a commercial pilot one day.
Subscribe to our newsletter
Join our newsletter for tech tips, reviews, free ebooks, and exclusive deals!
Apple’s Time Machine is a built-in backup feature for your Mac that will automatically backup all of your files, apps, music, photos, emails, documents, and system files. When you complete a backup, you can even restore files from your backup if the original files are deleted from your Mac or the hard disk (or SSD) in your Mac is erased or replaced. With Unraid, you can now use Time Machine with the SMB protocol and store your Time Machine backups on your Unraid server!
Note: This guide works with MacOS High Sierra.
Create a Time Machine Backup on your Unraid Server
To create backups with Time Machine and store them on your Unraid server, all you’ll need to do is connect it to your Unraid server and then Time Machine will automatically make:
- Hourly backups for the past 24 hours
- Daily backups for the past month
- Weekly backups for all previous months
- The oldest backups are deleted when your backup disk is full
If you want to control when backups are completed, we suggest you use a tool such as Time Machine Editor so you can customize when backups are made and select a host of other options not available in Time Machine itself.
Unraid and Time Machine Setup
Before you begin, make sure SMB is enabled in the Unraid webgui by going to:
- Settings –> SMB under “Network Services”
- Set “Enable SMB” to “Yes” and click “Apply” (Array must be stopped to change this).
- Also, set “Enhanced macOS interoperability” to Yes as well.
- In the Unraid webGUI, go to “Shares” and click “Add Share”.
- Name the share (Ex: Time Machine).
- Set your minimum free space or leave default. This is the minimum free space available to allow writing to any disk belonging to the share.
- Under “Included disk(s)” select the disk in the array that you’d like to use for your Time Machine share. You can still use this same disk for other shares.
- Keep “Enable Copy-on-write” on “Auto”.
- Under SMB Security Settings.
- Under “Export” select “Yes (Time Machine)”
- Set your “TimeMachine volume size limit”. This limits the reported volume size, preventing Time Machine from using the entire real disk space for backup. Example: setting this value to “1024” would limit the reported disk space to 1GB.
- Set your Security parameters to what you prefer.
- Click Apply/Done.
From here, there are just a few more steps:
- Connect to your Time Machine share by connecting to it through the Finder.
- Next: go to Time Machine Preferences on your Mac and “Select Disk”.
- Your newly mounted Time Machine share should show up. Select this share, enable encryption if desired and click “Use Disk”.
- Now, Time Machine will say it’s trying to connect to your share. Before clicking connect, it’s recommended to eject your mounted share from your desktop and then connect.
- Time Machine immediately begins making periodic backups—automatically and without further action by you.
Note: The first backup may take a long time, depending on how many files you have and the size of your Mac’s harddrive. Thereafter, Time Machine backs up only the files that changed since the previous backup, so future backups should be faster.
Reminder: We suggest you use a 3rd party tool such as Time Machine Editor so you can customize when backups are made and select a host of other options not available in the Time Machine program itself.
That’s it. Now, all of your Time Machine backups will be stored on your Unraid server and if something bad happens to your Mac, you will be able to restore files, settings, and apps from these backups!
Creating Multiple Time Machine Shares for Different People/Macs
So, say you want to create multiple time machine backups for different people/Macs in the house? You will need to create a separate share for each Time Machine backup and separate users in Unraid. For example, say the Stooges want to backup their Macs. If the username on each of the Macs is larry, curly, and moe, you would create Unraid users larry, curly, and moe. Once the users are set up then you would create the individual Time Machine shares (ex: tm-larry, tm-curly, tm-moe). From there, simply follow the instructions above!
For more info on Time Machine shares, be sure to also check out Space Invader One’s excellent video on Unraid Shares and MacOS!
ITS recommends backing up all your documents, files, and settings on a regular basis. Time Machine as part of the Mac OS no longer allows network drives to be used as a backup source. You will need an external hard drive. The size of the drive depends on how much space is being used on the computer.
Note: You can checkout an external hard drive from Smith Media Studios located in Henshaw B or external hard drives can be purchased at the computer store.
Disk Space Used:
- Click on GO in the upper left hand corner of the screen.
Click on Computer. Or Hold down the Command and Shift keys and hit the letter C.
Right click on the MacintoshHD and select Get Info, or click on MacintoshHD and hold down the Command key and hit the letter I.
Plug in the external drive.
From the Apple menu select System Preferences and then Time Machine.
Click Select Disk, select the external hard drive you would like to use, then click Use for Backup.
The Backup process should begin automatically. Time Machine saves hourly backups for the past 24 hours, daily backups for the past month, and weekly backups for everything older than a month.
Stoddard Hall | Northampton, MA 01063 | 413.585.4487
Questions or comments? Send us an email
This is a tested and foolproof plan for automatically backing up your hard drive, so you never have to worry about data loss again.
Like most people, I’m lazy about backing up my data. If it’s remotely inconvenient, I won’t do it. Fortunately, there are now several things you can do to back up your data, all without having to lift a finger. Smart Wi-Fi 6 access points and cloud storage services have changed how easy it is to backup your hard drive.
Best disk storage device for Time Machine automated backups
When Apple released Time Machine, they introduced a dead-simple way to backup your Mac. Just plug in an external hard drive, and let it do the rest. While it’s a great solution, I still have to remember to get my hard drive out on a regular basis, hook it up, and let it do its thing. I’m too lazy for that, or at least too lazy to do it frequently enough.
My solution was to get a Synology DiskStation. It’s a network-attached storage (NAS ) device that supports Bonjour and Time Machine backups. When used at home, it will backup your MacBook Pro and any other Mac computer, including the new Apple Silicon (M1 chip) Macs, on your local network without having to do a thing. Time Machine automatically detects when you’re on your home network and then determines when it’s time to backup your computer. All of it is done in the background. It’s beautiful!
Synology 2-Bay NAS DiskStation DS218
Synology also supports dual disk redundancy. I use the Synology DS1520+ with five WD Red NAS SSDs . It operates silently, and if two hard drives fail, I won’t lose any data.
Synology is controlled by a web app called DiskStation Manager (DSM ) which mimics a browser-based operating system (OS )
Best automated backup to cloud solution
Unfortunately, relying on one backup is not the best backup plan. Especially if you lose your computer in a house fire, which happens to be the same location as your Synology DiskStation. For that reason (and others), I use a cloud computing service for backups.
Just like Synology DiskStation with Time Machine, these services can be set up to run automatically in the background. The cloud computing service I use and recommend is Backblaze.
Backblaze
I’ve tried several cloud computing backup services on macOS, including Mozy (now Carbonite), but Backblaze was the service that worked the best and was also the most unobtrusive. Like Time Machine, Backblaze automates the backup of your hard drive, or the folders you specify, and saves them securely in the cloud.
The price is incredibly cheap. It only costs $6/mo for unlimited storage. One of the things I like the most about Backblaze is that it allows me to specify the backup speed. I can either choose better network performance (slower backup speeds) or faster backups (full throttle backup speeds).
Backblaze has flexible backup performance settings to optimize uploading for any network
Backblaze provides four options for restoring files. The first option lets you find and select files to download instantly. The second option has the same functionality, but instead of downloading the files, it saves a copy of them in Backblaze’s B2 Cloud Storage service. The third option will send files on a USB flash drive if the size of the files is 256 GB or less. And the fourth option will send you a hard drive if the size of the files is 8 TB or less.
Backblaze provides multiple restore options, including instant downloads, saving to B2 Cloud Storage, or copying to a USB flash drive or hard drive
What I liked most
- Unlimited files
- Affordable
- Unobtrusive – runs in the background
- Fast online backups
- Multiple restore options
- Well maintained by developer
Could be better
- No known shortcomings
How to create a redundant backup with Synology and Backblaze B2 Cloud Storage
Since I’ve experienced catastrophic data loss before, I go one step further with my backups. I use the Hyper Backup app that comes with Synology to automatically backup my Time Machine backups once a week to Backblaze’s B2 Cloud Storage. That way if my daily backups somehow get corrupted or my Synology goes up in smoke, I’ll still have a recent copy of my Time Machine backup on B2.
Use Synology’s Hyper Backup to backup Time Machine backups to Backblaze B2 cloud storage
I’ve tried many backup solutions over the years, and Synology and Backblaze are truly the best automated backup solutions I’ve found for the Mac.
✿ This site uses privacy-first Fathom Analytics and does not track or collect personal data.
Search Coywolf Reviews
© 2017-2022 Coywolf LLC All Rights Reserved – Privacy Policy – Terms of Service
Coywolf and the Coywolf logo are registered trademarks of Coywolf LLC
automount finder macos time-machine
At home, my primary computer is an iMac with an external USB hard drive. The external drive is shared so that other computers can use it for Time Machine. I have a MacBook Air that I take to work every day, and it uses the shared Time Machine drive when I am at home. However, I have to manually mount the drive.
How can I set up my MacBook Air to automatically mount the shared drive when I’m on my home AirPort network?
Currently, I perform these steps to mount the shared drive and back up:
- In a Finder window, select the iMac from the Shared list
- Press “Connect”
- Authenticate with my iMac user credentials (I just saved the password to my keychain)
- Choose the USB drive from the list of available volumes to mount
- Use the Time Machine menu extra to choose “Back Up Now”
Ultimately, I want to make this a zero-step process, so I can come home, turn on the MacBook Air, automatically detect and mount the shared drive, and back up with Time Machine. I assume this can be automated, with an automation script set up as a login item, but it would be preferable to avoid explicitly scripting it.
(I originally wanted to attach the hard drive to my AirPort Extreme and share it from there for Time Machine, but this failed or was not allowed on SnowLeopard; I don’t remember. I haven’t attempted it since upgrading to Lion.)
Thanks for reading!
Both of my computers are running Lion.
I think I can get you started, but using terminal commands, which you said you’d prefer to avoid. Apologies, but it might give you a starting point. All of the following you could put in a bash script and run as a login item.
You’ll need to first share out the target drive(s) ( MyBook in the examples below) using file sharing (System Preferences > Sharing > check the File Sharing box, add the drives you need and set appropriate permissions – I just use Everyone to keep it simple).
You can mount a remote machine and/or its associated drives using mount like so:
Make a directory as the mount point (obviously call test whatever you want):
Now mount the remote drive. I’m assuming this is already connected to your iMac and appears when you connect to your iMac using Finder:
On my remote Mac Mini, to connect to my MyBook attached to it via USB, that would be:
If you need to authenticate (I got error -5000 when trying to mount my home folder), you can also do this using
However, the password would unfortunately have to be in the clear. So again, this might be:
You can also connect to your home folder using the above method, just by replacing MyBook with the name of your home folder.
The drive you mounted should now appear in the finder and you should be able to use it like any other locally mounted drive. When you’re finished, you can do:
to remove it. BTW, if you’re not an administrator, you might need to add sudo in front of each command and type an administrator password.
Are you wondering how to back up a Mac to an external hard drive without a Time Machine? Well, look no further; you’ve hit the information jackpot.
There’s nothing like learning the hard way how important backups are. If something goes wrong with your Mac, and you haven’t done any recent backups, you could face the devastating loss of unrecoverable work, files, images, data, and information.
Backups are essential for any Mac user, but you don’t have to rely on Time Machine. That’s what we’re here for, to show you the best ways to back up your Mac with or without Time Machine. Let’s get started straight away.
Reasons to back up your data
Your Mac could get damaged or stolen.
Your drive could fail.
It’s challenging to recover data from SSDs.
Ways to back up your Mac
There’s plenty of different ways you can backup your Mac; let’s take a quick look at some of the most popular and easiest options out there:
iCloud, OneDrive, Dropbox or Google Drive.
Keep reading, and we’ll take a closer look at some of these options further in the article.
Why Time Machine backup might not be the best option
For years, Apple’s native Time Machine backup software was the first port of call for users looking to secure their data against hard drive failure.
With Time Machine, you can protect your files for free, automatically once configured, with relative ease. But while Time Machine gets the job done, its reliance on local storage, for many Mac users, isn’t enough, leaving more and more people asking, “how to back up Mac without Time Machine?”
Here’s an overview of some of the Time Machine pros and cons:
No monthly costs
Time Machine can be slow
Utterly reliant on external drives
Drives can be damaged, lost or stolen
Malware infections can pass to external drives
Luckily, Time Machine isn’t your only option. Jump to the next step to learn how to back up a Mac without a Time Machine.
How to back up Mac to an external hard drive
For those who like the idea of local backup, but not with Time Machine, did you know there’s a manual way?
We’ll get to the manual backup in just a moment, but first, more importantly, before you conduct any kind of backup, give your Mac a quick cleanup: there’s no point in backing up all your system junk and clutter too.
Take some time to clear away all of your built-up cache files, temporary or broken files, your Downloads folder, and empty your recycling bin.
If you want to save time, I recommend using CleanMyMac X; they have a really awesome System Junk module that not only clears your system junk but optimizes your Mac at the same time; here’s how:
From the left sidebar, select System Junk.
Press Scan, then once complete, press Clean.
Now your Mac is nice and clean, let’s take a look at manually backing up your data.
It’s not as complex as you may have thought; all you need is an external hard drive with enough free space to back up your files.
Here’s how to back up your data manually:
Plug your chosen external hard drive in; once loaded, open it.
Create a new folder inside and give it a name.
Locate your Mac startup disk in Finder or on your desktop and open it. Press Users, then select all the folders and data you want to back up, drag this into your newly created file on your external drive and wait for the copy to finish.
That’s it! This can take a while if you’re copying over lots of files. Don’t forget to eject your external hard drive safely; failing to do so can corrupt files and folders. Here’s how:
Select your external drive either via Finder or via your Desktop.
Right-click and select Eject.
How to back up Mac to a cloud storage
If you don’t like the sound of a manual backup, no problem, there’s plenty of third-party backup tools with cloud storage available; here are my top three recommendations.
1. EaseUS Todo Backup
EaseUS Todo Backup for Mac is a reliable data backup and disaster recovery tool, combining macOS clone with file sync functions, data backup, and archive.
Let’s look at some of the highlights:
Free trial available
30-day money-back guarantee
Over 530 million users worldwide
For anyone looking for Time Machine alternatives, this is a great option.
2. SuperDuper
SuperDuper for Mac is considered a user-friendly backup and recovery tool. Even the most untechnical Mac users would find this easy to use with its clean and straightforward interface.
Free trial available
Wide range of features
Hard drive clone
3. ChronoSync
ChronoSync is an all-in-one solution for backups, file syncs, cloud storage and bootable backups. A comprehensive and reliable choice, let’s take a closer look:
Free trial available
File and folder synchronization
Backup to external or network Volumes
Knowing how to back up your Mac to an external hard drive without a Time Machine not only gives you options but empowers you to make the right choice for you.
No matter which option you choose, manual or third-party tools, backups are vital against data loss; make them regular, and don’t forget to clean your Mac up first.
Happy backing up, and we’ll see you again soon.
Time Machine
Time Machine is Apple’s solution for the everyday Mac customer. It’s easy to set up and use, and creates an excellent safety net for those who wish to back up their data to a locally-attached external hard drive.
On page 14 of his Mac OS X 10.5 Leopard review, John Siracusa talks about Time Machine (which debuted in 2007 with Leopard) and shares some (pre-Leopard) backup stats of Mac users based on a poll Apple took:
Eighty percent of Mac users said they knew they should back up their data. (This is scary already. Only 80 percent?) Twenty-six percent said they do back up their data. That actually doesn’t sound too bad until you get to the next question. Only four percent back up regularly. In a nutshell, this means that if you could snap your fingers and make one Mac user’s main hard drive disappear, there’s a 96 percent chance that you just destroyed files that are completely unrecoverable.
Welcome to Time Machine
Time Machine has lots of nice features. It is automatic, backing up every hour without any user intervention. By default, it will copy everything on your Mac — system files, applications, accounts, preferences, email messages, music, photos, movies, documents, and more.
The best part of Time Machine, however, is its ability to keep multiple copies of files. Any time a file is changed, Time Machine backs it up, making recovery of a specific version of a file fast and simple.
In practice, this means that if you added one sentence to a Pages document every day, at the end of the month, you’d be able to retrieve a copy reflecting each and every edit point.
It also means that if you delete a file or folder from your Mac, Time Machine will keep a copy around for a while, giving you a window of time in which it can be recovered.
Since Time Machine will do this until the hard drive it is using becomes full, we recommend dedicating an entire hard drive to it, and one that is at least twice the size of your internal disk. The bigger the drive, the deeper Time Machine’s archives can go.
Setting up Time Machine
Time Machine is incredibly easy to set up. Simply buy a hard drive and plug it into your Mac. Once you do, macOS will show this dialog box:
Once a drive is selected, Time Machine will begin its initial backup. Depending on the number of files on your computer and the type of drive you’re using, this could take several hours. But, since Time Machine only grabs changed files during subsequent backups, future backups should be much, much faster and hopefully will just happen without you even noticing.
By default, Time Machine backs up all files, but you can change this in System Preferences:
If you’re setting up a Time Capsule, be sure to check out this article on Apple’s support site for more information.
Using Time Machine
Time Machine is designed to run every hour. If your Mac is asleep or misses a backup for some reason, it will begin to work again as soon as it can. In short, as long as the Mac can see your Time Machine hard drive, it will take care of backing up for you.
Time Machine is controlled from a simple menu bar application:
The drop-down gives information about the most recent backup, and can be used to pause the application if a backup is currently being created.
While in the early days Time Machine was a resource hog, on modern Macs, there’s no real performance hit when the application is running.
Recovering files with Time Machine
Recovering a file from a Time Machine backup is brilliantly easy. Simply navigate to the Time Machine icon in your Mac’s menu bar and select “Enter Time Machine,” which will bring up this interface:
You can navigate to the folder your file was in with the Finder window, but the real magic takes place with the slider on the right side of the screen. Scrubbing over it with the cursor shows the dates and times of available backups. Recovering something that was accidentally deleted from your Documents folder is as easy as navigating to that folder and going back until reaching a point in time before the file was deleted.
(The same technique can be used if you wish to recover an older version of a file that is still present on your Mac.)
Once you’re done, click the “Restore” button to copy the file from the backup drive and return it to your Mac’s main drive. If a document exists in the directory with the same name, macOS will ask you what it should do.
If you reformat or replace your Mac, Setup Assistant can be used to copy all (or some) data from a Time Machine drive. Simply have the drive plugged in at first boot, and the OS will walk you through restoring your files.
Beyond Time Machine
There’s no reason not to keep a Time Machine backup. It’s easy to set up and maintain, and external hard drives are cheap. That said, it’s not the only option out there. If you’re looking to beef up your backups, check out these articles:
Your Mac’s Time Machine should be your primary backup system. Not only does it let you restore your Mac to a happy working state after a crash, but it also lets you recover individual files or folders you may have accidentally erased. Additionally, as its name suggests, you can see what files looked like an hour ago or anytime in the recent past.
What is Time Machine and why should you use it?
Time Machine is a backup system software for Macs that run on Mac OS X Leopard or later. It makes regular periodic backups in the following intervals:
- Hourly backups for the past 24 hours
- Daily backups for the past month
- Weekly backups for previous months
Since the scheduled backups don’t replace previously saved files and only save the changes you’ve made to a file, you don’t have to worry about storage space running out fast.
Let’s say you’ve been working on a file for five days. Time Machine has periodically created backups of the changes you’ve made every day. So if you need to retrieve a version of a file with changes made on day 2, you can do so even after you’ve made several changes on the file from days 3 to 5. This is because Time Machine stores multiple copies of the file from days 1 to 5.
In case you’re getting a new Mac, you can easily copy all your files from your old computer to the new one, with your settings, files, and folders intact. And if you’re backing up data from several Mac computers, there’s no need to use a separate device for each Mac, provided it has enough space for all files.
How to use Time Machine
To use Time Machine, you only need an external storage drive such as a USB, an SSD card, or any storage device that can be plugged into your Mac. Then follow these steps:
- Connect an external storage device (or macOS server) to your Mac.
- Go to System Preferences > Time Machine.
- Click Use as Backup Disk. (It’s recommended that you click Encrypt Backup Disk before you do so, in order to set up a password for accessing your backup.)
- If Time Machine doesn’t automatically pop up when you connect an external storage disk, go to System Preferences > Time Machine.
- Select the storage disk you’ve just connected, then click Use Disk.
Other backup options
Although there are various other backup systems for Mac, Time Machine is one of the more practical options for users who value simplicity, convenience, and reliability. What’s more, it’s free.
That said, third-party backup systems may offer more comprehensive features. And since Time Machine only backs up data instead of the entire hard drive, restoring an entire system is relatively slower.
Despite this minor setback, Time Machine is a reliable, user-friendly, and economical way to back up your files. Whether you’re backing up a device for personal or business use, using Time Machine ensures all your files are safe and can be recovered. If you need more comprehensive backup solutions, our experts are ready to help — call us today.
Whidbey Island & Seattle Mac Consulting
Do you use Time Machine to backup your Mac? There’s an adage that goes if it’s worth backing up once, it’s worth backing up twice. Consequently, I backup my Mac to two different hard drives as well as backing up my data to the cloud using Backblaze.
Storing backup data on two different hard drives provides me with some peace of mind since I know that these drives don’t last forever. When one of the drives starts to die on me, I don’t fret because I know I have another full backup on my second backup drive. I simply replace the failing drive with another healthy drive. Then, I’m all set.
Here are instructions for configuring Time Machine to backup to two different hard drives.
Let’s imagine that the names of these two backup hard drives are Time Machine Red and Time Machine Green.
Let’s further imagine that your Mac has been backing up to Time Machine Green for many months already.
- Connect the new hard drive, named Time Machine Red, to your Mac.
- Wait about 10 seconds to make sure that this drive’s icon appears on your Mac’s Desktop.
- Click on the Apple Menu, select System Preferences and click on the Time Machine icon.
- Click Select Disk.
- Select Time Machine Red from the list below Available Disks.
- Click the Use Disk button
- You’ll be asked if you want to use this new disk, Time Machine Red, will replace the previous disk, Time Machine Green, or if you want to use both. Click the Use Both button.
- Note: If this new disk is not formatted using the MacOS Extended format then you’ll be notified that this disk needs to be erased. If you see this prompt let this disk be erased, assuming you don’t have any data on this disk that you care about.
- Note: If your second backup hard drive is in a Time Capsule or a network attached storage device, like a Synology DiskStation, then you’ll be prompted to login to the device. Enter your login credentials to connect to the Time Capsule or the Synology NAS.
- Click the red dot to close the Time Machine Preferences window.
Time Machine will start to perform its backup shortly to the new hard drive, Time Machine Red. In the future, Time Machine will backup to whichever disk is currently connected to the Mac. If both disks happen to be connected then Time Machine will alternate between each drive.
Was this tip helpful?
My web hosting costs continue to rise, but I am committed to keeping my content free and independent. This means no ads, no sponsored articles and no subscription fees.
All Tech Tips are provided, as is, without guarantee. If you choose to follow any of the guidance I provide, please make sure you have a full backup of your stuff before you begin. Also, please be aware that there are risks involved in working on your Mac and you assume full responsibility for this risk.
Leave a Reply Cancel reply
This site uses Akismet to reduce spam. Learn how your comment data is processed.
One of the things you’ll love about your Mac – especially if you have recently switched from Windows – is Time Machine, the built-in backup feature. To use it you’ll need an external storage solution such as an external hard drive (or SSD) connected via the USB, Thunderbolt or FireWire port on your Mac, the Time Capsule or macOS server on your network, or the external hard drive connected to the AirPort Extreme base stations on your network. It is recommended that you back up before every major action, but as you start using the feature you’ll see that you don’t really need to back up your Mac on a daily basis. But that, of course, varies by user.
Understanding Mac’s Time Machine
Time Machine has its own scripts for housekeeping, but sometimes (such as when you see the “Time Machine could not complete the backup” error message) you may need to intervene to clean up space on your Time Machine drive. Space can always be saved on your backup if you delete junk, cache and temporary files before you back up the computer. That’s particularly true if you haven’t set up any exceptions in Time Machine preferences, and everything is saved, even applications.
Download CleanMyMac X from MacPaw’s website and clean up to 500MB of junk data from your computer while enjoying all the features of the software without major limitations.
Since every external storage device has its own physical limits, if you are going to keep that drive in the long run then it’s good to optimize your backups so that they occupy less space. For that it is possible to compress Time Machine backups, but before you start deleting and compressing backups you need to understand how Time Machine works.
Time Machine uses File System Event Store, a hidden log macOS keeps of changes made to the data on each HFS+ formatted drive or partition. But this won’t list every file that has changed; instead, it will list the directories affected. Time Machine uses this log to find out what’s changed and what needs to be backed up.
When Time Machine does the first backup, it copies everything (except trash and system work files) and creates a dated backup folder (year-month-day-hhmmss) in the Backups.backupdb folder, placing hard links in it to all the backup copies it has just made. Another dated backup folder is then created with the second backup, and this repeats each time. There is a trick, however: the second backup folder contains hard links to the items that remained unchanged.
Compressing Time Machine Backups
There are notable differences between the normal (or local) Backups.backupdb folder and a backup made over a network. Local backups are stored in a single Backups.backupdb folder at the top level of the external hard drive.
If you are backing up your Mac over a network (be it wired or wireless), you’ll find the Backups.backupdb folder inside a container called a “sparse bundle disk image”. While it works just as well as the local backup version, an extra step is needed to actually recoup the space gained by deleting earlier backups due to its format. Unlike a normal folder or disk image, when you delete a file in a sparse bundle, it won’t change the container size. To recoup the space, run the following command in Terminal (replacing the ‘Yourbackup’ entry with the necessary backup name):
% sudo su – root
% hdiutil compact /Volumes/TimeMachine/YourBackup.sparsebundle
What you’ll then see is:
Starting to compact…
Reclaiming free space…
……………………………………………
Finishing compaction…
Reclaimed X.X GB out of XXX.X GB possible.
Removing Old Time Machine Backups
Old backups can be removed in many ways, but here is the simplest.
- Enter Time Machine.
- Navigate to the backup you want to remove.
- Right-click on the backup in the Finder window of Time Machine, and select Delete Backup.
Time Machine will prompt for the admin password and then delete the required file.
That’s a bit clumsy if you want to delete multiple backups, so here’s a Terminal command for this, which is very useful when deleting old backups:
tmutil delete /TimeMachine/Drive/Path/To/OldBackup/
Or, if you want to remove a backup from a specific date:
tmutil delete /Volumes/BackupDriveName/
Deleting Old Time Machine Backups Automatically
If you don’t mind speaking with your Mac via Terminal commands, then it’s even possible to automate the removal of old Time Machine backups by running the following batch script. Note that this will find the oldest and newest backups and display a prompt to delete the oldest, which then requires you to enter “Y” and the admin password to finish.
by Jonny Evans · Published September 3, 2018 · Updated September 3, 2018
You can still use Time Machine backup with your Mac, despite Apple’s decision to end its AirPort range of Wi-Fi products – you just need to use a third-party Mac- or network-connected drive.
Built to work seamlessly with Time Machine, Apple’s Time Capsule was the first product to make storage sexy.
Time Machine was introduced as one of 300 improvements in Mac OS X 10.5 “Leopard” in 2007 (when the iPhone also shipped).
It is a backup software application that is designed to archive everything on your system and is accessed using a unique interface that lets you dial back through previous archives to find the file, folder or other item that you may have accidentally deleted.
“Time Machine is a backup utility, not an archival utility, it is not intended as offline storage. Time Machine captures the most recent state of your data on your disk. As snapshots age, they are prioritized progressively lower compared
Time Machine shipped with Mac OS X Leopard in 2007 — when Apple still shipped software on disks!
to your more recent ones,” saysApple.
Time Machine was designed to work with Apple’s AirPort Wi-Fi and a connected drive, or with a Time Capsule. Apple has discontinued those products but continues to offer Time Machine in macOS X Mojave.
Why use Time Machine?
The big advantage of Time Machine on a Mac is integration, as both macOS and Time Machine backup grew up together. Once you set it up it is automatic, it keeps hourly, daily and weekly updates for you. It keeps those hourly backups for 24-hours and maintains daily backups for a month. Weekly updates are kept until the drive needs space — if your backup drive becomes full, Time Machine will continue to backup your recent data by deleting your oldest weekly backups to create the space it needs for new ones.
Time Machine can be incredibly useful if you lose your Mac or delete valuable data as all the information it stores will still be there.
However, it doesn’t create bootable backups, for example, and its file storage system is also a little unique. This is why most professional users choose to use popular third-party backup solutions such as SuperDuper and CarbonCopyCloner to suplement Time Machine protection. It’s good to use multiple forms of backup.
You set–up new Time Machine backups in System Preferences
The easy way to use Time Machine is to go direct
The easy way to use Time Machine is to get an external Thunderbolt, USB or FireWire drive. (Macworld recommends the high-capacity Seagate Backup Plus Hub) and connect it to your Mac.
- A dialog box should appear which will ask if you want to use the drive to backup with Time Machine.
- If this happens make sure the encrypt button is enabled and tap Use as Backup Disk.
- If the dialog does not appear, or you want to use a drive your Mac has mounted before then you can enable a connected drive for Time Machine manually in System Preferences>Time Machine>Select Backup Disk– just find the disk you want to use and click Use Disk. You should also use encryption to protect your data.
[amazon_link asins=’B013PUNMBU’ template=’ProductCarousel’ store=’9to5ma-20′ marketplace=’US’ link_id=’daf02818-af95-11e8-9822-93cdf7b17559′]
The backup process will begin and you will see a progress bar appear in the Time Machine preferences box – this is always an estimate and the actual time it takes to backup can be much longer.
How to use Time Machine for wireless backup
AirPort makes it very easy to connect a Time Machine drive wirelessly — just plug a supported drive into your AirPort router or use a Time Capsule.
The good news is that some non-Apple routers have USB ports which will support third-party drives that can then be set-up for use a Time Machine backup points. (NetGear routers have an excellent reputation for this).
How to set this up varies depending on the router, but in broad terms once you connect a drive to that router you should eventually be able to select it as a Time Machine backup destination using System Preferences as above.
Smart tip: The first Time Machine backup always takes a really long time – and this is way longer if you choose to backup over a Wi-Fi network. You can use this excellent tip to accelerate backups over Wi-FI, or simply connect the drive you want to use wirelessly directly to your Mac for the first backup, and then connect that drive to your router once that first backup is complete. When you do so you must then choose the drive as your backup destination point in Time Machine System Preferences, but the backup it then makes will be incremental as the data is already on the drive.
How to access a Time Machine backup
Open a window in the folder you want to restore data to, then tap the Time Machine icon at the top of the menu, in the Dock, or ask Siri to launch Time Machine. You can now race through the timeline at the right of the screen until the item is rediscovered.
Dear reader, this is just to let you know that as an Amazon Associate I earn from qualifying purchases.
Several users have reported that Time Machine is not working properly on the Mac. And this prevents users from backing up or restoring the Mac using Time Machine. Users have reported the following problems:
- Time Machine is stuck in the “preparing”, “preparing backup” stage
- Time Machine freezes or is not responding.
- Time Machine is very slow and the process takes a lot of time.
- Time Machine is not deleting older backups.
- Time Machine is not recognizing your backup disk. (see also: SD Card not Showing up or Detected on Mac)
If you are having this problem or a similar problem, then this article is for you. This article explains what you can do when Time Machine is not working.
Time Machine is Apple’s built-in backup technology. You can use it to backup your Mac. Backups are great way to keep your data protected. There can be several reasons why you may have issues with it. The following steps address them.
Basic Time Machine troubleshooting steps
Please try these steps first:
- Restart your Mac and then try again (Apple menu > Restart).
- Make sure that your backup drive is properly connected (if you are using a network, ensure that your Mac and disk are on the same network) and turned on and plugged into a power source.
- Ensure that your Mac is running the latest version of macOS. You can check for updates and update your Mac by going to System Preferences > Software Update.
- Ensure that your backup disk is supported by Time Machine. Supported disks may include:
- Time Capsule,
- USB or Thunderbolt drive,
- Network-attached storage (NAS) device.
- Likewise, ensure that your disk file system is compatible with Time Machine. Time Machine can’t back up to a disk formatted for Windows (FAT and NTFS). APFS or APFS Encrypted disks are the preferred formats. It also supports the Mac OS Extended format (Journaled) format. To find out the external drive’s format:
- Connect your drive to your Mac.
- Select it in Finder and click Get Info.
- Open the General section if it is not.
- Check its format.
- Ensure that your backup disk has enough available storage.
- Your disk may have errors. You may want to repair it using Disk Utility. And run First Aid on the Time Machine backup disk.
Stuck on “Preparing”
Sometimes you may experience an issue where a very long preparation phase may occur in Time Machine and it may seem to be stuck. When you go to System Preferences > Time Machine, you may see a message saying “Scanning xx items,” “Preparing,” or “Preparing backup” message. If you are experiencing this, try the steps below:
All Mac users should setup Time Machine backups with an external hard drive, Time Capsule, or network drive to insure they have regular automatic backups made of their stuff and MacOS X installation. But once you have a backup drive established with Time Machine, or if you use a different backup approach entirely, you may no longer want to be asked if you’d like to setup a new hard disk as a Time Machine backup volume each time you connect a hard drive to the Mac.
To be clear, we’re talking about what happens when you connect a new blank hard drive to a Mac, which will trigger a dialog box that asks “Do you want to use (drive name) to back up with Time Machine?” with a “Use as backup disk” or “Don’t Use” option. This is the dialog request we are aiming to disable here for connecting new drives to the Mac. What we’re going to cover will not disable Time Machine, it only disables that pop-up backup disk request dialog box in Mac OS X.
Average users should keep this dialog enabled and should not mess around with defaults command strings or the command line, this is intended for advanced Mac users only.
Disabling Time Machine Use New Drive Setup Requests in Mac OS X
- Open Terminal from /Applications/Utilities/ and enter the following syntax:
defaults write com.apple.TimeMachine DoNotOfferNewDisksForBackup -bool true
Again, this does not disable Time Machine, and it does not impact existing backups, it only stops the pop-up window from showing up. This can be very helpful for Mac users who rely on something like SuperDuper, BackBlaze, Crashplan, CarbonCopyCloner, or another backup solution, who do not want the Time Machine setup requests to appear.
Re-Enable Time Machine New Disk Backup Requests in Mac OS X
If you want to undo this and return OS X to it’s default behavior of asking to setup Time Machine each time a new disk is attached to the Mac, simply using the following defaults command string:
defaults write com.apple.TimeMachine DoNotOfferNewDisksForBackup -bool false
Again, hitting Return will cause changes to take effect. In this case, the Mac will return to the default behavior of offering to use the new disk as a Time Machine backup drive.
Regardless of how you have this setting configured, you should always backup the Mac on a regular basis. Setting up Time Machine for automatic backups on a Mac is easy and a great choice for most users. Whatever you do , don’t skip creating back ups, they’re important.
Time Machine is an excellent backup tool for any Mac. However, by default, it keeps all backup versions until the backup destination, be it an external drive or a storage server, is full.
This practice can be wasteful, and eventually, you’ll have no space for other uses, like storing files. It’s especially problematic when you use a backup server. Since one Mac can hog all the storage space, you’ll end up having nothing left for other computers and services.
That said, it’s a good idea to limit the amount of storage Time Machine can use.
Creating a separate partition on your backup drive is the best way to control the amount of storage Time Machine will use.
Determine the OS version and suitable backup limit
Before you can fix Time Machine’s storage, you first need to determine what version of macOS you’re running.
(If you don’t know how, check out this post, which also gives you some other handy Mac skills, including how to run Terminal, which you’ll need to use in this post.)
After that, find out the amount of storage you need for the backups. Generally, you want to use 150% or more of your Mac’s internal drive capacity.
So, for example, if your MacBook has 128GB of internal storage, 300GB of backup space is generous. But pick a number that suits your needs. The more storage space, the more versions of backups you’ll get, which means the further you can go back in time.
Limit Time Machine backup size in macOS 10.12 and earlier
This trick is easy to implement and for sure works on macOS 10.12 (Sierra) and older versions. Note that you need to log in with an administrator account.
Here are the steps:
- Convert the storage limited you want into megabytes. So if you’re going to use 300GB, then the number you have is 307200 since 1GB = 1,024MB.
- Run Terminal (you can search for it using Spotlight at the top right corner). Type in this command, then press Enter:
sudo defaults write /Library/Preferences/com.apple.TimeMachine MaxSize 307200
You’ll be likely prompted to enter your account’s password, so do that and press Enter again. And that’s it! From now on, Time Machine on that Mac will automatically delete old backups to make sure it uses no more than 300GB.
If you want to revert to the default value (no limit), run this command:
sudo defaults delete /Library/Preferences/com.apple.TimeMachine MaxSize
Limit Time Machine backup size in all versions of macOS
If you run the latest macOS (10.13 Mojave or newer), the command above won’t take effect. Instead, you’ll need to limit the storage space at the destination side, be it the external drive you plug directly into your Mac or a Time Machine-supported NAS server.
By the way, since you make changes to the backup destination, this method will work on all macOS versions. But it does take a bit more work.
Limit Time Machine backup size of an external drive
The idea here is to create a separate partition on the external drive and use that partition exclusively for Time Machine backup. For that, you turn a single hardware drive into two different volumes (or logical disks) and use one for Time Machine.
Note: Doing this will erase all drive content, so make sure you’re OK with that.
Here are the steps:
Run Disk Utility and choose Partition.
1. Connect the external drive you want to use for Time Machine to your Mac and call up Disk Utility (you can find it using Spotlight). In Disk Utility, select the drive, then click on Partition.
Select Name, Format, and Size for the new Partition.
2. Click on the Plus (+) to add another partition to the drive, then pick the Name, Format, and Size for the new partition. (For this example, I named the new partition Time Machine, used Mac OS Extended (Journaled) as the format and 300GB as its size.) Then click on Apply.
By the way, if you’re curious as to what file format to use. Here’s the breakdown:
- APFS only works with Sierra (10.12) or later.
- Case sensitive means files of the same name but different letter cases (i.e., MyFile.txt vs. myfile.txt) exist as two separate files.
- Encrypted means data stored on the drive can be encrypted, use this if you intend to store sensitive data on the drive. The catch is if you forget the password, you’ll lose the data.
- MacOS Extended Journaled (a.k.a HFS+) works with all Mac OS versions and will not work with Windows.
- exFAT works with both Windows and Mac but does not support Time Machine backup.
- MS-DOS (FAT) is an ancient file system, and generally, you shouldn’t use it.
Confirm the partitioning.
3. Confirm the action by clicking on Partition. The drive will then have two partitions. One of them is 300GB, and the other has the rest of the drive’s storage space.
Select the newly created partition as the backup destination.
4. Run Time Machine (again, you can use Spotlight to call it up) and use the newly created partition as the backup destination.
And that’s it! You can now use the other partition for file storage; Time Machine will never touch it. By the way, if you use a Time Machine-supported router, such as the Asus RT-AC86U, this method works, too.
Limit Time Machine backup size on a NAS server
This part depends on the NAS you use. Similarly, you can create a separate volume and use it exclusively for Time Machine. Some servers also allow for setting a storage limit (quota) for an existing shared folder.
You can easily set a quote for a shared folder in a Synology NAS server.
If you happen to use a Synology NAS server, like the DS1618+ or the DS1019+, which I would recommend above servers from any other vendors, you can easily do this by editing a shared folder within the Control Panel.
Remember that the folder share quota is only available when you use the NAS with the btrfs file system.
Dong’s note: This post was originally published on Mar 21, 2018, and has been updated.


