Justin Pot has been writing about technology for over a decade, with work appearing in Digital Trends, The Next Web, Lifehacker, MakeUseOf, and the Zapier Blog. He also runs the Hillsboro Signal, a volunteer-driven local news outlet he founded. Read more.
Kodi can make your massive media collection easy to browse and play, but adding new media is a bit of a chore. By default, you need to manually tell the program to re-scan your folders every time you add something, which is annoying if you add new media regularly. Isn’t there a way to automate this?
Yes: there are three options. Here they are, listed in terms of how easy they are to set up:
- Tell Kodi to update the library every time it starts up. This doesn’t require any add-ons, but only works if you close and open Kodi regularly.
- Use Library Auto-Update, a lightweight add-on that re-scans folders on a timer you set. This is ideal if you don’t restart Kodi regularly, but still want routine updates.
- Use Watchdog, a slightly heavier add-on that monitors folders and adds new files in real time. This is ideal if you are constantly adding new media, but takes up a lot of system resources and might prove unstable.
None of these methods are particularly complicated, but the two add-ons are going to require a bit more effort, with Watchdog being the most work. In exchange for more complication, each option gives more flexibility than the last, so it’s worth going over all three.
Our recommendation: choose the least complicated option that does what you want.
Option One: Update Kodi’s Library When the Program Launches
Kodi can, without any add-ons, re-scan your library every time it starts up. To get started, click the Settings gear from the home screen.
Next, head to Media Settings.
From here you’ll find the option to scan the library on startup. Note that there is a different option for Videos and Music.
Toggle those two options and your done: Kodi will now update the library every time you start it up. If that’s all you want, you don’t need to do anything else.
Option Two: Update on a Timer with Library Auto-Update
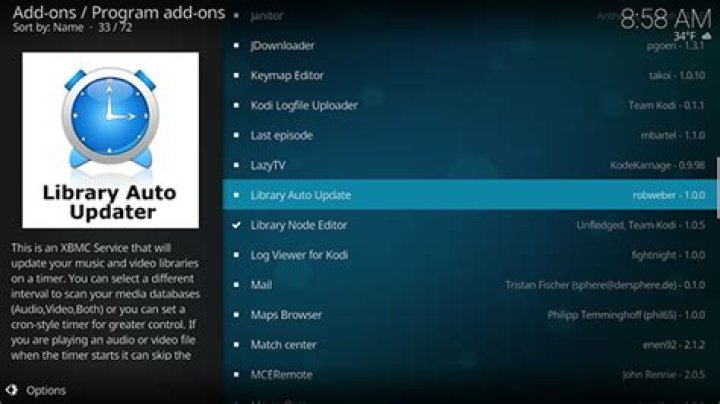
Some people rarely, if ever, restart Kodi, putting the computer to sleep instead of shutting it down. If that’s you, re-scanning the library probably isn’t good enough. Library Auto-Update is a Kodi add-on that lets you set a schedule for re-scanning your library. The add-on is lightweight, too—all it does is trigger the built-in library scan on a regular basis.
You’ll find Library Auto-Update in the default Kodi add-on respository, under Program add-ons. If you aren’t familiar with how to install add-ons, check out our guide.
Scroll down until you find the add-on, then install it.
Access the settings and you can configure whether or not each update has notifications. There will be many updates, so consider toggling this.
Under the Video and Music sections you can set how frequently updates occur.
By default all of your video sources will be scanned, but you can instead set specific folders to be scanned here. Do that and only the specified folders will be updated regularly.
If you delete videos frequently, you might be annoyed to see them still referenced in your Library. The Cleaning section of the settings lets you take care of that.
Enable the “Clean Libraries” option to regularly remove all references to any deleted files from your library. This will take a bit of time, so only enable this if you really do delete media files with some frequency.
Option Three: Monitor Your Folders in Real Time with Watchdog
Scheduled updates are nice, but if you add media files constantly, they not enough. This is particularly true if you’ve got some sort of automated system set up for recording or downloading new TV episodes, and you want to watch them right when they’re available.
If that’s your situation, Watchdog is the add-on you’re looking for. You’ll find it in the default Kodi repository, under Services. If you aren’t familiar with how to install add-ons, check out our guide.
Scroll down to the bottom and you’ll find Watchdog.
Install it and you’re pretty much done: Kodi will start adding new files to the library basically as soon as you put them in a source folder. The downside: this can take up a lot of system resources, and is occasionally unstable.
You can tweak things quite a bit, however, so head to the add-on’s settings and get familiar. From the main settings, you can tell the add-on to remove deleted files from the library, or even to scan when you start up Kodi.
You can also tell the add-on not to scan new files while you’re watching something, using the “Pause during playback” feature. If you don’t like seeing notifications, you can also turn those off.
By default, the add-on will scan your complete library, with all sources, but you can set it to watch specific folders instead. If you’ve got a PVR set up to integrate with your Kodi library, for example, you could set it to watch only your PVR folder.
You’ll find a few more things to tweak in the “Advanced” section.
From here you can set the polling interval in seconds; that is, you can set how often Kodi will check folders for new files. You can also set a delay between finding a new file and adding it to the library. You can even set Kodi to automatically scan the entire library when new files are added.
Overall, Watchdog is the most complete tool for automatically keeping your library up-to-date, and is a must for automation freaks. But it can be a bit of a resource hog, so only use Watchdog if it’s worth it to you.
This is an XBMC Service that will update your music and video libraries on a timer. You can select a different interval to scan your media databases (Audio,Video,Both) or you can set a cron-style timer for greater control. If you are playing an audio or video file when the timer starts it can skip the library update process until it is completed so that you’re media experience is not interrupted. Updating a specific Video Path, and Cleaning the Music/Video libraries is now supported.
1 Installing
This add-on is installed from the Add-on browser located in Kodi as follows:
- Settings
- Add-ons
- Install from repository
- Program Add-ons
- XBMC Library Auto Update
- Install
2 Introduction
The XBMC Library Updater will update your music and/or video libraries according to times specified by you. Thanks to pkscuot for several small tweaks to this addon!
All source files for this addon can be found via the Github page.
3 How to use
A note on Timers:
Standard Timer – specify an interval to run the library update process. It will be launched every X hours within the interval unless on of the conditions specified by you as been met (don’t run during media playback, etc) in which case it will be run at the next earliest convenience.
Advanced Timer – specify a cron expression to use as an interval for the update process. By default the expression will run at the top of every hour. More advanced expressions can be configured such as:
Read up on cron for more information on how to create these expressions
MisterTic
Junior Member
I’m using Kodi on my raspberry and I’m having trouble updating my library automatically.
I was using Plex before and the library was automatically updating itself on the Plex client when a movie was added to the server.
I know that Kodi works differently, but how do I update the Kodi database automatically when I add a movie to my “NAS”?
I created an NTFS link between my NAS and Kodi however, I have to click on “Update Library” manually.
When I use the addon to update the library automatically by creating a script that updates the library every minute, of course Kodi crashes from time to time.
Of course I can restart Kodi for the automatic update, or do a manual update but it is not practical.
In addition, I switched to Kodi to use it on a second screen (transcoding problem with plex). But as the library does not update automatically, I must first connect to Kodi (raspberry) click on update the library, return to the floor and start watching via my phone on the second TV to using a Chromecast key.
I find it very “boring”.
Today I do not put my movies on my “NAS”, I use the application VideoStream google PC to cast on the chromecast key.
In the end, I ask myself the question: “Should i go back to plex ?”
Sorry for the Google translation. English is not easy for me.
(2018-01-02, 17:03) MisterTic Wrote: I know that Kodi works differently, but how do I update the Kodi database automatically when I add a movie to my “NAS”?
You don’t. Kodi would have to continuously scan your NAS drive(s) for changes, and most people won’t like that since they want their NAS/drives to go to sleep when they are not watching videos.
I don’t know how many videos are being put on your NAS each day, but pressing the ‘button’ to manually scan for new movies every couple of days is not the most exhausting thing to do IMO.
Perhaps you can run a CRON script on the RPi to automate the Update Library every 6 hours or so, or whatever interval is convenient for you.
(2018-01-02, 17:03) MisterTic Wrote: In the end, I ask myself the question: “Should i go back to plex ?”
MisterTic
Junior Member
(2018-01-02, 17:03) MisterTic Wrote: I know that Kodi works differently, but how do I update the Kodi database automatically when I add a movie to my “NAS”?
You don’t. Kodi would have to continuously scan your NAS drive(s) for changes, and most people won’t like that since they want their NAS/drives to go to sleep when they are not watching videos.
I don’t know how many videos are being put on your NAS each day, but pressing the ‘button’ to manually scan for new movies every couple of days is not the most exhausting thing to do IMO.
Perhaps you can run a CRON script on the RPi to automate the Update Library every 6 hours or so, or whatever interval is convenient for you.
(2018-01-02, 17:03) MisterTic Wrote: In the end, I ask myself the question: “Should i go back to plex ?”
Only you can answer that question.
Thanks for taking time to respond to me.
When I want to watch a movie, I download it and then I want to watch it. I upload it from my PC to my “NAS”.
This is not a problem when I’m on the main TV with the raspberry I’m browsing in kodi and I’m updating my library.
However, when I use my second TV with a chromecast key, I run the movie with the Yatse app on my phone. The movie is not listed in Yatse until the library is updated.
At first, I have to turn on my main TV, open kodi, update the library, go back to the second tv, update the list on Yatse, launch the movie.
I prefer to start the movie directly via VideoStream for google today or use an external hard drive.
I migrated to RecallBox to play old games, with Kodi. I’m sorry, TV smarts have the integrated plex client, I’m not sure this is the case for Kodi. Unless you buy an android box.
With the “CRON” script that updates every minute the Kodi library crashes systematically. Pity. I think my use requires Plex.
Bypass geo-blocked content! and stay safe & annonymus online.
If you’re blocked from viewing content based on your location, consider using a VPN to unblock it. A VPN is a service that switches your online identity with another one so that you appear online as if you’re from another geographical location.
Update your Kodi Video and Music Libraries on a timer. Timer runs as Kodi service so you never miss an update.
Description
This is a Kodi Service that will update your music and video libraries on a timer. You can select a different interval to scan your media databases (Audio,Video,Both) or you can set a cron-style timer for greater control. If you are playing an audio or video file when the timer starts it can skip the library update process until it is completed so that you’re media experience is not interrupted. Updating a specific Video Path, and Cleaning the Music/Video libraries is now supported.
Version 1.2.3- fix for hourly timer settings not working
How To Install
Direct installation
Via Repository
Via Directory
- Download the addon.
- Open up Kodi and navigate into Add-ons.
- Click the open box icon (above the side-menu).
- Select Install from zip file.
- If this is the first addon you install, Kodi will warn you about installing addons from “unknown sources” for security reasons – it’s your call.
- In any case, Kodi will warn you, you may not get auto-updates for this addon.
- Navigate into the location where you’ve downloaded the addon to and select it to Install.
- First make sure you have the repository installed
- Open up Kodi and navigate into Add-ons.
- Click the open box icon (above the side-menu).
- Select Install from repository.
- If you have at least one repository (besides the default) installed:
Select the repository you wish to install from.
- If you have at least one repository (besides the default) installed:
- Select the category the addon belongs to, in this case it should be service.
- Select Library Auto Update.
- Click Install.
For a full installation guide please click here.
How do I update my MXQ box?
How to update the MXQ 4K TV box
- Download the latest MXQ Pro Firmware.
- Use a USB to USB cable, connect one end to a PC.
- Press and hold the reset button on the MXQ 4K, (use a pen or pin, the reset button is located inside the AV port)
- Connect the power and the USB to USB cable.
How do you update apps on Kodi?
From the Home screen, select Add-ons, then in the Add-ons manager select the correct category for your add-on or go to My add-ons (this can also be done from the Home screen) and select All. Navigate to your add-on and select it. Then select Update. Select the version you want to update to and it will install.
Can you update Android version on TV box?
Android TV boxes usually come with the latest firmware versions that are available. The trouble is, that Android TV box firmware can become out of date as fast as you can say “Google Update.” Some manufacturers are going to be better than others about updating their device’s firmware.
How do you update Kodi on a smart TV?
Here’s how to update Kodi on those smart TV models:
- Open the Play Store on your Android TV;
- On the left side of the screen, select ‘My Apps’;
- This is where you’ll see the list of available updates. Select ‘Kodi’;
- Finally, select ‘Update’ and your Android TV will do the rest.
How do I update my box?
Updating on Windows
- To install the update, in your system tray, click the Box icon to display the search menu, or use the keyboard shortcut Ctrl + Alt + Shift + B.
- From the search menu, begin the update either by clicking Update Available or by clicking the gear icon and then clicking Update.
What is a Matricom g box?
Matricom G-Box Q² Android TV Streaming Media Mini PC [2GB/16GB/4K] Quad/Octo Core. The G-Box Q² is a full Android computer made for your living room and has so many options! Unlike Roku, Apple TV, Nexus and more, the G-Box Q is free of any restrictions. Install your favorite apps and customize away!
What is G Box TV?
The G-Box is a full media experience made for your living room! Enjoy watching your favorite shows and movies at full HD. Unlike Roku, Apple TV, Nexus and more, the G-Box is free of any restrictions. The G-Box can stream all your favorite movies and TV, and fully supports most media formats for offline viewing.
How do you use a Matricom g box?
Setting Up Your G-Box
- Plug the Power Cord into the wall and into your G-Box.
- Plug the HDMI Cable into the G-Box and into your TV.
- Press the power button on the Remote to control the TV. ∗Make sure the front of the G-Box is facing you so the remote can read the IR sensor.
How do you reset AG Box Q?
Insert toothpick or similar object into “reset” hole on the back of your G-box Q, until you feel a click. Once you feel the click of the reset button, Hold it down with toothpick while reconnecting the power to your G-box Q. Hold down the button for roughly 20-30 seconds or until you see your screen change.
How do I update Android on TV?
- Press the HOME button on your remote control.
- Select Help. For Android™ 8.0, select Apps, then select Help.
- Then, select System software update.
- Then, check that the Automatically check for update or Automatic software download setting is set to ON.
How does the Android TV box work?
A box is connected to a TV and setup to the internet via wired Ethernet or WiFi connection. After a box is connected to a TV, and the internet, apps can be installed. For example Android TV boxes can output HDMI to a TV giving it HD viewing ability. They also can use a remote control, keyboard, or mouse for input.
How do I reset my MXQ pro 4k?
How to hard reset the TV Box MXQ Pro 4k?
- Disconnect the device from the power supply.
- Inside the AV slot insert a match or a thin stick until you find a small button, hold that button for a few seconds and connect the power supply.
- You will have a menu on the screen.
- Select delete all user data and press Tab.
How do I update my Kodi library?
Update Your Library Using the Library Auto Update add-on
- Start on your Kodi home screen.
- Click on Add-ons.
- Click on the icon that looks like an open box.
- Click on Install from repository.
- Go to Kodi Add-on repository.
- Go to Program add-ons.
- Scroll down to Library Auto Update.
How do you update Kodi on Sony TV?
Just make sure Kodi is installed through the marketplace, then you’ll never have to worry about updates again.
- Launch the Google Play Store.
- Click the Settings section to the left.
- Under the General label select Auto-update apps.
- In the window that opens, select “auto-update apps at any time”.
- Exit Google Play.
How do you update Kodi on Apple TV?
Scroll right to the NitoTV menu on the Apple TV and choose the first option “Install Software”. Scroll down the list until you see “Kodi-ATV2” and click on that. From that menu press “install” and your Apple TV will install Kodi and then do a SOFT reboot (no tethered boot required).
How do you manually sync a box?
2) Go to Box.com to manually enable sync to computer. You need to make sure the folders you want to sync to and from your computer are enabled to sync in Box.com. Go to Box.com > Find and click the file option button > Properties > Sync to Computer.
How do I get rid of Box Sync?
Mac
- Quit Box Sync by clicking on the Box Sync icon in your menu bar and selecting Quit.
- Open your System Preferences > Extensions > Finder and un-select the Box Sync Finder Extension.
- Delete Box Sync.app from your Applications folder.
What are box tools?
Box Tools is the installer package for both Box Edit and Device Trust functionality.
How do I install apps on Matricom?
How to Install Kodi on Matricom G-Box Q2 with ES File Explorer
Out of the box Kodi requires it’s users to update all of their content libraries manually. So, if you add a new movie to your media centre or remove a TV show then you have to perform a re-scan for to pickup the change. If you are someone who is regularly downloading new digital content you want your new videos to be ready to play as soon as they are on your system. Thankfully it is possible to force a Kodi update library on startup. In this simple post we will show you how to update Kodi library automatically keeping your media collections fully up-to-date. A full video tutorial is available at the end of the post.
Best Accessories for Kodi
Below are our editors accessory recommendations you should try with your Kodi setup. [Read: How to Play Games on Kodi]
| Product | Image | Detail | Price |
|---|---|---|---|
| VONTAR T6 Plus 2.4GHz Remote | Somatosensory Mouse, Infrared Remote, 2.4GHz Wireless QWERTY Keyboard & Touchpad, Colorful Backlit, Lithium Battery. For Kodi, PC & Android. Micro USB charging. | ||
| Esynic 2.4G Wireless Mini Keyboard | 2.4G wireless keyboard and mouse. Control Kodi from the comfort of your sofa. Supports PC, Android, Smart TV and other devices. | ||
| TBS DVB-S2 Dual Satellite Tuner | Watch satellite TV & listen to radio on PC from within apps like Kodi (PVR). Twin tuner allowing you to record multiple channels. | TBS DVB-S2 | |
| Toshiba X300 4TB Hard Drive | 4TB storage capacity, 7200RPM speed, 128MB cache, 3.5″ SATA. Reliable internal storage for your media center. | Toshiba X300 | |
| WD 2TB Elements Portable HDD | USB 3.0 portable hard drive in black for multiple devices. Carry your Kodi media libraries in your pocket. | WD Elements |
How to Update Kodi Library Automatically – Scan for New Content
A full video tutorial showing this guide in full is available at the end of the post. Before we look at the Kodi library auto update settings be sure to backup your media solution. Although this is only a minor setting tweak and easily reverted it is always good to keep a solid backup. For this post we are using Kodi 17.5 Krypton (latest at time of writing) but the process is the same for most other versions of the application. If you have not yet upgraded see our Upgrade Kodi guide post. [Read: How to Add Subtitles to Kodi & The Subtitle Settings]
Let’s begin! Click on cog shape shown at the top of the left hand menu. This will take you to the main Kodi settings screen you can see this highlighted on the image below. [Read: How to Change Language on Kodi]
Select the Settings Cog
When you arrive at the main settings page you will see an icon for each type of Kodi setting. The Kodi library auto update configuration can be found under “Media settings” highlighted in the following screenshot. Select Media settings and you will be taken to the page that controls your libraries. [Read: 30 Best Kodi Skins – The Complete List]
Select Kodi Media Settings
Kodi Library Auto Update Settings
Select Library from the left hand menu (this is the default starting page). On the right you will now see the following settings headers; Manage Sources, Video Library and Music Library as shown below. The “Manage Sources” section allows you to point Kodi in the direction of your content by telling it which folders contain Videos, Music or Pictures. [Read: How to Customize Kodi Home Screen – Add Kodi Menu Items]
Kodi Library Settings
Scroll down to the Video Library heading . You will see from the image above that “Update library on startup” is highlighted. To let Kodi scan for new content when it boots you must switch on this setting as shown. Once this is switched on Kodi Library Auto Update is enabled and every time you load the application it will check your sources for new files. If it finds any it will download the necessary art work / information and display them ready for use. It will also remove items that no longer exist. [Read: How to Play Blu-ray Movie Discs with Kodi]
This settings is separate for Video and Music. To let Kodi update library on startup for Music you music scroll down to the Music Library heading and enable the same setting there . [Read: Kodi Controller Configuration – A Gamepad Remote]
Update Kodi Libraries Automatically Video Tutorial
The below video tutorial shows you just how easy it is to auto update Kodi libraries. For many more Kodi guide videos subscribe to the Home Media Portal YouTube Channel now!
HMP Verdict – Kodi Update Library on Startup
And that is all there is to it. Update Kodi library automatically and your content will always be fully up-to-date on your system. With just two settings to change you can let Kodi Scan for new content on startup and never have to refresh your media player manually again. Nothing like automating your Kodi house keeping tasks![Read: How to Lock Kodi using Kodi Master Lock Code]
The Library Updater will update your music and/or video libraries according to times specified by you. Please note that this is just a fancy timer that calls out to the normal Kodi Library Scanning functions. All of the processes associated with scanning are all handed off to Kodi.
Thanks to pkscuot for several small tweaks to this addon!
Be aware that settings are visible based on the Kodi Settings Level set. Levels higher than Standard (Advanced or Expert) are designated next to that setting.
- Startup Delay – if an update should run on startup (dependent on the time the last update has ran) this will delay it from running for a few minutes to allow other XBMC process to function.
- Show Notifications – shows notifications when the updater will run again
- Run During Playback – should the addon run a scheduled scan when you are playing media (yes/no)
- Only run when idle – restricts the scanning process to when the screensaver is active
- Check if sources exist before scan – checks if the sources are online before starting the scan process. For single source scans it will check only that source.
- Disable Manual Run Prompt – disables the dialog box when selecting Manual Run and just goes right to the library update
Enabling this will turn on scanning for the Video Library. This is the same as calling “Update Library” from within the Video menus of Kodi. There are a few options you can tweak regarding how often you want the scanner to run. Read the section on Timer Options for more information.
Custom Paths
Custom paths are a special advanced feature for the Video library. It allows you to specify different schedules for individual paths in your library. This editor is limited to the Cron style syntax for scheduling. The path you select must already be in the video database and have content selected. The path must also match your source path exactly.
Enabled this will turn on scanning for the Music Library. This is the same as calling “Update Library” from within the Music menus of Kodi. The options here are identical to the Video Settings above. Read the section on Timer Options for more information.
For both Video and Music library scanning there are two types of timers to choose from.
Standard Timer
Specify an interval to run the library update process. It will be launched every X hours within the interval unless on of the conditions specified by you as been met (don’t run during media playback, etc) in which case it will be run at the next earliest convenience.
Advanced Timer
Specify a cron expression to use as an interval for the update process. By default the expression will run at the top of every hour. More advanced expressions can be configured such as:
- 0 */5 ** 1-5 – runs update every five hours Monday – Friday
- 0,15,30,45 0,15-18 * * * – runs update every quarter hour during midnight hour and 3pm-6pm
Read up on cron () for more information on how to create these expressions
Cleaning the Library:
Cleaning the Music/Video Libraries is not enabled by default. If you choose to do this you can select from a few options to try and reduce the likelyhood that a DB clean wile hose your database.
- Library to Clean – You can clean your video library, music library, or both.
- Prompt User Before Cleaning – you must confirm that you want to clean the library before it will happen. Really only useful for “After Update” as a condition.
- Frequency – There are several frequency options.
- “After Update” will run a clean immediately following a scan on the selected library.
- The Day/Week/Month options will schedule a clean task to happen. Cleaning the Video Library is hardcoded for midnight and the music library at 2am. Weekly updates occur on Sunday and Monthly updates occur on the first of each month – these values are hardcoded.
- You can also choose to enter a custom cron timer for video and music library cleaning. These work the same as any of the other cron timers for the other schedules.
If you’re having issues with this addon there are two main places to look. The first is the addon thread on the Kodi Forums. This is where you can ask general questions regarding functionality. If you’re having a legitimate issue, such as an error message, you can create an Issue for it in this repository.
Pull Requests are welcome if you want to dig around in the code to fix issues or add functionality. Please submit them using the usual workflow. Additionally you can help keep languages files up to date by visiting the Weblate page for this addon and updating untranslated strings. Changes to Weblate will automatically create PRs to this repository. This is a great way to contribute if you’re not a coder!
About
Kodi Addon to update your video/music libraries on a schedule
You can export in two ways
1. Export movies and tv shows (with manual updates for tv shows)
This mode involves manual export of each tv show/movie through the context menu, in this case new seasons or episodes must be updated manually.
- To export, open context menu of a tv show and select Export to library .
- To export new seasons/episodes, open context menu of a tv show and select Export new episodes .
- To force a tv show update, open context menu of a tv show and select Update inside library , this function will completely delete all files exported of the tv show and export them again.
2. Export movies and tv shows (with auto updates for tv shows)
This mode involves manual export of each tv show/movie through the context menu, but with scheduled automatic updates for the search for new seasons and episodes.
If you decide to use this feature pay attention to the notice written at the end.
How to enable the automatic updates:
- Open add-on settings, and go to the page Library
- Auto update mode set to Scheduled
- Perform auto-update set how often updates are performed
- Time of Day set the start time, if when open Kodi the time has already elapsed, the update will still be performed at a later time.
- Only start after 5 minutes of idle if turned on updates will only start when you do not use Kodi for at least 5 minutes. If turned off updates will start when you open Kodi.
Where are the exported files?
By default the files are located in the add-on user data folder with a path like
but the full path may change depending on the type of operating system, the file path scheme is viewable in Kodi Wiki
For easier an access to your exported files, you can change the default path and choose a custom one.
So in add-on settings, go to Library page and:
- Turn on Enable custom library folder
- Click on Custom library path , to set up your preferred folder
- Select your preferred path (in the path selection window press the back button several times to have full access)
- Create a new folder like “Netflix exported”, where within it the add-on will create two new subfolders shows and movies
WARNING: If this setting is changed after you have already exported tv shows or movies, you must reset the database data! This implies the loss of all exports!
To reset database, in add-on settings, go to Library page and:
- Select Delete library contents
NOTE: if you are an experienced user, instead of resetting you can move the folders of the files manually
How to synchronize Kodi library with Netflix “My List” of an profile
Synchronization with My List involves the automatic export and removal from the Kodi library of what is added/removed from My List of a specific profile.
When you make changes to My List from another device or from another app or website, the changes will not be reported in the add-on in real time, but you will have to wait for the schedule to run.
If you decide to use this feature pay attention to the notice written at the end.
Note that when you enable this feature the context menus like Export/Remove from library, will no longer be accessible, because all these operations will be performed automatically from the context menus Add/Remove to My List.
Before continuing you must complete the point 2 of You can export in two ways, in order to enable the scheduled mode.
How to enable the sync of Kodi library with My List:
- First important thing, login with the profile containing the My List to synchronize!
- Open add-on settings, go to Library page
- Turn on Keep My List and Kodi Library in sync
- Click on Set a profile for synchronization , to sync the library with the My List of the chosen profile
- If you want customize the export folder go to paragraph Where are the exported files?. If you want to customize it must be done before before the next points
- Click on Perform full sync now , to start the synchronization immediately
Notice for the use of auto-update and auto-sync with Netflix “My List” feature
AN INTENSIVE USE OF THIS FEATURES due to many exported tv shows MAY CAUSE A TEMPORARY BAN OF THE ACCOUNT that varies starting from 24/48 hours. Use at your own risk.
If it happens often, there is the possibility to exclude the auto update from the tv shows, by open context menu on a tv show and selecting Exclude from auto update .
Table of Contents
How to install Kodi on RetroPie Step 1: Navigate to the RetroPie menu on your RetroPie. Step 2: Navigate to RETROPIE SETUP. Step 3: Select “Manage packages” Step 4: Select “Manage optional packages” Step 5: Select Kodi. Step 6: Choose “Install from binary” Step 7: Restart your RetroPie.
How do I update Kodi 19 on Raspberry Pi?
Click on the Settings icon (gears) to open the Settings window. Click on the LibreELEC option. Now on the window that appears, select the Updates option on the left tab. Click Automatic updates on the right tap and set it to manual.
How do I update Kodi source?
The forth method is to update manually. From the Home screen, select Add-ons, then in the Add-ons manager select the correct category for your add-on or go to My add-ons (this can also be done from the Home screen) and select All. Navigate to your add-on and select it. Select the desired version and it will install.
Can I update Kodi from the app?
Yes, you read it right. Kodi is available on Microsoft Store and you can install and update it within the app store. No need to download a separate offline installer and going through all the hassle of manually installing it.
How do I update Kodi 18.9 on Nvidia Shield?
Here’s how to install Kodi on Nvidia Shield through Google Play: Turn on your Nvidia Shield and open the Google Play Store. Use the search function to find Kodi. On the app page, click Install to download and install Kodi on your Nvidia Shield. Launch the app by clicking the Open button once the installation is finished.
How do I download new version of Kodi?
How to install Kodi on a Firestick Get Downloader from your Firestick’s app store. Use Downloader to open the Kodi website. The Android option on the Kodi website. Download the 32-bit version of Kodi. When prompted, open your Firestick settings. Enable both of these settings. When you first open Kodi, it’ll be empty.
How do I manually update my Kodi library?
Here’s how to do that: Start on your Kodi home screen. Click on Add-ons. Click on the icon that looks like an open box. Click on Install from repository. Go to Kodi Add-on repository. Go to Program add-ons. Scroll down to Library Auto Update. Click on it and a box describing the add-on appears. Click install on the bottom menu.
How do I get updates?
How do I update my Android ™ ? Make sure your device is connected to Wi-Fi. Open Settings. Select About Phone. Tap Check for Updates. If an update is available, an Update button will appear. Tap it. Install. Depending on the OS, you’ll see Install Now, Reboot and install, or Install System Software. Tap it.
How do I update my Kodi on my laptop?
Way 1: Update the latest Kodi from the official website Go to Kodi downloading website, then select Windows. Click INSTALLER to download the file. Click the downloaded file, and click Yes to continue. The Kodi setup wizard pops up. Click I Agree to agree the license agreement.
What is the latest version of RetroPie?
RetroPie 4.7 images are now available, and include a variety of changes and improvements. We marked RetroPie 4.6 as having beta support for the Raspberry Pi 4.
How long does RetroPie take to update?
Install RetroPie Install on Pop!_ OS, Ubuntu, or another Debian-based Linux distribution: or follow the instructions below. Total time for install is only 15 minutes.
How do I update my Raspberry Pi 4 firmware?
You can do this by opening a new terminal window and entering the command sudo rpi-eeprom-update . If an update is required, install the latest software for the Raspberry Pi 4 by first running the command sudo apt upgrade , and after that has completed, run sudo apt full-upgrade .
How do I check my version of Kodi?
How to Check Kodi Version on Your Computer? Launch the application. Click the settings icon on the top left. Next, click on the system information tab. Check under the version info to see your Kodi version.
How do you update Kodi on a smart TV?
Launch the Google Play Store by selecting the icon in your TV’s menu. Click the section on the left named My Apps. Updates will be listed at the top. You can choose Update All to download and install updates for each of your apps, or just scroll right and update Kodi by itself.
How do I get Kodi 18 on Nvidia Shield?
How to Install Kodi 18 on Nvidia Shield TV Turn your Nvidia Shield TV ON and you’ll be welcomed by the Home Screen. Use the search bar on Google Play and type in ‘Kodi’. On the app page, click ‘Install’ and wait for Kodi to be downloaded and installed on your Nvidia Shield device.
How do I change Kodi version?
The Kodi app on Fire TV Stick has been updated to the latest version. To verify the new update, launch Kodi, go to Settings > System Info and see the Kodi version on the right bottom of your display.
How do I scan my library on Kodi?
Kodi can, without any add-ons, re-scan your library every time it starts up. To get started, click the Settings gear from the home screen. Next, head to Media Settings. From here you’ll find the option to scan the library on startup.
What is NFO metadata?
Metadata NFO. These are the full metadata NFO files that are commonly used. The Kodi Export feature generates these files as well as 3rd party media managers. All available XML tags are listed here as well as a description on how and where the files are saved.
Why does Kodi say my library is empty?
Kodi goes back to its original default state with an empty library when that happens. In such circumstances, users who installed builds need to restore them. If you’re new to Kodi, note that the your library is currently empty message is not a software error.
How can I update my app?
Update Android apps manually Open the Google Play Store app . At the top right, tap the profile icon. Tap Manage apps & device. Apps with an update available are labeled “Update available.” Tap Update.
I have LibreELEC 8,2,5 running off RPi 3B+. Files are served over the wired LAN from a NAS through NFS protocol. I have set it up NOT to automatically update the libraries as I feel there isn’t enough CPU power in the Pi for that and because the NAS is pretty noisy. Kodi is set up to automatically send WOL on access (so the NAS doesn’t need to be started manually).
However, around the same time every night (1:30), it starts a library scan, waking up the NAS in the process.
Is there a hidden setting somewhere that would still allow for automatic scanning of library ?
Any way to know which process is the culprit here? I set up Kod’s log to “debug”, so there’s lots of files listed with full addresses…And the log is pretty large.
- Sep 29th 2018
- Official Post
There is no secret setting for auto-scanning a library on a clean setup of LibreELEC or Kodi. You may have installed an addon that does trigger a library update at 1:30 every time.
- Sep 30th 2018
- Official Post
might be helpful
I like beer
- Previous Official Post
- Next Official Post
- Oct 1st 2018
- Official Post
Anyway. without the log we can´t tell anything. The IPs shown in the log are only your internal IPs and should all start with “192.168.xxx.yyy”. So there´s generally no problem sharing them. The IP from my NAS is 192.168.1.175 and you can´t do anything with that info
The log would tell us exactly what´s happening. The only thing where it might be kind of hidden is, if you might have set-up a cronjob doing the automatic library scan via some “kodi-send”-command or a JSON request. Then there should be at least something from Kodis webserver be mentioned in the log. But I guess you would know if you have done that, because that has to be done manually via commandline.
Anyway. without the log we can´t tell anything. The IPs shown in the log are only your internal IPs and should all start with “192.168.xxx.yyy”. So there´s generally no problem sharing them. The IP from my NAS is 192.168.1.175 and you can´t do anything with that info
I was referring to the files themselves. I know one can’t do much with an internal IP.
The scan does show their full path and may fall under one of the rules about “forbidden content”
CvH Now you point me to it… I may well have installed such a plugin. I’ll keep the thread updated.
Update your XBMC Video and Music Libraries on a timer. Timer runs as an XBMC service so you never miss an update
This is an XBMC Service that will update your music and video libraries on a timer. You can select a different interval to scan your media databases (Audio,Video,Both) or you can set a cron-style timer for greater control. If you are playing an audio or video file when the timer starts it can skip the library update process until it is completed so that you’re media experience is not interrupted. Updating a specific Video Path, and Cleaning the Music/Video libraries is now supported
- More Video
- XBMC nico
NICO NICO DOUGA plugin
Национальный агрегатор онлайн-контента
Film, Dizi, Muzik, Haber, Spor ve Dahasi. xbmcTR.com
How to install XBMC Library Auto Update?
XBMC Library Auto Update is available in the official Kodi repository which is included by default in Kodi. You can install this addon by going in Kodi to System >> Settings >> Addons >> Get Addons >> XBMC.org Addons or Kodi.tv Addons
About SuperRepo and XBMC Library Auto Update
SuperRepo does not maintain XBMC Library Auto Update. We only provide an automated index for Kodi users to have easy access to XBMC Library Auto Update and other addons for Kodi. We are not affiliated with the developers (robweber) and do not provide help for this particular addon.
Kodi может упростить просмотр и воспроизведение вашей массивной коллекции мультимедиа, но добавление новых медиа-это небольшая работа. По умолчанию вам нужно вручную указывать программе на повторное сканирование ваших папок каждый раз, когда вы что-то добавляете, что раздражает, если вы регулярно добавляете новые носители. Разве нет способа автоматизировать это?
Да: есть три варианта. Вот они, перечисленные с точки зрения того, насколько легко их настроить:
- Скажите Kodi обновлять библиотеку каждый раз, когда она запускается. Это не требует каких-либо дополнений, но работает только в том случае, если вы регулярно закрываете и открываете Kodi.
- Использовать библиотеку Auto-Update, Легкая надстройка, которая повторно сканирует папки на установленный вами таймер. Это идеально, если вы не перезапускаете Kodi регулярно, но все еще хотите обычные обновления.
- Используйте Watchdog, Немного более тяжелая надстройка, которая отслеживает папки и добавляет новые файлы в режиме реального времени. Это идеально, если вы постоянно добавляете новые медиа, но занимает много системных ресурсов и может оказаться нестабильным.
Ни один из этих методов не является особенно сложным, но два дополнения потребуют немного больше усилий, причем Watchdog-большая работа. В обмен на большее усложнение каждый вариант дает больше гибкости, чем предыдущий, поэтому стоит просмотреть все три.
Наша рекомендация: выберите наименее сложный вариант, который делает то, что вы хотите.
Вариант первый: Обновите библиотеку Kodis при запуске программы
Kodi может без каких-либо надстроек повторно сканировать вашу библиотеку каждый раз, когда она запускается. Для начала щелкните шестеренку настроек на главном экране.
Далее перейдите в Media Settings.
Отсюда вы найдете возможность сканировать библиотеку при запуске. Обратите внимание, что есть другой вариант для видео и музыки.
Переключите эти два варианта, и все готово: теперь Kodi будет обновлять библиотеку каждый раз, когда вы ее запускаете. Если это все, что вы хотите, вам не нужно делать что-либо еще.
Вариант второй: обновление на таймере с автообновлением библиотеки
Некоторые люди редко, если вообще когда-либо, перезагружают Kodi, укладывая компьютер в спящий режим вместо того, чтобы выключать его. Если это вам, повторного сканирования библиотеки, вероятно, недостаточно. Library Auto-Update-это надстройка Kodi, которая позволяет вам устанавливать расписание повторного сканирования вашей библиотеки. Дополнение легкое, все, что оно делает,-это запускает встроенное сканирование библиотеки на регулярной основе.
Вы найдете Library Auto-Update в добавке Kodi по умолчанию в разделе Program adpository. Если вы не знакомы с тем, как установить надстройки, проверьтеНаш гид.
Прокрутите вниз, пока не найдете надстройку, затем установите ее.
Доступ к настройкам, и вы можете настроить, есть ли у каждого обновления уведомления. Будет много обновлений, так что подумайте об этом.
В разделах «Видео и музыка» вы можете установить, как часто происходят обновления.
По умолчанию все ваши источники видео будут отсканированы, но вы можете вместо этого установить определенные папки для сканирования здесь. Сделайте это, и только указанные папки будут регулярно обновляться.
Если вы часто удаляете видео, вы можете быть раздражены, увидев, что на них все еще ссылаются в вашей библиотеке. Раздел «Очистка» настроек позволяет вам об этом позаботиться.
Включите опцию «Чистые библиотеки», чтобы регулярно удалять все ссылки на удаленные файлы из вашей библиотеки. Это займет немного времени, поэтому включите это только в том случае, если вы действительно удаляете медиафайлы с некоторой частотой.
Вариант третий: отслеживайте свои папки в режиме реального времени с помощью Watchdog
Запланированные обновления хороши, но если постоянно добавлять медиафайлы, их недостаточно. Это особенно верно, если вы получили какой-то автоматизированной системы, настроенной для записи или загрузки новых телевизионных эпизодов, и вы хотите смотреть их прямо тогда, когда они доступны.
Если это ваша ситуация, Watchdog-это дополнение, которое вы ищете. Вы найдете его в репозитории Kodi по умолчанию в разделе Services. Если вы не знакомы с тем, как установить надстройки, проверьтеНаш гид.
Прокрутите вниз до дна, и вы найдете Watchdog.
Установите его, и вы в значительной степени сделали: Kodi начнет добавлять новые файлы в библиотеку в основном, как только вы поместите их в исходную папку. Обратная сторона: это может занять много системных ресурсов и иногда нестабильно.
Однако вы можете немного подправить вещи, так что переходите к настройкам надстроек и знакомитесь. Из основных настроек вы можете указать надстройке удалить удаленные файлы из библиотеки или даже сканировать при запуске Kodi.
Вы также можете сказать надстройке не сканировать новые файлы во время просмотра чего-либо, используя функцию паузы во время воспроизведения. Если вам не нравится видеть уведомления, вы также можете отключить их.
По умолчанию надстройка будет сканировать вашу полную библиотеку со всеми источниками, но вместо этого вы можете настроить ее для просмотра определенных папок. Например, если у вас есть PVR, настроенный для интеграции с вашей библиотекой Kodi, вы можете настроить его на просмотр только вашей папки PVR.
Вы найдете еще несколько вещей, чтобы настроить в разделе Advanced.
Отсюда вы можете установить интервал опроса в секундах; то есть вы можете установить, как часто Kodi будет проверять папки на наличие новых файлов. Можно также установить задержку между поиском нового файла и его добавлением в библиотеку. Вы даже можете настроить Kodi на автоматическое сканирование всей библиотеки при добавлении новых файлов.
В целом, Watchdog является наиболее полным инструментом для автоматического поддержания вашей библиотеки в актуальном состоянии и является обязательным для специалистов по автоматизации. Но это может быть что-то вроде ресурсной свиньи, поэтому используйте Watchdog только в том случае, если оно того стоит.
В Libby вы можете брать бесплатные электронные книги и аудиокниги из вашей библиотеки. Все, что вам нужно, — это абонемент.
Знакомьтесь — Libby, приложение, в котором вы можете брать книги из библиотек.
В Libby вы можете брать бесплатные электронные книги, цифровые аудиокниги и журналы из вашей библиотеки. Все, что вам нужно, — это абонемент.
Когда вы впервые откроете Libby, приложение поможет вам найти свою библиотеку. Затем вы сможете внимательно изучить коллекцию вашей библиотеки или сразу же сделать заказ на издание.
На своей Книжной полке вы найдете все взятые или заказанные вами издания, а также все свои метки.
Когда вы подключены к сети Wi-Fi, взятое автоматически загружаются для чтения офлайн. Если вы используете мобильную сеть передачи данных, вы можете читать издания в потоковом режиме, пока не подключитесь к Wi-Fi.
взятое автоматически возвращаются в назначенный срок, так что вам не придется беспокоиться о штрафах за поздний возврат.
Коснитесь кнопки Действия, чтобы открыть дополнительные опции, например, досрочный возврат. Коснитесь издания, чтобы открыть ее и начать читать.
Если вы зарегистрированы в библиотеке в США, для большинства изданий у вас будет выбор: отправить издание в Kindle или начать чтение в Libby.
В нижней части экрана можно выполнить поиск, перейти в свою библиотеку, открыть Книжную полку и просмотреть график действий. Вы также можете открыть для чтения свое текущее издание.
Вы можете управлять уведомлениями, добавлять библиотеки, обращаться за помощью и выполнять многие другие действия в меню Libby.
Скачайте Libby, чтобы начать брать книги уже сегодня. Желаем приятного чтения!
Шаг 1
Скачайте Libby из магазина приложений на вашем устройстве.
Вы также можете получить доступ к Libby, открыв веб-сайт libbyapp.com в браузере Chrome, Safari, Firefox, или Edge (Chromium).
Шаг 2
Следуйте указаниям на экране, чтобы найти свою библиотеку, и зарегистрируйтесь, используя действительный абонемент.
Шаг 3
Просмотрите каталог и возьмите какое-либо издание.
Ваш выбор будет зависеть от библиотеки, потому что каждая библиотека сама выбирает, какие издания и форматы предлагать в Libby.
Шаг 4
Названия взятых изданий появятся на вкладке Книжная полка ( ) и при наличии подключения к сети Wi-Fi будут автоматически загружены в ваше приложение, чтобы вы могли читать их офлайн.
На своей Книжной полке выберите раздел Взятое в верхней части экрана. Из меню вы можете сделать следующее.
- Нажмите Читать в. , чтобы выбрать, где вы предпочитаете читать издание (Kindle или Libby), затем завершите отправку в Kindle (только для библиотек США) или начать чтение в Libby.
- Нажмите Открыть в Libby, чтобы начать чтение или прослушивание в приложении.
- Нажмите Действия, чтобы посмотреть такие опции, как Продлить и Вернуть досрочно.
Желаем приятного чтения!
Этот сайт использует cookie-файлы
OverDrive использует cookie-файлы и сходные технологии для предоставления вам обслуживания высокого уровня, наблюдения за производительностью и общей оценки тенденций использования OverDrive (включая сайты и приложения OverDrive). Мы используем эту информацию только для обеспечения лучшего качества обслуживания. Пожалуйста, напишите отзыв на типы используемых нами cookie-файлов.
So much of our media is digital these days, whether it be music or movies. With so many devices, how do we access our media as we stay on the go? Enter Kodi. The popular open-source media center is a fantastic way to organize and play virtually all of your collected media, and the available add-ons give you access to hundreds of web-based resources for streaming media. But now you find yourself wondering how to keep your new media player up-to-date so you don’t miss out on new features and security patches. Fear not, we have you covered. Here’s how to update Kodi on all of your devices.
How to update Kodi on a Windows PC or Xbox One
Use the Microsoft Store
If you’re a Windows or Xbox One user, installing Kodi from the Microsoft Store (formerly the Windows Store) is by far the easiest way to keep it updated. When a new version is released, your operating system should automatically retrieve it and install it for you.
How to update Kodi manually on Windows, MacOS, or Linux
If you don’t want to use the Microsoft Store on Windows for your initial Kodi install, or if you’re a Mac or Linux user, there’s no automatic update option for Kodi. However, Kodi will inform you when an update is available.
Installing updates for these platforms is the same process as installing Kodi for the first time:
- Go to the Kodi Downloads page and choose the installer that matches your platform.
- Download the installer and run it on your machine.
- Follow the prompts until the installation is finished.
The new version should automatically overwrite the older one while preserving your media library. However, it’s never a bad idea to create a backup before installing any new software, and there’s a backup add-on for Kodi that makes this a quick and simple task.
How to update Kodi on Android and Android TV
If you used the Google Play Store to download and install Kodi on your Android or Android TV device, you’re in luck: These versions of Kodi will automatically update themselves when new versions are released, as long as you’ve enabled automatic updates on your device.
If you sideloaded Kodi using an Android .apk file, you’re in the same boat as computer users, and you will have to track Kodi updates on our own and install them manually the same way you did when you initially added Kodi to your device. These updates are also available on the Kodi Downloads page. Pro tip: There’s a special installer app for Kodi for Android users who aren’t using Google Play that makes installing updates a one-tap process.
How to update Kodi on iOS
Using Kodi on iOS requires a jailbroken iPhone, iPad, or iPod Touch, and is not as simple as heading to the App Store and downloading the latest version. As with Kodi on a computer, each Kodi for iOS update will need to be installed manually, unless you used the Cydia app store, in which case you can find the latest version there too. Keep in mind, jailbreaking your device is frowned upon by Apple, and the company may refuse to support you or warranty your device if you end up having issues.
How to update Kodi on Fire TV
Like iOS, Kodi isn’t officially supported on Fire TV, but the process to install it and keep it updated is a little less onerous, and doesn’t involve jailbreaking. Here’s our full explainer on installing Kodi on Fire TV.
How to stay informed of new Kodi updates
Except for Kodi updates from the Microsoft Store or the Google Play Store, Kodi updates are manual affairs. As mentioned above, Kodi will generally inform you that an update is available, but you can also stay informed by following Kodi on Facebook or Twitter, or you can subscribe to the organization’s RSS feed. These outlets are a great way to find out when new versions are available, plus they’re often a great source for Kodi tips and tricks.
by Oswald
Updated on Dec 28, 2020
As of February 2021, the latest stable version of Kodi is the Kodi v18.8 “Leia”. This page will show you the detailed guide on how to update Kodi to the latest version without losing addon settings, configurations, builds, anything. I’ll illustrate the procedures on Windows 10. The processes of updating Kodi on different versions of Windows operation system: Windows Vista 7/8/10, etc. are pretty much the same.
Part 1. Update Kodi by Downloading the Installation Pack
Installing the latest Kodi version from Kodi official site: kodi.tv and overwriting the existing installation enables to preserve former settings, configurations, build. The exact procedures are just like how to install Kodi.
В· Navigate to Kodi official website: kodi.tv, click the blue Download button at the upper right side of the page.
· Scroll down until you can see a bunch of platform icons including Windows. Then choose your weapon – your device. Click on the Windows icon.
В· Download Kodi Leia for Windows under the Recommended tab
· When the download completes, run the Kodi Leia installation pack. Click “Next” and follow the setup wizard: Agree terms; select the type of install; define the destination folder; Then hit Yes at the prompted dialog (as the snapshot below) to overwrite the former version.
· Select the start menu folder to create Kodi shortcuts in; and hit “Install” to install Kodi. Check “Run Kodi” before “Finish” if needed.
Part 2. Use Kodi Windows Installer to Update Kodi within Kodi
Kodi Windows Installer is a Windows exclusive updating method, an addon from Kodi official repository that helps to update Kodi within Kodi, here’s how to install it on Kodi.
Step 1. Launch Kodi, click on Add-ons from main menu.
Step 2. Click on Download from the left panel.
Step 3. Click on Program add-ons.
Step 4. Scroll down until you locate Kodi Windows Installer, click on it.
Step 5. Install Kodi Windows Installer
Step 6. Click OK to install the necessary component.
Step 7. When the Kodi Windows Installer is fully installed, you can find it at Kodi main menu > Add-ons > Program add-ons.
Step 8. That’s where you can update you Kodi to the latest version.
Best Program to Convert/Rip Your Entire Movie Collection to Kodi Library
WonderFox DVD Video Converter
В· Fast convert your video/DVD collection to MP4, MOV, MKV, WMV and 300+ digital formats and devices including Kodi
В· Automatically enhance your video quality for better viewing enjoyment
В· Compress your media library without quality loss, significantly free up storage for your devices
В· Decrypt/bypass any advanced DVD copy protection
В· Download up to 8K videos from YouTube, Vimeo, FB, Dailymotion and 300+ websites in original quality
With this guide I will show you how to import and sync your Trakt TV collection within any add-on that is a fork of Exodus (Incursion & Placenta are 2 examples) and your Kodi library (also works exactly the same with Trakt TV Watchlist, Trakt Movie Collection & Trakt Movie Watchlist).
You are not downloading anything to your device using this process. All you are doing is creating a library of .strm files which take up very little space. I have a show with 224 episodes and it takes up less than 1MB.
- Open Kodi
- Select Add-ons
- Open your Exodus fork. I am using Incursion
- Select Tools
- Select SETTINGS : Accounts
- Select Accounts from the left hand menu
- In the right hand side menu under Trakt select Authorisation
- A popup will now appear asking you to go to – go there and enter the code you have been given. When you confirm that Trakt for Kodi can have access the popup in Kodi will dissapear and you should see your username in the Trakt Account section
- Select OK from the right hand side of the screen
- Select Name of Fork: Library
- Select TRAKT: Import TV Collection (or Collection, Watchlist, TV Watchlist)
- You will now be asked if you are sure. Select Yes & wait for your collection to sync. This can take a while if you have a large TV collection
- Highlight – DO NOT SELECT – Select Name of Fork: TV Folder (if you have imported Movies then you would now highlight Name of Fork: Movie Folder)
- Open the Context Menu (right click with mouse, long press middle button on Firestick, C on your keyboard etc.) and select Set content
- Clicked on the section marked This directory contains
- Select TV shows or Movies – whichever is applicable
- Select OK
- Select Yes when asked if you would like to refresh items within this path
- TVDB will now start scanning your TV shows. Wait for this to finish. It may take a while depending on the number of shows you have
- Now if you go to your Home Screen and highlight TV Shows all of your recently added episodes from shows will be there so you can watch direct from your home screen without having to search through an add-on.
- Now from your Home Screen select Add-ons from the left hand menu
- Select Browser (Icon that looks like a box in the top left)
- Select Install from repository
- Select Kodi Add-on repository
- Select Program add-ons
- Select Trakt
- Select Install
- Wait for Add-on enabled notification
- When the Trakt popup appears asking you to go to do so and enter the code the popup has given you. Sometimes it may give you another code. If it does then enter it again.
- You will now have Trakt highlighted. Open your context menu (right click with mouse, long press middle button on Firestick, C on your keyboard etc.) and select Settings
- Select Synchronize
- Turn on Sync playback progress to Kodi in the TV & Movie section
- Select OK
- Now select Trakt from the list again and select Run
- This will now scan your library to make sure all your watched episodes are marked correctly
- Now go back to your Home Screen
- Select the Settings icon (looks like a cog top left)
- Select Media Settings
- In Library turn on Update library on startup & Hide progress of library updates
- Boom. You’re all set with a great library that will always update when you boot your Kodi device and will add any new shows you add to your Trakt watchlist/collection
I recommend using a VPN to help keep yourself anonymous and protect yourself online. You can get large reductions on any package from IPVanish & 20% off any Strong VPN Package which allow you to connect multiple devices to an encrypted VPN connection at any one time.
- Native apps for Android TV, Android, iOS, Mac, Linux, and more OS’
- Unlimited connections (On IPVanish)
- Access all Kodi add-ons anonymously
- Tier 1 hardware (no speed slowdown)
- 250 GB SugarSync Online Storage (IPVanish)
- Prevent ISP Throttling
- Log-free, so you can’t be tracked
- 30 day money back guarantee (On IPVanish)
- The ability to be configured right at your router, for a hassle-free experience.
Before we start
Cleaning your Kodi library is something we all have to go through at some point. If you’re reading this now, you’re probably at said point. Therefor it’s extremely important that you know when to clean your library, as well as how to do it.
If you have a large Kodi media library, or a library of any size at all really, you may find yourself running into one of the following problems
- You change the directory of your local media files. Resulting in Kodi still thinking the files are in the old directory and refuses to play them, leaving you with unplayable media.
- Somehow, a single movie, or multiple movies have duplicated themselves in your library. So now they are need deleting.
- Deleting a file from your directory, however it still sits in your library, doing nothing and taking space.
If I’m describing a problem you are having, then it’s time to sort it. To solve this, we’re going to run through the simple process of cleaning your library. When you do this, Kodi will automatically scan all of your media files and remove any instances where the connecting media file can not be found. Thankfully, Kodi has this tool implemented so there is no need to download any add-ons or programs.
How to clean your library from Estuary
This tutorial is for the latest Estuary skin. There is a gallery with some images incase you have any problems. This process should be similar for almost every skin, so just look for the same menus.
- Go into your Kodi settings menu
- Select “Media Settings”
- Make sure that your settings level is set to “Expert”
- Go into the Library tab and select “Clean library”
- In the next window, pick yes.
- Thats it!
How to add a video Library to Kodi
Here is a blog on how to add a video library to your Kodi system and make everything that much easier to access your Favorite shows and films.
In the case of TV Shows this will automatically update and put the latest episode/series in the library that you have created.
For this blog i will be using Genisis but i know for a FACT that most add-on use the same principle.
Ok lets get on our way.
And the first thing we need to check is to see if we have HIDDEN FOLDERS checked.
And you can find that out here.
Then make sure that “Show hidden files and directories” is Blue.
Once you have made sure that is blue we can advance onto the GOOD stuff.
Lets go to are Genisis add-on…..In Video Add-ons.
Once we open Genisis as we all know we will be presented with a list and for this i will be using TV Shows.
Then Most Popular.
Now what you have to do is get the sub menu up on the show you want to add.
Just for the purpose of this blog i clicked on “ANT-MAN” .
Now you have to click on Add to Library.
Once you hit Add to Library it will “compress” wait for that to do its job.
Once it has completed come out and go to the FILE tab under the Videos on the main Menu bar.
Then click on FILE.
Then you need to click on Add Video.
Then you will have to browse to the Genisis folder.
These are the Paths that should get you to the right directory.
This is the Root.
Once you you get to the Movies stage then you should get to the stage where you have added the above TV series/Movies,
Now all you have to do is Click OK.
Give your Library a name on then OK.
Revert back to Confluence Skin In Kodi 17
Then you will be presented with the Directory content.
Use the UP/DOWN Arrow.
And mine was Movies this is what you should be looking at when you click on the UP/DOWN Arrow.
Then click on the OK.
Then you need to Refresh, click Yes.
Then you will see the Data Base updating the system and adding it to your short cut on your main Kodi screen.
And there it is.You have a new Tab and its in your Library.
Click on one of the desired selections you added to your Library and it will Auto Update.
Then it will find every Link that is possible.
So there you go.this will save you time actually going into the add-on and looking for something that you watch all the time.
And as i said above if its an up and running series it will automatically update so you do not have to go and look for the latest episode.
Por defecto en Kodi u OSMC (si tienes una Raspberry Pi) cada vez que agregas videos tienes que actualizar la librería de forma manual para que aparezcan en la pantalla de inicio, si quieres evitarte este trabajo y quieres que esta tarea se haga de forma automática sigue los siguientes pasos.
Haz clic en el icono de Settings como se muestra en la imagen siguiente.
Luego ve a Media Settings.
En Library habilita la opción Update library on startup.
Con esto ya lograste que cada vez que inicies Kodi u OSMC se actualice la librería, lo que sigue es agregar un timer para que cada cierto tiempo se este actualizando de forma automática, para esto instalamos el complemento Library Auto Update, este lo puedes encontrar en el repositorio por defecto de Kodi bajo Program Add-ons.
Desplazate hacia abajo hasta que lo encuentres e instalalo.
Ve a la configuración de este Add-on y en Video activa la opción Update Video Library.
Por ultimo si borras archivos de video con frecuencia habilita la opción Clean Library para que la librería se actualice de forma automática y no sigan apareciendo referencias a archivos que ya no existen.
There are many types of files with which we work at the moment in Windows , both professionally, as more domestic or related to leisure. For example, when we get home, we use our audio or video files to watch movies or listen to music. For this we must also have certain programs compatible with these files, as happens with Kodi in the entertainment section.
We are talking about this specific application because it is one of the main ones in the world when it comes to working with multimedia content. Here we refer to music, video , photo files, etc. But that’s not all, but Kodi also allows us to manage television channels , programs or games. All this from an interesting user interface.
Therefore we could say that Kodi is a complete multimedia center from which we not only reproduce these files. At the same time it allows us to control and manage our libraries of this content. For this, the open source program has been with us for a good number of years accumulating experience. In fact in the past its name was XBMC to be called as it is now. Of course, on many occasions this name has been tainted largely due to its relationships with pirated content.
However, it must be clear that Kodi is a totally legal program . The problem is caused by the use that some users make of it. To do this, they take advantage of the support with add-ons or complements that it has to call and illegally access paid content, free.
The importance of keeping the software always up to date
Well, once we know all this, say that in these same lines we are going to focus on the aforementioned add-ons . These are add-ons that we add to the media center in order to increase its versatility. So we can add new functions, improve the appearance of its interface, call other external content , etc. It is also worth mentioning that we can make use of both the program’s own plugins, and those developed by third parties.
But it is not enough to install these add-ons and we already forgot, since at the same time they need some maintenance, especially those of third parties. And it is necessary to bear in mind that in these moments the security of all our data in the PC is very important. Thus, the software that we use daily on the computer is a key element in all of this. Thus, one of the best measures we can take in this regard is to keep the programs we use updated at all times. You have to know that all this is becoming increasingly important in all types of applications and platforms .
The reason for all this is given by the possible attacks that outdated versions of the software can suffer, where Kodi and its add-ons enter. As we told you before, in this case we are going to focus on the popular multimedia center, a tool that, as with the rest, should be kept updated. This will help us, in addition to being able to enjoy all its news, to increase the security of our system. Thus, the first thing we must know to update Kodi, is to know which version we are using at the moment. To do this, we just have to start the program, since an image appears on the welcome screen indicating the version it is running.
Update Kodi to have the latest version
Therefore, at this point we will say that to update the software as such, we can do it quickly and easily. For example, for all those who use Windows 10 and have installed Kodi from the Microsoft Store , automatic updates are applied if we have the option activated.
On the other hand, assuming that we have installed the Win32 version of the program, we will have to download the new update by hand. For this we will only have to download and install it manually from the official website of its developers .
How to update installed add-ons on Kodi
This in regards to the application as such, but that is not the only maintenance we can do here. We say this because the add-ons that we install, as we mentioned before, also need to receive their own updates. Therefore, in the case of the complements that we are talking about, it is also advisable to always keep them updated to be able to make use of the most recent news of each proposal. The operation of all this is simple. Thus, if it is an external add-on, normally the small program itself contacts the main repository server.
This is something that is carried out periodically from time to time, all in order to check if there are any updates available for the installed add-ons . However, in the event that we want to make sure, this is something that we can carry out ourselves by hand, so we will show you how to do it.
The first thing will be to open the program as such to play multimedia content. Once we have its main interface on the screen, in the menu on the left we go to the section called add-ons. Then the add-ons that we have installed in the program appear .
Therefore, to see if this plugin is up to date or not, we select it by clicking on its icon with the right mouse button. Next, what we have to do is select the Information option that we will see on the screen .
In this way we will see that a new window appears on the screen in which we see various data related to that specific complement. At the same time we find a series of buttons that will allow us to interact with it. So we can configure it , if it allows it, delete it, deactivate it, or update it. That is precisely what interests us in this case, so we click on the “Update” button.
On the other hand, something that we must take into account since we are here, is that we can activate the function that makes the process take place automatically. Then we will only have to activate the Auto update selector to forget about all this in the future.
Do you ever find that your Genesis Library hasn’t updated with the newest TV episode that just aired? Force update Genesis and your library with this tip!
Welcome back to part 4 of our Kodi Genesis tips. If you want to check out some other Genesis tips, here are our others:
For part 4 of our Kodi Tips, we have important tips and information to force update Genesis to update your library.
This happens all the time to me: I wait patiently for a TV show to air and ten minutes after the show is done, I go onto my Kodi box and find that my library hasn’t updated with the new episode. I go into the Genesis add-on, find my show and once again am disappointed to find that it hasn’t updated.
So I wait 30 minutes, 60 minutes, two hours, and still can’t get the updated show. Only randomly over the next 5 hours will I get to go on and find my new episode. This is because by default, Genesis will only update itself and your library every 5 hours. Luckily, there are some tricks you can use to force update Genesis both automatically and manually to ensure that you can watch new episodes quickly after they air:
- In Genesis, navigate to Tools > GENESIS : Library > Library : Settings and make sure that both “auto update TV shows” and “update Kodi library after adding content” are both checked.
- In the Library : Settings screen, there is an option that says “GENESIS : Update Folders”. This is actually a hidden manual update button to force update Genesis and it’s dependencies and all of the sources it grabs links from. I highly recommend you do this when you want to force update Genesis to add new shows because it seems to work the best. I’ve added this command to my Favourites and have added this to my Kodi main menu to quickly force update Genesis!
- Make sure that for all of the TV shows you watch, you not only “Add to Library” to access your shows from your Videos library, but “Add to Favourites” as well to put them into your Genesis favourites folders. These shows will get priority when the add-on updates either automatically or when you force update Genesis using the tip above.
- If you want to force update Genesis for shows in your Library, you can also remove a show from your library (context menu on your TV show > remove from library) and re-add it to your library from within Genesis. This will force Genesis to completely add the whole show and refresh all sources at the same time, which is the same as an update to the library.
Do you have any other Genesis tips for us? Let us know on Facebook and Twitter today!
- I. Install Kodi
- II. Add the official Catch-Up TV & More repository
- 1. Add the source to add the official repository
- 2. Install the official Catch-Up TV & More repository
- 3. Install Catch-Up TV & More from the official repository
- Catch-Up TV & More settings
- Need help to install?
Go to and go down to the Choose your weapon section to select your operating system.
Download Kodi and install it on your computer. Launch it for the first time to make the first settings such as the language of the interface. There are a lot of tutorials on the internet explaining how to configure Kodi.
The plugin is available by default in the Kodi extension library, however the process of submitting updates to the Kodi team is slow. This delay often causes a considerable gap between the version available on the official repository and the latest version of the plugin available on GitHub.
To allow you to always have the latest available version of Catch-Up TV & More we provide an official repository for the plugin. This repository always contains the latest version of the plugin and allows Kodi to automatically update Catch-Up TV & More without any intervention on your part.
1. Add the source to add the official repository
Go to the Kodi settings.
Then in File Manager.
Choose Add source and fill in the fields as shown in the image:
- URL:
- Name: Catch-Up TV & More source
2. Install the official Catch-Up TV & More repository
Allow Unknown sources.
Install the repository from the zip file.
Choose between the stable and beta distribution channel.
If you choose the beta channel, Catch-Up TV & More will be updated automatically each time the plugin code is changed to Github. It means that you will always have the latest version and the latest bug fixes/improvements. However you are also exposed to various bugs and instabilities because the latest improvements of beta versions are not fully tested.
The stable channel only contains the major versions of the plugin ensuring you a better stability. However the frequency of updates is less important than the beta channel.
The stable channel corresponds to the master branch of the GitHub repository while the beta channel corresponds to the dev branch.
3. Install Catch-Up TV & More from the official repository
Wait during dependencies installation and the plugin installation.
You can now access the plugin from the Kodi Add-ons menu. The plugin will be updated automatically by Kodi.
Do not forget to take a look at the various plugin settings.
You can for example:
- Hide countries or channels
- Choose the video qualities
- Set up downloads
- Enter user accounts for some channels
- …
In addition, by opening the context menu from a menu item (right-click or c on the keyboard) you can:
- Move up or down the selected item in the menu
- Download a video
- Connect your VPN with OpenVPN
Contact us by mail or visit the official plugin forum.
A lthough Kodi is quite comprehensive with a lot of automatic functionality (build-in or via plugins), there are still some things that need to be done manually. Cleaning and updating the media libraries are unfortunately some of them.
Kodi has three library types: Music, Videos & Movies. For this post, the Movies library will be used, but the scenarios and options are more or less the same when it comes to manually update their entries. This post will show the most common scenarios one might encounter when working with Kodi’s libraries.
Although the process might be very similar to other skins, the default Confluence skin was used when compiling this post.
Table of contents
Why you need to do manual updates
Manual updates are not necessary at all and the content will still play as expected, but in order to keep things clean and organised this is a must. The whole idea here is to remove double entries, incorrectly named entries, corrupted images for entries and worse of all the wrong content.
Updating new content
This is the most basic function when it comes to manual media library updates. After entering the Library of your choice, by pressing the up-key the View options will pop up from the left of the screen. Scroll down to and choose Update library under Actions.
The Kodi Update library button can be accessed by pressing the up-arrow key after entering the Library. Also see
Automatic media library updates for Kodi media centre
Renaming titles
There might be two similar looking items, but they might for example have different build-in subtitles or one is 3D and one is not. They are correctly identified by Kodi, but the naming needs fine-tuning [e.g. Avatar vs. Avatar (3D)].
To change the title of an entry, while on the entry, press C/Context menu -> Manage… -> Edit title.
Double entries
Double entries are usually when the same item is added from different sources or has slightly different filenames on the same source. They are correctly identified by Kodi, but the extra one needs to be removed.
To do a cursory investigation, while on the entry, press C/Context menu -> Movie information. This will, among other things, show the source of the entry. Together with investigating the source, the specs will help to make a decision on which one is most desirable. I, for example, prefer movies with a good quality:size ratio.
After deciding which movie needs to be removed, while on the entry, press C/Context menu -> Manage… -> Remove from library. The library will automatically remove this entry, but upon a new Library update, it will return again, so remember to remove the entry from the source too.
Incorrect entries
There are, sometimes accidentally spotted, entries with the wrong information. The poster, movie information, everything is incorrect. This is because Kodi was unable to assign the correct movie to the given entry title.
The filename of the incorrect movie can be obtained by pressing C/Context menu -> Movie information.
On this screen, the movie title and the movie path are completely different.
In order to correct the movie information, while in the Movie information screen, choose Refresh -> Manual and type in the most distinguishable part of the entry’s name in the search area. This will bring up one or a few options to choose the correct movie from, which will be updated permanently in the Library.
Corrupt poster or background images
Incorrect poster or background images are those that look funny or is incomplete. The movie is identified correctly by Kodi, but the poster or background needs to be refreshed.
This can be easily fixed by removing the entry (C/Context menu -> Manage… -> Remove from library) and simply by updating the library.
Raspberry Pi accessories
To get started with Kodi on the Raspberry Pi, you might need some of the following accessories.
Please support us by using these links – they come at no additional cost to you, but we get a little commission each time they are used. These and others are available from Amazon.com and BangGood.
We have tested most of these products ourselves. Other selection criteria include affordability, quality, availability and average user rating and popularity by other buyers.
Links will open in a new window. (Dead or old links can be reported in the comments section below.)
Over the years, Kodi (formerly XBMC) has become one of the most popular media players. It provides all the essential functionality needed for any home theater setup while remaining open source and free. However, Kodi is not limited to just your living room. With the Kodi app for iOS or Android, you get a streaming media player that can act as a video player, music player, picture gallery, and so much more.
One of the key aspects of Kodi is its ability to play locally-stored files. With Kodi, you can add folders that contain your favorite videos (or other media content) to play through its slick interface. Once added, using add-ons such as Plex, you can stream your media to other devices on your home network like your Android TV, Apple TV, Roku, iPad, and many of the other devices you use to consume media.
Step 1: Add Files to Kodi
The process to add media is pretty straightforward. In this example, we will be using videos, but it’s the same process for both music and pictures.
Open either Kodi for Android or Kodi for iPhone (follow the instructions in this link to sideload Kodi), then scroll through the menu until you find the type of file you wish to add. If you are adding a video, use the Video menu instead of Movies. By adding your video to the Video menu, you will not only keep your files organized, but the Movies menu has additional functionality geared toward movies such as collecting and displaying information found from IMDB.
When you select theVideo menu, you are greeted with three options. To add your content, select “Files,” then choose “Add videos,” which will bring you to a new screen entitled “Add video source.” This screen will allow you to navigate to the folder on your phone which contains the videos you want to add to Kodi. By adding a folder, any files of that type (in this case, videos) that you add to the folder in the future will also be accessible through Kodi.
So next, select the “Browse” button, which will reveal the possible file locations that Kodi can access. For your locally stored files, you will select “External storage.” Here you will find a list of folders created by Android.
If you want to add videos that you have taken with your camera, select DCIM folder. Or, if you want to add videos that you downloaded from the browser, select the Download folder. In either scenario, once you select the folder, it will appear as if the folder is empty. Kodi is only displaying folder, so the lack of any listing means that only files are within this folder. Select “OK” to return to the “Add video source” screen with its field populated. If you want, you can change the name of the folder as it is known to Kodi in the field above “OK” and “Cancel.” If not, select “OK” near the bottom.
Another screen that is known as “Set content” will emerge — ignore it and select “OK.”
Step 2: Browse Your Media Library in Kodi
To watch your content, select the folder you added to Kodi which will pop up above the “Add videos” button. Once selected, you see all the video files located in that folder. Choose the file you wish you play and Kodi will immediately begin playback for you.
With Kodi, playing your content is simple. And with Kodi’s versatility, it can be one stop shop for all your media. Now that you know how to add media, what content have you added to Kodi? Let us know in the comment section below.
Keep Your Connection Secure Without a Monthly Bill. Get a lifetime subscription to VPN Unlimited for all your devices with a one-time purchase from the new Gadget Hacks Shop, and watch Hulu or Netflix without regional restrictions, increase security when browsing on public networks, and more.
New empire of knowledge
- 30/09/2019
- Anna Kim
- Contributing
How do you update an older version of Kodi?
How to Update Kodi
- From your Android main menu, find the Google Play Store icon and click on it.
- Using the search bar (it might be a magnifying glass icon), search for Kodi.
- Click on Kodi.
- If you already have the app installed and there is a newer version, click the button that says UPDATE.
What’s the newest update for Kodi?
What is the latest version of Kodi? The latest version of Kodi is 19.1 Matrix. This version was released in May 2021.
How do I update my Kodi device?
Open the Google Play Store, search for Kodi, and open it. If there is any new update available, it will show an “Update” button. Tap on it and the Play Store will start updating Kodi. That’s it.
Why is my Kodi not updating?
If you see the update failed error on your Kodi system, it means that this add-on updating process has failed. This happens when Kodi sees that there is a newer version of your add-on in the repository, but this new version is not compatible with the version of the add-on that you have currently installed.
Can I download older version of Kodi?
Older versions of Kodi Until the app developer has fixed the problem, try using an older version of the app. If you need a rollback of Kodi, check out the app’s version history on Uptodown. It includes all the file versions available to download off Uptodown for that app. Download rollbacks of Kodi for Android.
How do I downgrade Kodi version?
On Android: go to Settings > Applications/Apps > Select Kodi from the list of installed apps > Uninstall.
How do I backup my Kodi settings?
How to backup your Kodi:
- Launch Kodi.
- Click Add-ons.
- Click Program add-ons.
- Click the Backup add-on.
- Click Open Settings.
- Hover over Remote Dir.
- Click Remote Path Type and choose between Browse Path, Type Path and Dropbox.
Can I backup my Kodi?
The simplest method is the full Kodi Data backup which will backup everything except the original installation folder. It will preserve all add-ons, skins, library databases, playlists, cache along with all their respective settings and any other modifications you have made.
Where are Kodi settings saved?
How do I backup my Kodi library?
- In Kodi go to Settings -> Media -> Library and select Export library.
- Say “multiple files” when asked how you would like to export.
- Say “Yes” when asked about exporting thumbnails and fanart.
- Say “Yes” when asked about actor thumbnails.
- Say “Yes” when asked if you want to overwrite old files.
How do you show hidden files on Kodi?
Enable Show Hidden Files in Kodi
- Click SETTINGS (cog wheel top left)
- Click MEDIA SETTINGS.
- Click GENERAL, then at the bottom click settings to ADVANCED or EXPERT, on the right click SHOW HIDDEN FILES AND DIRECTORIES and your done.
How do I backup Kodi on my computer?
How to Copy Kodi Profiles to Another PC?
- Install the Backup Add-on to Clone Kodi Configuration.
- Configure the Backup Add-on Settings & Create a Backup.
- Restore to Another Device from Backup.
How do you load Kodi on a PC?
Here are the ways to Install Kodi Media player on your Windows: Step 1: Click on the Microsoft Store button which is available on your Task bar. Step 2: Click on the search button on the Microsoft store. Step 3: Enter Kodi on the search tab and select the resultant “Kodi” app displayed. Step 4: A page with details about Kodi app appears.
How do you update Kodi?
Manually update Kodi using the Google Play Store. If automatic updates aren’t working or you want to manually update Kodi on the Google Play store: Open the Google Play store on your Android TV box. Search for Kodi and open the app’s page. Click “Update” to download and install the latest version of the Kodi app.
How do I download Kodi on PC?
How to install Kodi On Windows PC in 5 min Step 1: Go to Kodi Home Page and click on the “Download tab” from the menu. Step 2: Scroll down and you’ll see the downloads link for many platforms as Windows, Mac, Linux, iOS and so on. Step 3: Locate this file into your PC and wait for the download completion, now run the .exe file.
Does Kodi version update automatically?
Kodi does not automatically update itself, so if you’ve been using Kodi for a few years then you could be several versions behind. This can cause compatibility issues with add-ons that stop them from working correctly. In order to update your Kodi to the latest version, follow the instructions here. Remember to make a backup before you update so that you don’t lose any of your important files, add-ons, or settings.


