Новая бета-версия Window Home erver доступна для всеобщего ознакомления, и у вас может не быть дополнительной машины для ее установки. Здесь мы рассмотрим использование бесплатного проигрывателя VMwar
Содержание:
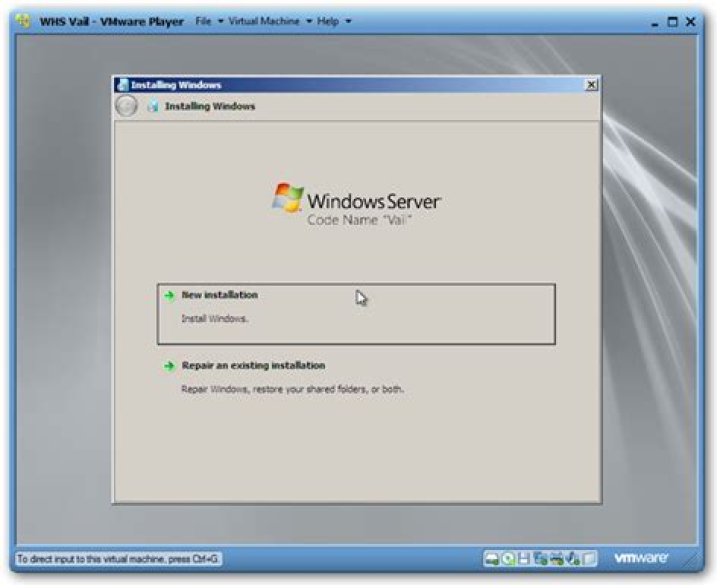
Новая бета-версия Windows Home Server доступна для всеобщего ознакомления, и у вас может не быть дополнительной машины для ее установки. Здесь мы рассмотрим использование бесплатного проигрывателя VMware Player для его установки, чтобы вы могли его протестировать.
В нашей последней статье об установке WHS Vail в продуктах VMware сегодня мы рассмотрим его установку в бесплатном VMware Player. Итак, мы рассмотрели, как установить Vail на VMware Workstation, которая предлагает бесплатную 30-дневную пробную версию, но после этого требует лицензии. Мы также рассмотрели возможность установки Vail на сервере VMware Server, который полностью бесплатен для личного использования. Установить WHS Vail на VMware Player довольно просто, хотя вам нужно обязательно выполнить правильные шаги и настройки.
Начиная
Для начала вам понадобятся следующие предметы.
- Последняя версия VMware Player
- WHS Vail Beta ISO
- Компьютер с 64-разрядной ОС Windows, поддерживающий аппаратную виртуализацию
- Достаточно места на жестком диске на главном компьютере для создания виртуального жесткого диска 160 ГБ, что является минимальными системными требованиями
- Не менее 2 ГБ ОЗУ на главном компьютере – минимальный объем ОЗУ, выделяемый для Vail, составляет 1 ГБ
В этой статье мы использовали машину с процессором Core i3 и 8 ГБ оперативной памяти под управлением Windows 7 Ultimate x64 и VMware Player 3.1.
Проверьте виртуализацию оборудования
Вам нужно будет убедиться, что ваш компьютер поддерживает аппаратную виртуализацию и может использовать либо SecurAble…
Или средство обнаружения виртуализации с аппаратной поддержкой Microsoft. Если ваш компьютер не поддерживает аппаратную виртуализацию, возможно, он выключен, поэтому проверьте настройки BIOS. Также вы можете обновить BIOS и найти настройку для его включения.
Установить VMware Player
Если у вас его еще нет, вам необходимо загрузить и установить последнюю версию VMware Player (ссылка ниже), где требуется регистрация.
Сначала загрузите и установите VMware Player (ссылка ниже). Это бесплатная загрузка, но требуется регистрация. Установите его, следуя указаниям мастера установки и принимая значения по умолчанию.
После его завершения для завершения настройки потребуется перезапуск.
Настройка VMware Player для WHS Vail
Уловка для его успешной установки состоит в том, чтобы убедиться, что вы выполнили правильные шаги, а не использовать мастер простой установки. Откройте VMware Player и нажмите «Создать новую виртуальную машину».
Когда запустится Мастер создания новой виртуальной машины, выберите Я установлю операционную систему позже.
В качестве гостевой операционной системы выберите Windows Server 2008 x64 и нажмите Далее.
Теперь вам нужно указать емкость диска, где минимум для Vail составляет 160 ГБ. У нас были лучшие результаты, создавая диск как один файл, а не разбивая их на несколько файлов.
Просмотрите все и убедитесь, что все выглядит правильно, в противном случае вы можете вернуться и внести коррективы. Вы можете нажать «Готово» и настроить оборудование позже или сделать выбор сейчас.
При настройке оборудования выберите Сетевой адаптер, а для сетевого подключения выберите Мост и отметьте Репликация состояния физического сетевого подключения. Это заставит сервер действовать так, как если бы он был отдельной физической машиной в вашей сети.
Для памяти минимальное требование составляет 1 ГБ, но если у вас есть дополнительная оперативная память, вы можете немного увеличить ее.
Для CD / DVD выберите использование ISO и перейдите к местоположению вашего VailInstallDVD.iso файл.
Проверьте свои настройки и, если все в порядке, нажмите Готово.
Теперь, когда все настроено, вы можете запустить виртуальную машину.
Если вы получили сообщение об аппаратных устройствах, просто проверьте Больше не показывать эту подсказку затем щелкните ОК.
Кроме того, если вы получили сообщение об обновлении программного обеспечения, нажмите Напомни мне позже.
Теперь вы можете начать процесс установки WHS Vail.
Во время установки внизу Player появится сообщение с предложением запустить VMware Tools. Нам не нужно устанавливать это сейчас, пока идет установка Vail, поэтому нажмите «Напомнить мне позже».
Сообщение покинет экран, и установка Vail продолжится.
Время, необходимое для установки, зависит от вашего оборудования. В нашей системе Core i3 с 8 ГБ ОЗУ установка заняла около получаса. Помните, что виртуальная машина будет перезагружаться несколько раз, вам не нужно будет много взаимодействовать во время установки Vail. Для получения дополнительной информации ознакомьтесь с нашей статьей о том, как установить WHS Vail.
После нескольких перезапусков и ввода правильных данных вы можете начать использовать свой новый Virtual Vail Server! На экране CTRL + ALT + DELETE для входа в систему щелкните Виртуальная машина и Отправить Ctrl + Alt + Del.
Теперь вы можете войти в Vail с учетными данными, которые вы ввели во время установки.
Успех! Теперь мы можем начать изучать, что предлагает новая версия WHS, и можем подключить к ней другие виртуальные машины или физические машины в вашей сети. Мы расскажем, как это сделать, в следующих статьях.
Помните, что вы не сможете подключиться к нему, если на вашем компьютере уже установлено программное обеспечение коннектора WHS версии 1.
Установите VMware Tools
Последнее, что нам нужно сделать, это установить VMware Tools для более гибкой работы во время тестирования. Щелкните виртуальную машину и установите инструменты VMware.
Когда появится AutoPlay, нажмите Запустите setup.exe.
Просто следуйте указаниям мастера установки, используя типичный тип установки.
Для завершения процесса установки потребуется перезапуск виртуальной машины.
Test Vail Out
Если вы перейдете к другой машине в своей сети, вы увидите сервер WHS Vail в списке «Сеть»… как будто это настоящая машина. Вы сможете подключить к нему RDP и использовать панель инструментов, заменяющую консоль версии 1.
Вы должны иметь возможность дважды щелкнуть виртуальный сервер Vail, ввести имя пользователя и пароль, а затем получить доступ к его общим папкам с других машин.
Здесь мы используем Dashboard на физической машине и делаем резервную копию на виртуальном сервере Vail. Вы можете использовать его так же, как если бы он был на реальном компьютере в вашей сети.
Вывод
В новой версии Home Server есть что изучить, и использование ее на виртуальной машине – отличный способ протестировать ее, не беспокоясь о поломке реального компьютера. Если вы энтузиаст домашних серверов или просто хотите попробовать его, установка Vail в качестве виртуальной машины – отличный способ сделать это без необходимости в дополнительной физической машине. Кроме того, бета-версия Vail и VMware Player бесплатны, что всегда круто.
Скачать VMware Player – требуется регистрация
Загрузите Windows Home Server Vail из Microsoft Connect
If you’re a Windows Home Server enthusiast, you’re more than likely aware of the new Beta code named “Vail”. If you want to test it out without worrying about having an extra machine, we can install and use it free in VMware Server. Join 42.
Install Windows Home Server “Vail” on VMware Server – kapcsolódó dokumentumok
If you’re a Windows Home Server enthusiast, you’re more than likely aware of the new Beta code named “Vail”. If you want to test it out without worrying about having an extra machine, we can install and use it free in VMware Server. Join 42.
Have you ever wanted to be able to access all of your important files, music, photos, and more from all computers in your home from one central server? Today we’ll take a look at Windows Home Server and show you how to install and configure.
24 янв. 2011 г. . Dynamic Host Configuration Protocol (DHCP) is a network protocol that enables a server to automatically assign an IP address to a computer from .
untuk server proxy, server web, maupun server database mysql. . untuk mengaktifkan koneksi ke telkom speedy dengan mengetikkan pon dsl-provider,.
18 июн. 2005 г. . Perangkat lunak sistem operasi yang sifatnya closed-source tersebut membuat administrator tidak mungkin melakukan tindakan pencegahan maupun .
carbon building that offsets energy bills and enhances internal . A smart LIPO4 Fitcraft battery system stores solar electricity, minimising.
2 сент. 2019 г. . implementation of squid proxy server on Windows servers and Linux servers. Then, from . minimum untuk server dengan sistem operasi.
“I get a 404 error when I click on the Download Source Code link on . But by simply dropping the free IE Browser ActiveX control on a VFP form,.
14 авг. 2009 г. . This manual, the Server Configuration Guide, provides information on how to configure networking for ESX Server, including how to create .
Consequently, VMware recommends enabling hyper-threading on the ESXi host if the underlying hardware supports the configuration. 2.1.7 “L1 Terminal Fault – VMM” .
If you want to share files between your Ubuntu and Windows computers, your best option is to use Samba file sharing. Join 425,000 subscribers and get a daily digest of news, geek trivia, and our feature articles. By submitting your email, y.
Instalasi dan Konfigurasi Server Debian Squeezy pada VirtualBox. Modul . [Debian 6.0.7] → [Settings] → [Storage] → [IDE Controller/Empty] → ikon CD .
Would you like to install WordPress on your own server the easy way? Here’s how you can get WordPress up and running in only a few clicks on most webhosts. Join 425,000 subscribers and get a daily digest of news, geek trivia, and our featu.
Instalasi dan Konfigurasi Server Debian Squeezy pada VirtualBox. Modul : Administrasi Server . Instalasi, Konfigurasi dan Pengujian NTP Server Debian.
22 июн. 2018 г. . vCenter Server Components and Services 10 . 6 After You Install vCenter Server or Deploy the vCenter Server Appliance 146.
SAP Sybase ASE and VMware virtualized environments. . of SAP database products and the VMware vSphere . drive, CD-ROM, USB. Table 1. Workload used.
INSTALL WEB SERVER +SSL. การติดตั้ง WebServer บน Ubuntu Server 10.04 (Apache 2, PHP5, MySQL-Server, phpmyadmin,openssl). ขั้นตอนการติดตั้ง WebServer Ubuntu .
SQL Server Club – grow your knowledge How to Install SQL Server 2008. A Step by Step guide to installing SQL Server 2008 simply and .
menerapkan Web Server di virtual mesin VMWare ESXi . Gambar 2 IP Address di Mikrotik . Saat booting, pilih ESXi 6.x standard installer.
Instalasi dan Konfigurasi Server Debian Squeezy pada VirtualBox. Modul : Administrasi Server. 62 | Page Modul 8.
Dynamic Host Configuration Protocol (DHCP) is a network protocol that is used to enable host computers to be automatically assigned IP addresses and related .
. Untuk menjalankan ACCURATE Accounting Software di sisi client (Operating .
A series of server operating systems developed by Microsoft Corporation. Windows servers are more powerful versions of their desktop operating system A series of server operating systems developed by Microsoft Corporation. Windows servers a.
Server dengan sistem operasi linux dan windows ini akan memberikan semua layanan kepada client berupa sistem operasi, GUI (Graphic User Interfaces), servis .
This command download hlds files, hltv and valve game engine. . In the C:HLDScstrike directory we have a file , server.cfg that we will open with .
Windows Server 2008, most enterprises stuck with Windows 2003. . For the vast majority of Windows Server 2003 instances, the applications have been.
Make sure the computer on which the Epson Edge Dashboard is installed meets the following requirements. . Mangga Dua Mall 3rd floor No 3A/B.
Tehát olyan IP cím MAC addressét nem tudjuk megkérdezni tőle, mely nem a saját subnetünkön van. Nyilván nem is akarjuk. A Windows Server 2008-ban lévő ARP .
4 апр. 2011 г. . VNC Server for the Windows host for Lake. Controller: RealVNC (by RealVNC Ltd) available from for $30.00, free for.
MIKROTIK. Windows Server. 12hours. 350. 2 Day in week . A full descrip on of Cisco devices (Router, Switch and Modules) . With last update MTCNA.
Abstrak : Kegiatan pengabdian kepada masyarakat ini dilaksanakan di SMK Negeri 1. Setia Janji pada siswa-i jurusan RPL (Rekayasa Perangkat Lunak) yang berjumlah .
Lakukan perubahan konfigurasi pada file vsftpd.conf dan ubah setingan menjadi. “YES” untuk mengaktifkan anonymous_enable, local_enable dan write_enable.
content/uploads/2016/06/Microsoft_Password_Guidance-1.pdf. 18. Click Finish. . In-Place Domain Controller Upgrade from Windows Server 2012R2 to 2016.
Copies 1 – 999 . Windows refers to Windows 7, 7 x64, Vista, Vista x64, XP, XP x64, . When sharing the printer on a network, you cannot create User Defined .
Teknologi sistem operasi Windows 2000 sebenarnya merupakan kelanjutan teknologi Windows NT yang telah cukup lama digunakan secara luas di pasaran. Keluarga .
Версии Windows. Бывают разные по «возрасту», например, предыдущие Windows XP, Windows Vista,. Windows 7, Windows 8 и актуальная версия Windows 10.
Virtuális gép indítása és a szükséges account adatokkal belépés . A „PTR” típusú rekorddal azonosítjuk az erőforrásokat, ezzel határozzuk meg, .
Meanwhile, the web server is created by using sentora panel. sentora panel is used because it has an installed packet like apache, php, mysql, phpmyadmin and .
Disabling Proxy Caching (page -7). OBTAINING AND INSTALLING SQUID. Squid is open source software that is available to download from the Internet.
Vmware Server. Merupakan produk gratis yang dikembangkan dari produk VMware. Workstation. Teknologi virtualisasi yang digunakan adalah instalasi diatas OS. ( .
Mikrotik Router has provided the management system to hotspot user through separate program package named User Manager. The main problem is the integration .
Pembuatan Web Server Dan Proxy Server Menggunakan Linux Ubuntu 12.10 Pada Jaringan. Komputer Di Balai Besar Industri Agro. PEMBUATAN WEB SERVER DAN PROXY .
Introduction
In the last 10 years our technology has moved towards “Greener” ways of reducing how many physical machines that run our different services and applications, Virtualization has become one of the number 1 ways of accomplishing that goal. Imagine having 40 to 50 “Virtual Servers or workstations” running on just one Physical Server which tremendously reduces the power consumption and output of running those 40 to 50 services and applications on separate physical machines. Now granted, you will not be able to run that many Virtual appliances on a Windows Home Server 2011 Platform; however you will still be able to get a few running within your Home Server Environment.
We will be installing a free Virtual appliance called VMware Server onto our Windows Home Server 2011. Even through Microsoft has there own Virtual Server application called Hyper-V, VMware is by far the forerunner of leading Virtual Technology today. Having started in 1998 with their Hypervisor and GSX platforms they have gone on to be the number 1 choice by most Government and Private Industries. VMware Server is VMware’s free Virtual Platform that was released initially back in July of 2006 with Version 1.0 as a way of having the consumers (preferably the Enterprise consumers) try it on a smaller scale so they would hopefully of course buy the even more robust platform. As of June 30, 2011 VMware no longer supports the VMware Server application and the last version released was in October of 2009 with Version 2.0.2. so the only support you maybe able to find will maybe be in the VMware support forums. That being said this is still a very useful application that runs a variety of different Operating systems with virtually all of the Windows Operating Systems up to and including Windows 7, Windows Server 2008 R2, and Windows Home Server 2011. This can also support Linux, Solaris (Unix), and even unofficially the MAC OS 10.
Disclaimer
The How to information is intended as a guide or helping resource to those who are doing a VMware Server 2 Installation. There is no 100% guarantee that this will install correctly the 1 st time installing the VMware Server Virtual appliance. I assume no responsibility for any consequences of the install and the user will assume the full risk of any adverse effects of a bad installation. It is recommended backing up your Windows Home Server 2011 before beginning the installation.
Guest Operating Systems Legality
It is the responsibility of the user to obtain the the legal licenses and genuine copies of any operating system that is used for the Virtual Machine on the Virtual Server. Yes, even if the OS is not being installed on a physical machine the same legal rights do apply.
Prerequisites Needed
– Keyboard, Mouse, and Monitor or Remote Desktop
– PC/Server that has a minimum of a Pentium Dual Core or AMD equivalent processor with at least 4GB of system memory
– VMware Server 2 Install Executable (This can be obtained at , The Software is free however you will need to Register to Download it). Insure it is the Windows Installer and not the Linux install package.
– Insure Your Windows Home Server has a static IP
Installation Instructions
1) Double Click the executable and wait approximately 1 to 2 minutes for it to unpackage.
2) When you see the VMware Server Welcome startup screen click “Next”
3) Accept the License agreement and click “Next”
- ヒント
- ブログ
- の仕方
- ウィンドウズ
- 電話
- メイン
- の仕方
- VMware PlayerでWindows Home Server “Vail”をセットアップしてインストールする方法
新しいWindows Home Server Betaはテストのために一般に公開されており、追加のマシンをインストールする必要はありません。ここでは、無料のVMware Playerを使用してインストールしてテストしてみましょう。
VMware製品にWHS Vailをインストールする一連の記事の最後の記事では、今日、無料のVMware Playerにインストールすることを検討しています。 VMware WorkstationにVailをインストールする方法については、無料で30日間の試用版を提供していますが、その後はライセンスが必要です。また、VailをVMware Serverにインストールしてみましたが、これは完全に個人的に無料です。 VMware PlayerにWHS Vailをインストールするにはかなり簡単ですが、正しい手順と設定に従ってください。
入門
- VMware Playerの最新バージョン
- WHSベイルベータISO
- ハードウェア仮想化が可能な64ビットWindowsコンピュータ
- 最小限のシステム要件である160GB仮想ハードドライブを作成するには、ホストコンピュータの十分なハードディスク容量
- ホストコンピュータで少なくとも2GB以上のRAM – Vailに割り当てるRAMの最小容量は1GBです
この記事では、Windows 7 Ultimate x64とVMware Player 3.1を実行するCore i3プロセッサと8GBのRAMを搭載したマシンを使用しました。
ハードウェア仮想化の検証
VMware Playerをインストールする
WHSベイルのためのVMware Playerのセットアップ
それを正常にインストールするには、正しい手順を踏んで、Easy Install Wizardを使用しないようにしてください。 VMware Playerを開き、[新しい仮想マシンを作成]をクリックします。
ゲストOSでWindows Server 2008 x64を選択し、[次へ]をクリックします。
CD / DVDを選択するには、ISOを使用して、あなたの場所を参照してください VailInstallDVD.iso ファイル。
ハードウェアのデバイスメッセージが表示された場合は、 このヒントをもう一度表示しない [OK]をクリックします。
インストールに要する時間は、ハードウェアによって異なります。 8GBのRAMを搭載したCore i3システムでは、インストールに約30分かかりました。 VMが複数回再起動することを覚えておいてください.Vailがインストールされている間に行う必要のある操作はあまりありません。詳細については、WHS Vailのインストール方法に関する記事をご覧ください。
数回再起動して正しいデータを入力すると、新しいVirtual Vail Serverの使用を開始できます!画面にログオンするためのCTRL + ALT + DELETE画面で、Virtual Machineをクリックし、 Ctrl + Alt + Delを送信.
VMware Toolsのインストール
最後に、VMware Toolsをインストールしてテストしながら、より流動的なエクスペリエンスを実現する必要があります。仮想マシンとVMware Toolsのインストールをクリックします。
Typical Setup Typeを使用して、インストールウィザードに従います。
テストベールアウト
結論
Home Serverの新バージョンでは多くのことを探求し、VM上で使用することは、実際のボックスのクラッシュを心配することなく、それをテストするのに最適な方法です。あなたがホームサーバーの愛好家、または試してみることに興味があるならば、仮想マシンとしてVailをインストールすることは、余分な物理マシンを必要とせずに、仮想マシンを実行するのに最適な方法です。また、Vailベータ版とVMware Playerはどちらも無料で、常にクールです。
VMware Playerのダウンロード – 登録が必要です
Microsoft ConnectからWindows Home Server Vailをダウンロードする
computer, mobile, cloud and general technology tips & tricks .
- Home
- Tech Blog
- PhotoBlog
- Contact
Monday, April 26, 2010
Windows Home Server Codename “Vail” Public Beta Available Today!
Today is an exciting day for me. As you know, one of the products I work on is Windows Home Server. Today we’re excited to announce that the next version of Windows Home Server (codename “Vail”) is available for you to try. This is a BETA release, and while it may seem like you want to switch to it as your actual home server, we want to remind you that it’s still not sanctioned for production usage, because it just hasn’t gone through the hours of testing needed for us to feel confident that it’s rock solid. Plus we’re still adding features!
What we do want to do with the Beta release, is get the public pounding away on all of our features, but most importanly our PC Backup and our new version of Drive Extender! We invite everyone to check it out by downloading the software from the Microsoft Connect site. (English language builds are available now). If you don’t have extra hardware, Vail installs flawlessly into Hyper-V based environments and one of our MVPS already has a blog post on how to install it into VMWare.
- Extending media streaming outside the home or office
- Multi-PC backup and restore
- Simplified setup and user experience
- Expanded development and customization tools for partners
Before we go too much further, however, we want to pass along a couple of very important hardware-related tips on installing the Vail Beta:
- In Vail, we’re moving to a new underlying server platform that will only run as a 64-bit OS. We do not recommend running Vail on a 32-bit PC or existing Windows Home Server systems (even 64-bit Home Server systems) because there may be compatibility issues with some OEM drivers.
- Since it is still in ‘beta,’ please install the Vail code on a secondary computer as opposed to existing Windows Home Server v1 OEM systems (not even 64-bit systems) If you do install the beta on an existing system, you may experience a number of problems, including the inability to run WHS v1 add-in applications (even those provided by OEMs). Installing on a secondary machine will help ensure the best possible user experience, and we would like your feedback on what this scenario is like.
- Installation of the Vail OS on a PC will also require users to wipe all data from that PC or device.
- The hardware requirements for Vail call for a 1.4 GHz x64 processor, 1 GB RAM, and at least one160 GB hard drive. Full details and additional requirements will be posted on the Microsoft Connect download site.
Also, if you are a developer, this beta includes a new software development kit (SDK) that gives developers and partners even more ways to customize the OS and add new functionality and services to Windows Home Servers. Download the SDK here.
Finally, before you start filing bugs, some features yet to come are:
- Changing a users password
- Changing your home server password
We look forward to hearing your feedback. Please open issues and discuss on the Connect Website.
注意:您需要在支持硬件虚拟化的64位Windows系统上安装VirtualBox。 我们已经阅读了一些文章,您可以在没有硬件虚拟化的系统上安装它,但是无法确认。 为了获得最佳结果,请确保主机计算机支持硬件虚拟化。
下载并安装VirtualBox
如果您还没有在您的PC上安装最新版本的VirtualBox,请转到VirtualBox网站并下载(下面的链接)。 安装是直接选择默认值。 在安装过程中,选择是以关于网络接口的警告。
设置新的虚拟机
您可以选择固定大小或动态扩展存储。 我们选择动态扩展存储相对固定的,最低要求是160GB和创造它作为固定存储需要相当长一段时间。 我们实际上尝试了这两种方式,他们工作平等。
VirtualBox硬件设置
我们调整显示和最大的视频内存,你可以启用2D / 3D加速,如果你想,但没有从中受益。 这是一个服务器,不意味着想。
网络设置可能是最重要的,因为它们在VMware安装中。 选中启用网络适配器并将其更改为桥接适配器。 这将使Vail VM在您的网络上显示为一个单独的机器。
安装客户添加
在Vail安装过程完成后,我们需要安装Guest Additions以使VM体验更流畅。 单击Devices \ Install Guest Additions。
然后浏览VirtualBox Guest Additions安装向导。
当重新启动时,在CTRL + ALT + DEL登录屏幕,进入机器\插入Ctrl + Alt + Del。
这是所有有它! 您现在可以在VirtualBox中开始使用Virtual Vail计算机。
结论
虽然我们在VirtualBox上安装Vail没有问题,但是它在我们的测试中没有像在VMware产品上运行一样顺利。 但是,如果你是VirtualBox的粉丝,并想试用Windows Home Server Beta“Vail”,而不需要另一台机器,这将做的伎俩。 无论您想使用使用VMware Player , VMware的服务器或VirtualBox的. 他们都是免费的和韦尔测试版是免费的,现在也是。
The Big WHS was originally supposed to house approximately 30TB of storage when the plans were first detailed on an Excel spreadsheet BOM in December 2009. This was a big upgrade to my first DIY Windows Home Server box that had well under 20TB. About five months later, the storage capacity has crested 60TB, with further room to expand. The Big WHS now spans two 4U Norco cases (using a total of 8U of rackspace and another 4U chassis is in the works) has over 60TB of storage, and requires well over a dozen ports on the gigabit switch.
The current hardware list is as follows:
- CPU: Intel Core i7 920
- Motherboard: Supermicro X8ST3-F
- Memory: Patriot Viper 12GB DDR3 1600
- Case (1): Norco RPC-4020
- Case (2): Norco RPC-4220
- Drives: 12x Seagate 7200rpm 1.5TB, 2x 7200.11 1TB, 12x Hitachi 7200rpm 2TB and 2x 1TB, 8x Western Digital Green 1.5TB EADS, 2x Western Digital Green 2TB EARS.
- SSD: 2x Intel X25-V 40GB
- Controller: Areca ARC-1680LP
- SAS Expanders: 2x HP SAS Expander (one in each enclosure)
- NIC (additional): 2x Intel Pro/1000 PT Quad , Intel Pro/1000 GT (PCI)
- Host OS: Windows Server 2008 R2 with Hyper-V installed
- Fan Controllers: Various
- PCMIG board to power the HP SAS Expander in the Norco RPC-4220
- Main switch – Dell PowerConnect 2724
Changes and Future Plan
The configuration changes have had a few drivers:
- I have been using many more Hyper-V virtual machines on the server lately. 8-10 VM’s run simultaneously on the box these days.
- Storage growth is approximately 1.2TB/month due to additional witness preparation footage being shot, all in HD. The acceleration of storage growth has required space for additional drives.
- The two Norco cases are LOUD with the stock fans with the RPC-4220 being significantly louder than a RPC-4020. I found that running the stock fans at 75% provided enough cooling while significantly reducing noise.
Bottom of modified PCMIG board and simple fan controller in RPC-4220 DAS Enclosure
Install SFF-8088 cable between the Norco RPC-4220 DAS/ SAS Expander Enclosure and main server
So those are the basic changes at this point. Nothing fancy, but I am probably done buying drives until the 3TB hard drives come to market later in 2010.
I am not done yet though. There are a few things I have been meaning to add:
- Supermicro X8SIL-F plus a Core i3 530 or Xeon X3440 in the second 4U (I did order a X3460 today also). Will need to have a separate power supply, but I would like to house a second CPU and more RAM in the second Norco enclosure. This will let me migrate some VM’s. I also have the opportunity to utilize the few unused hot swap slots in the Norco RPC-4220. Finally, I want a platform to test WHS V2 codename VAIL on a bare metal installation, and want a VMWare ESXi machine. Another use is that I want something that can host client Virtual Machines before putting them on the Big WHS.
- 10BaseT Ethernet… at some point I want to upgrade the network. A big factor here is that the switch costs are very high as are the costs for the cards. Even with 2x SSD’s in Raid 0 on SATA II read speeds are below 600MB/s. This means that there is very little opportunity to use full 10BaseT 10 gigabit bandwidth between single clients and the server using a direct CAT 6 run.
- I am thinking of utilizing the Norco RPC-470 from the first WHS to be a third 4U enclosure for holding optical drives, SSDs, and another virtual machine farm. I am more sold on the idea of it being an optical media expansion/ SSD case than I am of it being yet another virtual machine box. On the other hand, I am biased at the moment because I just lost an entire physical stack of installation DVD’s two weeks ago. The time involved in validating the non-operational status of those disks has been time consuming. I’ve started burning in the new 4U and am actually connecting it to a Silicon Image based eSATA 4-port card (I just wanted to see what this would be like).
Third 4U to be more disks plus SSD’s and/or optical drives
Finally, the first WHS was dismantled this weekend. Its Norco RPC-470 is being used as a test server (see above) and will most likely become a third 4U for the Big WHS. The Core 2 Duo 6420, Gigabyte motherboard, DDR2 memory, and Adaptec controllers will most likely be sold or given away.
That wraps up this edition of the Big WHS update. Stay tuned to see what happens next! It should be exciting as WHS V2 codename VAIL gets closer to release.
Für den Test der Preview-Version von „Vail“ muss man sich bei Microsofts Connect-Programm anmelden und kann daraufhin die ISO-Images herunterladen. Auf der Seite befindet sich ein Link zu einem Produktschlüssel, mittels dessen man Windows während der Installation oder anschließend aktivieren kann. Bei der Installation in virtuelle Umgebungen sind ein paar Besonderheiten zu beachten.
Windows Home Server 2 wird, genau wie der jetzige Windows Home Server, nicht als Shrink Wrap zu kaufen sein, sondern als OEM-Produkt vorinstalliert auf entsprechenden Hardware-Produkten, meinst auch mit dem Namen „Home Server“ versehen. Administratoren und Entwickler können ihn natürlich per TechNet-Plus- respektive MSDN-Abo herunterladen und auf beliebiger Hardware installieren.
Bei Vail handelt es sich technisch um Windows Server 2008 R2 Standard, der um wesentliche Business-Bestandteile erleichtert wurde, wie etwa Active Directory. Das bedeutet, das Betriebssystem gibt es nur als 64-Bit-Variante, es auf einer existierenden Box zu ersetzen funktioniert also nicht per Update, sondern erfordert eine Neuinstallation.
Vail installieren und testen
Für den Test der Preview, deren Einsatz in Produktiv-Umgebungen Microsoft übrigens per EULA verbietet, empfiehlt sich eine virtuelle Umgebung. Profi-Produkte wie VMware Workstation mit ihren Team-Fähigkeiten sind hierbei eigentlich nicht vonnöten: Vail verlässt sich auf die UPnP-Fähigkeit des im Netzwerk vorhandenen Routers, um automatisch Port Forwarding zu konfigurieren und Namensauflösung und die gegenseitige Erreichbarkeit der Arbeitsgruppenrechner auch mit dem DNS- und DHCP-Setup eines simplen Home-Routers zu gewährleisten.
Da virtuelle Router wie etwa der von VMware Workstation oft nicht UPnP-fähig sind, muss man für einen sinnvollen Test die Testmaschinen bridged ans physische Netzwerk anhängen, um dessen Router zu verwenden, wofür auch kostenlose Produkte wie VMware Player oder Virtual PC ausreichend sind.
Eine Kleinigkeit ist noch zu beachten: Da auf Vail automatisch die Rolle als Zertifizierungsstelle für das Heimnetz installiert wird, kann nach der Installation weder der Name des Home-Servers geändert werden noch der der Arbeitsgruppe, welcher er angehört. Letztere ist das englischsprachige voreingestellte WORKGROUP – es empfiehlt sich eventuell, auch englischsprachige Clients zum Testen zu verwenden, um sich die manuellen Anpassungen der Arbeitsgruppennamen zu ersparen.
Clients und Windows Home Server 2 verbinden
Nach der Installation kann man sich von den Client-Computern aus mit dem Server verbinden und unter der URL jeweils die Connector-Software herunterladen und installieren – dabei ist jetzt auch eine Version für MacOSX.. Beim Dashboard, mit dem man den Server administriert, handelt es sich um eine Remote-Anwendung, die zum Client gestreamt wird. Man sieht also auch die Arbeitsstation als Remote-Rechner, an der man gerade arbeitet, also etwa wenn man gerade deren Backup auf den Windows Home Server einrichtet.
Täglich Know-how für IT-Pros mit unserem Newsletter
Wir verwenden Ihre Mail-Adresse nur für den Versand der Newsletter.
Es erfolgt keine personenbezogene Auswertung.
User reviews
Podcasts Worth a Listen
SPONSORED
In this episode, Chris talks to Danny Abukalam about implementations for Software-Defined Storage (SDS), in particular the Task Specific model. Danny works in Product Engineering at SoftIron, a company that develops hardware platforms for Open Source software. In the storage market, SoftIron offers solutions that combine task-specific designed hardware with Ceph Open Source storage software. This podcast explores the evolution of SDS and the choices available for end users when deploying storage solutions. The conversation covers proprietary, DIY, supported, and task-specific solutions, weighing up the pros and cons of each.
You can find much more detail about the operating models for SDS in our free eBook, sponsored by SoftIron. This is free to download without registration here –
For more information on SoftIron’s products and services, go to
Elapsed Time: 00:40:23
Timeline
- 00:00:00 – Intros
- 00:01:45 – A brief history of Software-Defined Storage
- 00:02:35 – Four phases of SDS
- 00:06:50 – Open Source is a driver of SDS development
- 00:09:00 – Modern storage is focused on software features
- 00:11:00 – SDS deployment requires IT to be the end-to-end owner
- 00:12:30 – Are enterprises more interested in self-build SDS?
- 00:14:05 – How efficient is modern on-premises technology?
- 00:19:05 – What is Ceph and where has the Ceph project reached?
- 00:22:00 – How is Ceph being used?
- 00:24:00 – Proprietary model – fixed hardware and software from the vendor
- 00:27:45 – DIY model – pick, choose and support every component
- 00:29:50 – Supported solution – narrow vendor HCL designs
- 00:31:20 – Task Specific – hardware designed for Open Source software
- 00:33:25 – New technology needs greater levels of management
- 00:36:20 – What will the future of SDS be?
- 00:39:00 – Wrap Up
Related Podcasts & Blogs
- #189 – The Quiet Success of Software-Defined Storage
- #198 – Software-Only Storage Vendors
- Storage Predictions for 2021 and Beyond (Part III – SDS)


