When you’re listening to music or a podcast on your phone, it’s annoying to be interrupted by an incoming text or email notification. Here are some fixes.
When you’re listening to music or a podcast on your phone, it’s annoying to be interrupted by an incoming text or email notification. Here’s a look at a few ways to listen to your audio in peace on Android and iPhone.
Stop Notification Sounds on Android
Unfortunately, there isn’t a universal fix for this on Android since many devices are running different OS versions. One thing you can do is set your notifications to sound lower or to vibrate.
Another solution is to install the app called Don’t Pause. The free version puts the notification sounds to vibrate, and the pro version offers additional features. This allows you to know; still, there’s a notification but won’t interrupt the audio you’re listening to.
One of the caveats is it only works with Android 3.0 and higher. So, if you’re still using an older Android device, you’ll need to do it manually. I’d imagine there are similar apps out there that are similar, or, depending on your phone’s manufacturer, it might have a built-in software solution. If you know of one, let us know in the comments section below.
Stop Notifications Sounds on iOS
On your iPhone, the easiest way to disable the audio dropout annoyance is to flip the mute switch on the side of the phone. Or, you can turn on the Do Not Disturb feature. Swipe up from the bottom of the screen and tap the crescent moon icon to turn it on or off.
By default, it will only work while your iPhone or iPad’s screen is off. To configure it more granularly, go to Settings > Do Not Disturb and you can set it to what works best for you.
That’s all there is to it. If you’re tired of having notification sounds interrupting your audio listening experience, these tips should help you out.
Want to silence or adjust those iPhone, iPad, or Apple Watch alerts? Here's how.
If you have an iPhone, iPad, or Apple Watch ($666.87 at Amazon) , you don’t always want to be alerted to or bothered by phone calls, texts, and any other types of notifications. Maybe you’re in a public place where you can’t take calls or messages, or perhaps you simply need some quiet time. The good news is that you can disable such notifications for your mobile device. Here’s how.
iPhone and iPad
The quickest and simplest way to disable notifications on your iOS device is through the “Do Not Disturb” option, which prevents phone calls, text messages, alerts, and other notifications from popping up on your screen, making a noise, or vibrating your device. Phone calls and text messages still arrive, you just won’t see or hear any notification when they do.
You can quickly turn on the “Do Not Disturb option” through the Control Center on your device. To activate this on an iPhone X or later or an iPad with iOS 12 or later, swipe down from the upper-right corner of the screen. To activate it on an older device or one not yet updated to iOS 12, swipe up from the bottom of the screen.
At the Control Center panel, tap the icon that looks like a half moon. A brief message flashes: “Do Not Disturb: On.” Tap anywhere on the home screen to make the Control Center vanish. You’ll then see the half-moon icon in the upper-right corner.
You can also enable Do Not Disturb by going to Settings > Do Not Disturb. Turn on the switch for Do Not Disturb. The option will remain on until you turn it off, either from the Settings screen or from Control Center. But you can dive further to better control how and when Do Not Disturb works.
Customize Do Not Disturb and Call Notifications
To get more specific with Do Not Disturb, first turn it off if it’s enabled. Turn on the Scheduled button. Here you can schedule a specific timeframe during which Do Not Disturb is activated.
For example, if you don’t want to hear notifications while you’re asleep, you can set the “From” time for whenever you go to bed and the “To” time to when you expect to wake up. You can also turn on the switch for Bedtime, which dims the lock screen and silences calls and notifications. Do Not Disturb will automatically take effect every day or night unless you turn off the Scheduled button.
Next, you’ll notice a section for Silence. Here, you can opt to always silence incoming calls and notifications, meaning whether the iPhone is locked or unlocked, or only when the phone is locked. To choose the latter option, tap the entry for “While iPhone is locked.”
Maybe you want to disable notifications for most calls but allow them from certain people or under certain circumstances, for instance from a family member or in the event of a possible emergency. You start by simply enabling Do Not Disturb or turning on the Scheduled button as explained above.
Then tap the setting for “Allow Calls From.” Here you choose from Everyone, No One, Favorites, or All Contacts. Selecting Favorites or All Contacts typically makes the most sense as it will allow calls only from people you know, preventing a stranger from calling you during your Do Not Disturb period.
Back at the Do Not Disturb screen, you can also turn on the option to allow Repeated Calls based on the assumption that someone who needs to reach you in the event of an emergency might try calling several times in a row.
Allow Specific Contacts to Call or Text You
Instead of allowing your favorites or all contacts to reach you when Do Not Disturb is enabled, you can designate only specific people who can get through. To do this, you need to enable a feature called Emergency Bypass for those specific people.
Open the Contacts app. Open the contact for whom you want to enable this feature and tap Edit. Tap the setting for Ringtone and then turn on the switch for Emergency Bypass. Tap Done and then Done again. You can enable this option for as many people as you wish.
You also have some control over using Do Not Disturb from the Control Center. Open the Control Center and press down on the Do Not Disturb icon. Depending on where you are and what you’re doing, a few options are available to determine how long Do Not Disturb will last, such as “For 1 hour,” “Until this evening,” or “Until I leave this location.” You can also tap the option for Schedule to return to the Settings screen for Do Not Disturb.
App-Specific Notifications
You can turn off or otherwise control notifications for specific apps and adjust how they appear on your device. Go to Settings > Notifications. There, you’ll find a list of installed apps that support notifications.
Let’s say you want to customize alerts about Facebook activity. Tap Facebook and turn on “Allow Notifications” if it’s not already activated. Below it, you can choose where and how the alerts will appear: Lock Screen, Notification Center, and/or Banners.
You can select a Banner Style. You can also turn on the Sounds switch to hear the notification and the Badges switch to display a number on the app’s icon whenever a notification is available.
Most apps also require you to go into the app itself and customize the types of alerts you’ll receive. For Facebook, open its app and tap the Hamburger icon. Go to Settings > Notifications > Notification Settings to mute push notifications and choose which notifications to receive.
Apple Watch
Notifications on an Apple Watch are less noisy than they are on an iPhone or iPad. However, you can still prevent them from appearing, especially if you’re in a public place where you don’t want to bother other people. Your Apple Watch’s Do Not Disturb mode mimics the settings from your iPhone, so enabling it on your iPhone automatically enables it on your watch.
On your iPhone, open the Watch app. Swipe down to the General setting, and tap Do Not Disturb. Make sure the option to Mirror iPhone is turned on. The fine print below this option indicates that your watch takes on the same Do Not Disturb settings that you enabled on your phone. Here, you can also enable Workout Do Not Disturb to silence phone calls and other notifications when you’re working out.
You can enable Do Not Disturb from your Apple Watch, which also enables it on your iPhone or iPad. At the clock face, swipe up to display the Control Center. Then tap the half-moon icon to turn on Do Not Disturb.
How to Disable Notifications While Driving
Apple has a special version of Do Not Disturb that is meant to be used specifically for when you are driving. Here is how to turn on Do Not Disturb While Driving on your iPhone.
Apple Fan?
Sign up for our Weekly Apple Brief for the latest news, reviews, tips, and more delivered right to your inbox.
This newsletter may contain advertising, deals, or affiliate links. Subscribing to a newsletter indicates your consent to our Terms of Use and Privacy Policy. You may unsubscribe from the newsletters at any time.
Notifications are useful. They give you valuable information on phone status and information update. All notifications are displayed in the Galaxy S5 notification panel.
For example, when a message arrives, by default, you will get the notification on Galaxy S5 to alert you.
Or when you missed a call, you will get a notification.
In Galaxy S5, just like other Android devices, notifications are sent to the screen (notification panel) outside the app. In other words, even when you are not actively using the app, the app can still ask the system to send you a notification.
Some free apps may exploit the Android notification by sending you excessively spammy messages through notification system.
So, you may try to disable notifications from certain apps (because you are not ready to uninstall the app).
In this guide, I will show you two approaches to disable app notifications on Galaxy S5.
How to disable app notifications on Galaxy S5 if you know the app name?
If you know the name of the app that sends annoying notifications, you can stop or disable the app notification on your Galaxy S5 easily by following these steps.
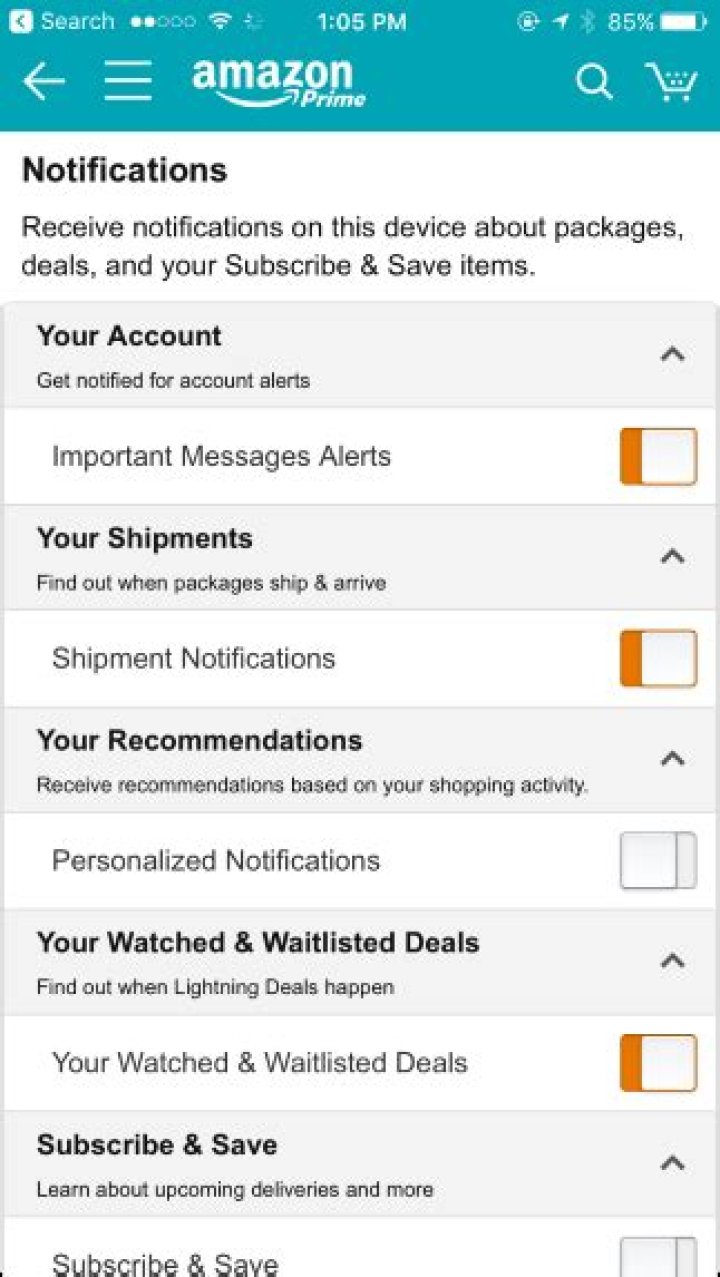
In this part of the guide, I use Amazon Appstore as an example. Actually, Amazon Appstore does not send annoying notifications. You can get some paid apps for free each day.
Step 1: Go to Settings.
You can access Galaxy S5 settings in many ways, for example:
- you can tap Apps (the 16 white dots), then tap Settings.
- you can tap the Settings icon in Galaxy S5 notification panel (see this guide on how to use Galaxy S5 notification panel).
- you can tap the Settings icon in Galaxy S5 quick settings panel (see this guide on how to use Galaxy S5 notification panel).
Step 2: Start Application manager and find the app.
In Galaxy S5 settings, tap Application manager as shown below.
This will list all apps in your Galaxy S5. The apps downloaded by you are listed under Downloaded tab. If you want to find some pre-installed apps, you need switch to All tab.
In this example, tap Appstore as shown below.
Step 3: Check/uncheck show notifications.
In the app info page for the app (Appstore in this example), you can uncheck Show notifications to disable the app notifications.
If Show notifications is not checked, it simply means notification was disabled already.
Now, if you want to disable app notifications on Galaxy S5, you will see the following warning message:
If you disable notifications for this app, you may miss important alerts and updates.
You need tap OK to acknowledge the warning and disable the app notification on Galaxy S5 as show below.
You may notice that after tapping OK, the show notifications becomes un-checked as shown below.
From now on, this app will not send any notifications to your screen.
Of course, if you are actively using the app, the app may still pop out some message for you.
How to disable app notifications on Galaxy S5 if you do NOT know the app name that sends the notifciation?
Sometimes, you get many spammy notifications in Galaxy S5. But you have no clue who is the bad guy.
If you want to disable notifications from such apps, you may follow these steps.
Step 1: Tap and hold the notification.
In this part of the guide, I will use Evernote as an example because I have no spammy apps on Galaxy S5 ):, assuming I don’t know this notification is from Evernote.
So tap and hold the notification until you get the App in pop out.
Step 2: Tap App info.
Now, tap App info to find out from which app the notification is sent.
Step 3: In app info page, check/uncheck show notifications.
After tapping App info, you will be directed to the detailed info page corresponding to the app that sends the notification.
So, you can uncheck Show notifications to disable app notification on Galaxy S5. Of course, you will get the similar warning message mentioned above. Tap OK to finish the operation.
This app will not be able to send you any new notifications.
Can you disable app notifications on Galaxy S5 now?
If you have any questions or encounter any problems to disable app notifications on Galaxy S5, please leave a comment in the comment box below.
Notifications are one of the most important aspects of your smartphone, whether or not you realize that. They act as shortcuts to things like your music player, reminders to complete tasks, and buzzers to let you know that someone is reaching out to you. They’re seriously handy, and Android’s robust notification system is one of its best features.
But they can be annoying, too, especially in an era where we’re constantly connected with our phones in our pockets. Notifications can ruin a movie, make it hard to focus, or just distract you when you’re trying to turn your brain off for the day. If you’re wondering how to turn off some of those notifications and live a slightly quieter smartphone life, we’ll help you out.
Check out that screenshot above. See all those notifications? That could be much worse, but it’s still incredibly annoying. Let’s get it fixed.
Step 1: Swipe down on the notification bar and see what notifications you currently have. For our example, we have quite a few different notifications present, but Twitter is the annoying one that we want to nix.
Swipe that notification to the left. Not all the way, mind you; we just want to swipe it enough to show the notification settings and mute buttons. If you only want to make the app be quiet for a short period of time, you can tap the mute button to get a few minutes of silence, but we’re going to make these notifications go away completely.
Step 2: You need to tap that settings icon. That’s going to launch us directly into the settings app on your phone, and right into the notification settings for that particular app.
Alternatively, if you’re trying to shut off the notifications for an app without doing it through your notification shade, you can still find this in the settings app. This will vary slightly by phone, but generally you’ll want to navigate through Settings > Notifications > App Notifications, then select the app that you need to change.
Step 3: Now that we’re in the right part of settings, you’ll be able to see everything that this app can send you notifications for. Something like Gmail is a little more sparse, only allowing you to toggle notifications for received emails. It’s not like Gmail does much else!
But if you’re looking at something like Twitter, you can actually toggle certain things off. If you don’t want notifications for DMs, for example, you can turn that off while leaving everything else on. But if you do want to turn the app’s notifications off completely, just toggle that top option.
Step 4: And that’s most of the hard work! You’ll notice that every notification toggle for Twitter has been hidden; it won’t bother you anymore, no matter how many messages and alerts you get. You’ll still get those sent to your account, obviously, but your phone won’t bother you about it at 3AM.
If you want to turn it off for a bit, like when you’re on vacation, you can turn it back on later by repeating these steps, then tapping that top option again. Things will go back to just how you set them before you turned everything off.
It’s not a bad to periodically go through your app notifications and turn things off for games that you don’t play as often anymore, apps that bug you about current in-app promotions, and anything else that’s distracting the rest of your life. Stay on top of your digital wellbeing and you’ll be way less stressed every day, trust me.
Born in southern Alabama, Jared spends his working time selling phones and his spare time writing about them. The Android enthusiasm started with the original Motorola Droid, but the tech enthusiasm currently covers just about everything. He likes PC gaming, Lenovo’s Moto Z line, and a good productivity app.
Smartphones are great for being connected to the rest of the world whenever you need to be, but it can get a bit much when you are constantly bombarded with notifications. These notifications are generally quite useful but it can be a bit overwhelming when it doesn’t seem to ever stop. Luckily, Android has a solution. Read on to find out how to manage your notifications in Android.
Why should you manage your notifications?
With the ever-increasing number of apps we have on our smartphones, it’s becoming pretty much a requirement to manage your app notifications. Between Facebook, WhatsApp, text messages, Snapchat and maybe some news apps too, you can end up receiving notifications every few minutes. And you’ll quickly realize that the majority of these aren’t really that useful to you. So managing these notifications will not only bring you peace of mind, but it’ll stop you looking at your phone every two minutes to see what’s it’s alerting you about now.
Whether you are using Android Marshmellow or newer, or Android Lollipop or older, we’ve got you covered.
Temporarily turn off all notifications
Like Apple’s iOS, since Android Marshmallow 6.0 Android offers a “Do not disturb” option, whereby the smartphone won’t ring or vibrate and can even switch off all forms of interruption. You can turn off all notifications on your phone or only authorize specific ones, like your wake-up alarm or calls from certain people.
Notifications will still arrive on your phone but you won’t be disturbed by then as your phone will remain silent and the screen stays off.
How to set up Do not disturb on Android Marshmallow or newer
Go to your smartphone settings and select Sound & notification then Do not disturb to enter the settings for this mode. You can then modify these to suit your needs (alarms, reminders, events, etc.).
Android Pie has made it easier for you to manage your notifications. / © NextPit
To activate this mode, drag the menu down twice from the top and press the Do not disturb icon. Once in the options, you can select the time frame as well as Total silence, Alarms only or Priority only.
Pull the notifications bar down twice to access the Do not disturb settings. / © NextPit
You can also set Do not disturb mode to automatically switch on at a defined regular time. In the settings, select a time slot when you want the mode to switch itself on.
How to manage notifications on Android Lollipop or older
If your device runs Android Lollipop or an older Android version, you can also deactivate any interruptions. To do this, press the volume rocket up or down until a menu appears.
There are then two different ways to deactivate notifications:
- Priority: you’ll only be notified of priority notifications like alarms. You can decide yourself which ones are a priority. It’s worth mentioning that when you limit the notifications you receive to priority ones only, you won’t hear any other notification. Go to Settings -> Sound & notification -> Interruption then select the types of notifications you wish to set as priority.
- None: all notifications are switched off. When you select this option, you won’t receive ANY notifications.
Limit notifications to certain apps
Some people prefer to manage their notifications by deciding what notifications each individual app is permitted. Lollipop allows you a decent amount of control and Marshmallow takes it a step further by allowing you to refuse authorizations. Notification management is in Settings -> Sound & notification. In App notifications, you can access the settings for each app individually. This is perfect if you wish to stop that one app that’s causing your phone to go off every two seconds.
You can also hide the contents of a notification when your device is locked.
How to individually manage app notifications on Android Marshmallow or newer
Managing your app notifications on Marshmallow is super easy. / © NextPit
How to individually manage app notifications on Android Lollipop or older
You can restrict certain app notifications in Android Lollipop. / © NextPit
Do you have other ways to manage your app notifications on your smartphone? We’d love to hear about it so we can update our article. Let us know in the comments below.
A lot of our readers have been reporting that Gmail notifications are not showing up on their Android phone. This can be concerning because without notifications, how will you know what the buyer/supplier/boss said? You can’t expect yourself to check emails every now and then. That is why push notification was invented. Those days are long gone.
Let’s take a look at some of the possible solutions to rectify Gmail notification issue and see how we can stop Gmail app on Android from misbehaving.
1. Check App Settings
The first thing that you can do to make sure you are receiving push notifications for your Gmail app is to check the app settings.
To do this, open Gmail app on Android and click on the menu icon and scroll down to find Settings. Here you will find all the email IDs that you are using in the Gmail app. Select the one for which you are not receiving push notifications.
Once inside, you need to select Inbox notifications and click on Notify for every message option. Now you should hear a ping every you get a mail.
This will resolve the issue for most of you who are not receiving emails on their Gmail app on Android. You are not done yet. Go back to Settings and choose General settings. Select Manage Notifications here and make sure that Mail is set to On.
This will take care of in-app notification settings for the Gmail app. Wait for a few hours to see if you are receiving mail notifications. Or, alternatively, send yourself a few mails and check what happens on your Android’s screen.
2. Battery Optimization Settings
This can be a potential problem even if it is in your own interest. Your phone is called smart for a reason. When it senses that the battery is dying, it will begin optimizing your phone, and the apps installed therein, to make the most of the remaining battery juice.
To make this happen, your phone may begin cutting back down on notifications which may include the Gmail app. You need to tell your phone to exclude Gmail app when this happens.
Open Settings, click on Battery & performance and select Choose apps there.
Search for Gmail and select No restrictions to make sure you continue to receive notifications even when your phone’s battery is low.
Depending on the make and model of your smartphone, settings and options may vary, but you should be able to still find it.
3. Data Optimization Settings
You have enabled notification and checked battery optimization but the Gmail app still needs data, your Internet plan, to download emails and attachments. It is also possible that your Android smartphone is restricting Gmail from using data? Data optimization was created to help users make the most of their data plan, helping them stay within their monthly limits.
Go to Settings and select Data usage there. Find the Gmail app and make sure that Mobile, Wi-Fi, and Background data, all three are checked. So that Gmail app is syncing data whether you are on a data plan or WiFi and also working in the background when you are not actively using the app.
In the third screenshot above, you will see App Info option at the bottom of the screen. Click on it to reveal more data options for the Gmail app. Select Restrict data usage option here and uncheck the mobile data checkbox.
This will tell your smartphone to allow Gmail to use data even if you are running out of your data plan.
4. Sync is On
You can add a number of accounts to your smartphone like Google, Facebook, WhatsApp, Twitter, and so on. Some of these accounts have sub-accounts like for Google, there is Gmail, Docs, Sheets, and Contacts. You can toggle sync for each one of these services individually. This allows you more freedom and flexibility.
Let’s see if you have Gmail sync on or not. Go to Settings and select Sync. Select Google from the list and you will notice all the services that are offered by the search engine giant here. Make sure Gmail is checked here.
5. Cache & Release
We all know about cache memory and how it plays a major role in maintaining the sanity of your apps. But at times, it can also wreak havoc. We need to make sure that your Android smartphone is not using cache memory to show emails that are already received and not showing new content.
To clear cache memory and other data from the Gmail app, go to Settings, go to Install Apps and select Gmail. At the bottom of the screen, you will find options to clear data and cache memory.
Do it so that if there is any memory leak, it is taken care of and Gmail will download fresh data from the server.
Fix Gmail Notification Error on Android
In addition to the above-mentioned steps, check if you are using the latest version of the Gmail app or not. This simple little trick has been known to work from time to time.
If you are not receiving notification for new emails from your Gmail app on Android, one of these solutions should work for you. I usually don’t recommend my readers to uninstall the app or do a factory reset unless it is critical and absolutely necessary. While uninstalling and re-installing Gmail is not a big deal, factory reset is, so do it only if necessary.
Disclosure: Mashtips is supported by its audience. As an Amazon Associate I earn from qualifying purchases.
Right, you’re now passed the stage of being excited about receiving emails and now the notification sounds are becoming a burden to you.
Worry not, it’s understandable. Today you’re going to learn how to turn off email notification sounds on your Android phone.
This way, you’re going to see the email notifications whenever you receive emails while with your phone, but as long as you’re not using your phone, you’re not going to know you have email notifications.
So, even if you receive an email while you’re away doing something else, it’s going to be there waiting for you until you access the phone.
Hopefully, you’ll be able to sleep well at night knowing you won’t get bombarded with email notifications sounds.
Sounds good? Well, let’s begin.
Steps to Turn Off Email Notification Sounds on Android
Step 2: Tap the Menu Icon and tap Settings.
Step 3: If you have just one email address, you’re going to see it there. If you have more than one (like in my case), you’re going to repeat the steps for each of them.
Now, tap the email you’re interested in muting notification sounds on.
For this example, I’ll be stopping all notification sounds on my [email protected] email address.
Step 4: Tap Notifications and select All. The reason why we’re selecting All is because we want all emails to show up on our notification panel on our phone.
If you decide to select High Priority Emails, you’re only going to get notified when you receive emails from people (or companies) you’re always communicating with. Those emails you always read etc.
Selecting None means you’re not going to see any notification, unless you open your Gmail app.
So, just to be safe, tap All. This way, you won’t miss any email sent to you.
Step 5: Head back to the list of options and tap Inbox Notifications.
Step 6: Here, uncheck Notify for Every Message.
To be honest, I’m not really sure why this option is here, because the next step also has something similar. But well, we want to make sure those sounds are completely terminated, so just uncheck the option.
Step 7: Tap Manage Notifications and tap Behavior.
Final Step: Now tap Show Silently.
There are other options as well, we’re choosing Show Silently to make sure the notifications get shown without any sound. I mean, it’s self-explanatory.
If you select the forth option, you’re not going to get a notification sound or an icon on your notification panel.
You’ll always have to open your Gmail app before you can see your new emails.
In my opinion, that’s not ideal. You can easily swipe away emails you’re not interested in reading from your notification panel.
Well, that’s all I can say for now on how you can turn off your email sound notifications.
Frequently Asked Questions
How do I turn off app notification sounds?
A really simple way to do this is by going to your Phone’s Settings, accessing all your apps (by tapping Apps & Notifications in most cases), selecting the app you’re interested in turning off notifications for, tapping Notifications and then switching off Show Notifications.
How do I get rid of notifications sounds on Android?
You can do this by heading to your Phone’s Settings, selecting Sound and changing the Default notification sound to None.
Turning off notification sounds means you’re not going to know if you receive text messages, Facebook messages, etc. I would recommend turning off notifications for individual apps you don’t want notifications from.
Conclusion
So, I just explained how you can turn off email notification sounds on your Android phone. You can watch the video above if you’re having problems understanding article.
Remember, if you have many emails connected to your Gmail app, you’ll have to repeat the process for each of them.
Whenever you feel like you want the sounds again, you can undo everything we did.
If you have any questions, ask them in the comments and I’ll try to update you on how you can achieve what you want.
Support me by subscribing to my YouTube Channel and checking out my Merch.
You can turn on notifications to get alerts on your phone or computer when you get new emails.
Turn notifications on or off
If you have multiple accounts in the Gmail app, you need to change this setting for each account.
By default, notifications are turned on for any messages in your Primary label.
First, turn on notifications & choose your settings
- On your Android phone or tablet, open the Gmail app .
- In the top left, tap Menu .
- Tap Settings.
- Select your account.
- Tap Notifications and select a notification level.
- Tap Inbox notifications. Note: If you’re using Android O and above, tap Manage notifications. Under your account, make sure the switch is set to On.
- Choose your notification settings, including sounds.
Note: Your Android device also has notification settings that are separate from the Gmail app.
Change notification settings for certain labels
- On your Android phone or tablet, open the Gmail app .
- In the top left, tap Menu .
- Tap Settings.
- Select your account.
- Tap Manage Labels.
- Tap one of your labels, like Important.
- Tap Sync messagesLast 30 days or All. If you don’t sync messages, you can’t turn on notifications for that label.
- Choose your notification settings for that label. Repeat this for any labels you want to get notifications for.
You can limit your notifications to only high priority emails.
- On your Android phone or tablet, open the Gmail app .
- In the top left, tap Menu Settings .
- Tap your account.
- Tap Notifications select High priority only.
Tip: High priority emails will override any other notifications settings you’ve made for certain labels.
- Open the Gmail app .
- At the top left, tap Menu Settings .
- Select the account you want to change.
- Under “Notifications,” tap Notification sounds.
- Tap Email or Chat and spaces.
- In the window that opens, tap Go to settings.
- Tap Sound or Advanced Sound.
- Under “My sounds,” pick a sound.
- To turn off Notification sounds, select None.
This will allow you to turn on notifications to easily get back to your ongoing meeting, such as when you’re in another app
- On your Android phone or tablet, open the Gmail app .
- In the top left, tap Menu .
- Tap Settings .
- Select your account.
- Tap Manage Notifications.
- You will be taken to the Gmail system settings, where you can then turn on notifications for Gmail.
- On your Android phone or tablet, open the Gmail app .
- In the top left, tap Menu .
- Tap Settings.
- Select your account.
- Tap Notifications select None.
I’m not getting any notifications
If you don’t see your notifications, follow the steps above to turn on notifications. If that doesn’t help, try these steps:
- On your Android phone or tablet, open the Gmail app .
- In the top left, tap Menu .
- Tap Settings.
- Select your account.
- Make sure the box next to “Sync Gmail” is checked.
If you still aren’t getting notifications, learn how to fix sync errors with the Gmail app.
Choose your cart
- Back to Menu
- Sign in to My Account
- Sign in to My Account
- Register
- Prepaid instant pay
- Wishlist
- Business sign in
- Quick links
- Quick links
- Featured devices
Choose your cart
Have a phone you love? Get up to $500 when you switch and bring your phone.
- Up to $500 via Verizon e-gift card (sent w/in 8 wks). Port-in & activation of 4G LTE/5G phone on select Unlimited plans req’d. Line must remain active for 45 days. $500 charge back if service cancelled w/in 12 mos or eligibility req’s are no longer met. See for details.
- Samsung
- Samsung Galaxy S Series
- Samsung Galaxy Note
- Samsung Galaxy Tab
- Samsung Galaxy Z Series
- Samsung Galaxy Buds 2
- Samsung Galaxy Watch
- DROID
- Moto Z Droid
- Apple General
- Apple AirPods Pro
- Apple Watch
- iPhone 13 / Pro / Pro Max / Mini
- iPhone Pro 12
- iPhone 11 / 11 Pro / 11 Pro Max
- iPhone X / Xr / Xs
- iPad
- iPhone 8
- iPhone 7
- iPhone 6
- iPhone 5
- iPhone SE
- iPhone 4
- Accessories
- Blackberry
- Windows Phone
- Jetpack 4G LTE Mobile Hotspot
- Network Extender
- Verizon 4G LTE Router
- Verizon Ellipsis Jetpack
- Verizon SmartHub
- Additional Products General
- Basic Phones
- My Verizon
- 5G
- Prepaid Plans
- 4G LTE – LTE Advanced
- Bring Your Own Device
- Verizon Smart Family
- International Travel
- Verizon Cloud
- Verizon Messages
- Verizon Wireless Services General
- Voice and Broadband Calling Plans
- Total Mobile Protection
- My Business Account
- Community Announcements
- Recognition Room
- Suggestions for this Community
- Community Blog
- Off-Topic Lounge
- Verizon Community
- :
- Android
- :
- Android General
- :
- How do I stop notifications when I am on a call?
- Mark as New
- Bookmark
- Subscribe
- Email to a Friend
I want to receive notifications, BUT do not want them while I am on a call. Like it keeps vibrating and
cuts out when another call is coming in. How to turn that off.
Android
- Tags:
- Mark as New
- Bookmark
- Subscribe
- Email to a Friend
I would be thrown off as well if I got a notification while on a call. You can turn this off. Go to Message+. Tap on the Menu Key in the upper left corner. Tap on Settings. Tap on Advanced at the bottom of the screen. Uncheck Notifications during call.
AlbertoR_VZW
Follow us on Twitter @VZWSupport
If my response answered your question please click the �Correct Answer� button under my response. This ensures others can benefit from our conversation. Thanks in advance for your help with this!!- All Community topics
- Previous Topic
- Next Topic
- Mark as New
- Bookmark
- Subscribe
- Email to a Friend
Settings—Sound & notification—under Notifications select Interruptions and you can set it to Priority only. If you have no notifications set as Priority then you shouldn’t get notifications while in a call.
- Mark as New
- Bookmark
- Subscribe
- Email to a Friend
I have no priority notifications set, but yes still come through on a call.
- Mark as New
- Bookmark
- Subscribe
- Email to a Friend
Notifications can be frustrating when they interrupt calls psf2835 Lets work towards a resolution to stop notifications. What type of notifications are still making the device vibrate while on a call? What make and model phone are you using? Is this something that recently started? If so, when did this start?
Thank You,
MichelleS_VZW
Follow us on Twitter @VZWSupport
If my response answered your question please click the “Correct Answer” button under my response. This ensures others can benefit from our conversation. Thanks in advance for your help with this!!


