Guess Your Password:
Update! Update! Update! Digitalforus!
1. Open the command prompt window on your
screen; this could be done through searching for
the app in the start menu or just through the run
window which could be accessed by pressing Win
+R buttons of the keyboard and then typing in the
CMD followed by entering.
2. Type in the command: “ net accounts” in the
CMD window. This would list you current
password policy which is by default
“Lockoutthreshold: Never” which means that your
account would not be locked no matter how many
times your windows password is filled incorrectly.
Temporarily Lock Your PC if Someone Tries to
Temporarily Lock Your PC if Someone Tries to
Guess Your Password
3. Follow through by putting in the another
command: “ net accounts /Lockoutthreshold:3 ”
This command would set up the limit for the
incorrect password filling on the Windows, and
after the limit, you have set the Windows would be
locked. Here in this command, we have set up the
limit to 3, but you could also change it in the
Temporarily Lock Your PC if Someone Tries to
Temporarily Lock Your PC if Someone Tries to
Guess Your Password
4. To set up the lock duration for the Windows
after filling of incorrect password for the set limit,
just type in the another command in the CMD
panel : “ net accounts /lockoutduration:30 “. The set
time will be in the minutes and you could also set
it to your needs in the command. This command
would make up the duration of 30 minutes.
Temporarily Lock Your PC if Someone Tries to
Temporarily Lock Your PC if Someone Tries to
Guess Your Password
5. That’s all; your windows will now lock up every
Many times it happens that you find someone trying to break into your account. It is indeed a very alarming situation because once an intruder gets into your PC; he can do absolutely anything with your private and personal data. This act breaches your privacy. To prevent this from happening, people usually set passwords for their accounts so that anyone who wants to use your account must know your password. Only then, he will be granted an access to your account.
However, do you think that setting up an account password is enough? No, it is not sufficient. Because someone may guess your password by entering some wrong passwords and eventually knowing the correct one. In this case, you need to take some other measures to protect your PC. One such solution is of locking your PC for a while if someone tries to enter a wrong password for some specified amount of times. In this article, we will tell you the method through which you can temporarily lock your PC if someone tries to access it with a wrong password in Windows 10.
Locking the PC Temporarily in Case of Wrong Password Attempt
In order to perform this action, you need to proceed as follows:
Type cmd in the search section of your taskbar and click on the search results to launch the command prompt window.
As soon as you will click on Command Prompt, its window will pop up on the screen. It is shown in the following image:
First, you need to check if you have already set the password limit or not. For doing this, type the command net accounts in your command prompt window and press enter. This command is shown below:
As soon as you will press enter, some information will be displayed on the command prompt which is shown below:
As you can see that the field corresponding to the title “Force user logoff how long after time expires?” is set to Never which means that currently, you have set no limits on wrong password attempts so you will need to modify this in order to protect your PC.
Now you need to define a threshold for failed password attempts so that as soon as the threshold value is reached, your PC is locked automatically. For doing this, type the command:
and press enter. It means that if someone attempts to enter a wrong password for 5 times, your PC will be locked. You can set any threshold value of your choice. This command is shown in the image below.
As soon as you will press enter, a message will be displayed saying “The command completed successfully” which means that your lockout threshold value is correctly set.
Now, you need to set a lockout duration, which will specify that for how long your PC will be locked after the failed password attempts. For doing this, type the command:
and press enter. It means that once the lockout threshold value is reached, your PC will be locked for 20 minutes. You can set any lockout duration value of your choice. This command is shown in the image below.
As soon as you will press enter, a message will be displayed saying “The command completed successfully” which means that your lockout duration value is correctly set.
The last thing you will need to do is to define the time for a retry after the lockout. For this, you will need to set a lockout window. Type the command:
and press enter. It means that you will be able to make a retry after 20 minutes of a lockout. You can set any value of your choice for the lockout window. This command is shown in the image below.
As soon as you will press enter, a message will be displayed on the command prompt saying, “The command completed successfully” which means that your lockout window is correctly set.
You can confirm all the changes you have just made by typing the command net accounts in the command prompt and pressing enter.
Conclusion
In this way, you can protect your PC or your account from being misused by intruders. These changes will be saved in your PC until you reset the settings to default. Now, no one will be able to break into your PC without knowing your password.
Here in this article, we have written the method with which you could set up your PC in such a way that it gets temporarily locked whenever someone tries to guess your user account password. So, here’s how to temporarily lock your PC if someone tries to guess your password with the help of simple commands that will help you to have your privacy and limit login attempts in your Windows OS.
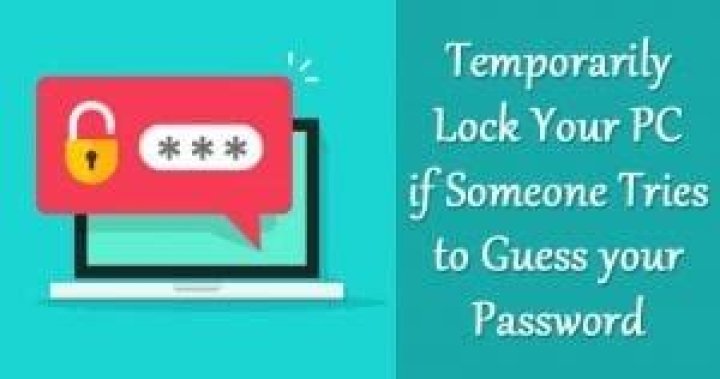
[dropcap]S[/dropcap]ecurity is a preferable thing which all the users might want to be of the topmost level while they use any computer because the computer would contain many important data which is accessed by anyone else could cause up the user sometimes. Keeping in mind the security traces, the Windows is implemented with the user accounts which could be locked by the unique password which the user could only set up. As the hacking methods are increasing therefore that much security won’t prove to be beneficial and the accounts of Windows could easily get hacked by the users trying to guess. This could be prevented if the Windows is set to temporarily lock the PC while if anybody attempts to guess the Windows password. Here in this article, we have written the method with which you could set up your PC in such a way that it gets temporarily locked whenever someone tries to guess your user account password. To know about the method, just head on to the main part of the article which is given below, read about it after that.
How to Temporarily Lock Your PC if Someone Tries to Guess your Password
Below is the complete step by step guide that will help you to temporarily lock your PC if someone tries to guess your password. So follow the below steps to proceed.
Steps to Temporarily Lock Your PC if Someone Tries to Guess Your Password:
Step 1. Open the command prompt window on your screen; this could be done through searching for the app in the start menu or just through the run window which could be accessed by pressing Win+R buttons of the keyboard and then typing in the CMD followed by entering.
Step 2. Type in the command: “net accounts” in the CMD window. This would list you current password policy which is by default “Lockoutthreshold: Never” which means that your account would not be locked no matter how many times your windows password is filled incorrectly.
Step 3. Follow through by putting in another command: “net accounts /Lockoutthreshold:3” This command would set up the limit for the incorrect password filling on the Windows, and after the limit, you have set the Windows would be locked. Here in this command, we have set up the limit to 3, but you could also change it in the command.
Step 4. To set up the lock duration for the Windows after filling of incorrect password for the set limit, just type in another command in the CMD panel : “net accounts /lockoutduration:30“. The set time will be in the minutes and you could also set it to your needs in the command. This command would make up the duration of 30 minutes.
Step 5. That’s all; your windows will now lock up every time the user entering it exceeds the limit of setting up password filling time and duration. This would be a great step to make your PC more protected from the unknown users.
Using Local Security Policy
Well, there are two methods which you can utilize to lock someone out of your PC. The local security policy is the second one. If you don’t feel comfortable with the Command Prompt, then this one is even easier.
Step 1. First of all, open your start menu and then type in Local Security and then open the ‘Local Security Policy’ from the menu.
Step 2. Now on the Local Security Policy menu, you need to locate Security Settings\Account Policies\Account Lockout Policy
Step 3. Once located, you need to double click on ‘Account Lockout threshold’
Step 4. Now it will open up another dialog box. There you need to enter the number of invalid login attempts. You can choose any value and then click on ‘Ok’ to make changes.
Step 5. Now you will see another pop-up, there you just need to click on ‘OK’
That’s it, you are done! Now if anyone tries to log in to your computer and fails due to incorrect password, he will be locked out for 30 minutes.
At Last! This was the method through which you could set your computer to temporarily lock your PC whenever someone tries to guess your password. As from the article, you have got up that the method isn’t too difficult or complex but any moderate user could apply it without any issues. It’s now your time to apply this method and hence make your PC much more secure and prevent up the unknown users let guess your password. Hope you would like the method, don’t forget to share your views.
Worried about people trying to guess the administrator password on your Windows 7 box? By locking out your account after a number of invalid login attempts, your account will be safe.
1. Click on the Orb->All Programs->Accessories->Right click on Command Prompt->Run as administrator.
2. In Command Prompt, type in: net accounts and hit Enter.
3. To change the number of invalid login, type: net accounts /lockoutthreshold:x (replace x with a number, account will be lock out after x invalid login attempts) and hit Enter.
4. By default, Windows will lockout an account for 30 minutes. To change it, please type the following: net accounts /lockoutduration:x (Replace x with a number, x must be bigger or equal to lockoutwindow time (in step 5) ) and hit Enter.
5. You may also want to change the period of time that Windows reset account lockout counter (default is 30 minutes), just type the following: net accounts /lockoutwindow:x (replace x with a number, x must be smaller or equal to lockoutduration time (in step 4) ) and hit Enter.
From now on, if someone try to guess your password, they will be locked out.
Hi, I’m Carly, a Customer Service Representative for the Minnesota Unemployment Insurance Program.
In this video, I’ll explain how to get access to your account if you receive a message that your password is suspended or your account is temporarily locked.
Slide 2
Your account will be temporarily locked when you enter your account password incorrectly multiple times, AND you also answer your security question incorrectly.
There are several reasons for this, but the most important is to stop someone from trying to guess your password and access your account to obtain YOUR personal information or steal YOUR unemployment benefits.
We take protecting your personal information VERY seriously. It’s for this reason that we are quick to lock your account when a user cannot be authenticated, and very careful not to unlock it for anyone but you.
Slide 3
[Screen text: What will not work: Resetting your password; Using your old password. What will work: Calling Customer Service]
Once your account is locked, you will not be able to reset your password or unlock your account on your own. Even if you later remember your password, you will not be able to use it to log in.
You must call Customer Service to have your account unlocked.
Slide 4
There’s a good chance you’ve never had to call Customer Service before, so let’s walk through the process to speak with a representative.
If you’re in the Twin Cities Area, call 651-296-3644.
If you’re outside the Twin Cities Area, call 877-898-9090.
When your call is connected, you will select the language you want to hear, and then enter your Social Security number followed by the pound key. Just enter the numbers, not the dashes.
Then you’ll hear several options. Press 2 to speak with a representative to have a temporary password mailed to you.
You’ll then be placed on hold to wait for the next available representative. Depending on the time of year and time of day, this can take between thirty seconds and two minutes.
There’s hold music so you know your call is still connected. Don’t hang up and call again, hoping you’ll get to a representative faster. Calls are answered in the order they are received.
Slide 5
Once you’re on the phone with a representative, they will ask questions to verify your identity before assisting you.
Usually, this takes only a few minutes, but it could take longer if the proper information is not available.
Slide 6
[Background image: Temporary password letter]
After we verify your identity, we will send you a letter containing a temporary password. This is the only password that can unlock your account.
For your account security, we cannot view your temporary password. Your Temporary Password letter is sent to the address in your account and will arrive within a couple of business days.
Look for the date in the first bullet point. This is when you can use your temporary password.
If you try to enter your old password or log in with the temporary password before this date, you will lock your account again and have to start this process over.
This will create additional delays in accessing your account.
Slide 7
[Background image: Temporary password letter; Self-Service System Log In page and Account Home page]
Follow the instructions on the front and back of your Temporary Password letter to log in to your account, using your temporary password, and create your new password.
Once you create your new password, you’ll receive a message that you’ve successfully changed your password. This means your account has been unlocked and you can access your account again.
Slide 8
To prevent your account from being locked again, remember these tips:
Use a password that you can remember easily like a word or number, but that only you know.
Don’t use passwords that are easily guessed by others like your birth date or your cat’s name, and don’t share your password with others.
The same applies to your security answer. If you write your password down, keep it in a safe place.
Slide 9
[Screen text: To enter your password by phone: online password = DOGGY5, phone password = 364495]
When entering your password on the phone, convert any letters to numbers.
Slide 10
If you have a mobile phone with a full keyboard, use only the buttons that you would press to make a phone call. Do not use the letter keys on the full keyboard.
Do not try to enter your password as if it’s a text message.
Pressing a number key repeatedly on your keypad does not advance to the next letter shown on that key. Instead, it enters the number multiple times.
Slide 11
[Background image: Temporary password letter]
I hope this video helps you understand how to unlock your account and prevent future access problems.
Remember: If your password is suspended or you are locked out of your account, call Customer Service.
Do not try to log in to your account while waiting for your temporary password, or you will lock your account again and you will have to call Customer Service to request another temporary password.
You will receive a temporary password in the mail. Your temporary password IS NOT active until the date indicated in the letter.
Slide 12
If you have questions or need assistance, contact Customer Service; we will be happy to assist you.
Meanwhile, check these resources for more information about passwords.
[Screen text: Customer Service, Phone: 651-296-3644 (Twin Cities area), 1-877-898-9090 (Greater Minnesota), 1-866-814-1252 (TTY for the hearing impaired) | Links for more information: Using Your Password, Password Resets and Account Lockouts, Tips to Avoid Locking Your Account, Video Library]
It’s just a matter of time until you get in front of your PC, try to sign in but, after several attempts, realize you forgot your password, and are now locked out of the system.
If you a prudent user, though, you probably use a Microsoft Account to sign in to Windows 10, because that is the default account type the operating system prompts you to create upon setting up your computer. And it’s what you use to access all Microsoft services, including OneDrive, Outlook.com, and the Windows Store. And if you can’t sign in to your PC, a Microsoft Account also makes it super easy to reset your account password to regain access to Windows 10.
If you forgot your password and you’re locked out of your account, in this Windows 10 guide, we’ll walk you through the easy steps to reset the password associated with your Microsoft Account.
How to reset your Windows 10 account password
- Once you’re entered your incorrect password, you’ll noticed a warning message, which also provides a specific link. Using another computer or your smartphone, use that link that will direct you to the Microsoft Account password reset page.
- Select the I forgot my password option.
Click Next.
Click Next.
Click Send code.
Click Next.
Click Next.
You’ll get a message that letting you know that your account has been recovered. Click Next to complete the task.
Remember that for you to be able to sign in to your account your computer must be connected to the internet. If everything worked as expected, you’ll once again be back in your account.
As you can see, it’s very simple to reset your password on Windows 10, which is yet another good reason to use a Microsoft Account over a local one. However, because anyone can come across this issue, it’s important that you periodically check your account settings making sure you have the most up-to-date security settings, including a valid alternative email address and phone number that you can use for recovery.
Finally, it’s important to note that resetting your Microsoft Account password will not only change the password on Windows 10, but also on all Microsoft services associated with the account.
More Windows 10 resources
For more help articles, coverage, and answers on Windows 10, you can visit the following resources:
Razer Enki X review: A $299 all-day gaming chair for the rest of us
If you want a computer chair that straddles the line between all-day comfort and gaming, Razer’s new Enki series has you covered. Designed by an aviation design specialist focusing on comfort for pilots, this chair impressed us big time. Here’s our full review and why you should consider the $300 Enki X.
Razer Zephyr $99 N95 smart mask ever sells out in minutes
Razer announced availability for the Zephyr facemask today. It features N95 filters with two-way protection, customizable RGB lighting, and a transparent front. The big news, however, is that it has a $99.99 price tag.
Windows 10 November 2021 Update is official, and it’s coming soon
Microsoft has today announced that the next Windows 10 feature update, officially known as the November 2021 Update, will begin rolling out next month and that the final build is available now for testing in the Windows Insider Release Preview channel and via ISOs.
The NFL is back! Check out these must-have Windows apps for football fans
After months of waiting through the offseason, the NFL is finally back this week. With these Windows 10 apps, you won’t miss a snap of the NFL action.
Have you noticed that the password-protected user accounts on your Windows PC will not lock out after numerous failed logon attempts? No matter you’ve noted such a phenomenon or not, it is necessary for you to learn about how to realize account lockout after failed logon attempts. Meanwhile, the article mainly shows you how to make it on Windows 10 computer.
Video guide on how to make account lockout after failed logon attempts in Windows 10:
Steps to realize account lockout after failed logon attempts on Windows 10:
Step 1: Open Administrative Tools.
Click the bottom-left Start button, type administrative in the empty search box and tap Administrative Tools.
Step 2: Open Local Security Policy.
In the Administrative Tools window, double-click Local Security Policy.
Step 3: Find and open the policy named "Account lockout threshold".
FYR, it is located in Account Policies/Account Lockout Policy.
Step 4: Set the account lockout threshold.
In the policy’s properties window, input a value between 0 and 999, and then click OK. For instance, if you want account to lock out after three invalid logon attempts, type 3 and tap OK.
Step 5: Accept the suggested value changes.
As the Suggested Value Changes dialog appears, choose OK.
After these five steps, the encrypted user accounts on your PC will lock out after the number of times of failed logon attempts set by yourself.
Related Articles:
Hot Articles How to Reset Windows 10 Forgotten Password
How to Bypass Windows 10 Password Login with/without Password
Easy Guide to Reset Windows 10 Admin Password Like an Expert
4 Tips to Change Windows 10 Password without Knowing Current Password
Can’t Sign into Microsoft Account Windows 10 | Account Locked/Blocked More + Hot Categories Windows 10 Password Windows 8 Password Windows 7 Password More + Latest Articles How to Calculate Power Consumption of a PC 7 Useful Commands Windows 10 Users Should Know 7 Ways to Access System Restore in Windows 10 How to Create or Delete Partitions Using Command Prompt How to Format Disk Partition Using Command Prompt How to Enable and Use God Mode in Windows 10 More + Hot Products Windows Password Genius iTunes Password Genius Product Key Finder More +
Windows offers a convenient computer-locking functionality that many PC owners make use of. But how can we determine who tried to unlock our computer while we were away? That question is answered by an app called ‘Lockscreen Pro.’
Lockscreen Pro is an excellent piece of freeware that comes as a desktop application for computer which are running the Windows OS. The function of the application is to let computer owners easily lock their systems with a password. The lock screen can be made to show the current battery status (in case of laptops), the time, and optionally a photo background. The app even lets webcam-equipped systems to take a snapshot each time somebody unsuccessfully tries to unlock your computer.
To begin using the app, you must first download and unzip its setup archive which is sized at only 3.5 MB. To run the app, you need only open the extracted EXE file – installation is not required. A bunch of settings will open up that ask you to customize your lockscreen (see screenshot above).
In this settings window, you can choose what appears on your lock screen. For laptop owners, it would be best to select the battery and clock options. These options will present a lock screen like in the image below:
You can see that there is not much to check out. The bottom left corner shows the battery status, the center is where you enter the password, and the current time is shown in the bottom right in the 12 hour clock format. If you want the lock screen to be a bit more visually appealing, you can go with the photo background option. Through this option, you can either specify a custom lock screen background or have the app provide one to you. The following screenshot shows my lock screen with the photo background option enabled.
With your preferences selected from the app’s main window, you can open the app to quickly lock the computer. Alternatively you can check out the photos which the app has taken on each unsuccessful login attempt.
Each unsuccessful unlocking attempt is present in the left most pane with its day, date, and time. Clicking on an entry displays the snapshot that was taken by the webcam at that particular time.
In this simple way, not only are you able to securely lock your computer, but you are also able to find out who was trying to get access to your PC while you were away.
The lockout feature in iOS 7, which securely locks your device after a few incorrect passcode entries, can be a real pain in the ass sometimes.
My friends are jerks and routinely lock me out of my iPhone for entertainment, and my poor mother has a horrible memory and recently disabled her iPad with too many passcode attempts.
How Apple’s Lockout System Works in iOS 7
Six failed attempts gets you a 1 minute lockout. Seven gives you 5 minutes, eight gives 15, and nine 1 hour. After ten failed attempts, the system will either lock you out completely or erase your data, depending on your settings. Once locked out, you will need to sync with iTunes to restore, so make sure you have current backups, or are backing up to iCloud.
- Don’t Miss: 200+ Exciting New iOS 13 Features for iPhone
How to Disable Passcode Lockouts in iOS 7
Sadly, there’s currently no built-in way to disable Apple’s passcode lockout feature in your iPhone’s settings. You can disable the “Erase Data” option for ten failed attempts, but that just saves your device from being wiped.
Lucky for us jailbreakers, we can disable lockouts, and it’s fairly easy.
To get started, jailbreak your iPhone if you haven’t already, then head to Cydia to download and install Disabled.
Setting Up Disabled on Your Jailbroken iOS 7 Device
Just go into the Settings app, find the Disabled preferences, and Enable the tweak.
alt=”How to Disable Security Lockouts from Too Many Failed Passcode Attempts on Your iPhone” width=”532″ height=”532″ />
Bypassing the Lock Screen with Notifications
You can also bypass the passcode entirely by pulling down the Notification Center and tapping on a notification, though it will not work with emails. I wouldn’t advise enabling this option, as anyone can then unlock your device, but that’s up to you and the trustworthiness of your peers.
alt=”How to Disable Security Lockouts from Too Many Failed Passcode Attempts on Your iPhone” width=”532″ height=”532″ />
Warning: Disabled Disables “Erase Data”
Fair warning—this tweak will disable the “Erase Data” feature, so if that’s important for your security purposes, this tweak may not be for you. If you lose your iPad or iPhone, you can still wipe your device via your iCloud account, but you’ve gotta get to a computer quick.
With this tweak enabled, you can be happy knowing that you won’t get locked out of your device whether you’re drunk, forgetful, or have horrible friends with a mean sense of humor.
Keep Your Connection Secure Without a Monthly Bill. Get a lifetime subscription to VPN Unlimited for all your devices with a one-time purchase from the new Gadget Hacks Shop, and watch Hulu or Netflix without regional restrictions, increase security when browsing on public networks, and more.


