Last updated on January 19, 2020 By Serhat Kurt Leave a Comment
This article explains how you can update the macOS software on your Mac.
It is very important that you keep your Mac up to date to help protect your computer and to keep it running smoothly. This short article explains how you can do this.
Apple releases macOS updates, patches and security fixes periodically. These updates generally include various performance improvements and important bug fixes.
Please note that you may want to back up your Mac before updating.
Check for macOS Updates
You can check for updates and then update your Mac. Updating your macOS will also update macOS built-in apps (e.g., Safari, iTunes, etc). But this does not include third-party apps that you downloaded from the App Store. However, you can also set your Mac to install app updates from the App Store automatically.
There are 2 ways to check for macOS updates. You can try any of them:
- Apple menu > About This Mac > Software Update.
- Apple menu > System Preferences > Software Update.
If there is an update available, click Update Now. Your Mac will download the updates and restart to complete the updates.
If you click the More Info.. link, you can view more information about the updates. You can also choose what updates you want to install and not install. Simply select the checkboxes of the updates that you want to install and do not select the checkboxes of the updates that you do not want to install. Then click Install Now.
You can set your Mac to update automatically. Simply check the “automatically keep my Mac up to date” box.
To change your update options, click the Advanced… button:
You can have your Mac automatically:
- Check for updates
- Download new updates when available
- Install macOS updates
- Install app updates from the App Store (so that you do not have to go the App Store to update third-party apps, your Mac can automatically install app updates)
- Install system data files and security updates
We recommend that you select, at least, “Check for updates,” “Download new updates when available,” and “Install system data files and security updates.”
Mac App Store
You can update your third-party apps via the Mac App Store (cannot connect to the Mac App Store?). This is a simple process. As explained above, you can set up automatically. Here is how:
- Open the Mac App Store from your Dock or Finder
- Click Updates (left side menu)
- Click the Update button next to the app you want to update or you may want to click Update All to update all apps.
Earlier macOS versions
The above steps are applicable to macOS Mojave or later. If your Mac is running an earlier version of the Mac operating system (OS X High Sierra, Sierra, El Capitan or older), the steps are a little different. Here is how:
- Open the Mac App Store from the Dock or Finder
- Click Updates (top toolbar)
- Click Update or Update All to update all apps.
You can also turn on Automatic Updates by going to Apple menu > System Preferences > App Store, and select ”Download newly available updates in the background.”
This article explains how you can fix macOS update problems.
How to update apps you didn’t download from the Mac App store
You may have downloaded and installed apps from other sources that are not the App Store. This is a little harder than updating the Mac App Store apps. Please note that these steps may not work for all non-App Store apps.
- Open the app you want to update
- Click the app’s name in the Menu bar
- Click Check for Updates and follow the instructions.
Filed Under: Guides Tagged With: macOS, Update
By Bryan Clark 22 November 2020
Keep your Mac safe and running smoothly by keeping it up-to-date on all the latest updates
An up-to-date Mac is a safe Mac. Downloading and installing the latest updates — not only to the macOS operating system, but to your applications as well — is the only way to ensure that your PC has the latest security patches needed to secure your system.
Aside from the big updates, the new versions of macOS each year, Apple periodically sends out supplemental patches to fix bugs and patch security holes in the system. Occasionally these add new features and iron out rough spots in old ones, but the most important part is that they close known security holes that hackers could use to exploit your machine.
Here’s how to keep your system, and your applications, up-to-date and as safe as possible.
How to Install macOS Updates
As part of macOS, system updates got a lot easier to find and install. Instead of rummaging around the App Store, now you can just head to the System Preferences menu to download any system update. To be clear, we’re talking about updates, not upgrades. A system upgrade would be a new version of macOS — upgrading from Mojave to Catalina, for example — rather than one of the supplemental updates and bug fixes.
To update macOS, now you just need to head to the Apple Menu > System Preferences > Software Update. From there, your Mac will scan the system to see if there’s an update available. If you’re running the latest software, you’ll see it here. Or, if there’s an update available, you can click the Update Now button in the top right corner.
A better idea, however, is to just click the checkbox next to “Automatically keep my Mac up-to-date.” This will send a notification each time a new update is available, and ask you whether you want to install it now, or wait until later.
As far as upgrades, you can still find those in the App Store, like usual. Just search for the version you need — e.g. Big Sur, Catalina, Mojave, etc. — download the file, open it and let it run.
How to Keep Your Apps Up-To-Date
Perhaps the easiest way to keep apps updated is to use the same thing we recommended for the operating system. Head to the Apple Menu > System Preferences > Software Update. From there, check the box to “Automatically keep my Mac up-to-date,” but this time, click the button next to it that says Advanced. From here, you can check or uncheck the updates you want Apple to be on the lookout for.
It’s not the most comprehensive way to do this, but it will update the bulk of your apps without you having to do anything else.
For those it doesn’t update automatically, you’ll need to do a little bit of work. First, open the Mac App Store. In the left sidebar, click the Updates button to see apps that have updates available. You can update each by clicking the button next to the app, or you can update all of these automatically in the future by clicking App Store (in the menu bar) and then Preferences > Automatic Updates.
For apps you didn’t download from the App store, it’s time for some manual labor. It’s impossible to give you exact instructions for each app, as this is entirely developer independent. But typically you can find the update menu in one of the following locations (from the menu bar):
- App Name > Update
- App Name > About > Update
- Help > Update
Again, this is entirely developer dependent. There’s no standard here, and the location to find these update options changes with each app you use. These are common spots to find them, but it’s not an exhaustive list. Also, the wording could be different: “check for update,” for example.
Many apps, especially in the most recent versions of macOS, will send you a notification when an update is ready. This, however, isn’t true of all apps, and especially older ones.
Other apps, like the Adobe Creative suite, have their own automatic update apps that run in the background when you run the app. Or there’s Google Chrome, for example, that automatically downloads and updates itself.
To keep your Mac safe, however, you need to stay on top of these updates. And while it’s easy to ensure you have the latest version of macOS, it’s a little tricky to manage all of your apps, especially those downloaded from third parties, outside the App Store.
If you don’t want to go the extra mile, it’s worth it to consider installing only apps from the Mac App Store, though it’s not a perfect solution.
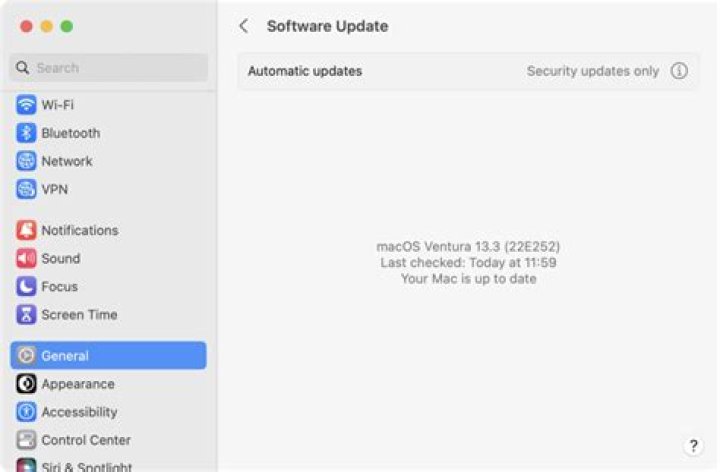
Periodically, Apple releases updates to your macOS software (which can include updates to apps that come with your Mac and important security updates).
If you receive a notification that software updates are available, you can choose when to install the updates, or choose to be reminded the next day. You can also check for macOS updates manually in Software Update system preferences.
Tip: To check for updates to software you’ve downloaded from the App Store, open the App Store.
Check for Mac updates manually
To install updates manually on your Mac, do one of the following:
To download macOS software updates, choose Apple menu
> System Preferences, then click Software Update.
Tip: You can also click the Apple menu—the number of available updates, if any, is shown next to System Preferences. Choose System Preferences to continue.
To update software downloaded from the App Store, click the Apple menu—the number of available updates, if any, is shown next to App Store. Choose App Store to continue in the App Store app.
Set your Mac to check for software updates automatically
On your Mac, choose Apple menu
> System Preferences, then click Software Update.
To automatically install macOS updates, select “Automatically keep my Mac up to date.”
To set advanced update options, click Advanced, then do any of the following:
To have your Mac check for updates automatically, select “Check for updates.”
To have your Mac download updates without asking, select “Download new updates when available.”
To have your Mac install macOS updates automatically, select “Install macOS updates.”
To have your Mac install app updates from the App Store automatically, select “Install app updates from the App Store.”
To have your Mac install system files and security updates automatically, select “Install system data files and security updates.”
To receive the latest updates automatically, it’s recommended that you select “Check for updates,” “Download new updates when available,” and “Install system data files and security updates.”
Note: MacBook, MacBook Pro, and MacBook Air must have the power adapter plugged in to automatically download updates.
Tim Brookes is a technology writer with more than a decade of experience. He’s invested in the Apple ecosystem, with experience covering Macs, iPhones, and iPads for publications like Zapier and MakeUseOf. Read more.
App updates deliver new features, security fixes, and improve the stability of existing software. Unfortunately, not every Mac app is updated the same way. Some take care of themselves, while others need a nudge from you. Here’s what you need to know to keep all your Mac software up to date.
How to Update Mac App Store Apps
Apps installed via the Mac App Store are updated using the same storefront. You don’t need to worry about doing this manually, provided you’ve turned on automatic updates. Your Mac will periodically check for updates, and then download and apply them as necessary.
You can still manually check for updates if you want, though. To do so, open the Mac App Store by either clicking it in the Dock or “Applications” folder, or searching for it in Spotlight. Click “Updates” in the sidebar to see any that are pending.
You’ll see an “Update” button next to any apps with pending updates; click it to manually trigger the update. If there aren’t any updates, the Mac App Store will show you the most recently installed apps, along with a brief description of what was changed. Click “More” next to each entry for more information.
You can enable automatic updates by launching the Mac App Store, clicking Mac App Store > Preferences in the menu at the top, and then selecting “Automatic Updates.”
How to Update Apps You Didn’t Purchase in the App Store
Apps you’ve installed outside of the Mac App Store may or may not update themselves. This varies from app to app. However, the most common, like Chrome, popular free apps, like the Transmission BitTorrent client, and paid apps that are actively being developed will likely notify you of any pending updates.
You might see a notification when you launch an app telling you there’s a new version available. You can often just click “Update” to close the app and update it. You might also have the option to delay or opt out of the update, altogether. Not all apps will notify you about a pending update, however.
For some, you’ll have to look through the menus at the top to find a “Check for Updates” option. Most frequently, you can click Help > Check for Updates, but it might also be in the menu with the app’s name. In Transmission, for example, you’d click Transmission > Check for Updates.
Some apps don’t actively check for updates, and there’s not a lot you can do beyond remembering to do it yourself. Not all apps update gracefully, either. Some will offer to download and apply the update, while others will take you to the app’s homepage so you can manually download the new version.
Sometimes, you’ll be notified when a new version of an app is available, but you’ll have to download it yourself. This will also require that you replace the old version manually. For the best results, right-click the old version in your “Applications” folder, and then choose “Move to Trash” (don’t empty the Trash yet, though).
After you download the new version, copy the APP file into the “Applications” folder, and then run the app to make sure it works as expected. If you see an error like the one shown below, you might have to circumvent Gatekeeper’s restrictions.
If the new version isn’t working or the changes aren’t ideal for your workflow, you can delete the new version and restore the old one from the Trash. To do so, just right-click the file, and then choose “Put Back”.
When the app is working as expected, you can empty the Trash—just right-click the icon in the Dock.
Some Apps Depend on Other Ecosystems
You have to update some apps via their own app store or loader. Some examples of this include the Adobe suite, which depends on the Creative Cloud desktop app, and games installed via Steam.
These apps usually can’t be updated manually, so you’ll have to open the launcher to see and install any pending updates.
How to Update Safari Extensions
If you’re running macOS Catalina or later, Safari extensions are installed via the Mac App Store. They update via the “Updates” page, the same as any other app from the Mac App Store. They’ll also update without a prompt, provided “Automatic Updates” is enabled.
On versions of macOS prior to Catalina, you might need to manually check for updates under Safari > Preferences > Extensions. Just click an extension, and then click “Check for Updates” if that option is there.
Using Chrome or Firefox? Their extensions should be handled by the browser itself. Chrome tends to take care of these on its own terms, but you can also force Chrome to update extensions, if you prefer.
How to Update Homebrew Apps
Homebrew is a command-line based package manager that allows you to install popular apps via the command line. Homebrew works a lot like Linux package managers. It makes it quick and easy to download and update apps without having to manually download or click anything.
To update apps via Homebrew, you’ll have to install them via Homebrew. If you don’t already have Homebrew installed on your Mac, this won’t really apply. If you do, though, you can force an update check for all Homebrew apps with a single command.
First, open “Terminal” by either searching for it in “Spotlight” or navigating to Applications > Utilities. Type the following and press Enter to update Homebrew:
Homebrew will update itself and its app catalog if necessary. Next, type the following and hit Enter:
This will check for any outdated apps. You can then execute the following to update everything:
To update a specific app, you’ll need to know its “formula.” This is the label Homebrew uses to identify apps. For example, Firefox uses “firefox.” So, to update Firefox specifically, you would execute the following:
You can check out the Homebrew Documentation for more commands.
You Can Always Manually Check Versions
If you’re unsure if an app is up-to-date, and you can’t find a “Check for Updates” button anywhere, you can always check manually.
To do so, launch the app, and then click the menu with its name at the top of the screen. Click “About ” to see some information about the app, including its version number.
You can now head to the app’s homepage and check whether there’s a new version available. If there is, you can download and update it the way we described in the “How to Update Apps You Didn’t Purchase in the App Store” section above.
It’s important to keep software up to date, and the same is true for macOS. You can learn how to update macOS to the latest version to keep your machine as secure as possible.
Many of us Mac users forget to update our installed apps to the latest versions, missing out on everything from newly added features, bug fixes, to important security improvements. Sure there are plenty of reasons for forgetting to update applications, whether because we’re too busy to remember, don’t know how to update, or simply don’t get around to launching the App Store on a regular basis, but let’s be honest, this isn’t really a good habit.
Fortunately, Apple has thought of an excellent solution, and if you’re in this cohort of forgetful app updaters, consider relying on the Automatic App Update feature built into modern versions of Mac OS instead.
When enabled, Automatic Updates is entirely hands off, and Mac applications will update and install themselves in the background without having to meddle around yourself. This is convenient and important, as keeping things up to date is one of the essentials of Mac system maintenance. Let’s cover how to be sure this feature is enabled for Mac apps installed through the App Store, as well as important security updates and Mac OS X system software.
The instructions here are for macOS High Sierra, Sierra, Mac OS X El Capitan, Yosemite, and Mavericks. Newer versions of MacOS system software have this feature enable and located in a different location.
How to Enable & Use Automatic Updates in Mac OS X High Sierra, Sierra, El Capitan, Yosemite, Mavericks
This will enable all of the automatic app and Mac OS / Mac OS X update features on the Mac, providing for very simple management of applications:
- Pull down the Apple menu and go to “System Preferences”
- Choose the “App Store” preference panel
- Check boxes for the following:
- Check “Automatically check for updates”
- Check “Download newly available updates in the background”
- Check “Install app updates” – this actually installs the updates to /Applications for you
- Check “Install system data files and security updates” – this is critical to leave enabled
- Optional but recommended for good measure: Get caught up now by clicking the “Check Now” button to launch the App Store into the Updates tab, and select the “Update All” button
That’s all there is to it, now all of your Mac apps that have been downloaded from the App Store will update and install themselves automatically without any user involvement. The last step gets you caught up to the latest versions of apps now, something that otherwise won’t happen until the update feature gets around to checking things on it’s own schedule.
Of course, automatic app updates isn’t for every Mac user. If you’re in a limited bandwidth environment or are intentionally holding onto an old version of an app, you’ll probably want to set the feature to be turned off, but otherwise this is an excellent feature to leave on with most Macs.
Stepping away from the Mac, you’ll find that iOS has similar features for the iPhone and iPad, but due to the background activity and power usage it can lead to quicker battery drain. Thus the automatic update feature is typically less useful in the mobile environment and should often be disabled, particularly on the iPhone.
iOS 7 can automatically download and install app updates, which give the info for recently updating and new features. Blow will guide you how to keep apps updating with the latest versions.
PhoneClean – Upgrade Apps with Fast Speed
PhoneClean – Upgrade Apps with Fast Speed
Firstly free download and install it, then use Quick Clean feature to eliminate 30+ types of junk files on iPhone to quickly update the apps.
Excited about the new app feature? Want to upgrade it in the first time? Here is a tip to keep your apps up to date. In the meantime, you should also know where to find the apps.
If you desire to explore the newest and popularized app in App Store with a quick time, simply type into the app’s exact title or a keyword description of the app to display the list of relevant matches.
How to Keep Your Apps Update to the Latest Versions?
As we all know, app developers will release their apps to the newest versions in a period of time. If you are an user of iOS 7, it will automatically update your installed apps when your iDevice has accessed to the Internet.
To get this auto-update option, you need to launch Settings firstly, and then, tap on the iTunes & App Store option. After doing in that way, you can set up automatic downloads for Music, Apps, Books and Updates in the menu. Besides, please make sure the virtual switch associated with the Updates option has been turned on.
itunes & app store option
Next, slide down to the Use Cellular Data option. Then, choose whether you want apps to update through a cellular data connection to the Internet. One more essential thing, a WiFi connection is required when the apps require a large files size.
use cellular data option
If an app displayed on the Update screen with an Open button, it means the app has been updated associated with the date of the update. Tap on the app icon or its title to get more information about the update, such as functionality, features,etc. By clicking the Open button, you can launch it to use.
Supposing that an Open button is not showed on the Update screen, a progress meter indicates the app is being updated and downloaded to your device currently. If it shows an update but it hasn’t been downloaded and installed, an Update button will present with that app, instead of an Open button. Near the top of the screen, pending updates will be displayed.
To ensure the fast speed of updating, PhoneClean will be a good assistant. It will eliminate 30+ types of junks, especially for “Other” on iPhone, iPad and iPod touch.
| #! /bin/sh |
| # up – v2 – script to keep your Mac up-to-date (OS, Homebrew, and App Store updates) via the command line |
| # run thus to to install: cd /usr/local/bin && curl -s -O && chmod 755 /usr/local/bin/up |
| # and then run it anytime by simply entering the command: up |
| # By based on a script by |
| # homebrew |
| echo ” Checking for homebrew packages. “ |
| brew update > /dev/null ; |
| new_packages= $( brew outdated –quiet ) |
| num_packages= $( echo $new_packages | wc -w ) |
| if [ $num_packages -gt 0 ] ; then |
| echo ” \n $num_packages New brew updates available: “ |
| for package in $new_packages ; do |
| echo ” * $package ” ; |
| done |
| echo ” \nInstall brew updates? (y/n) “ |
| read answer |
| if echo ” $answer ” | grep -iq ” ^y ” ; then |
| brew upgrade && echo ” \nBrew updates done! “ |
| fi |
| echo ” \nClean up old versions of brew packages? (y/n) “ |
| read answer |
| if echo ” $answer ” | grep -iq ” ^y ” ; then |
| brew cleanup && echo ” \nBrew cleanup done! “ |
| fi |
| else |
| echo ” \nNo brew updates available. “ |
| fi |
| # mac app store (requires ) |
| echo ” \nChecking for Mac App Store updates. “ |
| new_packages= $( mas outdated ) |
| echo $new_packages |
| num_packages= $( echo $new_packages | wc -w ) |
| if [ $num_packages -gt 0 ] ; then |
| echo ” \nInstall Mac App Store updates? (y/n) “ |
| read answer |
| if echo ” $answer ” | grep -iq ” ^y ” ; then |
| mas upgrade && echo ” \nMac App Store updates done! “ |
| fi |
| else |
| echo ” \nNo Mac App Store updates available. “ |
| fi |
| # macOS |
| echo ” \nChecking macOS updates. “ |
| softwareupdate -l |
| echo ” \nInstall macOS updates, if any? (y/n) “ |
| read answer |
| if echo ” $answer ” | grep -iq ” ^y ” ; then |
| sudo softwareupdate -i -a && echo ” \nmacOS updates done! You may need to reboot. “ |
| fi |
- © 2021 GitHub, Inc.
- Terms
- Privacy
- Security
- Status
- Docs
- Contact GitHub
- Pricing
- API
- Training
- Blog
- About
You can’t perform that action at this time.
You signed in with another tab or window. Reload to refresh your session. You signed out in another tab or window. Reload to refresh your session.
Updating your Mac is easy. And if all you do is download apps from the Mac App Store, keeping those updated is easy , too. But if you want to make sure everything on your Mac has the most recent features and security fixes, we have a few tips that can help you out.
How to keep macOS updated to the latest version
Your Mac should let you know when you need to install updates. However, you can always check by clicking on the Apple icon in the top-left corner of your screen, clicking on System Preferences, and clicking on Software Update.
Make sure that box is checked so your Mac will download and attempt to install updates for you. You should also click on Advanced and make sure everything is checked there, too:
What about beta updates?
If you want to live on the wild side and try out newer macOS features (and fixes) before everyone else, you have two options.
- Apple’s public beta for macOS
First, sign up for the official Apple public beta for macOS. You’ll have to download and install a beta utility on your Mac—as easy as installing an app—and you’ll then run a Software Update to install the latest public beta version. This might be slightly less stable than a regular version of macOS, but it’ll likely give you less grief than .
- Apple’s developer beta for macOS
I like running the developer beta because I have no fear and I have yet to encounter a Mac-destroying bug (knock on wood). Normally, getting access to a developer beta requires you to give Apple $99 a year as part of its Apple Developer Program. Or you can do what I do: Visit betaprofiles.com and download the macOS beta profile. Install it on your Mac, run a Software Update, and you’ll have the latest preview version of macOS that developers get to play with. Apologies, in advance, if something screws up.
How to keep your Mac’s apps updated to the latest versions
If you install apps on your Mac from the App Store, all you have to do is launch the App Store app and click on the Updates tab. In fact, you’ll see a big, red notification on the App Store icon in your Dock whenever you have updates that you need to download and install. This process seems pretty easy, but don’t blow it off.


