Want Plex to see movies or TV shows you just added? Want to manually update the database or set it to update itself? Media not showing up in Plex when it should be? These are all common issues facing new Plex users but can be quickly overcome with a refresh or rescan. Here is how to force a refresh in Plex and generally manage your media.
The Plex Media Server uses a database to manage all your media. Even if you add correctly formatted files into your source folder, Plex won’t see them until you update the database. If you have not formatted your movies, music and TV shows correctly, Plex will not always see them whether you rescan or not.
In Plex-speak, refreshing is about metadata. If you want to add new media, that is scanning. The two terms are interchangeable but if you’re new to Plex, it helps to understand the two terms. Metadata is all that useful stuff from IMDB or wherever that tells you about each show. A scan collects the media itself and populates it in your library.
Attention All Kodi & Plex Users: Here’s a few facts for you about the potential dangers of streaming online while unprotected:
- Your ISP has a direct window into everything you view and stream on the web
- Your ISP is now LEGALLY allowed to sell that information about what you view
- Most ISPs don’t want to deal with lawsuits directly, so oftentimes they will pass along your viewing information to protect themselves, further compromising your privacy.
The only way to protect your viewing and identity in the 3 above scenarios is by using a VPN. By streaming content directly through your ISP, you potentially expose everything you view on the internet to both them, as well as those who’s interest they might be protecting. A VPN protects that. Follow these 2 links and you’ll be streaming securely in no time:
- ExpressVPN is our VPN of choice. They are extremely fast and their security is top notch. Get 3 months free for a limited time
- Learn How To Install a VPN on Your Fire TV Stick
First I’ll tackle the refresh and them I’ll cover how to make sure you format your media correctly so you stand the best chance of Plex picking it up and collecting the metadata for it.
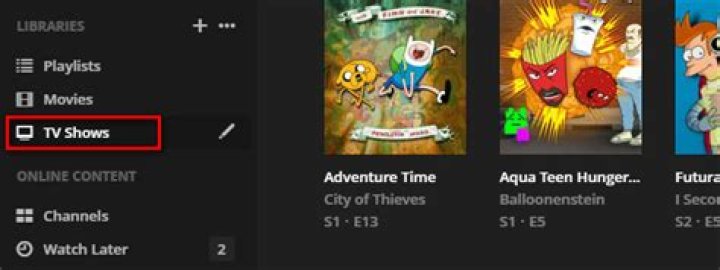
Force a refresh in Plex
Forcing a refresh in Plex tells the Plex Media Server to scan for changes in your libraries so it can collect metadata on it all. This is not about the media itself, that’s a scan which we cover in a minute. This is about the images next to your movie or TV show and the description that comes with it.
To refresh all metadata in Plex:
- Go to the main screen where your libraries are listed on the left.
- Select the ‘…’ icon in the top of the left pane.
- Select Refresh All Metadata.
You can also refresh metadata for individual media within Plex:
- Enter the item details from your Plex library.
- Select the ‘…’ icon in the top right of the screen.
- Select Refresh Metadata.
You can do the same with entire TV series, album or artist using the same method. Refreshing will cause Plex to check all media contained within the library, series or individual item and refresh the metadata for it.
Force a scan in Plex
If a refresh is for metadata then a scan is for media. If you add a new movie or TV series to Plex, you would perform a scan to have the Plex Media Server add it to the database. You can perform a manual scan or have it automatically detect when you add new media.
Manual scan in Plex:
- Go to the main screen where your libraries are listed on the left.
- Select the ‘…’ icon in the top of the left pane.
- Select Scan Library Files.
This scans your entire content library for changes and may take a minute or two depending how much content you have.
Automatically scan for changes in Plex:
- Navigate to the Settings menu in Plex.
- Select the Server tab and Library on the left.
- Check the box next to Update my library automatically.
You have a third option should you want it. Scan periodically. You can set this to scan at set times between 15 minutes and 24 hours.
- Navigate to the Settings menu in Plex.
- Select the Server tab and Library on the left.
- Check the box next to Update my library periodically.
- Set a time underneath.
Content not showing up in Plex
You perform these scans and refresh steps in Plex to have media and its metadata populate so you can watch your content. But what if you have added content to the correct library folder on your computer, performed a scan and it doesn’t show up? Most often this is down to incorrect formatting.
Plex is very picky about naming conventions. While it can work with media that doesn’t conform to these conventions, it isn’t guaranteed. If media isn’t showing up this is usually the first thing to check. This page on the Plex website describes exactly how to name your movies, TV shows, music and anything else you want to add to your server. Follow this formatting exactly and your media should always show up.
Scans and refreshes are considered different things in Plex and it is useful to know which is which. Refreshes are for metadata and scans are for media. Forcing a refresh will update the movie image and description while a scan will update the movies itself. Once you master this, the rest is a breeze!
This tutorial will show you how to change the artwork/images used for the music, movies and TV shows stored in your Plex media server.
- For the sake of this guide we’re going to edit the images used in the Music category of Plex. The steps are exactly the same if you’re changing the images used for TV Shows and Movies. So to get started, select your Music library in Plex.
Make sure to sort your collection (for now) by Artists – you can make this change from the navigation box at the top of your list.
Now we’ll change the image used for a specific band, in this case Gov’t Mule (because the image Plex uses by default has a band member that’s no longer in the band). To do so, hover your cursor over the Artist until a ‘pencil’ (paintbrush?) icon appears in the bottom left corner of the artwork (see screenshot below) and then select it.
The image used for the Band/Artist is the called the Poster – so select that item from the list of options.
Select choose an image
Navigate to and then select the image file that you’d rather use.
After the upload has completed, you’ll be notified.
Once that’s done, click the SAVE CHANGES button.
Finally – check out the new artwork!
You can also edit what’s called the background image – the one used by Plex as a wallpaper on the information pages for a specific Band/Artist, TV Show or Movie (see screenshot below).
Just repeat the first 3 steps of this guide, and this time select Background instead of Poster
Once again repeat the steps to select an alternate image.
If this article helped you, I’d be grateful if you could share it on your preferred social network – it helps me a lot. If you’re feeling particularly generous, you could buy me a coffee and I’d be super grateful 🙂
Heather Senior Editor at TechJunkie. I have a passion for writing all things tech. When I’m not writing, you can find me geeking out, gaming and spending time with my family. Follow me on Twitter @BloomerHeather. Read more August 10, 2018
Plex is a powerful media center server that lets you set up a personalized media library online and then access it from all of your devices – PCs, tablets, laptops, smartphones, or whatever you have. It’s like having your own cloud-based media channel that only you can access. Plex comes in both free and paid versions (there are a number of features of the paid version, but the main one is that the paid version of the mobile apps lets you watch full-length videos, while the free mobile apps will only let you watch video for one minute).
Once you’ve set up your Plex account, you’re assigned a virtual server on Plex’s system. Then, you can start uploading all your movies, music, photos and more, which you can then view wherever you’ve got Plex Installed – just stream your content from your virtual server.
As with any streaming service, device or application, sometimes things may become lagged or seem sluggish during playback. This is often caused by having a large amount of data in the application cache. The cache is where Plex stores files locally to speed up your access to them. For example, if you’re watching a show, Plex might download the entire show to your cache directory as you’re watching, and then actually play the show from your local device’s cache. However, if the cache becomes full of many files and file fragments, it can slow down playback because the Plex app has to look through all those cache files every time you ask it to do something. Periodically clearing out your cache eliminates this problem and can improve the performance of your Plex client apps.
In this article, I’ll show you how to clear the cache on Plex. Note that you have a separate cache for each device you use. You don’t necessarily need to clear the cache on every device every time – just on the device you want to use.
Locating Caches on Plex
The location of the cache directory varies depending on the operating system on the device where you’ve got Plex installed.
Windows
On a Windows PC, your cache is located in your user directory. Open an Explorer window and navigate to “%LOCALAPPDATA%Plex Media ServerPlug-in SupportCaches”
In the Caches directory there will be subdirectories for the various shows and movies you’ve been watching. You can delete the individual directories or all of them at once, it’s entirely up to you.
MacOS
If you’re using a Mac for your Plex installation then in your Macs finder do the following.
- Click on Go then navigate to Go to Folder and select it. В
- Next enter
/Library/Application Support/Plex Media Server/Plug-in Support/Caches in the Go to the Folder text entry box. Then, click the Go button. В В В В В В В В В В В В В В В В В В В В В В В В В В В В В В В В В В В В В В В В В В В В В В В
Linux
There are many different Linux variations.В However, the location of a Plex server on Linux is usually something like this:
В·В В В В В $PLEX_HOME/Library/Application Support/Plex Media Server/Plug-in Support/Caches
As with Windows and Mac, delete the subdirectories that you’d like cleared.
Android
Plex also allows you to install its application on your Android smartphone or tablet. If you’d like to clear the cache of the app on your phone or tablet, it’s very easy to get that accomplished. The exact screens and command names may vary slightly depending on your version of Android, but in general:
- Swipe down on the top of your Android device and tap on settings, the gear-shaped icon. В В В В В В В В В В В В В
- Next, under phone tap on Apps or Applications. В В В В В В В В В В В В В В В В В В В В В В В В В В В В В В В В В В В В В В В В В В В В В В В В В В В В В В В В В В В В В В В
- Then select application manager. В В В В В В В В В В В В В В В В В В В В В В В В В В В В В В В В В В В В В В В В В В В В В В В В В В В В В В В В В В В В В В
- Select All Apps in the dropdown. Scroll down until you see the Plex app listed. В В В В В В В В В В В В В В В В В В В В В
- Tap on it and choose storage. В
- Finally, tap the clear cache button. That’s it – your Plex app cache is now clear.В
You may now carry on and continue viewing or listening to your media.
Conclusion
When you start to see sluggish behavior on your Plex server, one easy fix for the problem is to clean out its cached data.В Now you know how to do that for Windows, Mac or Linux operating systems and Android. All you need to do is navigate to the plug-ins cache location on your computer and delete the appropriate directories. On Android head to the Applications section, find the Plex app, and tap the clear cache button.
Following last week’s Siri proxy hack, developers have been able to control a Viper-enabled car and Plex Media Center through voice commands.
Share this story
- Share this on Facebook
- Share this on Twitter
Share All sharing options for: Siri hacks control your car and media center
We covered the Siri proxy hack last week, which allows developers to catch custom phrases and act on them, expanding the functionality of Apple’s voice-controlled personal assistant. We’d anticipated this work being employed by other developers, and a few exciting uses for the hack have already started to appear.
First up, Brandon Fiquett has written code that allows him to start, stop, open the trunk, and activate the alarm in his Acura using the kind of voice controls we’ve come to expect from Siri. The hack works alongside his Viper car automation and security system, with Siri communicating with his proxy server, which forwards commands on to the cellular-connected car.
Second, an Icelandic developer named Hjalti Jakobsson has created a plugin for Plex, allowing you to ask for “Seinfeld season five, episode one” — and returning either the episode title or an apology if it can’t find the show you’re after. The system is impressively fast, with no lag between sending the command and playback beginning.
While the source code for the car control is available for download now, the Plex controller still requires some work before it’s ready for primetime. You’ll still need to set up your own proxy server though, and we know that for some of you the thought of adding a modified root certificate to your iPhone is out of the question.
Plex makes media manageable and does an excellent job of curating content from multiple sources, organizing it, streaming it to a range of devices, making it available for you to enjoy at home. At TechJunkie, we write a lot about Plex as it continues to be an outstanding system for organizing your media library. Plex is notable as a platform with an intuitive User Interface (UI), delivering nearly seamless performance and streaming. That said, Plex isn’t without its quirks and one of them is Plex’s naming conventions for TV shows and movies. Plex uses the thetvdb.com as the bases for naming shows. And if the media doesn’t appear there, or is formatted differently, it won’t appear properly in Plex. Luckily, there’s a workaround.
When uploading media to your Plex Media Server, you need to use a specific naming convention to enable the system to categorize and identify the media correctly. TV shows, movies, and music should always have their own folders and none should appear in the other’s folder to avoid confusion. When you’ve had your Plex for a while the mislabeling and filing really starts to add up to some confusion and more time than you’d likely want to spend searching for shows and movies.
Media should be uploaded with the correct folder and filename otherwise Plex may have trouble identifying it. If the filename doesn’t follow the convention, rename it using the appropriate method for your platform. For example, right-click the file and select Rename in Windows or select the file and hit Return in MacOS and type in the new name.
Attention All Kodi & Plex Users: Here’s a few facts for you about the potential dangers of streaming online while unprotected:
- Your ISP has a direct window into everything you view and stream on the web
- Your ISP is now LEGALLY allowed to sell that information about what you view
- Most ISPs don’t want to deal with lawsuits directly, so oftentimes they will pass along your viewing information to protect themselves, further compromising your privacy.
The only way to protect your viewing and identity in the 3 above scenarios is by using a VPN. By streaming content directly through your ISP, you potentially expose everything you view on the internet to both them, as well as those who’s interest they might be protecting. A VPN protects that. Follow these 2 links and you’ll be streaming securely in no time:
- ExpressVPN is our VPN of choice. They are extremely fast and their security is top notch. Get 3 months free for a limited time
- Learn How To Install a VPN on Your Fire TV Stick
Plex media naming conventions
There is a specific format that you must use to arrange your media in order to have Plex identify it. This format is recommended by Plex itself to ensure the link to TVDB and their metadata crawling app can correctly identify and label media.
According to Plex, the correct naming convention goes like this:
However, that isn’t the whole story, especially when it comes to TV shows. If you have content that runs to several episodes over multiple seasons, you need to organize your Plex to avoid confusion and disorganization.
A fuller picture would look like this:
You can add TV episode name and release date if you like and the S01E01 is optional but can help TVDB correctly identify each episode you upload. If the show or season you are trying to name is similar to another, adding the season date helps TVDB load the correct details. Otherwise, Plex can become quite confused.
According to Plex naming convention guidelines, an example TV show listing would look like this (using Grey’s Anatomy as our example):
If you are trying to name TV shows in Plex that are identified by date, you need to use the correct format. These are usually for podcasts, news reports or where an episode of something doesn’t have a distinct name.
Again, using a Plex example:
Every episode is called The Colbert Report so identifying it by date makes your finding it and Plex’s job of identifying it much easier. You can use dashes, periods or spaces to separate the date.
- Dashes (2010-01-20)
- Periods (2010.01.20)
- Spaces (2010 01 20)
All will work within Plex and should be correctly identified in TVDB.
Music and movie naming in Plex
Naming movies and music uses the same conventions above. Movies will usually just follow the Movie/Title convention while music can be ordered by album, artist and/or track.
The Plex example shows:
The same approach applies to music as TV shows. Separate albums and add tracks if they are separate. Many MP3 will include metadata so you won’t have to do anything, others do not. By using the recommended format, Plex will look up the needed information then identify the content accurately, helping you a maintain a more organized, useable Plex for music, movies, TV shows, and other content. While Plex Media Server is easy to use, it takes a little care to set it up properly. Once you get used to the naming convention and double checking it when uploading media it will quickly become second nature. The ease of use once loaded onto Plex makes that extra effort well worthwhile too!
If you have a Plex, you might find this article on how to install plugins on your Plex to be useful. Do you have any ideas for managing a Plex media center? If so, please leave a comment below!
- Google Home products
- Jellyfin
- Kodi
- Localcast
- Plex
- Bonus: Home streaming devices
Read more:
Google Home
Price: Free
Google Home is an excellent series of home devices. It sits on your countertop and plugs into your TV. It then streams whatever you want. The basic setup requires a Chromecast and your phone. However, you can build out with Google Home devices if you want to. The app keeps everything connected and shows you content on Chromecast-ready video and music apps. It’s a bit expensive to get into with the hardware. However, this is currently the best solution for a smart home style media setup and it’s the one we would recommend first if you plan on going that route. The Google Home app is free. The Chromecast and Google Home devices will cost you some money.
Jellyfin
Price: Free
Jellyfin is a newer competitor to apps like Plex. It’s a media server app that connects your phone to your home PC. Basically, you store all of your media on your computer and this app lets you access that data on your phone. This one is free, open source, and doesn’t track anything you do. That gives it a leg up on many competitors. The app supports Chromecast as well as native viewing on your Android phone. Additionally, the server isn’t difficult to setup on your home PC.
Price: Free
Kodi (formerly XBMC) is one of the few true media center apps in Google Play. It gives the entire home screen a new interface that makes it easier to access video, music, and photos. There are also plugins that you can use to find additional content. You’ll likely want to use this on a larger screen like a tablet or perhaps an Android device that is plugged into your TV via HDMI-out. It’s completely free to download and use. Additionally, it’s open source. That means there are some variants of Kodi out there by other developers that do slightly different things. You can search Google Play for Kodi to see all of the unofficial branches and variants available, such as SBMC.
LocalCast
Price: Free with in-app purchases
LocalCast is an app that was originally intended as a streaming app for Chromecasts. It also supports streaming to any DLNA devices that are running on your network. It can stream almost any file, but whether or not it works on your Chromecast depends on its compatibility. Additional features include SMB support, the ability to cast PDFs onto the screen, and some types of subtitles will work as well. It’s a bit more simple than other media center apps, but it’s not a bad way to go if you need something simple. There are both subscription and single price purchases available. Go with the one you want. BubbleUPnP is another decent app that does mostly the same kind of stuff if this one just isn’t doing it.
Price: Free / $4.99 / $4.99 per month / $149.99
Plex is one of the most popular media center apps out there. The app lets you to access your Plex server on your Android device. That means you’ll have to install the Plex server on your own computer so that you can stream from it. Don’t worry, it’s not difficult. You can also subscribe to Plex Pass for additional streaming features. It’s a rock solid app that includes modern features like Android TV support. It even supports VR headsets via a separate app. It’s pretty decent and a good place to start. You will have to either subscribe to Plex Pass or make a one-time purchase to unlock all the features. Thankfully, you have some options there, including both single purchases or recurring subscriptions.
Various streaming services
Price: Free apps / Hardware costs money
Media center apps are a bit of a dying art. These days, more and more media center devices are coming out. That includes Roku, Amazon streaming sticks, and the aforementioned Google streaming solutions. That also includes Android TV, WebOS (on LG TVs), Tizen (on Samsung TVs), and others. They all usually have the same core streaming services along with native apps to play local files via a flash drive. Your best bet is to find something like this and upgrade over time. It’s worth noting that Kodi is compatible with most of these types of devices as well.
Read more:
If we missed any of the best media center apps for Android, tell us about them in the comments! You can also click here to check out our latest Android app and game lists!
Plex is a fork of the Open Source Kodi (previously XBMC) project from 2008, the Plex Media Server has evolved into what amounts to a free, personal Netflix + Spotify that lets you stream home content to devices or browsers with an optional subscription model for added features. Here’s how to use your own self-signed SSL certificates to encrypt connection streams.
Getting Started
I am going to assume you have Plex Media Server already setup, if not there are plenty of other guides to do this. We will focus on creating, installing and using your own self-signed SSL certificates to encrypt connection streams to the outside world. This is aimed for a CentOS7/RHEL7 installation, substitute appropriately for other Linux distributions.
Install the Requirements
We’re going to be using the openssl commands and a Python script to create our certificates.
Create the SSL certificates
We’re going to do everything else as the plex user inside their home directory.
This will prompt you for a passphrase, enter something here and remember it.
Create the CSR
Next you’ll create the certificate signing request and be prompted with some questions. You can enter any value you want here, don’t overthink it. The only important thing that must match is the Common Name which should be valid FQDN / hostname of your home machine where any external clients will connect. There are plenty of free services that provide dynamic DNS for this if you don’t have the ability to add an A record somewhere.
Strip Out Passphrase
Now we’re going to strip the passphrase out of the keyfile, it will prompt you one more time for the passphrase.
Create the Certificate
Create the PKCS12 Certificate
Plex requires a pkcs12 certificate to be generated, but we’re going to use a python script for that. You first need your ProcessedMachineIdentifier number from your Plex installation, thanks to the Reddit post that cleared this up.
Obtain your PMI Number
Obtain the long 30-35 character alphanumeric string after ProcessedMachineIdentifier= in the following file:
Let’s assume mine is ProcessedMachineIdentifier=”547bzw4423296e0ba072364f11c84kj3fae632ld5” for this example.
Bring it Home
Now you’ll snag the following Python tool, it will create your pkcs12 certificate as well as generate a long hash that you’ll need for Plex as the “private key” (this is confusing as you’d normally think it refers to your actual private key – not so.
The syntax is plex.cert plex.key ProcessedMachineIdentifier
If all is well you’ll see a long hash as the return, save this as you’ll need this later. It will also generate a certificate.p12 file. The hash is a decryption passphrase for the PKCS #12 file.
You should see something like this (save it).
At this point you should have the following items ready – certificate.p12 and the long hash (passphrase) above. Let’s move on to installing this in Plex.
Installing Certificate in Plex
Login to Plex Media Server and go to Settings -> Server -> Network and place the above info like below – the path to the certificate.p12 and the really long hash (passphrase) that was generated earlier. You will also want to put the Common Name you entered during SSL certificate creation here in the custom certificate domain area.
NOTE: Be sure that the permissions are correct on the certificates, they should be owned by the plex user. While you’re there set secure connections to required, at this stage in Plex development all clients should work fine with it.
Lastly make sure you enter the full URL for your home server under Custom Server Access URLs.
Save your settings and restart Plex Media Server. You can also take a look at the logs to make sure everything is humming along – mine were located in /var/lib/plexmediaserver/Library/Application\ Support/Plex\ Media\ Server/Logs/Plex\ Media\ Server.log
NOTE: Router and DNS Rebinding
Plex does some interesting trickery with DNS rebinding to make their wildcard plex.tv certificates work along with your own self-signed certificates for connection streams once authentication is finished. If you’re using a popular Open Source router firmware like Tomato you’ll want to apply an option in DNSMASQ to allow for this.
I am running an ASUS RT-N66U on Tomato Shibby, so I use the following settings in Advanced -> DNS/DHCP DNSMASQ configuration (may need to reboot router to take effect).
Verification
You should now be able to refresh your Plex server URL and be prompted to accept a self-signed certificate. Click view and you should see the details you entered earlier when you created it. Happy Plexing!
Add missing album art or customize WMP music with your own images
- Tweet
- Share
What to Know
- In Window Media Player, click Library, expand the Library section, and click the Album category. Find an album missing art.
- Option 1: Search online for the real album art and copy it. Then, in WMP, right-click the album art area and select Paste Album Art.
- Option 2: Add custom art. Paste any image you like with the JPEG, BMP, PNG, GIF, or TIFF format.
This article explains how to add album artwork, including custom images, in Windows Media Player if albums in your music library are missing cover art.
How to Add Art for Album Covers
Click the Library menu tab at the top of Window Media Player 11 main screen.
In the left panel, expand the Library section to view the contents.
Click on the Album category to see a list of albums in your library.
Browse the albums until you see one with missing album art or with art you want to replace.
Go to the internet and locate the missing album art by typing the name of the album and the artist into a search field. If you already have the image you want or made a custom image of your own, locate the image on your computer.
Copy the missing album art from the internet. To do that, locate the album art and then right-click on the album art and select Copy Image.
Go back to Windows Media Player > Library.
Right-click the current album art area and select Paste Album Art from the drop-down menu to paste the new album art into position.
Verify that the correct image pasted into the box.
Album Art Requirements
To use an image file as new album art, you need an image in a format that’s compatible with Windows Media Player. The format can be JPEG, BMP, PNG, GIF, or TIFF.
Plex has incredible support for an extensive library of movies, music, and TV shows. It allows you to stream content directly onto your TVs from your library located on a standalone server, personal computer acting as a server.
The media player can do much more than streaming content for you. It has plugins that can enhance your viewing experience altogether.
Best Plex Plugins you should install
#1 FilmOn
You can watch the UK, European TV Networks for free from anywhere around the world. It also has 600 free channels, while others are behind a paywall.
There are a plethora of documentaries, comedy shows and general TV channels to watch on FilmOn.
#2 Webtools
Webtools help you organize Plex media content and the server with ease. It is a collection of utility tools for controlling several aspects of Plex.
As a part of the tools pack, you get subtitles management, logging too, and other management modules amongst other tools.
You can manage your Plex server easily with the tools offered by Webtools. Moreover, you can host a few apps and channels as well with the plugin.
#3 Tautulli
Monitoring your server is essential for the smooth running of all things in the play. Tautulli is one of the best Plex plugins for you, that runs alongside your server and monitors, tracks the server activity.
Users can also access statistics such as what has been watched, who watched it, when and where it has been watched.
Additionally, you can track/delete synced content on your server. Detailed media information for all videos, images can be viewed as well.
Moreover, users can set trigger/script notifications for events happening on your server. It would help manage traffic, load and more on the server.
#4 SubZero
We often watch movies in foreign languages for which subtitles are a must. SubZero is one of the best plex plugins for subtitles.
There is an-built subtitle manager in Plex, which certainly lacks new features and updates. They have been instances where it failed to display subtitles at all.
Subzero searches from 10 different leading subtitles sites(with their APIs) for providing the best matching subtitles for the TV shows, movies you are watching.
Additionally, it keeps on searching for subtitles in the background for the content on your server. You will have preloaded subtitles and wouldn’t have to wait for them to load.
#5 Plex-Sync
Another useful Plex plugin is Plex-Sync, which is a must-have for Plex servers. It syncs content across different servers which means that it will synchronize the watch time, watch/seen status across different Plex servers for various TV shows, movies and other media.
Plex-sync relies on IDs of different media libraries to sync watch status across the Plex servers of your choice with the help of CLI(Command Line Interface).
However, if you want to avoid the hassle of manually syncing content on other Plex servers, you can use Cron.
#6 Organizr
You may be running several Plex servers at once. It is not easy to manage and track them simultaneously. Organizr helps you to set up “tabs” with individual servers where they all can be managed separately without any hassle.
You can add multiple users for the management of the Plex servers from the settings. Themes can be applied to the interface if the default skin feels monotonous.
Additionally, you can access manage your server from mobile as well, from anywhere in the world.
#7 Plex Export
Next on the list of the best plex plugins is Plex Export. It allows you to share the list of content on your server in the form an HTML page.
The HTML page can be shared with anyone, without sharing access to your Plex server.
Furthermore, the media display page shows an overview of all the media in each of the library sections accompanied by thumbnails. Filter content by genres, actors, etc. and get details on an episode by clicking on the thumbnails.
Plex Export requires PHP to be installed on your server.
Moreover, you will need a token for your system if Plex is running on home mode. Learn more on the token from here.
#8 Transmogrify
There are thousands of movies worth watching, but it isn’t easy to decide on your own. Take the help of Transmogrify to view RottenTomatoes and IMDb page, ratings, and reviews of the movie, TV shows, and documentary that is present on the server.
You can also add trailers to the movies that you are about to watch, which are fetched from YouTube. Furthermore, letterboxd pages can be viewed as well for movies.
In any case when you are on the fence about which movie, show to watch, use the random movie/tv show picker and let the plugin choose for you.
Similar to Prime Videos and Netflix, there is an actor profile for the cast members of movies, shows as well in features. It can be enabled as per user liking.
There is a Chrome extension of Transmogrify for Plex to use on web client, server
How to Sideload/Install Plex Plugins?
Plex shut down the plugin’s support last year but luckily you can still sideload them manually. here’s how:
- First of all, download the plugin file/folder. If it is in compressed form like “.zip”, then extract it.
- Look for the “.bundle” file in the folder.
- Copy the .bundle file into the Plugins folder of the Plex media server.
Remember that installing some plex plugins is a complex task with a different approach that may not work with a mere copy-paste of the files.
Over to You
Demand for Smart TVs has soared in the recent period. OTTs and the decreasing quality of Cable content are amongst the key reasons behind it.
Plex is a fantastic way to watch your favourite movies, TV shows without subscribing for expensive cable. Further, use some of the best Plex plugins to make it a more wholesome experience.


