Today’s Best Tech Deals
Picked by PCWorld’s Editors
Top Deals On Great Products
Picked by Techconnect’s Editors
R. Don Schneider protects his passwords by storing them in KeePass. But he also wants to access them on his Android phone.
Everyone on the Internet should use a password manager, and KeePass Password Safe is one of the best. Like all such programs, it stores your passwords in an encrypted database that’s easy to access as long as you remember the master password. But it’s also free, easy to use, and open source. (See Some password managers are safer than others for details.)
But you’re not always at your computer. You’ll inevitably want access to your password database from your smartphone, as well.
[Email your tech questions to [email protected].]
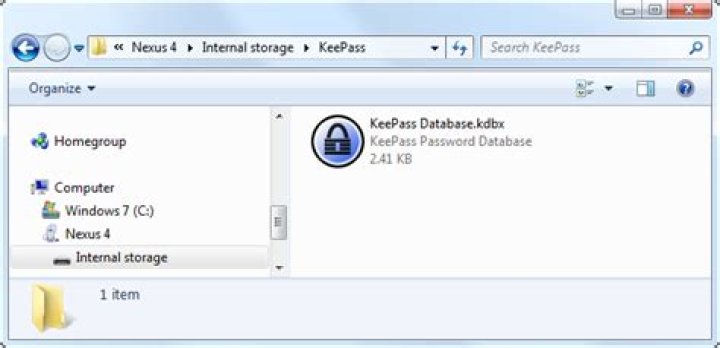
There’s no official KeePass Android app, but you’ll find several KeePass-compatible ones. I recommend Keepass2Android, largely because of its exceptional support for Dropbox, Google Drive, and other cloud storage services. With one of these services, you can add new passwords on your PC and have them appear automatically on your phone, and vice versa.
The Windows part of this sharing is extremely simple. For instance, if you use Dropbox, simply keep your database file (the one with the .kdbx extension) in your Dropbox folder.
Things are a little more complicated in Android, which is why you want Keepass2Android to help you smooth them out. The first time you launch the app, tap the Open file button. You’ll find Dropbox (and other cloud options) on the list. It’s all very simple from there. (I’m assuming that you’ve already installed and set up Dropbox on both the PC and the phone.)
But Keepass2Android has one major flaw. Copying usernames and passwords from the app and pasting them elsewhere isn’t as intuitive as it should be. Here’s what to do:
After you’ve opened Keepass2Android, typed in the master password, and gone to the item you need, tap and hold on the User Name until all or part of it is selected. If only part of the name is selected, use the selection handles to select the entire name. Then tap the Copy icon in the upper-right corner.
Go to the app where you want to paste the text–Twitter, Chrome, or whatever. Tap and hold on the appropriate field until the Paste option pops up. Tap that.
For the password, tap the eye icon near the top-right corner to make the password visible. Then follow the same directions as above.
Keepass2Android has another method for pasting user names and passwords, but it involves changing your onscreen keyboard to one that comes with the app. Unless you want to make the Keepass2Android keyboard your default, this can become a hassle.
Since I first published this in 2017 a lot has changed, so I updated and simplified this post a bit, with the focus on the software that is needed to sync a KeePass database across multiple devices and platforms.
Ensuring security of the database and secrets
When creating your keepass database, make sure you set a strong master password and increase the number of key transformation rounds to protect the database against dictionary attacks (more information here). Keep in mind that browser integration can be a security risk if your system is compromised, as an attacker could intercept communications between the KeePass HTTP server and the browser extension. Good to know: the content of the clipboard is accessible for any app that is running. Make sure the KeePass client of your choice clears the clipboard automatically!
Cloud Storage Providers
Self Hosted (Installation instructions)
Free Cloud Storage Services
macOS
Linux
iOS/iPadOS
Android
Tip: enable the app’s keyboard to fill passwords, if available
Desktop Browser extensions (not recommended)
Don’t want to manage and sync passwords yourself? I moved away from KeePass a while ago and have been a very happy Padloc user. The code is open source, clients are available for all platforms and self-hosting a Padloc server is possible – although currently this means compiling each app for your custom server.
A short tutorial showing you the basic usage of KeePass.
This short tutorial will show you how to actually use KeePass. It describes only the basic usage, advanced features are covered on separate pages.
Creating a new database
The very first step is creating a new password database. KeePass will store all your passwords in such a database. To create one, click ‘File’ → ‘New. ‘ in the main menu or click the leftmost toolbar button. A window will appear, which prompts you for a master password and/or key file. The database will be encrypted with the password you enter here. The password you enter here will be the only password you’ll ever have to remember from on now. It should be long and built up of mixed characters. Keep in mind that when someone gets your database file and guesses the password, he could access all passwords you stored in the database.
For this tutorial, we’ll just use a password, not a key file. Click into the password edit field and enter a password of your choice. The password edit control isn’t limited in length, so feel free to even enter a whole sentence (just keep in mind that you’ll need to remember it).
Now you see the main window. On the left, you see the entry groups. On the right, you see the actual password entries. The password entries are grouped together into the password groups you see on the left. So, depending on which group on the left you selected, it’ll show you the entries in this group in the right view. KeePass has created a few default groups for you, but you’re totally free to delete them and create your own ones.
Adding an entry
Time to store your very first password in the KeePass database! Right-click into the right password entry view and choose ‘Add Entry. ‘. A window will pop up. In this window you can now edit your entry: enter a title for it, a user name, a URL, the password, etc. If you don’t need some of the fields, just leave them empty. When you’re done, click [OK].
You’ll see your new entry in the password list on the right now.
Using entries
You got the new entry in the password list now. What can you actually do with it now? Right-click onto the entry.
You have several options now. You can for example copy the user name of the entry to the Windows clipboard. When you’ve copied it, you can post it into any other program of your choice. The same works for copying passwords.
Alternatively, you can drag&drop fields into other windows. To see an example of how this works, see this page: Drag&Dropping Fields.
KeePass can open the URL you specified. To do this, just click ‘URL(s)’ → ‘Open’ in the context menu. KeePass will start the default browser and open the specified URL.
Saving the database
It’s time to save your database. Click onto the ‘Save’ toolbar button (which has a disk icon).
That’s it! You’ve made the first steps in using KeePass! You can now have a look at the more advanced features of KeePass.
Passwords and Key Files: In the tutorial above we’ve encrypted the database using a password. But KeePass also supports key files, i.e. you can lock your database using a file (which you can carry around on your USB stick for example). It even supports combining those two methods for maximum security.
TAN Entries: TAN entries are one-time passwords. Many banks are using TANs for better security. KeePass supports TAN entries, by making them expire automatically when using them.
Auto-Type: The auto-typing functionality is a very powerful feature. In the tutorial above you’ve copied the user name and password of an entry to the clipboard. Wouldn’t it be nice if KeePass would just type those strings for you into other windows? Wouldn’t it be nice if you could define whole sequences of keypresses that KeePass should type for you? That’s exactly what the Auto-Typing feature does: it sends simulated keypresses for you to other windows!
URL Field: The URL field supports URLs of course. In the tutorial, you’ve learned that you can enter simple URLs into this field and KeePass will open the browser window for you. But the URL field can do more! It actually supports many different protocols (not just http ) and supports executing Windows command lines through the cmd:// virtual protocol. The field also features a powerful substitution engine, replacing codes by other fields (user name, password, . ) of this entry.
Command Line Parameters: You can open .kdb(x) files by passing the file name to the KeePass executable file. But did you know that you can also send the password for the database and key file location over the command line? You can also use the command line to pre-select a key file for you.
Plugins (1.x, 2.x): KeePass features a powerful plugin architecture. If you miss some functionality, have a look at the plugins page to see if there are other people that have already written plugins for this. Many plugins exist to import/export data from/to other file formats.
Aug 2, 2017
Comment
There are many different versions of KeePass. There’s KeePassX, the original, and KeyPass2. In this tutorial, we’ll be focusing on how to install KeePass 2 on your Linux operating system.
Ubuntu
Debian
Arch Linux
Fedora
OpenSUSE
Other
KeePass 2 is pretty popular, due to it’s plugin support and the vast amount of mobile apps and browser extensions that work with it. As a result, users on pretty much any Linux distribution can get a copy of it installed. To get it working on your system, open your package manager (or software store), search for KeePass2, and install it.
Exporting Passwords
To make a KeePass2 password database, you’ll need to import passwords. For a large amount of Linux users, this means exporting the passwords saved directly inside Google Chrome/Chromium or Firefox. In this section of the tutorial, we’ll show you how to export the passwords saved inside of your browser, and save them to a file for importing into a new KeePass2 database.
Chrome/Chromium
Google Chrome has a pretty decent password management feature. Passwords are to passwords.google.com, and all of your private data is in the hands of Google. This works for most people, but if you’re looking to get away from Google, and move on to KeePass2, here’s where to start.
First, go to the address bar and enter: chrome://flags/
This opens up the experimental browser flags page. From here, you’ll need to look for the password Import/Export feature. Scroll through the long list. Alternatively, press Ctrl + F and type “ Password import and export “.
Click the enable button to turn the Import/Export feature in the browser on.
Next, find “Enable Material Design settings” and set it to “disabled”.
After turning the feature off, Chrome will prompt you to re-launch the browser. Click the re-launch button.
When the browser re-opens, open settings and type chrome://settings/passwords?search=passwords in the address bar. Click the export button and save the passwords database as a CSV file on your Linux PC.
Firefox
Unlike Chrome, Firefox doesn’t have any ability — at least natively — to export passwords. To accomplish this task, you’ll first need to install an addon. Once installed, go to the Firefox addons area, find “Password Exporter” and click the preference button.
This brings up the Password Exporter main window. From here, it’s possible to export all of your passwords. Click “Export Passwords”. This grabs all saved passwords and puts them in an XML file.
Note: do you save all of your password data inside of LastPass? Follow the LastPass official instructions to export your passwords.
Importing Passwords
Before importing passwords, you’ll need to make a new KeePass database. Press Ctrl + N to create (and save) a new database.
After making a new database, you’ll need to set up a master password. Go to this website and generate a secure password. Then, take the password and enter it into the master password window.
After entering a secure master password, check the box next to “Key file”, and then click the create button to make a new key file. This is important, as it adds a bit of extra security. When both the key and master are set up, press the OK button to get started.
Import your password database by clicking File > Import.
Chrome/Chromium:
To import the Chrome password database, click on “generic CSV” database.
Firefox:
To import the Firefox Password Exporter database, click on Password Exporter XML.
Syncing Passwords
If you have multiple computers, the best way to sync the password database is to install Dropbox. Place the password database and key inside your Dropbox folder and point KeePass to it. This way, each and every change made to the password database (adding and removing new passwords, etc) will instantly sync across computers. This effectively makes your local password database “cloud-based”. If you’re not comfortable with Dropbox, consider something like NextCloud.
Using KeePass In Browsers
The KeePass setup works fine on its own, but if you want to tightly integrate your local database with your browser, here’s how to do it. First, enter the KeePass directory:
Note: Ubuntu and etc use the first one, and Arch Linux users use the second one. Try both locations to be safe.
Inside the KeePass2 location, make a plugins folder, and download the HTTP plugin.
Then, change the permissions of the plugin so that the program can correctly access it.
From here, install a browser extension. There are many different ones for Chrome and Firefox too. That being said, the most effortless one out there is probably KeePassHelper. It makes entering passwords an effortless process.
Get KeePassHelper for Firefox or Chrome/Chromium. When the add-on installs, it’ll detect the unlocked password database and automatically fill out login info for you!
Conclusion
With password managers it becomes much easier to keep track of complicated passwords. That said, most modern password managers shouldn’t be trusted. The reason? You should never trust anyone with your passwords but yourself. With KeyPass, everything is secure, and only you can unlock it. Sure, other companies might claim that they don’t look at your passwords, or sell your usage data, but we’ll never know the truth. That’s why it is probably best to roll your own solution!
1 Comment
Thank you – very helpful! I would love to use the HTTP plugin for Keepass. However, trying what you suggest leads to an error message; that file ‘KeePassHttp.plgx’ is not compatible with the current version of Keepass2 (version 2.31)
Leave a Reply Cancel reply
This site uses Akismet to reduce spam. Learn how your comment data is processed.
Introduction: Setup of Google Sync Plugin for KeePass V.2.x
Q: Why a password manager ?
A: Look at the upper image, if you got not a passwords like dKeDjupfS22ykVSyzAmo and you can memorize them for each site you use then you are a easy target for some script kid that dreams to be a hacker.
Q: Why KeePass and not RoboForm or RoboForm2Go or software XYZ?
A:It’s FREE and the supported operating systems: Windows 98 / 98SE / ME / 2000 / XP / 2003 / Vista / 7 / 8, each 32-bit and 64-bit, Mono (Linux, Mac OS X, BSD, . ). Ports of it on: PocketPC & Smart Devices, Windows Phone, Android, iPhone / iPad, Mac OS X, BlackBerry (including 10), J2ME / mobile phones (old ones), JavaScript (browsers, runs on a webserver), Palm OS. That means it runs virtually on anything.
I’m using Windows 7 and 8, Windows XP, Ubuntu Linux and Android and this software supports all of them and has even plugins support.
Q: OK, why do I need your guide and not the one provided by the plugin developer ?
A: First the official tutorial that has some steps missing and is sadly not up to date with the new features of Google’s API Console. Meaning you do like it says and you wont be able to sync with Google Drive, getting some strange looking errors.
See the video for the same tutorial or just see my youtube posted one:
Attachments
Step 1: Step 1 : Official Guide
This plugin requires some preliminary setup from Google
Log into to generate a Client Id and Client Secret.
Edit KeePass.config.xml and add Custom entries from Sample-KeePass.config.xml, included in the zip file
EnableAutoSync: synchronize automatically on save (optional)
GoogleSyncClientID: generated from Google API (required)
GoogleSyncClientSecret: generated from Google API (required)
GoogleSyncKeePassUID: UUID of your Google account KeePass entry (required).
(Create a new KeePass entry for a Google account if you do not already have it. Then right click on the entry > Edit/View Entry > Properties tab. Copy the UUID in the configuration file.)
GoogleSyncShowAuthenticationForm: Set this to true if you want to see the Google Authentication form – might be needed for Two factor authentication (optional).
Step 2: Step 2 : Create the ClientID and Secret the Right Way
1. Go to Credentials from the left menu and there choose Create new Client ID the OAuth 2.0 then choose Installed application and INSTALLED APPLICATION TYPE Outher then hit Create Client ID. See the first image.
2. Configure it like in the second image and then generate it, then copy the
CLIENT ID: xxxxxxxxxxxx-yyyyyyyyyyyyyyyyyyyyyyyyyyyyyyy.apps.googleusercontent.com
(yes this is the new format with xxx and yyy not like the old format with just xxx but it still works)
copy the CLIENT SECRET: zzzzzzzzzzzzzzzzzzzzzzzz
put them like sayed in the KeePass.config.xml (see the Sample-KeePass.config.xml for details).
3. Go to Consent screen and there choose the EMAIL ADDRESS and input a PRODUCT NAME (it can be anyting, i just put KeePass Google Sync) the rest let it like it is and hit Save buton on the lower part of the page. (THIS FIXES THE invalid_id ERROR). See the last image.
Step 3: Step 3 : Enable the Correct APIs
Go to APIs and enable the folowing ones: (THIS FIXES THE invalid_client ERROR AND Google.Apis.Requests.RequestError . ERROR)
• Drive API
• Drive SDK
(Click on the OFF buton on the right of the name and it will switch to on mode.)
With the last step you successfully configured the plugin and your google APIs to work with the plugin and now.
PS only 10.000.000 requests/day and the plugin is useing 2 for each of its options (sync, upload, download), that will let you with just 5.000.000 operations each day, no more that 57 operations/second for 24 hours.
Be the First to Share
Did you make this project? Share it with us!
Get more out of your password manager by following these best practices.
Subscribe now
Get the highlights in your inbox every week.
Our increasingly interconnected digital world makes security an essential and common discussion topic. We hear about data breaches with alarming regularity and are often on our own to make informed decisions about how to use technology securely. Although security is a deep and nuanced topic, there are some easy daily habits you can keep to reduce your attack surface.
Securing passwords and account information is something that affects anyone today. Technologies like OAuth help make our lives simpler by reducing the number of accounts we need to create, but we are still left with a staggering number of places where we need new, unique information to keep our records secure. An easy way to deal with the increased mental load of organizing all this sensitive information is to use a password manager like KeePassX.
In this article, I will explain the importance of keeping your password information secure and offer suggestions for getting the most out of KeePassX. For an introduction to KeePassX and its features, I highly recommend Ricardo Frydman’s article “Managing passwords in Linux with KeePassX.”
Why are unique passwords important?
Using a different password for each account is the first step in ensuring that your accounts are not vulnerable to shared information leaks. Generating new credentials for every account is time-consuming, and it is extremely common for people to fall into the trap of using the same password on several accounts. The main problem with reusing passwords is that you increase the number of accounts an attacker could access if one of them experiences a credential breach.
It may seem like a burden to create new credentials for each account, but the few minutes you spend creating and recording this information will pay for itself many times over in the event of a data breach. This is where password management tools like KeePassX are invaluable for providing convenience and reliability in securing your logins.
3 tips for getting the most out of KeePassX
I have been using KeePassX to manage my password information for many years, and it has become a primary resource in my digital toolbox. Overall, it’s fairly simple to use, but there are a few best practices I’ve learned that I think are worth highlighting.
- Add the direct login URL for each account entry. KeePassX has a very convenient shortcut to open the URL listed with an entry. (It’s Control+Shift+U on Linux.) When creating a new account entry for a website, I spend some time to locate the site’s direct login URL. Although most websites have a login widget in their navigation toolbars, they also usually have direct pages for login forms. By putting this URL into the URL field on the account entry setup form, I can use the shortcut to directly open the login page in my browser.
keepassx-tip1.png
- Use the Notes field to record extra security information. In addition to passwords, most websites will ask several questions to create additional authentication factors for an account. I use the Notes sections in my account entries to record these additional factors.
keepassx-tip2.png
Turn on automatic database locking. In the Application Settings under the Tools menu, there is an option to lock the database after a period of inactivity. Enabling this option is a good common-sense measure, similar to enabling a password-protected screen lock, that will help ensure your password database is not left open and unprotected if someone else gains access to your computer.
keepassx_application-settings.png
Food for thought
Protecting your accounts with better password practices and daily habits is just the beginning. Once you start using a password manager, you need to consider issues like protecting the password database file and ensuring you don’t forget or lose the master credentials.
The cloud-native world of disconnected devices and edge computing makes having a central password store essential. The practices and methodologies you adopt will help minimize your risk while you explore and work in the digital world.
- The defensive coding guide
- Webinar: Automating system security and compliance with a standard operating system
- 10 layers of Linux container security
- SELinux coloring book
- More security articles
Be aware of retention policies when storing your database in the cloud. KeePassX’s database has an open format used by several tools on multiple platforms. Sooner or later, you will want to transfer your database to another device. As you do this, consider the medium you will use to transfer the file. The best option is to use some sort of direct transfer between devices, but this is not always convenient. Always think about where the database file might be stored as it winds its way through the information superhighway; an email may get cached on a server, an object store may move old files to a trash folder. Learn about these interactions for the platforms you are using before deciding where and how you will share your database file.
Consider the source of truth for your database while you’re making edits. After you share your database file between devices, you might need to create accounts for new services or change information for existing services while using a device. To ensure your information is always correct across all your devices, you need to make sure any edits you make on one device end up in all copies of the database file. There is no easy solution to this problem, but you might think about making all edits from a single device or storing the master copy in a location where all your devices can make edits.
Do you really need to know your passwords? This is more of a philosophical question that touches on the nature of memorable passwords, convenience, and secrecy. I hardly look at passwords as I create them for new accounts; in most cases, I don’t even click the “Show Password” checkbox. There is an idea that you can be more secure by not knowing your passwords, as it would be impossible to compel you to provide them. This may seem like a worrisome idea at first, but consider that you can recover or reset passwords for most accounts through alternate verification methods. When you consider that you might want to change your passwords on a semi-regular basis, it almost makes more sense to treat them as ephemeral information that can be regenerated or replaced.
I hope these tips and tricks have helped expand your knowledge of password management and KeePassX. You can find tools that support the KeePass database format on nearly every platform. If you are not currently using a password manager or have never tried KeePassX, I highly recommend doing so now!
- Safe Computing
- Hosting Matters
- Computer Help
- Domain Names
- Webmaster Help
- Internet Marketing
- Web Development
- WAMP & LAMP
- MS Access
- Database SQL
- Prerequisites
- Database Design (6)
- Sample Database (11)
- Basic Select (12)
- Single Row Func (16)
- Multi-table Select (13)
- Subqueries (9)
- Summarize Data (5)
- Manipulate Data (11)
- Managing Tables (3)
- Problem Solving (13)
GeeksEngine is hosted by HostGator.
Probably the three most often used features in KeePass are:
- Open URL(s)
- Copy User Name to Clipboard
- Copy Password to Clipboard
If you have saved a URL in a password entry, you can open that URL in any web browser you wish by double clicking on the URL column of that entry.
KeePass allows you to configure what web browser you’d like to use to open the URL. There are two ways to set up its URL behavior.
Method #1: open URL in your default web browser. By default, all URLs are opened in your default web browser. Below are steps on setting the Default Browser to Internet Explorer (IE) and Mozilla Firefox.
Set up Internet Explorer (IE) as your default browser.
- Open Internet Explorer.
- On the menu bar across the top, click Tools > Internet Options.
- When the Internet Options window opens up, click on the Programs tab.
- At the bottom of the window, check the box titled: Internet Explorer should check to see whether it is the default browser.
Close all Internet Explorer windows and open it again.
The following message window should open up. If you don’t see the message window opens up, close all Windows related applications on your computer, especially Windows Explorer and Office applications. Then you try opening IE again.
Set up Firefox as your default browser.
- Open Firefox.
- On the menu bar across the top, click Tools > Options.
- When the Options window opens up, click on the Main tab. It should be on the Main tab by default.
- At the bottom of the Options window, check the box titled: Always check to see if Firefox is the default browser on startup. Or click the Check Now button on the right.
After you set up your default web browser for your computer, the URL in a KeePass entry will be opened (by double click the URL) in the default web browser when there is no URL Override specified for this entry. See below on how to set up URL Override for a password entry.
Method #2: open URL in a specific web browser. For a particular password entry, you may want to open it in a specific web browser which is different to your default web browser. You can do so by adding URL Override command in the Notes field when you create or edit a password entry.
- URL Override command for Internet Explorer:
Url-Override: cmd://
URL Override command for Firefox:
Url-Override: cmd://
Url-Override: cmd://
Actuall, you can set up any browsers to use for the URL if you use the full path to the EXE file of the browser. This gives you great flexibility. See below.
- URL Override command for Internet Explorer:
Url-Override: cmd://”C:\Program Files\Internet Explorer\IEXPLORE.EXE” “
URL Override command for Firefox:
Url-Override: cmd://”C:\Program Files\Mozilla Firefox\firefox.exe” “
Url-Override: cmd://”C:\Program Files\Opera\opera.exe”
One last note. The open URL methods shown above will only open the URL but not log into the site for you. To log into a secure site automatically, use KeeForm extension. If you use KeeForm, the only web browser to be opened is Internet Explorer as KeeForm does not support other browsers at this stage.
Other Recent Articles from the Safe Computing category:
This website is hosted by HostGator.
No portion may be reproduced without my written permission. Software and hardware names mentioned on this site are registered trademarks of their respective companies. Should any right be infringed, it is totally unintentional. Drop me an email and I will promptly and gladly rectify it.
Password manager programs are a boon for users who have multiple logins at various sites and are smart enough to not use the same common password across all these different sites.
You can easily choose a very strong and complex password for that online banking site without having to remember it since the password manager will autofill the login form with the password whenever you visit the bank’s website.
Synchronize to Access Your Passwords from other Computers
One of the most popular password managers around is AI RoboForm that stores all your saved logins & passwords as .rfp files on the local hard drive encrypted using the 128-bit AES standard. In simple English, decrypting such files is considered out of the realm of possibility for all known computing facilities.
If your work involves multiple computers, you’ll be happy to know that RoboForm software offers couple of good choices for password synchronization across computers.
You can either create a free online account at roboform.com and synchronize your passwords across multiple computers using the cloud (RoboForm servers) or, if you want to stay in control of your data, you can put the RoboForm data to a separate location (like another folder on the same computer or a removable flash drive) and then synchronize these locations with other computers using tools like Dropbox, Google Drive or SkyDrive.
To get started, just install Goodsync and then from your RoboForm Options, choose the Change Sync Settings option under User Data. Enter the details of your RoboForm Online account or select a USB drive, a folder on another network-connected computer or another folder on the same computer.
In addition to the cloud, you may also save RoboForm passwords to your Amazon S3 buckets or an FTP server. At the time of writing, both modes of synchronization were not simultaneously available.
The synchronization of passwords will happen automatically when RoboForm saves a password file or when you enter the Master Password or you can manually instruct RoboForm to “Sync RoboForm Data”.
Access Saved Passwords without RoboForm
Once your logins and passwords are saved onto your RoboForm Online account, you can retrieve this information on any computer using a web browser.
If that computer has RoboForm installed, the software can automatically log you into any of the saved websites. However, if the computer doesn’t have RoboForm installed, you’ll still be able to view the login and password information of any saved website and you can then manually copy-paste the credentials into the online form without too much of a hassle.
Alternatives to RoboForm for Password Synchronization
RoboForm is officially available for Internet Explorer, Firefox, BlackBerry and Windows Mobile but it won’t work if you are using Opera or a Webkit based browser like Google Chrome or Apple’s Safari.
In that case, you may either use LastPass (available for Windows/Mac/Linux and support most browsers except Opera) or download KeePass password manager and sync password information across computers using Windows Live Mesh. Unlike LastPass or RoboForm, KeePass won’t fill forms for your automatically.
Are your passwords safe online?
Your passwords files, stored on the RoboForm Online servers, are encrypted with your Master Password as the key. RoboForm says that “since your Master Password is not stored on our servers, absolutely nobody, including Siber Systems, can access your passwords or other RoboForm data.”
And to avoid man-in-the-middle attacks, all communication between your PC and the Roboform servers takes place over Secure Sockets Layer (SSL). Using SSL, which is implemented on both your computer and the Roboform server, the data (password files) you send can be trusted to arrive privately and unaltered to the server you specify and no other.
Pros & Cons of using RoboForm
One can create more complex and difficult passwords, safe in the knowledge that they’re accessible online and from multiple locations. Automatic sync and backup ensures that your login credentials are safe incase your machine suffers a crash. And the option to sync passwords to a USB disk ensures that you can carry your passwords anywhere.
There’s however some risk involved in trusting a third party to host your passcards because, no matter how heavily encrypted a file might be, the entry point is still your Master Password.
Make sure the Master Password is as strong as you can make it – long, random and interspersed with characters, digits and symbols.
Shahrzaad M Parekh (@sparxnet) is a technology enthusiast looking for new ways to make technology work for him and not vice-versa.
It is not surprising to see that most browsers come with their own password manager to allow you to save all your login passwords. The only problem is, they are not cross-browser compatible. What you stored in your Firefox browser can’t be used in Internet Explorer or Safari. In addition, if you are out travelling and need to use an Internet cafe to check your mail (or any other sites), you won’t have access to your passwords since that is only available in your local machine. With LastPass, you won’t have to face such problems anymore.
LastPass is an online password manager that you can install as an addon in Firefox and Internet Explorer. It encrypts all your passwords with 256-bit AES encryption algorithm and synchronizes them across different browsers and devices. With LastPass, you only have to remember one master password and it will take care of the rest.
When you first run LastPass, it will prompt you to create an online account. This will be the account that they use to store all your passwords. During the registration, you will have to create a strong master password. In case you are wondering how long should your password be to considered strong, there is a password meter that shows the strength as you type in your password. Note that I have used a 42-characters long password and the password meter is still not full.
If you want to let LastPass take full control over your password management, there is also an option for you to disable the default password manager in your browser.
To enable its users to migrate their existing password account to LastPass easily, there is an Import function that you can use to import your browser password setting. It also supports Keepass, 1Password, Sxipper and many other password managers.
The way LastPass works is similar to the way Firefox’s password manager works. Whenever you login to a site, an unobstructive popup will appear to ask you if you want to save the password for this site.
If the password is already in your account, when you go to the site, the login field will be prefilled with your login credential. There is even a auto-login function that you can use to quickly login to your site.
Just like Roboform, LastPass also comes with a form filling feature that you can use to quickly fill up your form. One annoying thing I found is that it shows a autofill pop up every time it detects a fillable form, including email newsletter subscription box. Since almost every sites comes with an email newsletter subscription box, the popup appears every time you visit a new site. This can be very irritating.
Bring LastPass with you everywhere
If you have installed portable Firefox on your USB drive, you can also install LastPass on the portable Firefox so that you have access to your password even when you are away from your computer. This is useful if you are on a travelling trip and need to use an Internet cafe to go online.
Backing up your password
When you save your password in LastPass, the password is stored in an encrypted form in the LastPass server. To avoid the incident where your password is inaccessible when the server is down, you can install LastPass Pocket on your computer and have it export and back up your account setting (including passwords) to your local hard drive.
LastPass currently only supports Firefox and Internet Explorer. The Safari version is on its way while the Google Chrome version is not available till Google released the extension API. LastPass works in Windows, Mac and Linux.
What other ways do you use to sync your password across various browsers and devices?
Damien Oh started writing tech articles since 2007 and has over 10 years of experience in the tech industry. He is proficient in Windows, Linux, Mac, Android and iOS, and worked as a part time WordPress Developer. He is currently the owner and Editor-in-Chief of Make Tech Easier.


