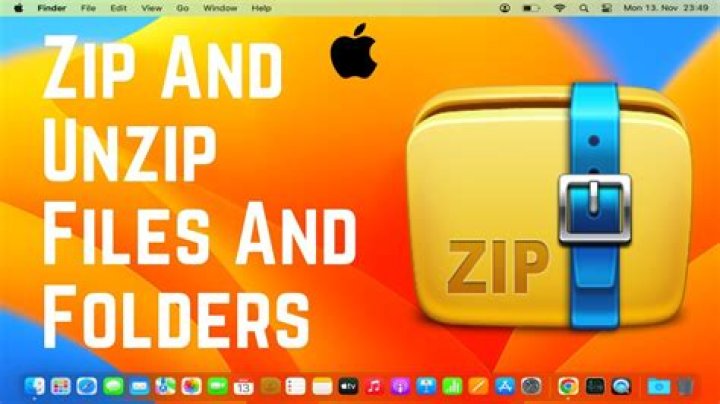
Zip files are archives that function as a single compressed package of a either multiple files, a folder, or a single item. Zip files are frequently encountered when downloading stuff from the web or elsewhere to a Mac, and while the Zip format used to be widely limited to the Windows world, .zip archives are often created and used on Mac OS now too.
If you get a zip file you may be wondering how you can open the archive to view what it is and extract the internal components of the zip archive. Wonder no more, it turns out that opening and unzipping files on a Mac is very easy thanks to the built-in Archive Utility tool.
Remember: a zip file (with a .zip extension) is simply a container holding another file or files. You don’t so much open it as you extract it to reveal the contents of the zip archive. For example, a single zip file may contain a handful of documents of various file types, or an entire folder of JPG files, or an application, or any such similar data. The zip file is simply the compressed data presented as a single archive.
How to Open Zip Files on a Mac
Extracting a zip file on a Mac is super easy:
- Locate the Zip archive file in the Finder of the Mac
- Double-click the .zip archive file to begin extracting the zip archive *
When finished, the unzipped contents will appear in the same folder as the original .zip archive
That’s it. In the example above, a zip file named ‘Archive.zip’ was extracted to create a folder called ‘Archive’ which contains the contents of the origin zip file.
The built in Archive Utility tool in Mac OS will open the zip archive and extract the file(s), typically they are placed within a folder of the same name of the zip archive, minus the .zip file extension.
You can also extract zip files by right-clicking (or Control+clicking) on a .zip archive and choosing to “Open”, or if you have third party unzip utilities installed (more on that in a moment), you can choose “Open With” and select another archive tool.
The Mac also includes an ultra simple ability to make a zip file or even to make a password protected zip file.
* If the zip archive is password protected, the proper password must be entered before the zip file will be extracted.
How to Open Zip Archives in Mac OS with The Unarchiver
Another option is to use the popular third party archive extraction tool called The Unarchiver to open .zip archives on the Mac. To do this, you will need to download and install The Unarchiver first.
- Get The Unarchiver from the Mac App Store
- Launch The Unarchiver and associate it with archive files
- Double-click any zip archive to open it with and decompress with The Unarchiver
Once The Unarchiver is installed and launched, it will want to associate with all known archive types on the Mac. This enables the third party tool to open zip archives and other items in Mac OS that the default Archive Utility may not support, which is another benefit. The Unarchiver can open zip archives as well as open RAR files on a Mac, zip CPGZ files, bz2 bzip, .7z files, .sit, gzip gz, tar, and many other file archive formats that you may encounter when downloading data from the internet or in emails. That vast support for extracting a wide variety of file types is one of the many reasons why The Unarchiver is a great third party app to add to a Mac.
Whether you use the default Archive Utility tool that comes with Mac OS to open zip files or go for the third party solution like The Unarchiver is entirely up to you, both will open a zip file with a simple double-click option.
Extract Zip Files with Terminal
The ‘unzip’ command is available in the Terminal to unzip archived zip files as well. The syntax is simple, just point the command at a zip archive to extract it to the present working directory.
You can also make a zip file via command line if desired, using the ‘zip’ command and pointing at a file or path to a folder as discussed here.
Can you view the contents of a zip file without extracting the archive?
You may be wondering if it’s possible to view the contents of a compressed zip archive, without bothering to extract the actual archive. In fact, you can easily do this using multiple methods, some of which are built directly into Mac OS via the command line. You can read how to view the contents of zip archives without extracting them here if this interests you.
How do you make a zip file on the Mac anyway?
You can read a detailed tutorial on how to make zip files in Mac OS here if interested. The short version is that you can select a file or group of files, right-click, and choose “Compress” to make a quick zip archive of those selected items. It’s very easy.
Have any other questions about zip files? Let us know in the comments!
Nowadays, we seldom see people write down notes in class, at work or anywhere else. This is because everyone greatly relies on their computer for these things in the same way that we use the Internet to gather information and top quality contents. Because of this, there are some instances wherein we want to save time and just download and upload documents compiled in one entire file. The only way to make this possible is by using various types of MAC Zip utility. If you still haven’t installed any into your MAC computer, take a look at the options you have and decide which one to get later on.
10. iZip
The iZip is one of the best zip utilities you can use of your MAC computer. This one is very easy to use and makes it possible to both zip and unzip a number of different files all at the same time. Other than this, it is also compatible for different types of document formats as long as they are supported by Apple. This tool is also absolutely free of charge and safe to use. iZip is also very popular and a lot of MAC users have already downloaded it because it’s very easy to use, does not cost anything and is also very reliable to say the least.
9. The Unarchiver
The Unarchiver is a default, pre-installed file compression utility that works for MAC OS X. What’s great about the Unarchiver is the fact that it also supports a number of different formats. When compared with the Windows ZIP option that only accommodates a limited range of options, this one would definitely stand out from them all. However, it is important to note that the Unarchiver is a read only application so if you want more features, you need to install more tools as well.
8. Archiver
The opposite of the Unarchiver is basically the Archiver. This one in particular is not free and comes with prettier and more advanced features. At $19, you can get a number of supports for various types of formats and contents and you can also incorporate passwords to your archives so that other people wouldn’t be able to access it. It is a must to remember your password though because if you forget it, you wouldn’t be able to open your files and you might even have to download and reinstall the entire tool just to be able to get the documents that you need.
7. Compress Files
On the other hand, the Compress Files is a more direct type of option you have when it comes to a MAC zip function. This option costs $15 but limits your options to only a few supported file formats. This is why if you are looking for a more direct and what you need is what you get kind of file compressor, then this is the one that should get. On the other hand, if you are looking for advanced features, forget about this one.
6. BetterZip
BetterZip is another competitive option you have when it comes to compressing and decompressing files of different formats. This one costs $20 but its advanced features and tools make it totally worth it. Unlike other types of Zip utilities, this one in particular makes it possible for you to not only compress and decompress a large number of files you can also do this with different formats all at the same time. Although considered to be a little pricey, it is also said that you can never really go wrong with this Zip tool in particular.
5. YemuZip
If you want to stick to free options for Zip utilities, make sure to try the YemuZip that is especially designed for use among MAC users. This one in particular is not only great because it’s free, it’s great because it easily archives your files without incorporating unnecessary texts to the filenames you use. This way, you would be able to easily organize your documents in minutes.
4. UnRarX
If you wish to decompress files you’ve archived and compressed in the past, make sure that you consider using the UnRarX. This one in particular is free and quite competitive but on the downside, this application is quite unfriendly especially among first-time users. But this option can temporarily suffice your needs for a Zip utility but not exactly something you can use for a long time.
3. Keka
Keka is another great option you have for a Zip utility if you are using a MAC OS X. This one is absolutely free and boasts of a user-friendly interface you will easily fall in love with. Another great thing to note about Keka is the fact that it supports a number of different file formats like Zip, Tar, Gzip, 7z, DMG, ISO and so much more. Also, it supports a number of extraction formats including RAR, 7z, CAB, PAX, ACE, PPC and more.
2. Entropy
Entropy is a powerful option for archiving files through the use of your MAC. This tool supports a maximum of 30 different formats both for archiving and extraction and also makes it possible to create, extract, preview, modify, encrypt and convert documents with just a few clicks. This tool is also supported by the AppleDouble metadata and comes with a number of options for keyword shortcuts and more.
1. iPack
The iPack is a full-featured compressed archiving and non-archiving tool designed for MAC. For a minimal cost of $1.99, you will already be able to get a hold of a wide range of features you wouldn’t get anywhere else. If you’re worried about the support you can get from this kind of software, forget about it because this one supports all types of files that MAC also supports. What’s more, it allows for editing and updating of documents even without extracting anything from an entire Zipped file.
How to Extract Zip Files on MacBook Pro?
ZIP is a useful file format that is used to compress large-sized file into a smaller one. There are different types of requirement to reduce size of file on MacBook Pro. There are times when we need to send a large file through email or share video on internet. As small file size will be very useful to make it possible easily, you can use different application to create ZIP files on MacBook Pro. In reverse, users also need to unzip files on MacBook Pro to use information from that compressed file. In Windows Pc, there is an inbuilt application to compress and decompress files easily but in Mac system, you need some program. Fortunately, you came to appropriate place where you will get an efficient tool to unzip files on MacBook Pro. Remo MORE is expert recommended tool to extract data from a ZIP file effortlessly.
A ZIP file can contain different types of file in several numbers. You can also add folders to a compressed ZIP file to minimize its size. If you have different set of files in a large number, you should use an efficient file extractor for unzipping. Though, there are so many tools available in internet to unzip files on MacBook Pro, choose a trustworthy application for successful extraction. If the unzipping operation is interrupted due to use of ordinary tool, the compressed ZIP may be inaccessible and you will lose all information from it. Remo MORE software is very suitable to avoid such unacceptable situation and unzip compressed file on any Mac system.
Mac OS X operating system supports for Zipping & unzipping right into the Finder. So, all you need to unzip files on MacBook Pro is double-click on the ZIP file. The system will decompress the archive in the same location where you have downloaded the compressed file or wherever it is located. Besides that, В by a convenient you can put all unzip files on MacBook Pro into a folder named same as the archive. For example, if the name of ZIP file is ” test_archive.zip”, Mac OS X will put all its contents intoВ the “test_archive” folder. Some users need third party application to make this decompression more easily. Then, Remo MORE utility will be most appropriate for this operation.
Remo MORE software offers some outstanding features to unzip files on MacBook Pro or any other Mac system. It is designed with a very easy user interface to make the unzipping process simple and quick. Any novice users also can extract data from a ZIP file using this tool on Mac computer without any difficulty. You can also update a ZIP file by adding or removing data on/from the created Zip. You can use this application to unzip files on MacBook Pro having different version of Mac OS.
Steps to Unzip Files on MacBook Pro:
Step 1: Install this application on your MacBook Pro system and launch it. From main screen, select “Compress” option under “Manage” tab as shown in fig A.
Fig A: Main Screen
Step 2: Now, select “Open/Update RZip File” option to compress video files as shown in fig B.
Fig B: Open/Update RZip File
Step 3: In this step, you have to add the Zip files that you want to unZip and then select “Extract All” option.
Fig C: Add & Extract Files
File compression is included in macOS
- Tweet
- Share
What to Know
- Zip a single file or folder: Control-click or right-click it and select Compress.
- Zip multiple files or folders: Shift-click to select them. Control-click or right-click selected files and choose Compress.
- Unzip an archive: Double-click the archive.
This article explains how to zip and unzip files and folders on a Mac using the Archive Utility built into macOS Big Sur (11.0) through Mac OS X 10.8.
Apple hides the Archive Utility because it’s a core service of the operating system. While this utility is tucked away, Apple makes zipping and unzipping files and folders extremely easy by selecting them in the Finder.
How to Make a Zip File on Mac: Zip a Single File or Folder
Compress and decompress a single file or folder using Finder to access the Archive Utility built into Macs.
Open Finder and navigate to the file or folder you want to compress.
Control-click or right-click the item and select Compress item name.
Look for the compressed version of the file. It has the same name as the original file with a .zip extension.
The Archive Utility zips the selected file and leaves the original file or folder intact. The compressed version is in the same folder as the original file.
Zip Multiple Files and Folders
Compressing multiple files and folders works about the same as compressing a single item. The main difference is the name of the zip file.
Usually, you’ll use the Archive Utility without launching it. However, if you have a large number of files to compress or decompress, you can launch the utility and drag and drop files and folders on it. The Archive Utility is located at System > Library > CoreServices > Applications.
Open the folder that contains the files or folders you want to compress.
Select the items you want to include in the zip file. Shift-click to select a range of files or command-click to select nonadjacent items.
Right-click or control-click any one of the items and select Compress. This time, the word Compress comes with the number of items you selected, such as Compress 5 Items.
Find compressed items in a file called Archive.zip, which is in the same folder as the originals.
If you already have an Archive.zip, a number comes after the new archive’s name. For example, Archive 2.zip, Archive 3.zip, and so on.
How to Unzip Files
To unzip a file or folder, double-click the zip file. The file or folder decompresses in the same folder as the compressed file.
If the zip file contains one file, the new decompressed item has the same name as the original. If a file with the same name exists, the decompressed file has a number appended to its name.
This same naming process applies when a zip file contains multiple items. If the folder contains an Archive, the new folder is called Archive 2.
Third-Party Apps for Zipping and Unzipping Mac Files
The built-in compression system that can zip and unzip files in macOS and OS X is relatively basic, which is why many third-party apps are also available. A quick look at the Mac App Store reveals more than 50 apps for zipping and unzipping files.
If you want more file compression features than Apple offers in its Archive Utility, these third-party apps might help.
Khamosh Pathak is a freelance technology writer who specializes in tutorials. His work has also been published on iPhoneHacks, Zapier’s blog, MakeUseOf, and Guiding Tech. Khamosh has seven years of experience writing how-tos, features and technology guides on the internet. Read more.
Macs ship with a robust built-in compression tool that can help you zip and unzip files and folders. Plus, it’s very easy to use! For added functionality, you can always try a third-party app as well.
First, let’s talk about the built-in Archive Utility tool. It’s not an app, but a feature deeply integrated into the Finder app.
How to Zip Files and Folders on Mac
To get started, open the “Finder” app, and locate the files or folders that you want to compress. If you’re selecting multiple files, hold the Command key while selecting the files.
Once you’ve made the selection, right-click on it to view the context menu. Here, click the “Compress” option.
If you’re using multiple files, the Compress option will also show you how many files you’ve selected.
Once the compression process is finished, you’ll see a new compressed file in the same folder. If you compressed a single file or folder, the archive will carry the same name, with a “.zip” extension.
If you compressed multiple files, you’ll see a new file with the name “Archive.zip.” You should rename the file to make it easier to find.
You can now move the compressed Zip file to another folder or send it along as an email attachment.
How to Unzip Files and Folders on Mac
Unzipping an archive is even easier. It doesn’t matter if it’s a Zip file that you downloaded on the internet or something that you compressed yourself.
Navigate to the archive in the Finder app and double-click the Zip file. After several seconds, the file or the folder will decompress in the same folder.
If it was a single file, you’ll see that the file will return to its original state, with the name intact. If you are decompressing a folder or a Zip file that contained multiple files, it will show up as a folder with the same name as the archive.
How to Change Archive Utility Settings
Even though Archive Utility has no visible UI, you can change some of its settings. To do this, open Spotlight on your Mac (Command+Space), and search for “Archive Utility.”
Once it opens, click the “Archive Utility” item from the menu bar, and click the “Preferences” option.
Here, you’ll be able to change the behavior of the Archive Utility in the Finder app. You can create a new default destination for all compressed and uncompress files as well as choose to move archived files to the Trash.
Third-Party Alternative: The Unarchiver
If you’re looking for more features, or if you want to uncompress different formats like RAR, 7z, Tar, and so on, try The Unarchiver. It’s a completely free utility that supports more than a dozen popular and obscure archive formats.
The app lets you change the default extraction destination. Additionally, it lets you choose to create a new folder for extract files, automatically open the folders once the extraction is completed, and enable an option to move the archive to the Trash once the extraction is done.
By creating a zip file on Mac, you can compress a single file, multiple files, or an entire folder into an archive .zip. Both Mac OS X and macOS operating systems have the built-in compression systems. Thus, you can zip and unzip files on Mac without installing extra software.
Zip files take less storage space on Mac. Moreover, you can share the same content with less time by compressing zip files. Many people prefer to zip files to reduce the email-transmission time. By the way, you can upload more files as email attachments without the space limit.
If you are not familiar with zipping and unzipping files on Mac, you can refer to the following paragraphs. This article introduces the detailed steps to create a zip archive in different cases. You can also unarchive zip files to extract whatever you need.
- Part 1: What Is a Zip File on Mac
- Part 2: How to Zip a File on Mac
- Part 3: How to Unzip a File on Mac
- Part 4: Store Too Many Files on Mac? Try This Powerful Mac Cleaner
Part 1: What Is a Zip File on Mac
Zip is an archive file format created by Phil Katz and PKWARE in 1989. It is a standard format designed for lossless data compression. When you create a zip file, the filename extension is .zip or .zip (newer compression algorithms). A zip file contains one or more files under the zip compression. You can set password protection when you zip a file on Mac.
You may also see rar files in many situations. What’s the difference between zip and rar? Well, the rar format was released in 1993 as a proprietary archive file format. In the zip VS rar round, zip has the better popularity than rar format. You need to install WinRAR to open rar files. But if you want to open zip files on Mac, you can solve the problem with simple clicks easily.
Part 2: How to Zip a File on Mac
There is a pre-installed tool named “Archive Utility”. You can make zip files on Mac directly with the help of Archive Utility. Of course, you can also type command lines to compress a zip file on Mac.
Last updated on March 21, 2020 By Serhat Kurt Leave a Comment
This article explains how you can zip and unzip files and folders on your Mac. macOS includes a built-in compression system, called Archive Utility, that you can use to do this.
Zip files are also called compressed. These files take up less storage space. A zip file is also easy to send or receive over the Internet. For example, you may send a lot of documents in a zip file via email, instead of attaching each file individually. You can easily create zip files and you can also easily open zip files on your Mac.
How to zip (compress)
Follow the steps below:
- Select file(s) and /or folder(s). You can command-click (press and hold the Command key and then select files or folders) to select multiple files or folders.
- Now control-click or right-click.
- A shortcut menu will appear. From the menu, click Compress.
Notes:
- If you zip multiple files or folders, the name of the zip file will be Archive.zip. You can change this if you want. Simply, select the Archive.zip file, and hit Return and enter a new name.
- If you zip just one file or folder, the name will be its name with .zip extension such as macreports.zip.
Use Terminal
The Terminal app on your Mac also lets you create zip files. Here is how:
- Open Terminal (Applications >Utilities).
- You can enter a command like the one below:
You can also type zip and then drag and drop the files you want to compress into the Terminal window.
How to unzip (uncompress)
- Find the zip file.
- Double-click it. Or you can right-click it, then select Open With > Archive Utility.
Notes:
- Your unzip file will be in the same folder/location that zip file stored in. For instance, if you’re extracting an archive named “macreports.zip” on your desktop, the extracted folder, named macreports, will be created on the desktop.
Use Terminal
You can also use Terminal to unzip your files. Here is how:
- Open Terminal.
- And enter a command like the one below:
This post will show details about how to make a zip file on mac. So you went on a trip with buddies, as well, as they’re requesting copies of your photos. You visited a lot of areas that you decide to arrange right into folders. After that, exactly how exactly are you going to upload the folders as attachments in an email? Well, the simplest means to do that is to turn them right into a ZIP document. Right here’s just how to whiz a file or folder on a Mac or a Windows COMPUTER.
Make a Zip File on Mac
In this post, you can learn about how to make a zip file on mac. Here are the details below;
What is a ZIP file?
Unlike standard digital files, a ZIP file is a collection of documents that have been compressed right into a file. It’s like some coins took into a solitary bag as well as zipped shut so that it can be easily moved, moved, or sent out. Besides being able to move or email some documents conveniently, zooming documents will also lower the files’ size and provide you with password defence.
Mac and Windows computers have their built-in compression attributes that can quickly whiz files or folders.
Make A Zip File On Mac
If you need to email some data, you can spare yourself the inconvenience of attaching each data individually to your email. You can develop ZIP data or zip a bunch of documents and connect them in sets.
If you’re using a Mac computer system, you can create zip data by complying with these steps:
1. Place all the data you wish to whiz in the very same folder. You can merely drag-and-drop files and folder into one place. It doesn’t matter if it is consisted of both documents and folders, as long as they remain in the same place.
2. Next off, right-click on the folder, including your documents and folders you wish to zoom. This will open a pop-up food selection. You can additionally use Control-Click to open up the contextual food selection too.
3. Click “Compress (folder name).” This will instantly turn on the built-in compression function to press your chosen files/folders. By default, your pressed data will have the very same name as your folder but with a “. zip” at the end. You’ll discover your zip file in the very same folder as your initial folder.
How To Make A Zip File On Mac
If you’re making use of a Windows PC, and also you wish to create a zip file for comfortable transport, or you intend to email several data, comply with the actions below:
1. Place all the data you wish to zoom in the exact same folder. Make certain they remain in the same place.
2. Next, right-click on the folder having your files and folders you want to whiz. If the files or folders are not alongside each other, tap and hold the Ctrl secret and left-click to highlight or select files/folders you want.
3. Lastly, press Send to, then Compressed (zoomed) folder. Your system will then produce zip documents, which will have the very same name as the folder, but with a “. zip” at the end.
If you need to know how to open zip documents on a Mac or PC, look at our example here.
Zipped (compressed) files take up less storage space and can be transferred to other computers more quickly than uncompressed files. In Windows, you work with zipped files and folders in the same way that you work with uncompressed files and folders. Combine several files into a single zipped folder to more easily share a group of files.
Locate the file or folder that you want to zip.
Press and hold (or right-click) the file or folder, select (or point to) Send to, and then select Compressed (zipped) folder.
A new zipped folder with the same name is created in the same location. To rename it, press and hold (or right-click) the folder, select Rename, and then type the new name.
Locate the zipped folder that you want to unzip (extract) files or folders from.
Do one of the following:
To unzip a single file or folder, open the zipped folder, then drag the file or folder from the zipped folder to a new location.
To unzip all the contents of the zipped folder, press and hold (or right-click) the folder, select Extract All, and then follow the instructions.
To add files or folders to a zipped folder you created earlier, drag them to the zipped folder.
If you add encrypted files to a zipped folder, they’ll be unencrypted when they’re unzipped, which might result in unintentional disclosure of personal or sensitive information. For that reason, we recommend that you avoid zipping encrypted files.
Some types of files, like JPEG images, are already highly compressed. If you zip several JPEG pictures into a folder, the total size of the folder will be about the same as the original collection of pictures.


